Originally Posted by zer061zer0 /img/forum/go_quote.gif Never tried the cardas in fact, have been really busy to even touch the phones. yup i just cut a hole in the centre
I have the hd414 pads but I never got around to cutting the hole because I thought it sounded pretty good intact. Can you tell what the difference is with or without the hole in the hd414 pads?
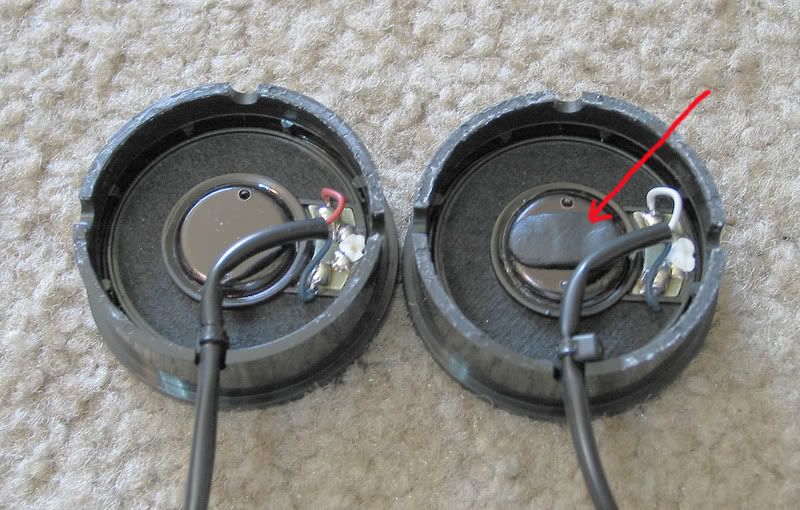
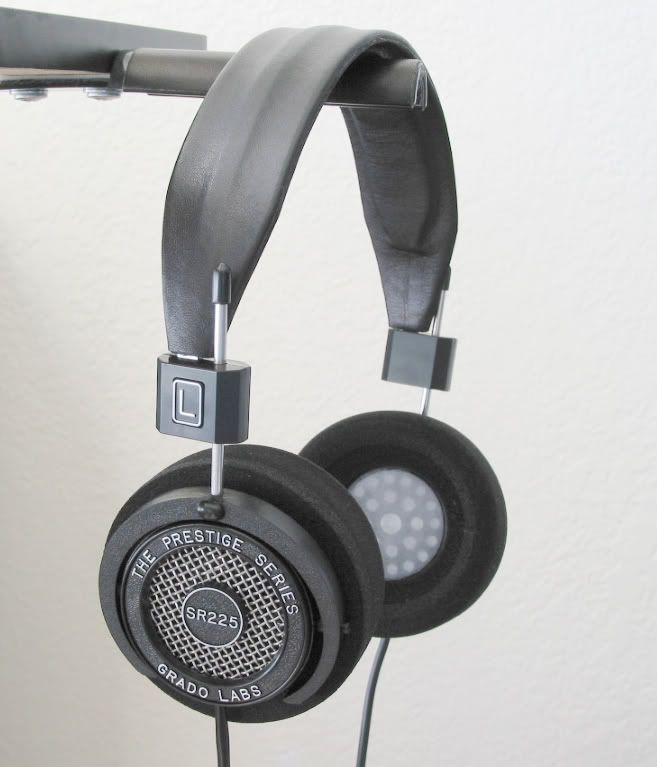
Here are some mods I've done to my new SR225...
1) Damping material on back of transducers similar to what Grado applies to all their upper end cans. I used the black elastomer material from a piece of Dynamat Extreme. This seems to reduce the peakiness in the midrange. Of course, it could just be placebo
...
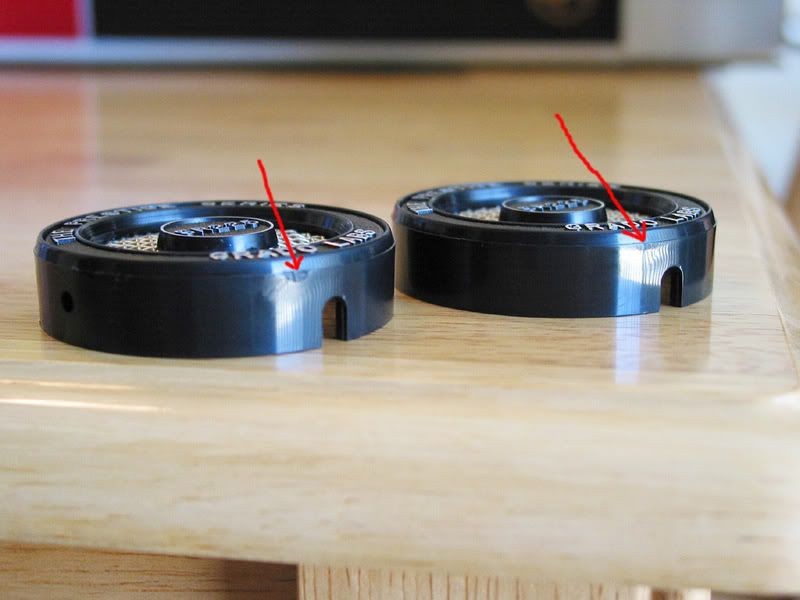
2) Sanded down and polished out the plastic "scar" found on all new plastic Grados (before on left, finished on right)...
Originally Posted by fraseyboy /img/forum/go_quote.gif Nice! I'm interested in doing this mod too. How did ya do it?
Headfi never ceases to amaze me, I was really sure to be criticized for the thin cable...
The mod was very simple actually.
Get rid of the little black bucklers at the end of the metal bar (can be pulled off by hand) and put them aside
Separate the earcup- and headband assembly groups
Drill a hole in each of the black plastic thingies for the fixation screws
The other end of the little metal bar needs to be strengthened by epoxy glue, if not, it is going to unscrew due to increased stress caused by the fixation screw. Degrease everything accurately before glueing.
The brackets holding the earcups can be dismounted from the earcups by simple straddling - carefully
Now the recable job. As first step, you have to seperate the two halfs of the earcups. The glue loosens when being warmed with a hairdryer, doesn't need much warmth. Don't let it blow to the front where the drivers are. Heared rumours that newer Grado / Alessandro earcups are fixed with superglue. No idea how to seperate that...
Grind down the silver colour from the letters if you like that (I did it for reasons of robustness)
Get rid of the original thick pompous ass cable, a simple earbud cable can do the job as well. Soldering may be difficult due to some strange copper eloxation - use a lighter to flame that away. Dont forget final pull relief.
Drill a small hole to the upper side of the inner earcup, close to the driver's backside, in order to get the other side's cable through
The headband's leather thingway needs to be unraveled at one side to get the cable to the other side (good opportunity to insert some foam for comfort purposes). If it's the plastic thingway, other solutions have to be found (suggestion: Beyerpad)
Other earcup will be turned 180° (if not desired, drill another hole)
Reassamble everthing. The earcup halfs don't need to be reglued, simple pressing will do
Don't turn the fixation screws downwards before exoxy has hardened
Result: Ultra-robust and ultra-portable MP3-"highender" fons - different leage than PX100 for sure
Pooh. Describing the job took longer than doing it. I would have been lost without my online-dictionary.
Originally Posted by nickchen /img/forum/go_quote.gif Headfi never ceases to amaze me, I was really sure to be criticized for the thin cable...
The mod was very simple actually.
Get rid of the little black bucklers at the end of the metal bar (can be pulled of by hand) and put them aside
Tear the earcups and the bar apart from the headband
Drill a hole in each of the black collets for the fixation screws
The other end of the little metal bar needs to be strengthened by epoxy glue, if not, it is going to unscrew due to increased stressed caused by the fixation screw. Degrease everything accurately before glueing.
Now the recable job. As first step, you have to seperate the two halfs of the earcups. The glue loosens when being warmed with a hairdryer, doesn't need much warmth. Don't let it blow to the front where the drivers are. ***Remark*** Heared rumours that newer Grado / Alessandro earcups are fixed with superglue. No idea how to seperate that...
Grind down the silver colour from the letters if you like that (I did it for reasons of robustness)
Get rid of the original thick pompous ass cable, a simple earbud cable can do the job as well. Dont forget pull relief.
Drill a small hole to the upper side of the inner earcup, close to the driver's backside, in order to get the other side's cable through
The headband's leather thingway needs to be unraveled at one side to get the cable to the other side (good opportunity to insert some foam for comfort purposes). If it's the plastic thingway, other solutions have to be found (suggestion: Beyerpad)
Other earcup will be turned 180° (if not desired, drill another hole)
Reassamble everthing. The earcup halfs don't need to be reglued, simple pressing will do
Don't turn the fixation screws downwards before exoxy has hardened
Result: Ultra-robust and ultra-portable MP3-"highender" fons - different leage than PX100 for sure
Pooh. Describing to job took longer than doing it. I would have been lost without my online-dictionary.
Lol... I forget to mention... I was only interested in doing the mod to fix the length of the metal bar things
Thank's for the guide though. It will make the job SO much easier!!!!
Sorry!
Oh also, what end do you mean when you say "The other end of the little metal bar needs to be strengthened by epoxy glue"? The end nearest the drivers? So like, more glue around the end of the metal bar which is connected to the main driver bit?
I mean the downwards end that sticks in the bracket. Some glue to the metal (~4mm or so), some glue to the bracket. I've used stuff that dries out completely transparent to avoid too ugly looks.
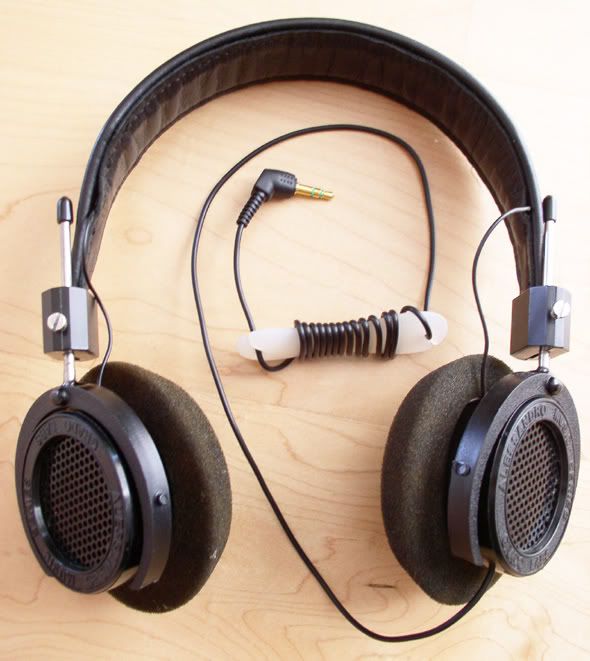
Posted in the diy forum but finally done.
I really like the fit and sound of these phones.
wood is maple with clear polycrylic. Pads are accura 660. Headband is deerhide with wax coat for protection.
This site uses cookies to help personalise content, tailor your experience and to keep you logged in if you register.
By continuing to use this site, you are consenting to our use of cookies.