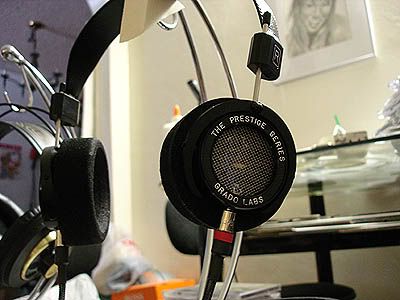
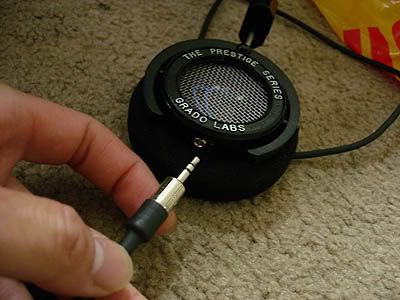
post your grado mods....
Jan 2, 2013 at 8:15 PM Post #2,701 of 8,992
I've been quiet for a while now..
Ditched the full-on design in Solidworks and wanted to give the lasercutter a chance.
Got a similar to original design ligned up, ready to be cut. All I need now is a slate of 8mm plexiglass, to complete the required materials.
Expect pictures very soon :)
 
Jan 3, 2013 at 7:27 PM Post #2,704 of 8,992
Quote:
Nope...they were made from a solid piece of bamboo.


Really nice looking cups. If you don't mind giving a few more detail about your build process that would be great. Did you use a lathe or a hole saw? How thick was the innitial chunk of bamboo? I'm looking to make something like this myself and would love some tips. Thanks.
 
Jan 3, 2013 at 7:43 PM Post #2,705 of 8,992
How do you like the headband? I just got mine today and I dunno... Mixed feelings . The stiching is a bit off & is it symmetrical as in can it be flipped either way? It's also really tight so it's tough to get the metal to re-grab ... I'm thinking maybe I should glue it...


The stitching is perfect on mine, and I saw no need to glue...as far as I can tell, yes, it's reversible, as long as you keep the padding facing down : )

Actually found a very fine flaw in one of the cups, but as always Luke is a stand up guy, and will be replacing them...
 
Jan 4, 2013 at 5:16 AM Post #2,708 of 8,992
Quote:
had this in another thread, might as well post it here too.

gradomodmod.jpg


modinside3.jpg


modified the plastic grill, made the cable detachable, and a DIY cable made specifically for my detachable jacks
smily_headphones1.gif
pretty cool i like yours :)

 
Jan 4, 2013 at 8:54 AM Post #2,709 of 8,992
Quote:
My own unique maple cup design for my MS-1s. Sitting on my own unique hickory veneered book shelves with HiVi B3S drivers. 


Ah! A step closer to the holy grail...not quite there yet, but almost a closed back Grado....
 
Jan 4, 2013 at 12:09 PM Post #2,710 of 8,992
Quote:
I've been quiet for a while now..
Ditched the full-on design in Solidworks and wanted to give the lasercutter a chance.
Got a similar to original design ligned up, ready to be cut. All I need now is a slate of 8mm plexiglass, to complete the required materials.
Expect pictures very soon :)

 
Finally had some playtime with the laser cutter!
Design is finished, but ran short in time to cut all the rings.
I'm missing a grill and the smaller diameter ring after the cushion right now.
Also i need to design the rings to hold the driver down, but I can't measure that untill after I liberate the drivers.
 
Designed to be cut from a single sheet of plexiglass.
In my case i had some spare red and blue to indicate left and right.
Hoping to start assembly soon.

clear1.jpg

clear2.jpg

clear3.jpg

clear4.jpg

 
Jan 4, 2013 at 8:09 PM Post #2,711 of 8,992
Quote:
Really nice looking cups. If you don't mind giving a few more detail about your build process that would be great. Did you use a lathe or a hole saw? How thick was the innitial chunk of bamboo? I'm looking to make something like this myself and would love some tips. Thanks.

A few Gradoheads from the local DIY headphile community created them.
The cups are factory made using a CNC machine.
 
Jan 4, 2013 at 9:55 PM Post #2,712 of 8,992
Imagine this one guys: Grado by Neil Peart.
 
Jan 5, 2013 at 9:02 PM Post #2,714 of 8,992
thought i'd poke my head in this thread to note what I feel is an increasingly key grado mod point. That being how the driver is mounted to the cup. Case in point: I recently tried to transplant my absolute favorite drivers from it's current cup which has a perfect press fit for the driver to a near identical cup (same mass, same finish, same wood, same cable) the only difference being that the opening was wider and required a wrap of tape to get the driver to stay put. result. total loss of mojo. Popped them back in their rightful houses and whamo, mojo revisted. lesson for all us grado modders to consider how that driver mates up with the other half of it's functional 'resonance' partner.
 
actually that wasn't the only difference in the two cups, one had a little more mass of wood around the lip of where the driver mounts. Otherwise the cups were real close in shape and mass. will take a pic later in case this is of interest to any 'yall
 
added pic:
the finish is the same, pic shows end grain on top so it looks diff/darker
 
Jan 5, 2013 at 9:22 PM Post #2,715 of 8,992
Quote:
thought i'd poke my head in this thread to note what I feel is an increasingly key grado mod point. That being how the driver is mounted to the cup. Case in point: I recently tried to transplant my absolute favorite drivers from it's current cup which has a perfect press fit for the driver to a near identical cup (same mass, same finish, same wood, same cable) the only difference being that the opening was wider and required a wrap of tape to get the driver to stay put. result. total loss of mojo. Popped them back in their rightful houses and whamo, mojo revisted. lesson for all us grado modders to consider how that driver mates up with the other half of it's functional 'resonance' partner.
 
actually that wasn't the only difference in the two cups, one had a little more mass of wood around the lip of where the driver mounts. Otherwise the cups were real close in shape and mass. will take a pic later in case this is of interest to any 'yall


Please share :)...my 225i drivers and cable are wrapped in a foam tape to keep them in their woodies, and I found their sound was warmed up, the bass went deeper, and they became a lot less fatiguing to listen to...
 

Users who are viewing this thread

Back
Top