Orthodynamic Roundup
Jan 19, 2016 at 8:58 AM Post #24,331 of 27,161
Out of its context it goes along with the "Head-Fi, the only place where you can plug headphones into a laptop, have them not work, and say "thank goodness it's just the laptop"" tagline ^^
 
True but I like my mods reversible and newplast absorbs resonances better than pretty much anything else:
 
http://qualia.webs.com/dampingfactor.htm
 
http://qualia.webs.com/newdampingfactors.htm
 
Jan 29, 2016 at 9:47 AM Post #24,332 of 27,161
Trying to browse trough this thread, oh boy!
 
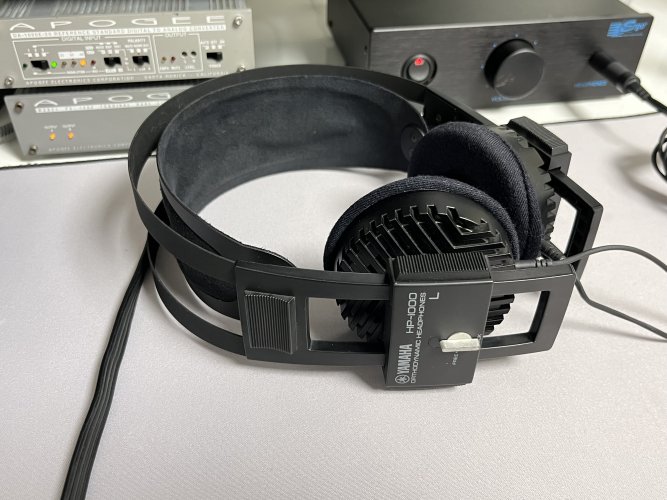
Recently (this week actually) found (and bought) both a pair of Fostex T20v1 and Yamaha HP-1, a pretty rare sighting on the swedish ebay-owned auctionsite Tradera.
 
Neither has arrived yet but I'm trying to prepare myself for some modding, specifically dampening the driver/housing.
 
On the HP-1 it seems pretty straight forward and I have even found a few places online describing most of the steps needed to mod.
The T20s on the other hand, not so much. 
One thing this thread speak of is that the driver on the v1 is a bit fragile and the magnets can come loose.
 
My question is: does anyone have some tips/tricks for dampening the T20v1, and most importantly, how to best open them without harming the driver.
 
I have modded (recabled etc) dynamic headphones before, so I'm not totally lost here :) 
 
Thanks in advance
 
Jorgen, Sweden.
 
Jan 29, 2016 at 5:10 PM Post #24,333 of 27,161
  how to best open them without harming the driver.

For the T20v1, just unscrew and open as it's a very simple affair. Don't worry about damaging the magnets at this point as unless you drop them they'll be perfectly fine.
 
Jan 29, 2016 at 9:54 PM Post #24,334 of 27,161
  For the T20v1, just unscrew and open as it's a very simple affair. Don't worry about damaging the magnets at this point as unless you drop them they'll be perfectly fine.


Is that the same for T20MKI v2?  I was led to believe that the housings are actually what is holding the driver together.
 
Jan 30, 2016 at 4:11 AM Post #24,335 of 27,161
Is that the same for T20MKI v2?  I was led to believe that the housings are actually what is holding the driver together.


Iirc there's a separate piece screwed onto the back of the baffle which holds the driver together. Separating the whole baffle from the cup won't cause the driver to fall apart because of this.


That's the T10 which has a very similar structure to the T20v1 and I think the T20v2 has this too.
 
Jan 30, 2016 at 3:17 PM Post #24,336 of 27,161
Iirc there's a separate piece screwed onto the back of the baffle which holds the driver together. Separating the whole baffle from the cup won't cause the driver to fall apart because of this.

That's the T10 which has a very similar structure to the T20v1 and I think the T20v2 has this too.


Thank you very much for clarification, like Hutnicks I was under the impression that the driver essentially came lose as you unscrewed the baffle.
 
Jan 30, 2016 at 3:46 PM Post #24,337 of 27,161
Thank you very much for clarification, like Hutnicks I was under the impression that the driver essentially came lose as you unscrewed the baffle.


I had visions of flying magnets and diaphragms dancing in my head
biggrin.gif

 
Feb 1, 2016 at 5:52 PM Post #24,340 of 27,161
Hey guys, again :)
 
Got the Fostex T20s today and unfortunately it doesn't look good :frowning2:
 
The left channel was dead and wiggling the cable didn't help so I opened the cup only to find that one of the solderingpoints where broken.
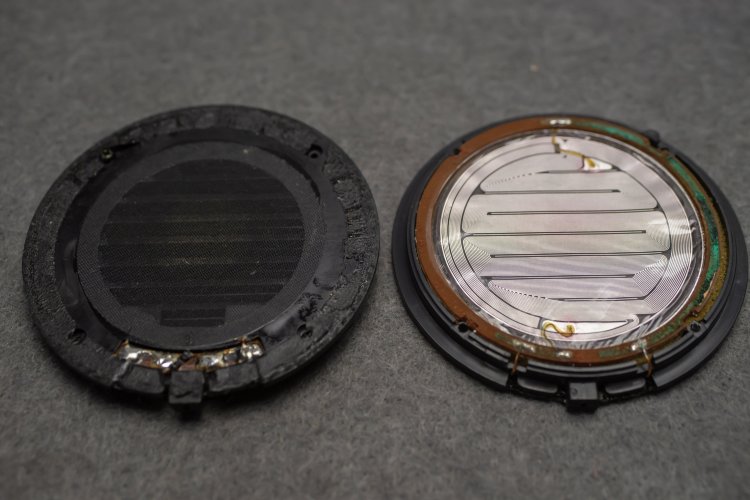
I then open the driver to inspect and it basically came in four pieces:


Two magnets, a diaphragm and a ring (which I can only imagine is a part of the diaphragm construction)..
 
Give it to me straight: are these reparabel at all?
My initial idea is to try to solder the cable back into whats left on the diaphragm, although while trying to get current across by having the pieces touch didn't produce any sound in the (reassembled) driver.
 
Finding another driver i literally impossible in Sweden to my knowledge, any recommendations on where to best look for them?
 
At this point, my only consolation is the Yamahas that is due to arrive tomorrow, hopefully they are in better condition.
 
Regards, Jorgen 
 
Feb 1, 2016 at 6:47 PM Post #24,341 of 27,161
Edit: ouch, reread your post again and it's more dire than it seems, sorry!
 
Feb 1, 2016 at 7:16 PM Post #24,342 of 27,161
Feb 1, 2016 at 11:32 PM Post #24,343 of 27,161
  The left channel was dead and wiggling the cable didn't help so I opened the cup only to find that one of the solderingpoints where broken.
I then open the driver to inspect and it basically came in four pieces:
Two magnets, a diaphragm and a ring (which I can only imagine is a part of the diaphragm construction)..
 
Give it to me straight: ...
 
At this point, my only consolation is the Yamahas that is due to arrive tomorrow, hopefully they are in better condition.
 
Regards, Jorgen 

 
Straight up - it might be. 
 
The tabs need aluminium solder which is not the easiest but also not impossible. The new lead free solder should actually work a treat although I have not tried. 
 
The ring is there to make contact with the opposite side of the diaphragm. If you have a steady hand you can check the continuity of the driver by placing a probe on the silver foil at the edge and then touching the middle of the driver. 
 
good luck and enjoy the yamaha. 
 
..dB 
 
Feb 2, 2016 at 5:51 AM Post #24,345 of 27,161


This could be an easy fix.
 
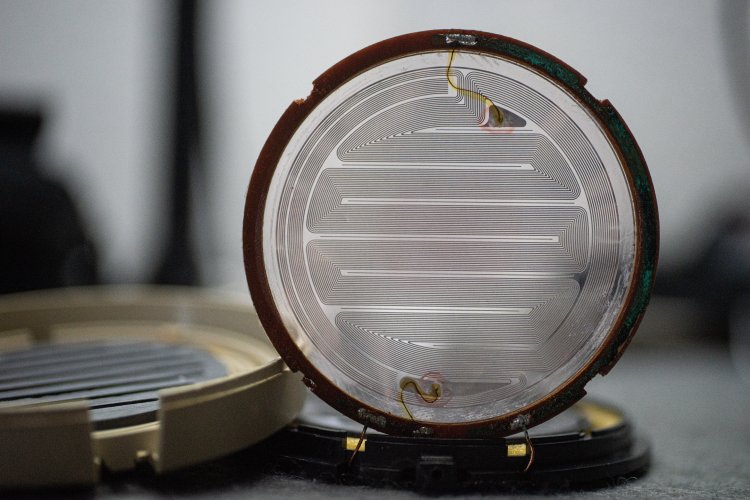
The diaphragm is essentially sandwiched between two rings of metal.
Each ring has one solder point.
Just solder your solder point back to the ring.
 
It gets more dangerous if you can't separate the diaphragm from the ring.
If the diaphragm gets hot, you risk damaging it.
If the diaphragm does not peel off with feather-touch ease, I would not try to peel it off by force, as you risk damaging it.
 
You want it to look LIKE THIS before you start soldering the broken metal back together.
If it does not do this naturally, don't force it.


If you can't separate the diaphragm like this, you need to work VERY quickly on the solder joint to prevent heat reaching the diaphragm.
 

Users who are viewing this thread

Back
Top