Just listened to some Fostex T50RPs today... WOW!
May 22, 2012 at 8:50 AM Post #8,356 of 11,345
Quote:
Hey guys, I got a little problem with my T50rp's, the copper colored metal headband piece keeps sliding down, when the hp's are on my head, thus making the cans feel a little loose, and it gets really annoy having to hold them in place. I've tried tightening the screw that holds the metal thingy (technical term) and headband together, but it doesn't seem to do a single thing.

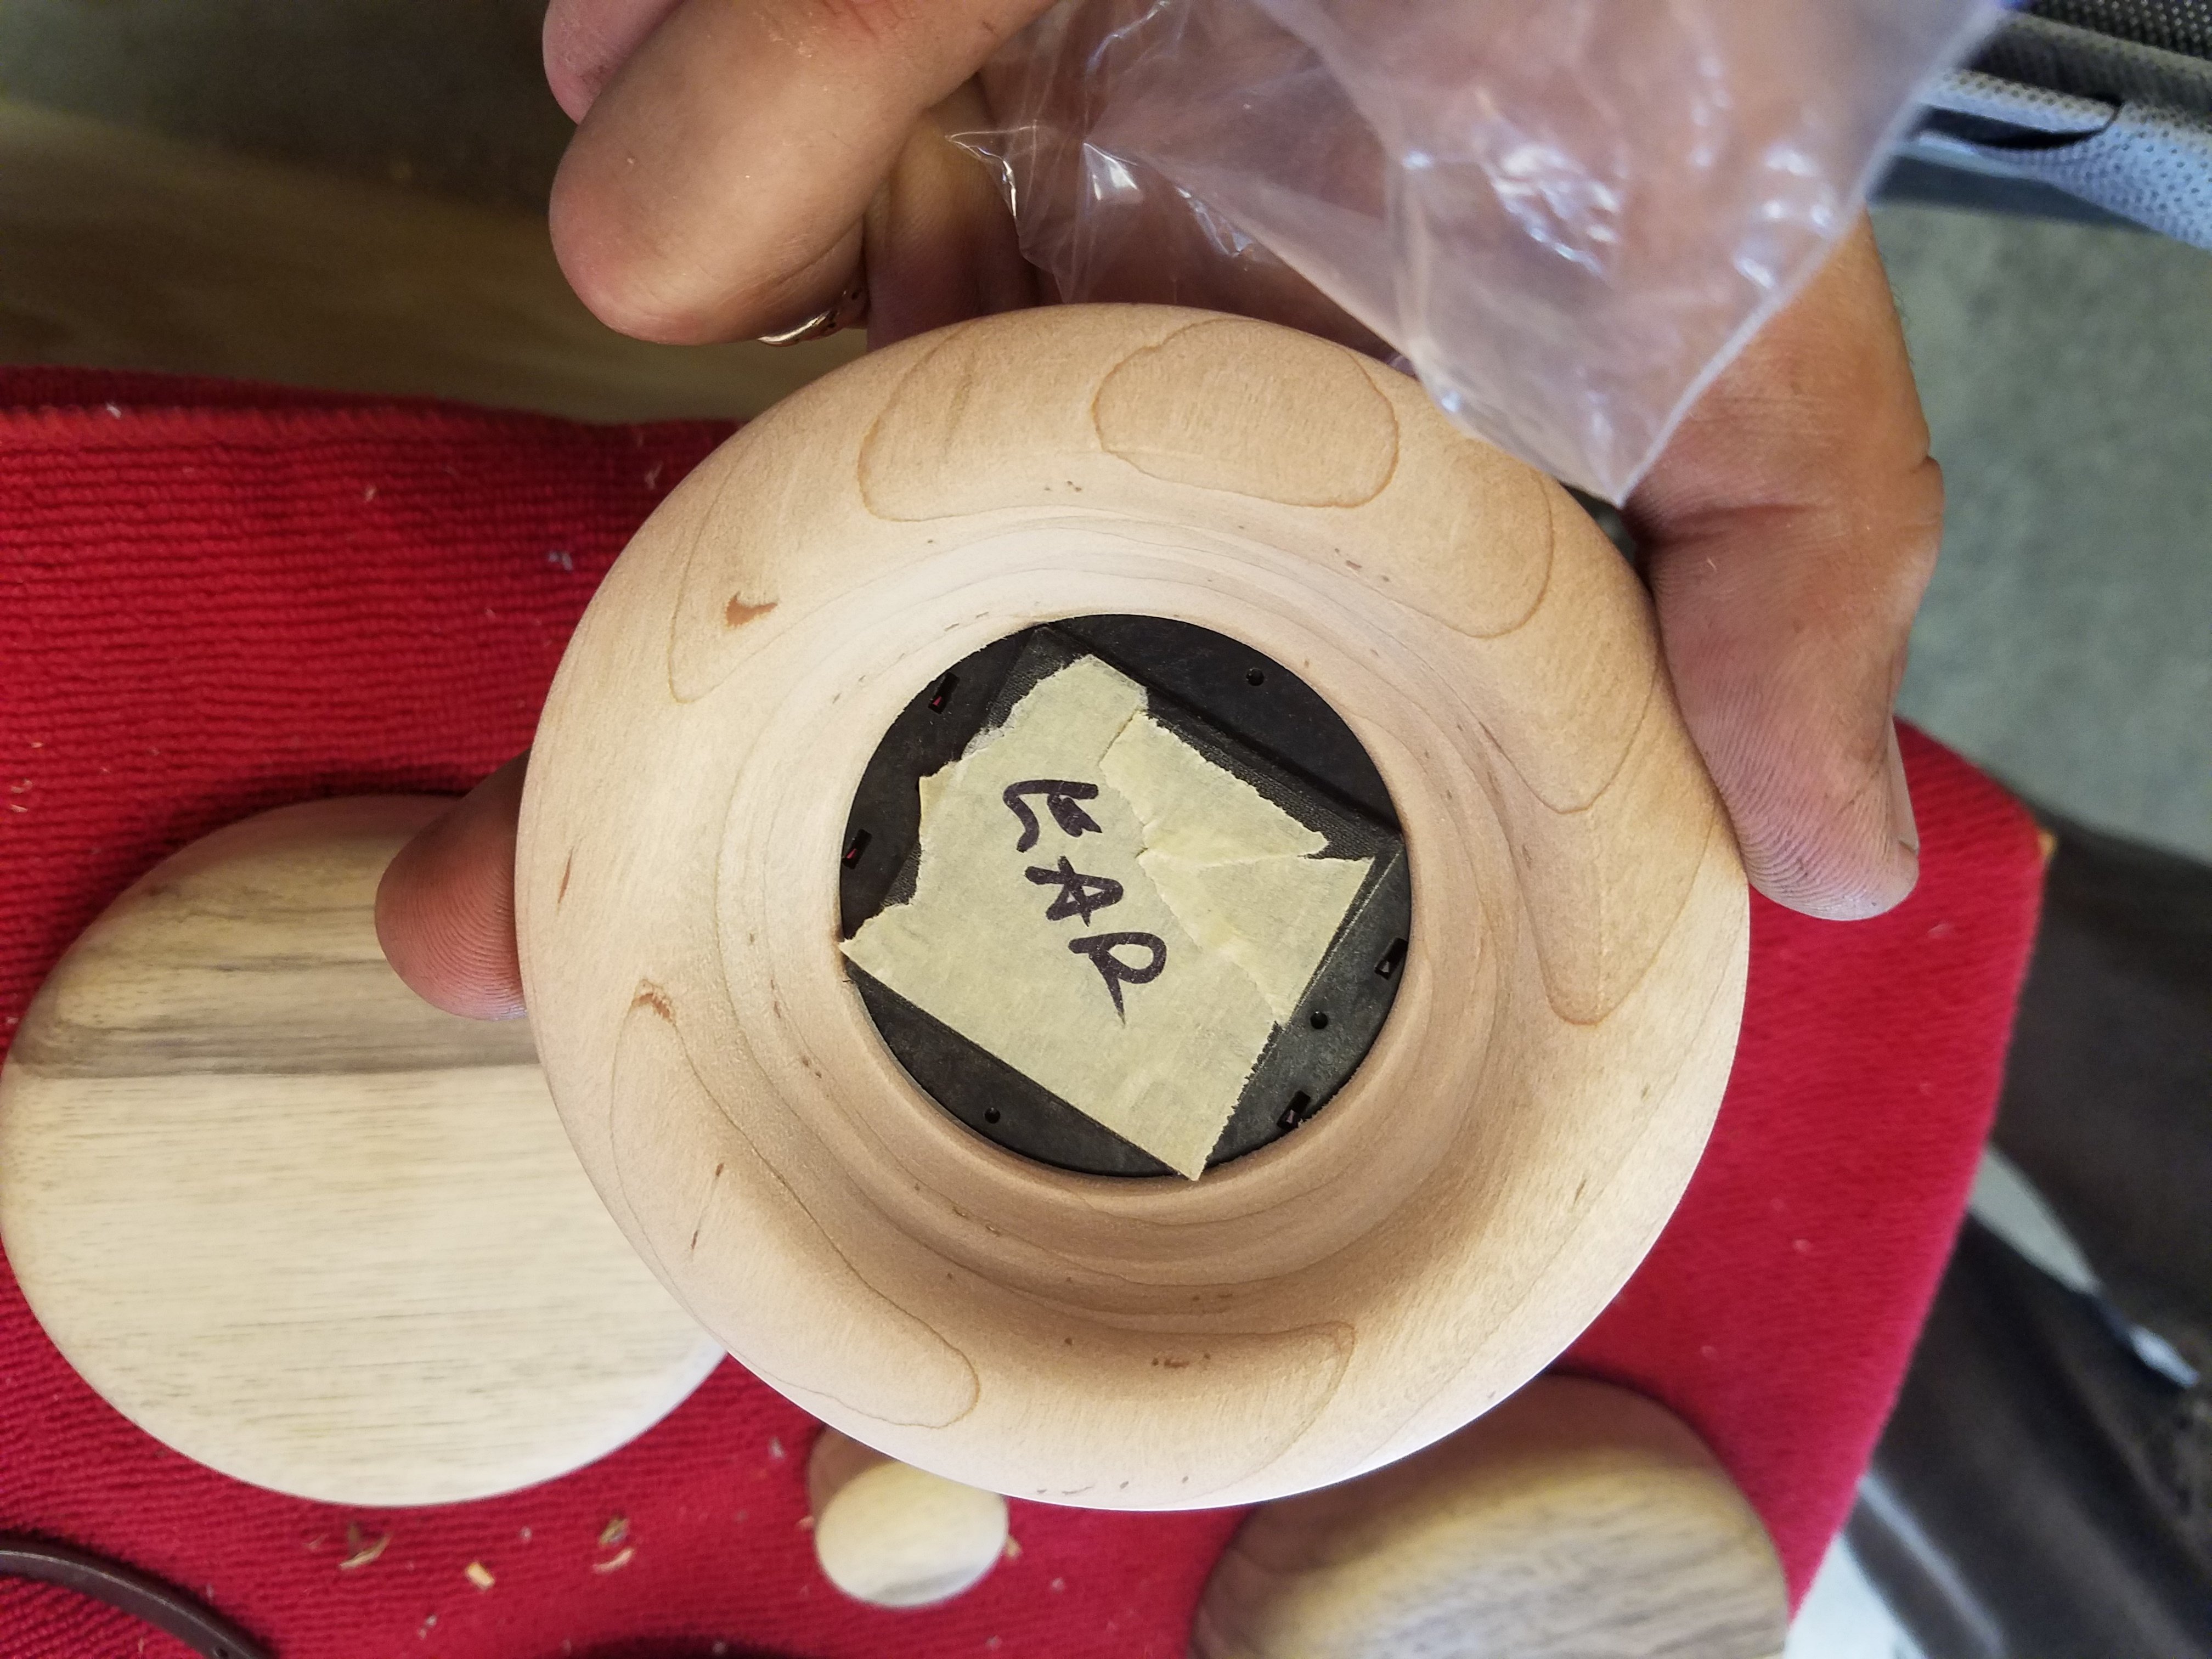
Sounds like your plastic headband hanger receiver threads are stripped. If so, get a bread bag wire tie with its plastic "cover" intact and stick one end into the threaded compartment of the plastic screw receiver. Bend it over the side like a horseshoe and cut it at the bottom-outside. This will hold the tie in place inside the threaded compartment. Try using 1 but you may need 2 in each compartment. The screw threads bite into the wire/plastic cover and cinch it down tight.
 
See post 5372 at this link:
 
http://www.head-fi.org/t/452404/just-listened-to-some-fostex-t50rps-today-wow/5370
 
Alternatively, fill the compartment with super glue. Let it cure for at least 24 hours. Use a drill bit one size smaller than the screw and drill down into the super glue to the screw depth. Tighten the screw into the assembly and it should cut new threads. This works great for the 4 cup/baffle threads and a 2mm drill bit or 1/8" drill bit, not 1/64"!
 
I've had better luck with the headband hanger receiver using the first method which is also easier than the second method. 
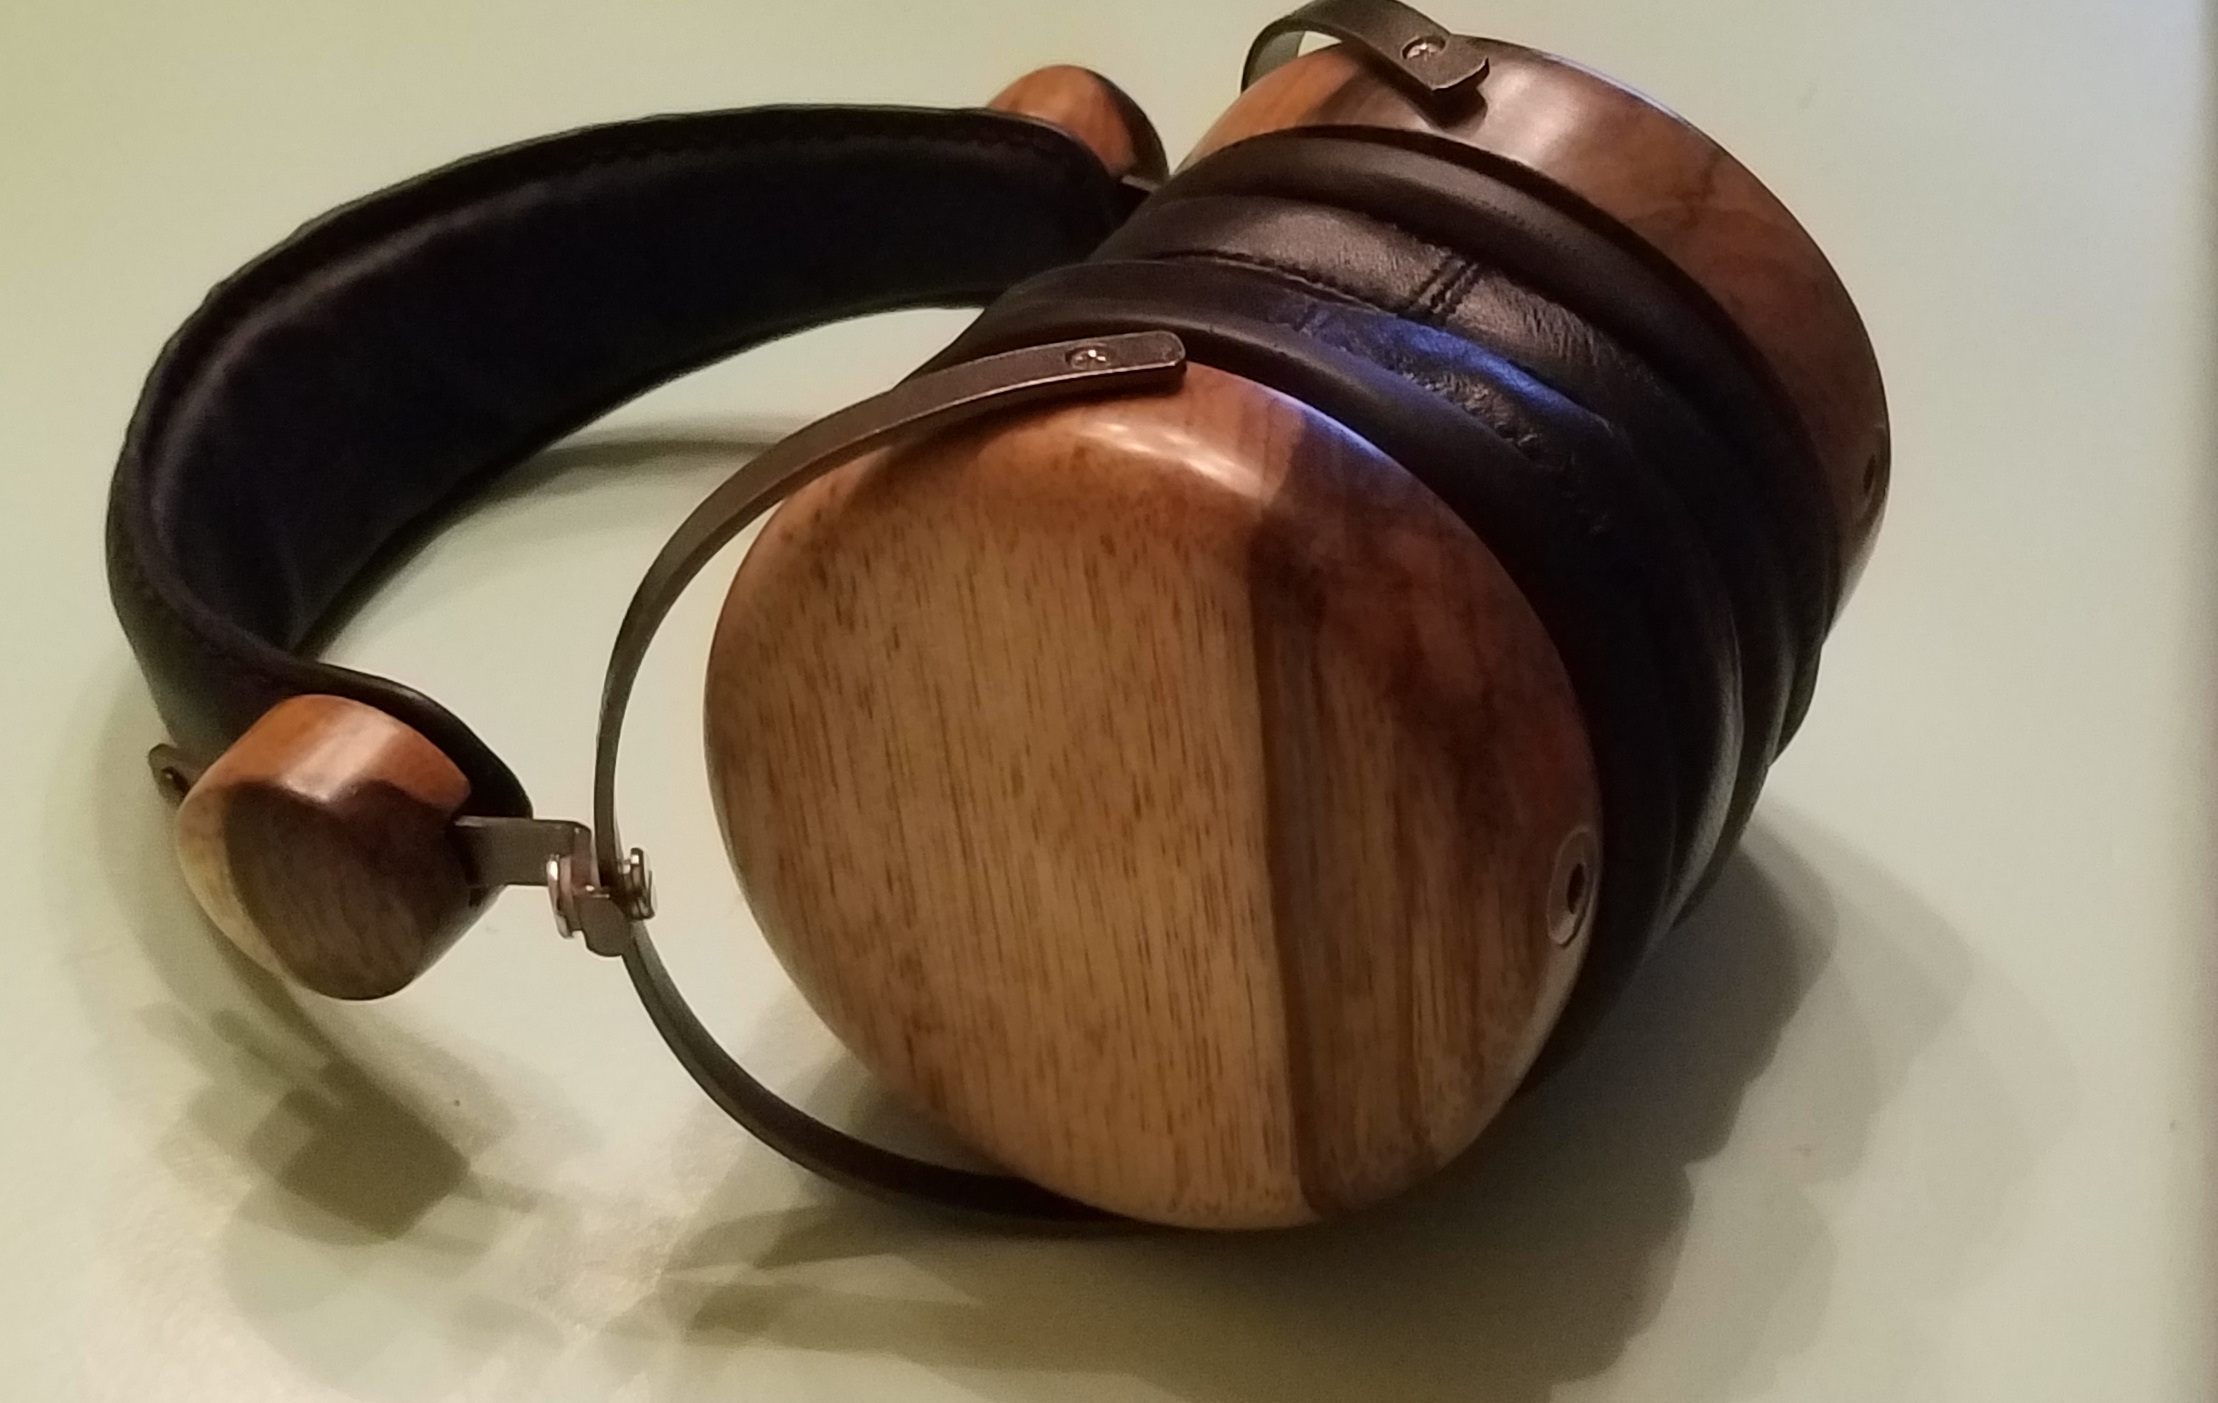
 
May 22, 2012 at 12:43 PM Post #8,357 of 11,345
I was having some real dopey fun doing this the other day.  Stock t50 pads on top of 840s, not adhered there but just using clamping force.  Easiest best way to increase bass impact I've found yet, if that's what you're into.  Of course it makes the rest of the music sound like it's being pumped in to you through one of those swirly funhouse tunnels, but if it's bass you're after...
 
Hey, my HM5 pads are due in today too.  Can't wait to triple-stack 'em and see how far down the rabbit hole that puts me.
o2smile.gif

 
Quote:
 
If you are overwhelmed by the plethora of mods and subtle variations then something super easy that I have found (and now a local friend) is pad stacking.  It will not make the headphones perfect nor will it be the best mod worth doing.  However, what is has done for me is created the most notable improvement in one simple step.  I have tried dozens of configurations of 100% reversible modifications.  Of everything I have tried, stacking pads on stock T50rps has given me more comfort and sound quality with little effort. 
 
So if you do not want to delve into the path of tweaking, tuning, and documenting each step... then I personally recommend stacking either the srh840 pleather pads, or the srh1440/1840 pads on top of the stock pads with a form of double-sided tape.  This is reversible and super simple.
 
I do encourage you to try other setups besides this one.  I just find pad stacking to be an easy way to unlock some of the T50rp potential.  Any new modders to the community can bring ideas that could potentially inspire a chain of future ideas.  
 
Good luck, good modding!

 
May 22, 2012 at 1:01 PM Post #8,358 of 11,345
I haven't been keeping up with this thread in the last months so please apologize my questions:
 
Can anyone tell me what are the differences between the Fostex T20, 40 and 50RP?
Will all this modding work as well on all three of them to the same sonic results?
Or will the T50RP inherently always gives the best sound quality?
And do any of these have removable cables or not?
 
Thanks!
 
EDIT: And where can I find these in stock? (I live in Portugal)
 
May 22, 2012 at 7:26 PM Post #8,361 of 11,345
Quote:
what's that? do i hear a possible future 8-track mod?
biggrin.gif

Hoping so, and green flecked metallic paint, maybe a pirate ship or barabarian mural on the sides.
 
I'm seriously considering a build of that nature. Add on a couple of chrome antennas each side.  You wait it'll show up in the Roundup thread one of these days. And it'll be mine. And i'll wear it in public.
 
May 22, 2012 at 11:24 PM Post #8,363 of 11,345
To all the pad-stackers out there:
 
Are you guys finding an effective way of stacking these pads yet keeping them sealed tight? It would appear that stacking and managing to seal them well would result in a nice thick yet affordable pair of pads. I'm very interesting in how they "stack" up to the O2 pads in comparison, considering they're both crazy thick.
 
May 23, 2012 at 7:07 AM Post #8,365 of 11,345
Quote:
 
It doesn't really take any skills whatsoever.  Can you use a screwdriver?  That's about all it takes.  All that's happening in this thread is people are opening them up and jamming stuff inside and then seeing how they sound. 


It also helps to be coordinated enough to not drop the screws and lose them....
 
May 23, 2012 at 10:19 AM Post #8,367 of 11,345
Quote:
Thought you guys might get a kick out of this 
smily_headphones1.gif


A while ago, I have clipped a Sansa Clip onto my CAL (mod to single entry / detachable cable), which is much easier to drive than T50RP. VMODA M80, TMA-1, or any headphone with detachable cable can be mod this way as well.

For details, please see my thread: http://www.head-fi.org/t/589320/wireless-headphone-with-integrated-mp3-player-w-pic-for-diy
 
May 23, 2012 at 11:13 AM Post #8,369 of 11,345
Quote:
don't overtight the screws, that's it...because a fubar screw thread is a major PITA to deal with.

 
Not really. See post 8360, just about 10 posts above, but you already know this. 
 
Super glue for completely stripped cup threads works like a charm. Properly implemented, this mod can withstand 30 to 40 mod cycles before needing a "re-do." I've done this on 4 sets; some more than once. Total time is about 10 minutes.  
 
Use liquid super glue. Gel will not flow and makes it difficult to fill the entire space.
 
Safety Warnings:
 
Wear old clothes. Place a protective cover over your work surface. Wear rubber gloves. Have an absorbent cloth ready to soak up any over-spill before it dries. Wear eye protection! Don't touch your face or eyes until you've recapped the super glue, disposed of your rubber gloves, and washed your hands. Obvious, you say? I have a friend who did not wear gloves, did not know he got a little bit of super glue on his finger, rubbed his eye, and had to go to the Emergency Department to remove his finger from his eyelid.  This really happend And, No, my friend was not me. I think he said acetone was used but I'm not certain. It would be a good idea to Google.
 
So here's what you do:
 
1.Use a paperclip to remove any loose debris from each screw chamber. 
2. Fill the chambers a little bit at a time and "tamp" with a paperclip to insure the glue fills the entire space.
3. Fill flush with the top of the chamber. Have a cloth at hand to absorb any over-spill. 
4. Let it cure at least 24 hours before you drill.
5. Use a drill bit no larger than the diameter of the screws. I used a 1/8" or 2 mm bit.
6. Drill slowly with minimal pressure and perpendicular to the cup floor plane. 
7. Drill to a depth equal to the length of the screws.
8. Position your baffles onto the cups as guides for the screws. If it's very hard to cut new threads using the screws, back out a little and continue to cut threads. Repeat as needed. Be Sure you tighten straight so your new threads will allow the screws to go all the way down and flush with the baffle countersinks.
 
May 23, 2012 at 12:30 PM Post #8,370 of 11,345
Quote:
 
Not really. See post 8360, just about 10 posts above, but you already know this. 
 
Super glue for completely stripped cup threads works like a charm. Properly implemented, this mod can withstand 30 to 40 mod cycles before needing a "re-do." I've done this on 4 sets; some more than once. Total time is about 10 minutes.  
 
Use liquid super glue. Gel will not flow and makes it difficult to fill the entire space.
 
Safety Warnings:
 
Wear old clothes. Place a protective cover over your work surface. Wear rubber gloves. Have an absorbent cloth ready to soak up any over-spill before it dries. Wear eye protection! Don't touch your face or eyes until you've recapped the super glue, disposed of your rubber gloves, and washed your hands. Obvious, you say? I have a friend who did not wear gloves, did not know he got a little bit of super glue on his finger, rubbed his eye, and had to go to the Emergency Department to remove his finger from his eyelid.  This really happend And, No, my friend was not me. I think he said acetone was used but I'm not certain. It would be a good idea to Google.
 
So here's what you do:
 
1.Use a paperclip to remove any loose debris from each screw chamber. 
2. Fill the chambers a little bit at a time and "tamp" with a paperclip to insure the glue fills the entire space.
3. Fill flush with the top of the chamber. Have a cloth at hand to absorb any over-spill. 
4. Let it cure at least 24 hours before you drill.
5. Use a drill bit no larger than the diameter of the screws. I used a 1/8" or 2 mm bit.
6. Drill slowly with minimal pressure and perpendicular to the cup floor plane. 
7. Drill to a depth equal to the length of the screws.
8. Position your baffles onto the cups as guides for the screws. If it's very hard to cut new threads using the screws, back out a little and continue to cut threads. Repeat as needed. Be Sure you tighten straight so your new threads will allow the screws to go all the way down and flush with the baffle countersinks.

 
Worst case scenario, you can also order parts from http://www.fullcompass.com
 
I haven't had a problem with stripping screws yet, but I did notice the hold on the gold posts has always been too tight, so I have needed to loosen the screw a quarter turn to allow easier movement.
 
EDIT: I am pretty sure this is the piece he would need, correct? http://www.fullcompass.com/product/347659.html
 

Users who are viewing this thread

Back
Top