


Rauliki
100+ Head-Fier
- Joined
- Jul 20, 2013
- Posts
- 133
- Likes
- 10
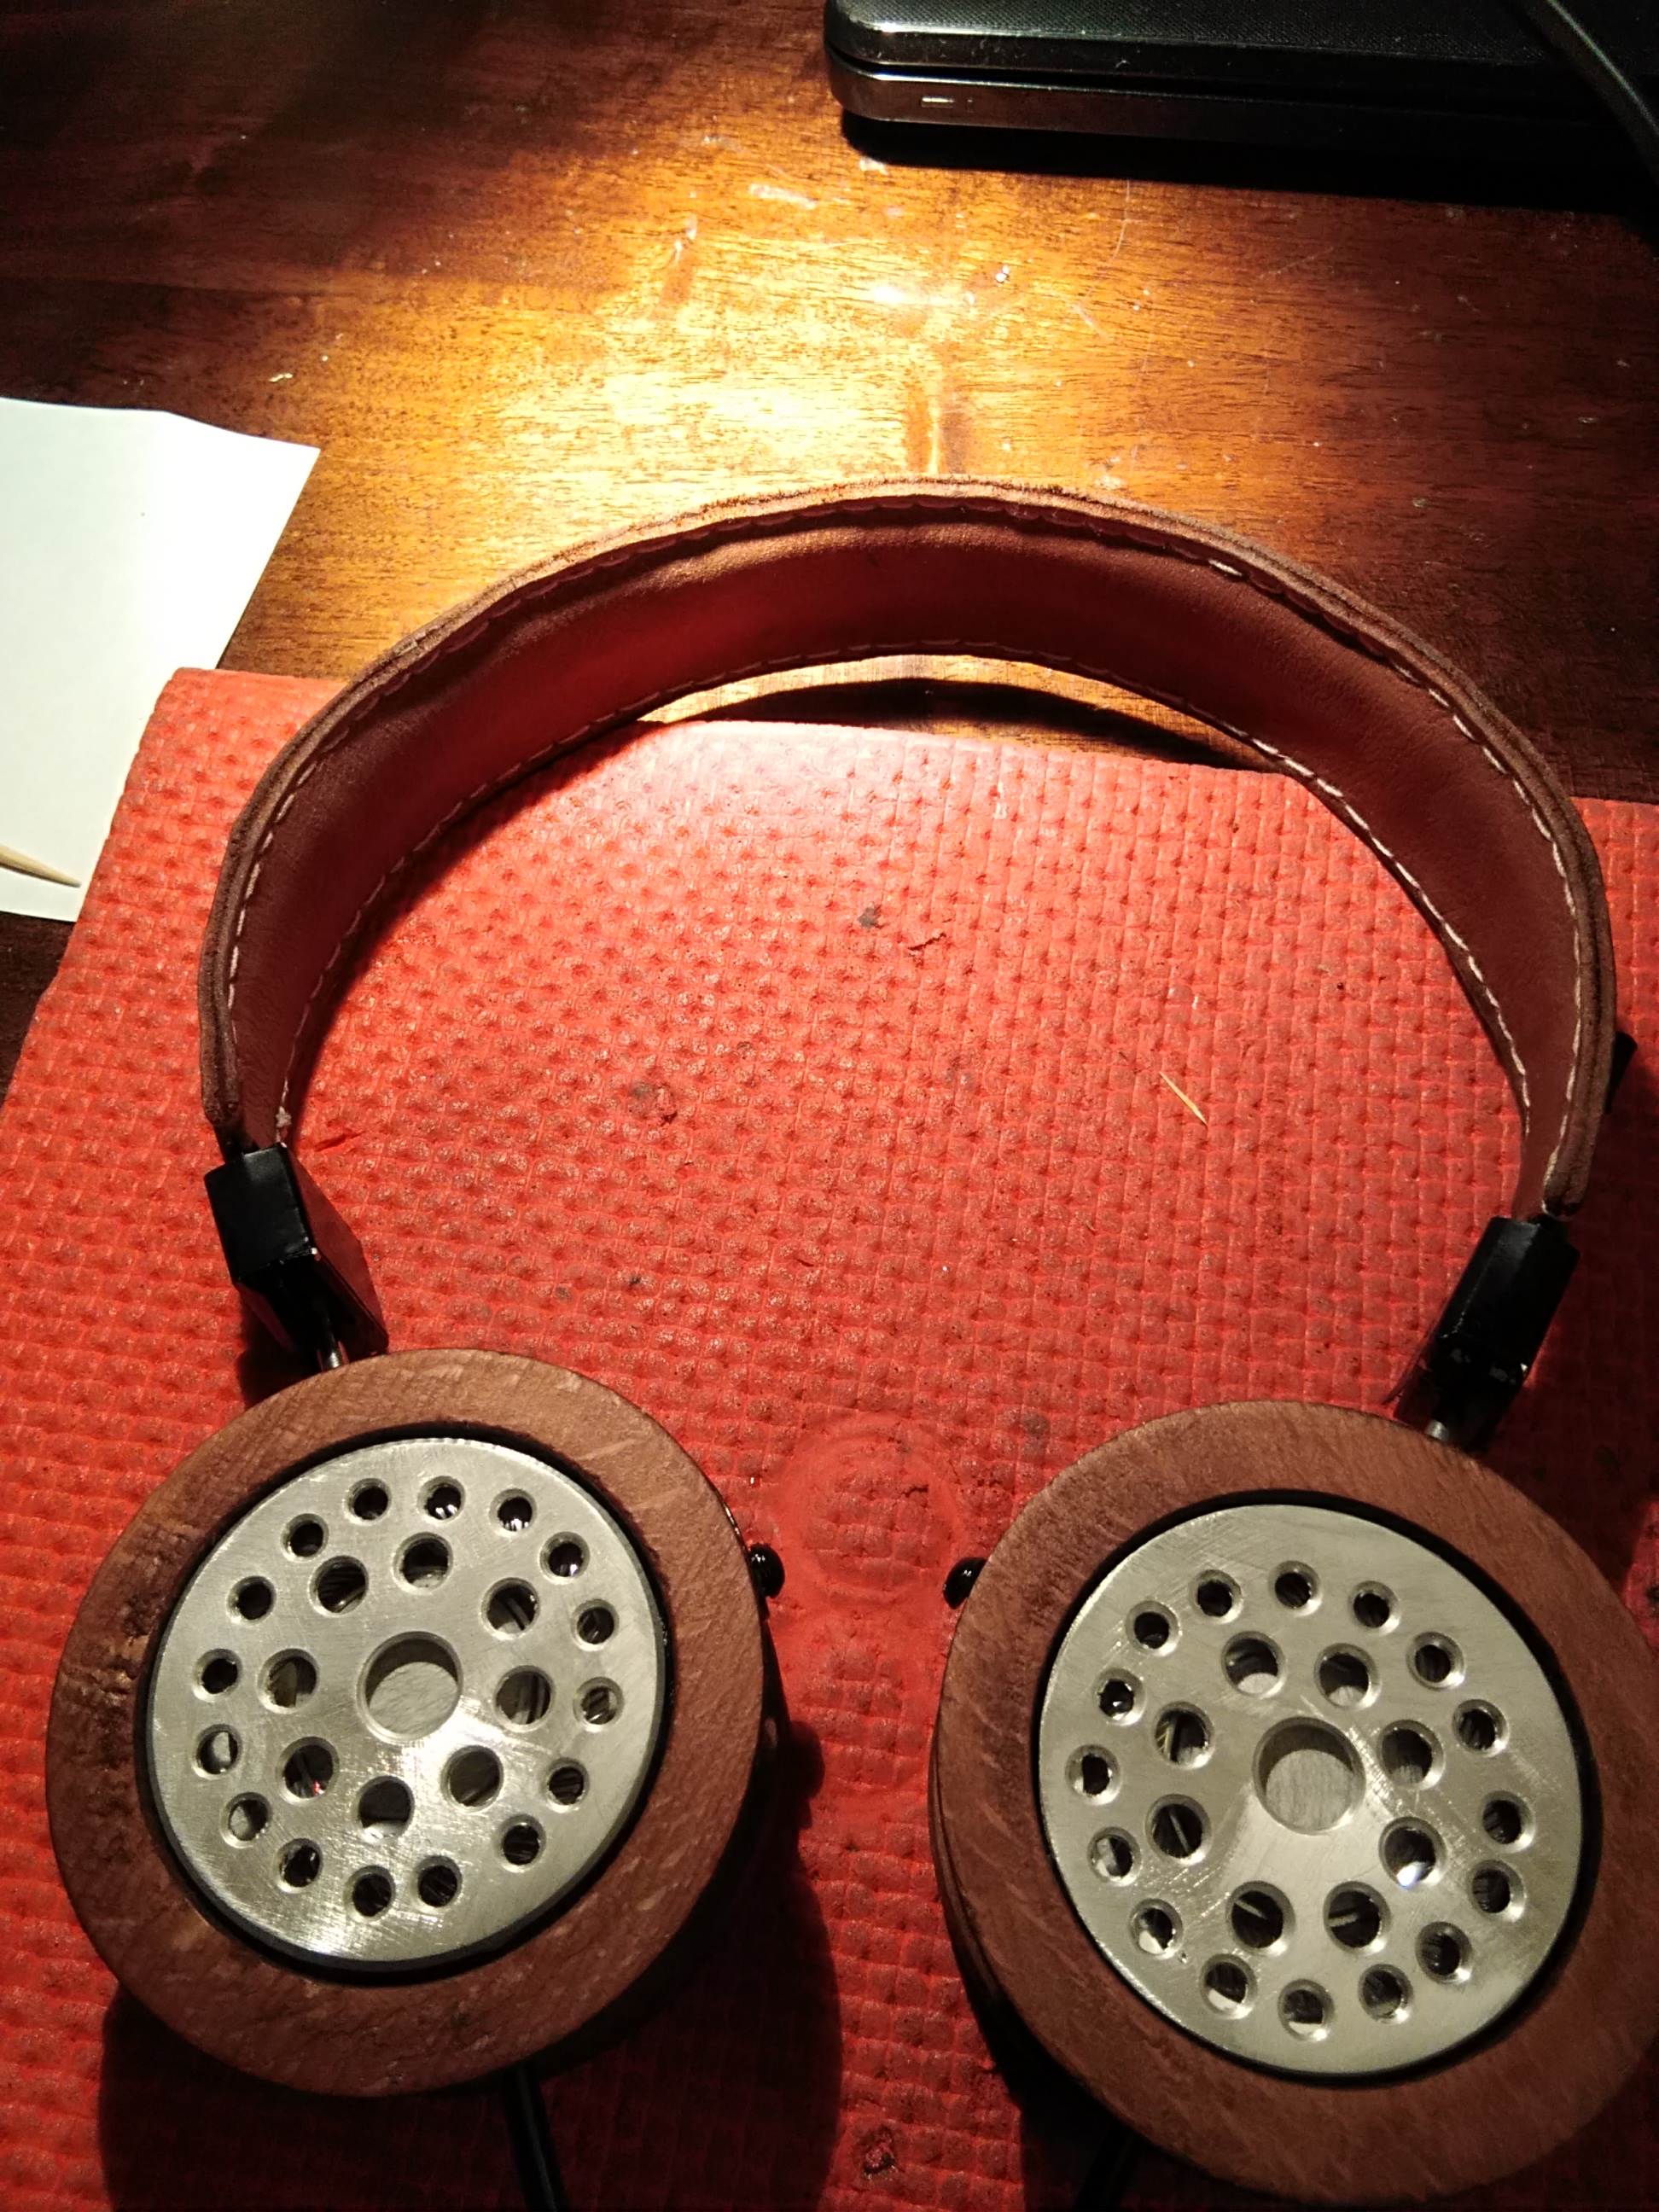
The only cups I have right now is this one set and I'm going to be using them in my next build.

Lovely pair. You really make great cups!
The only cups I have right now is this one set and I'm going to be using them in my next build.
There's a pair of nice looking zebra wood cups on Ebay at this time. A few smaller other offerings too. Winter tend to put somewhat of a hold on the wood lathing operations due to the cold and that most workshops are not built for full 4-season use out of the year.
")
Those are stamped metal sheets, which sadly are relatively air-flow restrictive and somewhat "less aerodynamic" than woven wire meshes. I will not guarantee the real benefits of this vs. yours, but as probably most of you know, moving air actually speeds up rather than slow down when it meets round objects (like the wire that make up mesh). The ones I linked to are the same type that higher end grado use, and you can choose how tightly woven it should be. I think a #20 mesh should be more than enough restrictive, but you can go all the way down to #400 which is more like a filter than a mesh. The effect of those neshes would actually be awesome to have A/B'ed and measured by some adventrous modders *ahem* ;D The only downside is that I think stainless steel can be quite horrible to finish with black varnish.
EDIT: I knew I forgot something: you've got some really nice looking cups there!
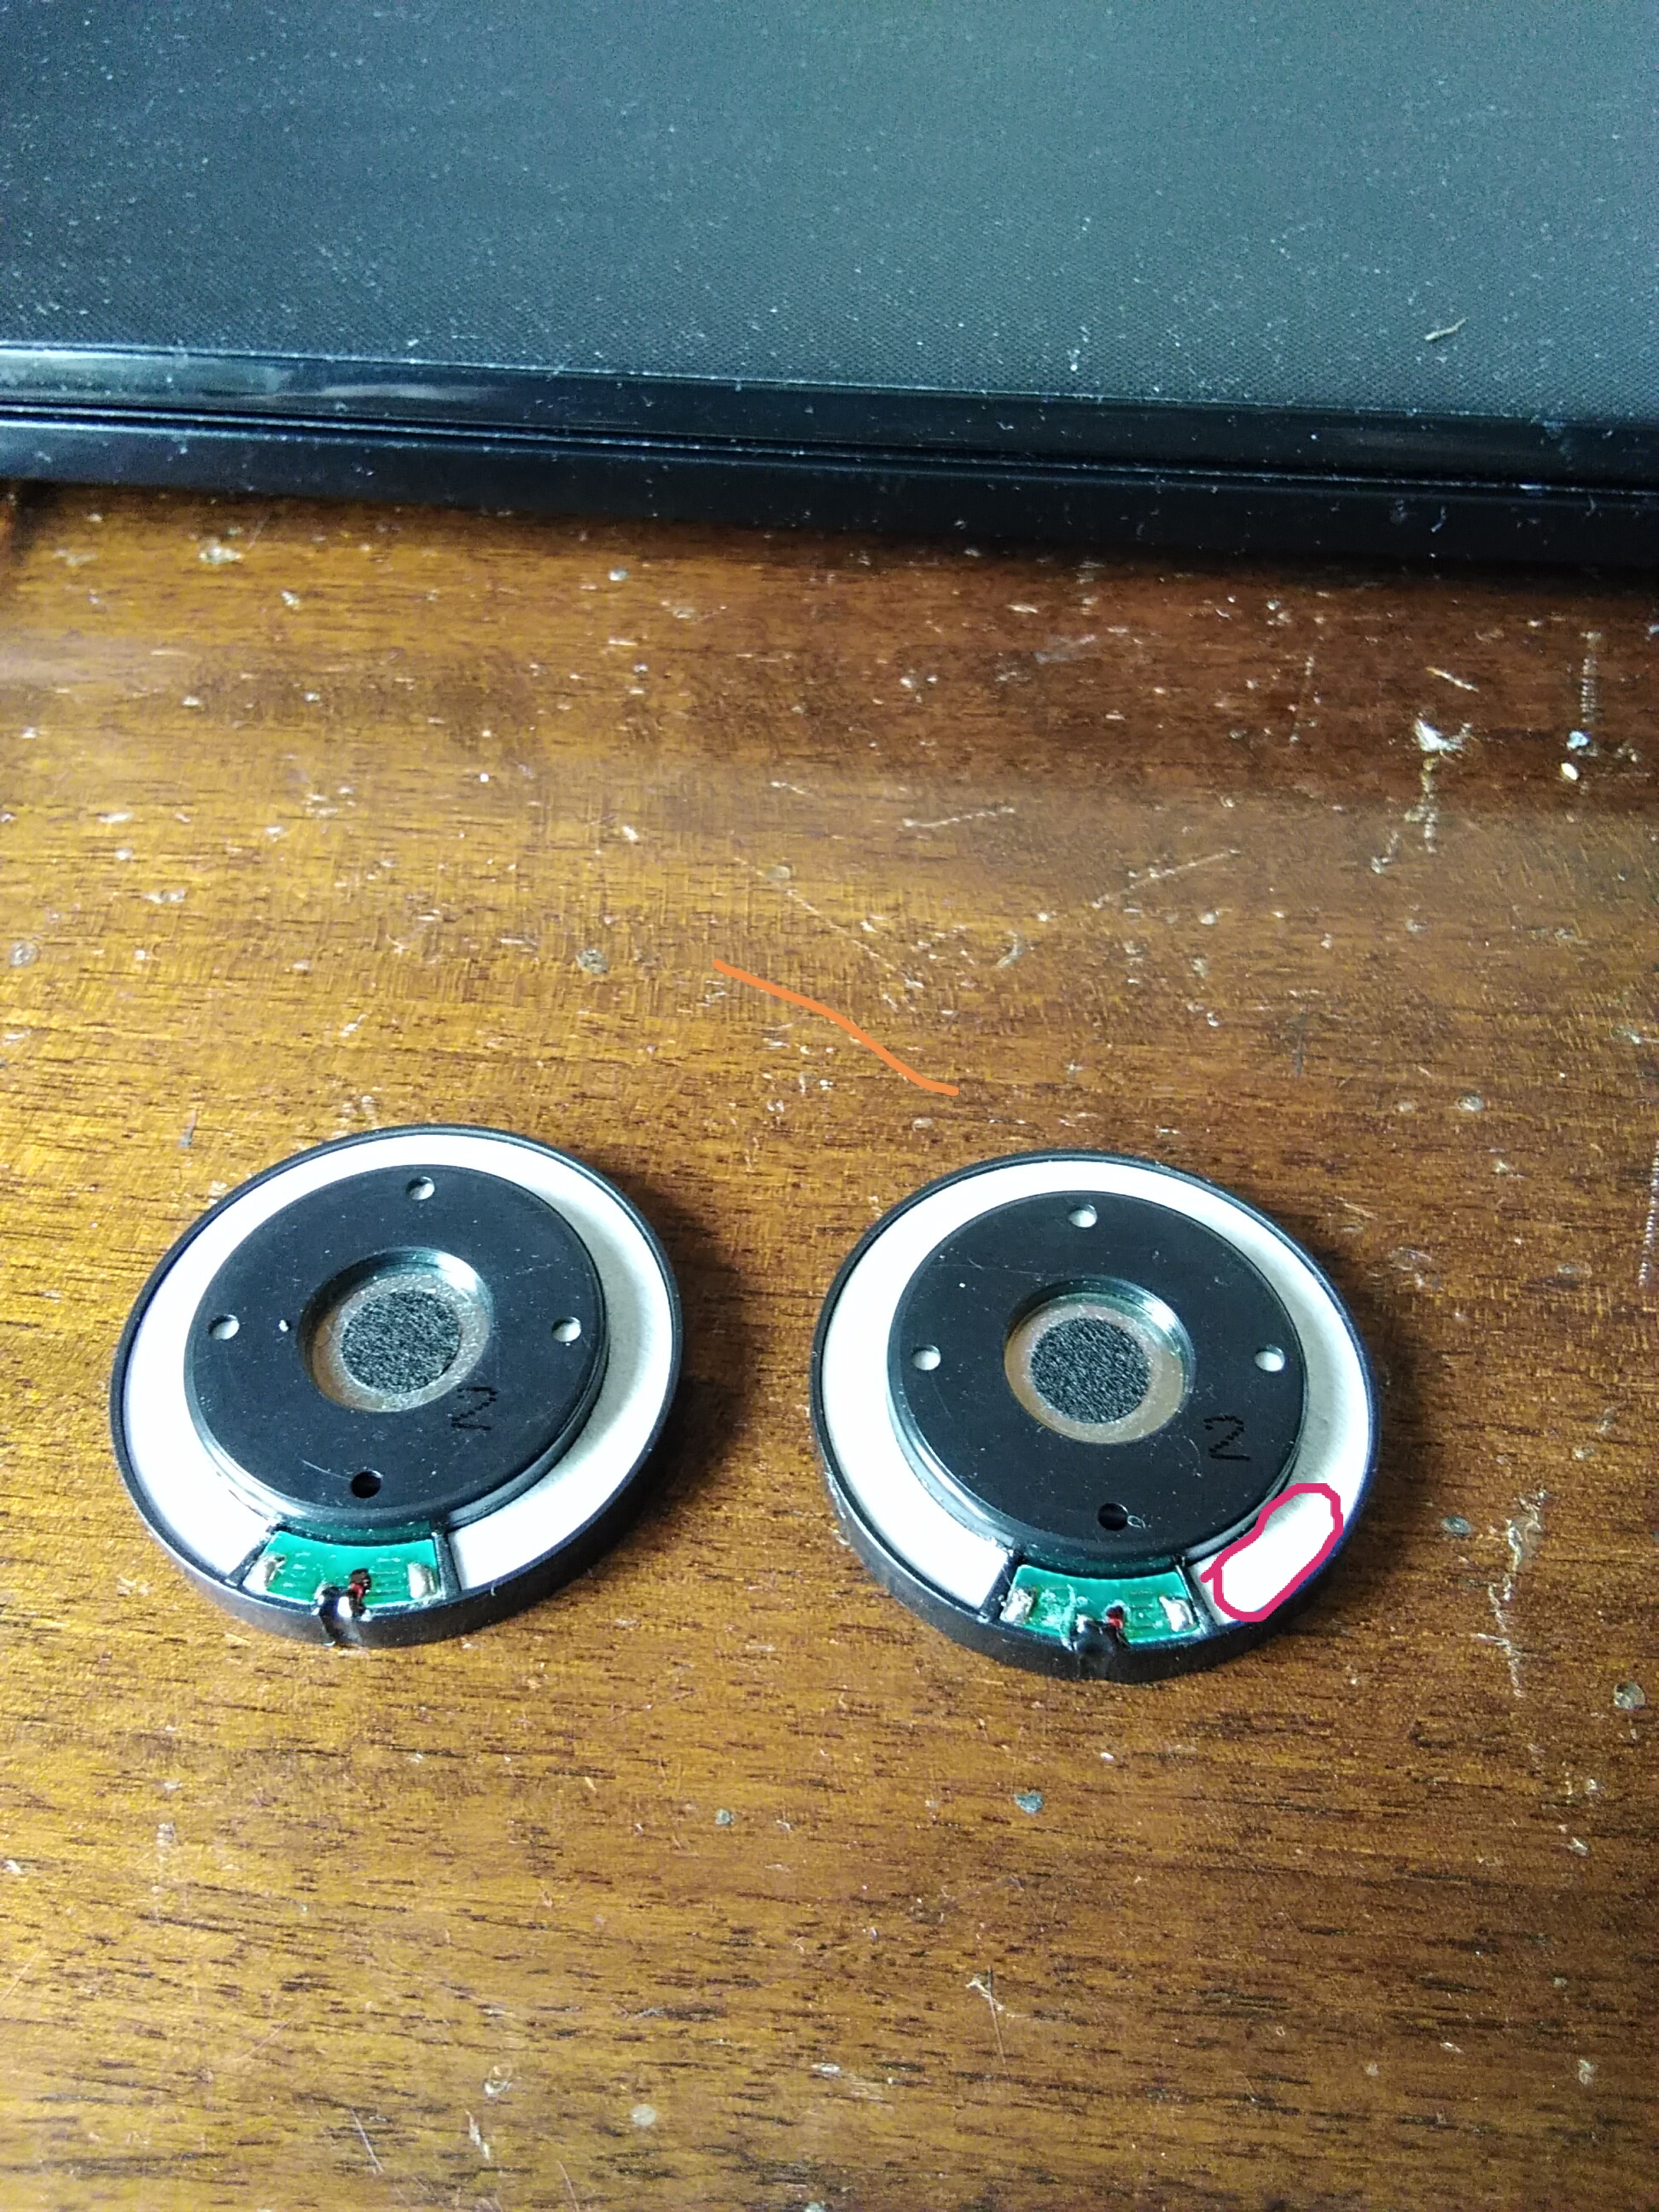
Upon further investigation of the blown out drivers, I noticed some interesting things.
Firstly, the red ring on the inner circle of the driver membrane disconnected from the magnet. I don't see anyway this could possibly be repaired. It also makes me wonder just how much pressure/volume it takes to cause that separation. Is the coil just glued onto the magnet in most drivers?
Second, there is a hole in the middle of the magnet, which does not go all the way through. I don't know if this is a normal design for dynamic drivers:
Lastly, there is a clear plastic sticker/sheet on the back of the magnet. I wonder if this is intended to have a damping effect, and if replacing it with dynamat would make an improvement. On my original build, I put dynamat directly over it, not realizing it was there.
The red ring is the voice coil. Its not supposed to be touching or glued to the magnet. Its supposed to be adhered to the diaphragm and suspended "floating" in the magnetic field.
