I've been shelling this weekend, shelling like it's 1999. JamesMcProgger suggested I post some of the docu-photos, as a mini-tutorial on making a GS1000 "and love out of nothing at all." (I wonder if Bonnie Tyler is a Grado fan.)
In weather news, somebody just had a total eclipse of the heart. (More Bonnie Tyler jokes are available in the book, Bimbo Anthems of the 80s.)

I was feeling board so I thought I wood lumber through this piece.

The Aztecs would have had more time for dominoes if they had had a tool like this to steal a few hearts.

I've come to realize that the best way to know if you're sawing into cocobolo isn't the looks of the wood - which has variations and other contenders with similarities in appearance. It's the shred left behind and the distinctive smell. Cocobolo is fierce and feisty fighter, leaving heavy, oily, shavings. I've had overheated embers catch on fire, though they burned slowly and quietly.

It all starts with a wooden hockey puck. I used to cut the inner hole earlier on in the process, but decided to delay that part of it until I'd put the puck on the lathe. If you want a decent pucking mushroom top, you need a claw - one of those 3-or-4 piece, self-adjusting jaws - to keep your piece centered. You can get a cheapo version of it but a decent one will cost more like $70 to $100. If you're not made of money, you can minimize your pucking problem by cutting the hole last.

A good place to start, when lathing is to take a flat chisel (or whatever it's called in woodworkerese) and smooth the surface.

I like to start by beveling the top corner.

One challenge is to know the proper dimensions. There's a logic to the beveling. Certain proportions apply. A good way to reference, without pulling out a slide rule, is to cut some of the center hole.

Laying down the center hole is a bit like laying down the rhythm track in the studio. Everything else builds on it.

Once the front beveling is set up, it's time to start whittling away at the bottom of the shell. If nothing else, doing so delineates the front and back halves as well as deciding how thick the mushroom top will be.

While the lathe is capable of removing the unneeded layers of wood, I've found that using the different sizes of hole saws makes certain rough chores a bit easier.

One way to handle this is to cut a 2" groove into the wood in an effort to get that slip-on grip.

I've found that a hollowed-out inner (the plastic ring minus the driver cage) is helpful for gauging depth and making sure the inner sinks deep enough into the groove to reach to the little plastic indentations that prevent the plastic from being inserted past a certain point.

At this point, we're not done yet but we're clearly getting somewhere (while getting sunburned).

Lathing down the bottom half establishes a top and bottom to this slip-on.

The shape is coming into its own, though at some point we'll want to remove the center plug.

Looking at it from this angle, you start to see the layers and the proportions at work.

Once you have the exterior lathed out to your satisfaction, then and only then should you remove the center plug (unless you have an industrial claw that can center your work without any wobble).

There's still work to be done on this piece, sanding and lacquering it to bring out its best, but we've come a long way from Puckville, Population: It.

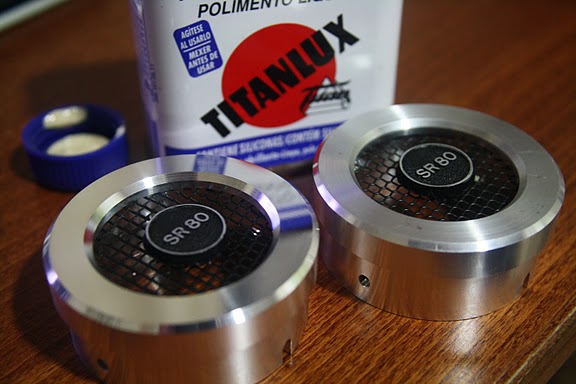
This was the same piece after a little sanding and a coat of lacquer.
Thanks for sharing. Looks good!


")
