


Joe Bloggs
Sponsor: HiByMember of the Trade: EFO Technologies Co, YanYin TechnologyHis Porta Corda walked the Green Mile
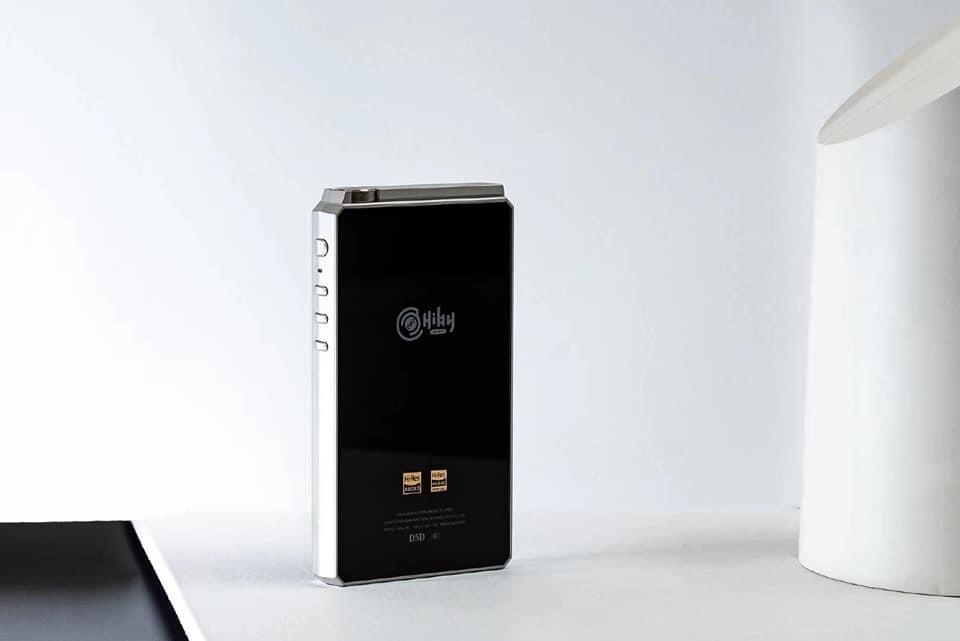
Well, I still have an R6 with me as parting gift from the company (update: I'm now back with the company ") ). Thought it might be interesting to update it to 8.1 myself. My update went pretty much all according to plan but I tried to document it as much as possible anyway:
). Thought it might be interesting to update it to 8.1 myself. My update went pretty much all according to plan but I tried to document it as much as possible anyway:
1. What you’ll need
2. What to do—pre-installation:
3. What to do—connection:
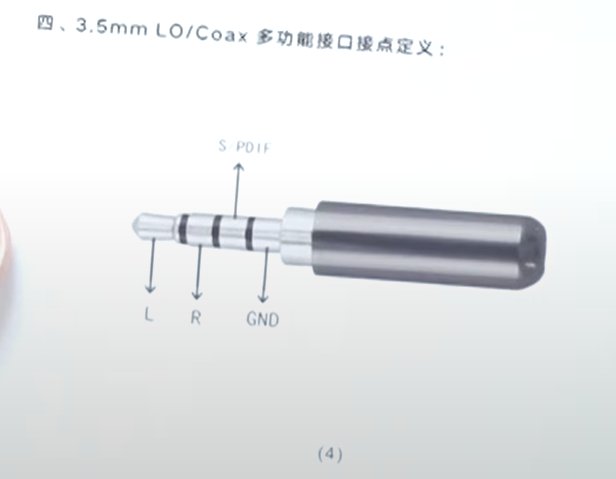
4. What to do—setup:
5. What to do—flash proper
b. In this screen,


click “software version” and navigate to your dir(3) (as per step 2a) and from there go into 8917_bin and then msm8917. Select msm8917 and press OK.
c. Make sure that one and only one of the 16 checkboxes on the left is ticked, then click the dropdown box “COMxx” to its right and select the COM number that’s the same as seen in step 5a.
d. Press Start to its right. The progress bar in the middle will go to 100% several times and then start moving slowly. At the end the light to its right should turn green and your R6 should reboot into the new OS.
P.S. In case anyone updated to latest OTA updates and have issues serious and urgent enough to warrant an immediate rollback, this can be done by redoing the above to roll the R6 to the first Oreo update. You can even roll back to the last Marshmallow ROM by doing the same as the above but substituting the Oreo firmware with the following:
https://drive.google.com/open?id=1T430gInJxYLzh7enRhI3by_rj_yxvrx2
). Thought it might be interesting to update it to 8.1 myself. My update went pretty much all according to plan but I tried to document it as much as possible anyway:1. What you’ll need
a. HiBy R6 (on any version of firmware) well charged
b. The (1) (2) and (3) zip files downloaded from here: https://drive.google.com/drive/fold...z7uL12kmlkGFJKsiJ5NM-TNuQB_nYtfbvxX92ZOvskr1s . There’s also a “Manual V1.0.pdf” but I struggle to understand its contents and HiBy will direct all people with questions to disregard this manual…
c. [update: please skip this step if you're running a windows 10 computer.]A windows computer RUNNING ON TEST MODE. Inside the (2) zip there is a batch script in testmode_bat called testmode_open.bat to put your computer into test mode, but the actual things required to actually put your computer into test mode varies by computer. Do not try to proceed, until you have something like these letterings on the lower right corner of your desktop:
 . Google "Windows (your version) Test Mode"
b. The (1) (2) and (3) zip files downloaded from here: https://drive.google.com/drive/fold...z7uL12kmlkGFJKsiJ5NM-TNuQB_nYtfbvxX92ZOvskr1s . There’s also a “Manual V1.0.pdf” but I struggle to understand its contents and HiBy will direct all people with questions to disregard this manual…
c. [update: please skip this step if you're running a windows 10 computer.]A windows computer RUNNING ON TEST MODE. Inside the (2) zip there is a batch script in testmode_bat called testmode_open.bat to put your computer into test mode, but the actual things required to actually put your computer into test mode varies by computer. Do not try to proceed, until you have something like these letterings on the lower right corner of your desktop:
2. What to do—pre-installation:
a. Right click on each zip file and select Extract All… to a common directory you can easily refer to. FROM HERE ON REFERENCES TO dir(1), dir(2) and dir(3) refer to the extracted contents of the 3 zips respectively. YOU MUST EXTRACT the zips and NOT try to use the contents of the compressed files directly.
b. [update: please skip this step if you're running a windows 10 computer.]Run Setup.exe in dir(1). Press Next or Install in answer to everything. The only thing you have to change from default is from “I do not agree…” to “I agree with the license agreement…” to light up a Next button.
c. If prompted to restart your computer, restart the computer as directed.
3. What to do—connection:
a. Connect the R6 to the computer using a good USB cable (no intermittent connections please!) while powered OFF. Wait until the HiBy logo passes and the charge animation shows up. Then press and hold the volume + and – buttons, then, while still holding those two buttons, start holding the power button as well. (Official instruction is simply to press and hold these three buttons at the same time. But if you press the power button before the volume buttons are held down, the device may not enter the right mode.) If successful, the R6 screen should flash the logo quickly and then go completely dark. Now you may release all buttons.
b. On your computer, press the windows key and type Device Manager and then enter. In Device Manager, look for the following (if your computer is in English):
 and clicking on the arrow to the left should reveal:
 where ? is a random COM port number. If you do not see this, or the device that appears reads as anything else (in particular it must read “9008” and not any other number), I don’t know what to do because I haven’t had the unluck to come across the situation personally and so haven’t had the chance to decipher what the manuals have to say on the matter…
b. On your computer, press the windows key and type Device Manager and then enter. In Device Manager, look for the following (if your computer is in English):
4. What to do—setup:
a. Go into dir(2) (as per step 2a) and run QCOM_MultiDnload(Inner)(SMT)(vc10).exe .
b. Your Win10 computer may refuse to run the program. There no “run anyway” or “yes” button in this screen that I forgot to capture the only time it appeared. You click on the highlighted text that says “read more…” or something like that to reveal the “run anyway” link.
c. After a HiBy logo, this is what you *should* see:
If instead the window looks cut off, it has been reported (by Howard Sto on Facebook HiBy User Group) that changing the high DPI settings thusly should help:
 (right click on the program name->choose Properties->choose Compatibility tab->tick Run this program as an administrator, then click Change high DPI settings…
Click OK on all windows when done. (and close and rerun the app)
b. Your Win10 computer may refuse to run the program. There no “run anyway” or “yes” button in this screen that I forgot to capture the only time it appeared. You click on the highlighted text that says “read more…” or something like that to reveal the “run anyway” link.
c. After a HiBy logo, this is what you *should* see:
If instead the window looks cut off, it has been reported (by Howard Sto on Facebook HiBy User Group) that changing the high DPI settings thusly should help:
Click OK on all windows when done. (and close and rerun the app)
5. What to do—flash proper
a. Go back to Device Manager and look at this again:
Note the number after “COM”. If you could find this before but can’t find it now, it may be because the Download mode on the R6 has some kind of timeout. Disconnect the R6, hold the power button for 15 seconds until it restarts and boots into Android, turn it off again, connect to the computer again, wait for battery animation to show up, hold volume +, - and power button together again to enter download mode again. Look for the pictured COM number again.b. In this screen,
click “software version” and navigate to your dir(3) (as per step 2a) and from there go into 8917_bin and then msm8917. Select msm8917 and press OK.
c. Make sure that one and only one of the 16 checkboxes on the left is ticked, then click the dropdown box “COMxx” to its right and select the COM number that’s the same as seen in step 5a.
d. Press Start to its right. The progress bar in the middle will go to 100% several times and then start moving slowly. At the end the light to its right should turn green and your R6 should reboot into the new OS.
P.S. In case anyone updated to latest OTA updates and have issues serious and urgent enough to warrant an immediate rollback, this can be done by redoing the above to roll the R6 to the first Oreo update. You can even roll back to the last Marshmallow ROM by doing the same as the above but substituting the Oreo firmware with the following:
https://drive.google.com/open?id=1T430gInJxYLzh7enRhI3by_rj_yxvrx2
Last edited:

|
Stay updated on HiBy at their facebook, website or email (icons below).
Stay updated on HiBy at their sponsor profile on Head-Fi.


|


