


Bilavideo
Caution: Incomplete trades.
- Joined
- Feb 29, 2008
- Posts
- 3,101
- Likes
- 128
THE FORMULA
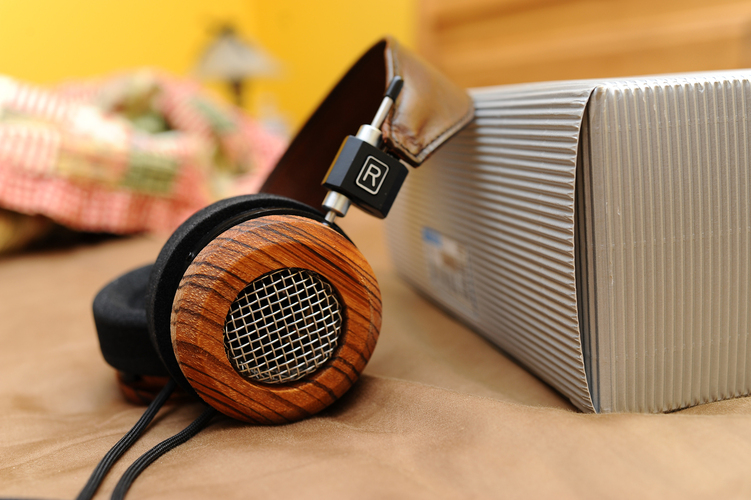
More and more as I try to dig myself out of a woodworker's apprenticeship (if that), I become a keen admirer of the carpenter's craft of cutting things in such a way that it all clicks together like Leggo in a kind of a tongue-and-groove fashion. Matching the tight tolerances between the lip of the plastic inner and the limited room for rotation within the C clamps, I've found it challenging, if not frustrating, to end up with such thin dimensions, especially when working with the most beloved wood. Even with a drill press, which is far less wasteful of the wood than a lathe, I can't help but regret the loss of such fine wood and the resulting fragility of shells that might otherwise be as solid as a rock if allowed a greater thickness. The space between a 2" plastic lip and a 2 3/8" outer face is just that: 3/8". That's not much. Where possible, I've sometimes widened the outer face to 2 1/2" but that leads to less up-and-down rotation, though it has - indeed - made for sturdier shells.

My solution has been to use a triple-cut strategy, one that produces a groove for the plastic in-between upper and lower (or outer and inner) walls or layers of wood that brace the plastic rather than simply slipping over it. Where the groove stops, the integrity of the wood remains untouched and a thicker outer face makes for a stronger shell, particularly where durability counts.

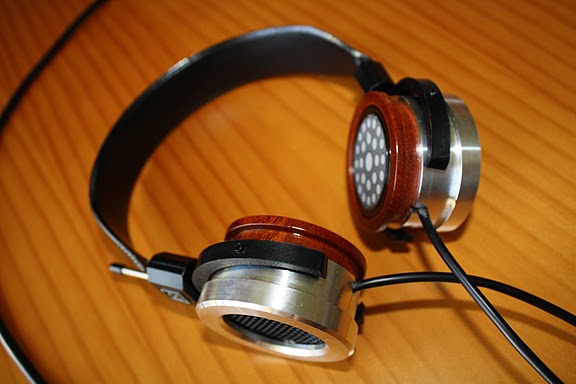
That was with regard to the outer wood "slip-on" designed to fit the standard plastic inner. Redesigning that inner chamber, however, to remake it as a wooden housing, has produced some interesting results. I'm not done yet, but I truly believe that the integration of wood - front and back - will make for a much more responsive shell overall. I'm beginning to see it as a three-stage mechanism whose full integration is necessary to really "get what you paid for." If I may be so bold as to say it, "glue" is the devil. Why would anybody want to put something rubbery in a dynamic shell? Why unnecessarily dampen the very mechanism you're using to augment the driver? That would be like throwing a sock in a saxophone. Glue may be necessary where the parts do not fit together on their own, but why aren't they fitting together on their own? Isn't this a cheat? Can you really cheat acoustics?

The next step has been to redesign the plastic inner to be a wood inner, one that would extend the shell to the mouth of the driver. The benefit of using such a shell, particularly with a tongue-and-groove arrangement, is that - whatever wood "does," it could start doing it at the driver, and where the force of the driver is greatest. Fitting together in this tongue-and-groove arrangement, there would be more than just a lengthening of the driver (without distancers or horn-like rear chambers). The interlocking of the front and rear driver walls would reinforce the walls (for durability) and double the contact surface.

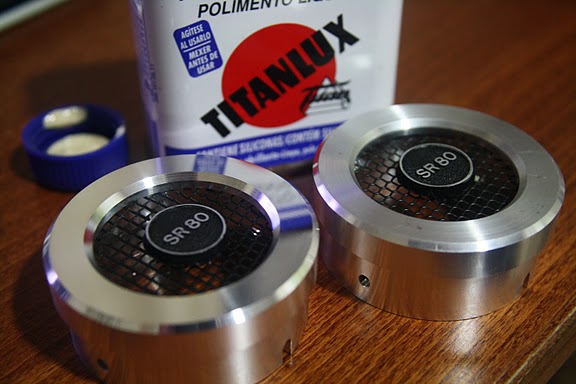
To make the front "inner" fit the outer rear chamber, I had to cut an outer wall of 2 1/4" with an inner wall of 1 7/8". But to create a cradle where the driver could be placed, I had to limit the depth of the 1 7/8" cut and plow through the rest of the ring at 1 5/8".

The result is an integrated pair that fit together "as snug as a bug in a rug."

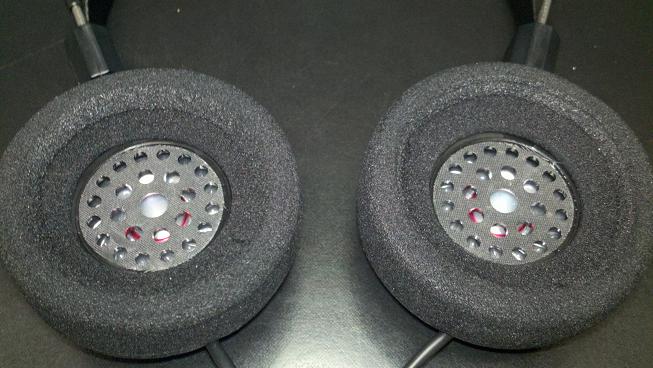
This old, broken driver is one I use for reference purposes. It doesn't fit as tightly as I'd like - in terms of width - but the depth is right. I could cut inner circle at 1 3/4" (thickening the space up by 1/8") but when I've done that in the past, I've found it too tight. I might order a hole saw at 1 13/16, which would probably tighten up the slack. As much as possible, I'd like there to be no shimming material - whether it's glue, rubber or anything else that would damp or deaden the transmission of vibrations from the driver to the walls of the shells. To the extent that the shells are to be an extension of the drivers, I want that contact to be as pure as possible.
This is completely at odds with loudspeaker design, where speaker cabinets are essentially garbage cans for back-wave resonance, acoustic containment systems in conjunction with a baffle. On the other hand, loudspeakers have dedicated woofers (and self-contained tweeters and midrange domes). They have to do something about all that bass resonance (with cabinets that are as stiff as possible but also as absorbent as possible). The 40mm Mylar drivers in Grados, like those of many headphones, are wide-range drivers with no special emphasis on bass. The beyerdynamic DT770 has a thick gel added to its drivers, which no-doubt helps with the bass and helps retard cone breakup, but Grados rely on the wood shells to amplify the thump of its bass. I like this approach because it doesn't compromise the treble by adding mass to the driver. The driver, proper, is allowed to act like a tweeter while the shell is allowed to assume double duty as a "woofer." How odd, yet effective.
There's a third stage I want to add to this process, and that's the creation of a cap or topper. The front grill can be more than just a protective enclosure. It can be a brace that pushes against the outer ring of the driver, holding it firm so that its vibrations don't go to waste. A tight, snug, fit - front, back and all around - will reduce driver rattling and ringing while pushing more energy into the shells. That will be the subject of a future project.
More and more as I try to dig myself out of a woodworker's apprenticeship (if that), I become a keen admirer of the carpenter's craft of cutting things in such a way that it all clicks together like Leggo in a kind of a tongue-and-groove fashion. Matching the tight tolerances between the lip of the plastic inner and the limited room for rotation within the C clamps, I've found it challenging, if not frustrating, to end up with such thin dimensions, especially when working with the most beloved wood. Even with a drill press, which is far less wasteful of the wood than a lathe, I can't help but regret the loss of such fine wood and the resulting fragility of shells that might otherwise be as solid as a rock if allowed a greater thickness. The space between a 2" plastic lip and a 2 3/8" outer face is just that: 3/8". That's not much. Where possible, I've sometimes widened the outer face to 2 1/2" but that leads to less up-and-down rotation, though it has - indeed - made for sturdier shells.
My solution has been to use a triple-cut strategy, one that produces a groove for the plastic in-between upper and lower (or outer and inner) walls or layers of wood that brace the plastic rather than simply slipping over it. Where the groove stops, the integrity of the wood remains untouched and a thicker outer face makes for a stronger shell, particularly where durability counts.
That was with regard to the outer wood "slip-on" designed to fit the standard plastic inner. Redesigning that inner chamber, however, to remake it as a wooden housing, has produced some interesting results. I'm not done yet, but I truly believe that the integration of wood - front and back - will make for a much more responsive shell overall. I'm beginning to see it as a three-stage mechanism whose full integration is necessary to really "get what you paid for." If I may be so bold as to say it, "glue" is the devil. Why would anybody want to put something rubbery in a dynamic shell? Why unnecessarily dampen the very mechanism you're using to augment the driver? That would be like throwing a sock in a saxophone. Glue may be necessary where the parts do not fit together on their own, but why aren't they fitting together on their own? Isn't this a cheat? Can you really cheat acoustics?
The next step has been to redesign the plastic inner to be a wood inner, one that would extend the shell to the mouth of the driver. The benefit of using such a shell, particularly with a tongue-and-groove arrangement, is that - whatever wood "does," it could start doing it at the driver, and where the force of the driver is greatest. Fitting together in this tongue-and-groove arrangement, there would be more than just a lengthening of the driver (without distancers or horn-like rear chambers). The interlocking of the front and rear driver walls would reinforce the walls (for durability) and double the contact surface.
To make the front "inner" fit the outer rear chamber, I had to cut an outer wall of 2 1/4" with an inner wall of 1 7/8". But to create a cradle where the driver could be placed, I had to limit the depth of the 1 7/8" cut and plow through the rest of the ring at 1 5/8".
The result is an integrated pair that fit together "as snug as a bug in a rug."
This old, broken driver is one I use for reference purposes. It doesn't fit as tightly as I'd like - in terms of width - but the depth is right. I could cut inner circle at 1 3/4" (thickening the space up by 1/8") but when I've done that in the past, I've found it too tight. I might order a hole saw at 1 13/16, which would probably tighten up the slack. As much as possible, I'd like there to be no shimming material - whether it's glue, rubber or anything else that would damp or deaden the transmission of vibrations from the driver to the walls of the shells. To the extent that the shells are to be an extension of the drivers, I want that contact to be as pure as possible.
This is completely at odds with loudspeaker design, where speaker cabinets are essentially garbage cans for back-wave resonance, acoustic containment systems in conjunction with a baffle. On the other hand, loudspeakers have dedicated woofers (and self-contained tweeters and midrange domes). They have to do something about all that bass resonance (with cabinets that are as stiff as possible but also as absorbent as possible). The 40mm Mylar drivers in Grados, like those of many headphones, are wide-range drivers with no special emphasis on bass. The beyerdynamic DT770 has a thick gel added to its drivers, which no-doubt helps with the bass and helps retard cone breakup, but Grados rely on the wood shells to amplify the thump of its bass. I like this approach because it doesn't compromise the treble by adding mass to the driver. The driver, proper, is allowed to act like a tweeter while the shell is allowed to assume double duty as a "woofer." How odd, yet effective.
There's a third stage I want to add to this process, and that's the creation of a cap or topper. The front grill can be more than just a protective enclosure. It can be a brace that pushes against the outer ring of the driver, holding it firm so that its vibrations don't go to waste. A tight, snug, fit - front, back and all around - will reduce driver rattling and ringing while pushing more energy into the shells. That will be the subject of a future project.


