Jul 3, 2011 at 1:01 AM Post #151 of 3,353


Quote:
If you still want me to take a look at it to see if it could be salvaged, I will. 


Thanks for the offer, but I *think* I should be okay. However, I'm probably going to just throw this driver away anyway so I'd be happy to send it to you instead. If you can salvage it, then perhaps you can find a use for it? 
 
-Marvin


Jul 3, 2011 at 1:16 AM Post #152 of 3,353


Quote:
Thanks for the offer, but I *think* I should be okay. However, I'm probably going to just throw this driver away anyway so I'd be happy to send it to you instead. If you can salvage it, then perhaps you can find a use for it? 
 
-Marvin


Q, Dont throw it away...I fried a driver and could use that one to have a completely functional set of headphones...check your PM
 
 
Jul 3, 2011 at 3:45 AM Post #153 of 3,353
10 7/8".  I just checked a stock headband of mine.  I measured it across the top with a cloth-based tape measure.


I didn't measure mine, but when I was cutting a piece of suede to be used, it didn't fit horizontally on a piece of 8x11 suede. It was pretty noticeably longer too, so as long as the piece was in fact 11" there is no way mine is 10 7/8"

And Kojaku, the VC wire, is usually ran through that white part, and then under a metal solder pad. The solder and cable usually goes on top of the pad that the VC wire is (supposed to be) permanently stuck down so the cable can come off, but the VC is protected under the pad. And for removing the bulk of the solder a bulb should do fine. It won't get all of it, neither will braid, but braid usually removes more.


I actually have one of those spring loaded vacuums. I sure hope I don't screw up this solder job xS

Kojaku
 
Jul 3, 2011 at 4:37 AM Post #154 of 3,353
Okay, so I ended up getting everything done earlier. 
 
Kokaju.... I tried taking some pictures to maybe give you a better idea, but poor lighting and a pretty mediocre cell phone camera probably won't do it justice. My mistake was being too paranoid that I'd burn the voice coils that I did not sufficiently melt the solder all the way, and yanked the cable out too soon. Since the metal pad that connects to the voice coil was a bit soft from the heat, it complete ripped off of the plastic piece. On my second run at it, since I had an extra driver as a safety net, I did not worry about overheating a voice coil and left the solder iron on it for quite some time and everything was fine. I think at a one point I had the solder boiling for about 5 seconds and it was still okay. Also, if I heated it up for a good amount of time, I just took a breather and let the whole thing cool down a bit before resuming. So, from a rookie who first picked up a soldering iron yesterday, and managed to kill a driver today, the biggest advice I can give you is to not let the paranoia get the best of you. Just relax and do what needs to be done! 
 
Anyway, here are some pictures:
 
This is the dead driver. As you can see, there is a gap between the white stuff and the solder on the right side. There should be a metal pad underneath there. It's a thin film that I managed to rip completely off. I believe I took the iron off the solder point just before I pulled the cable out. On the second go around, I left the solder iron on the solder point, made sure the cable slipped out, and then took the iron off. 

 
Here is the other driver. I had a vacuum pump that I tried to get as much solder as I could off but didn't do a great job. You can see the metal pads that sml refers to. That's the contact point, as when I touch the cable to that point, the driver pumps music. 

 
Here are some stab wounds that my dining table suffered from the driver liberation. I used a butter knife that had a sharp point, and a hammer and did not realize it went all the way through to the table. Thank goodness my girlfriend ordered a new dining table last week and they are out of stock so it has not been delivered yet. If this was the new table, I'd be in the dog house. 

 
Some of the plastic on these drivers got really messed up. On this one, the grill popped off the driver, so I had to glue it back together. This is the extra driver that I have. I got some PMs for this, but I'm going to hold onto it to be sure my friend's mods go through. If that checks out, then I'll pass it along.

 
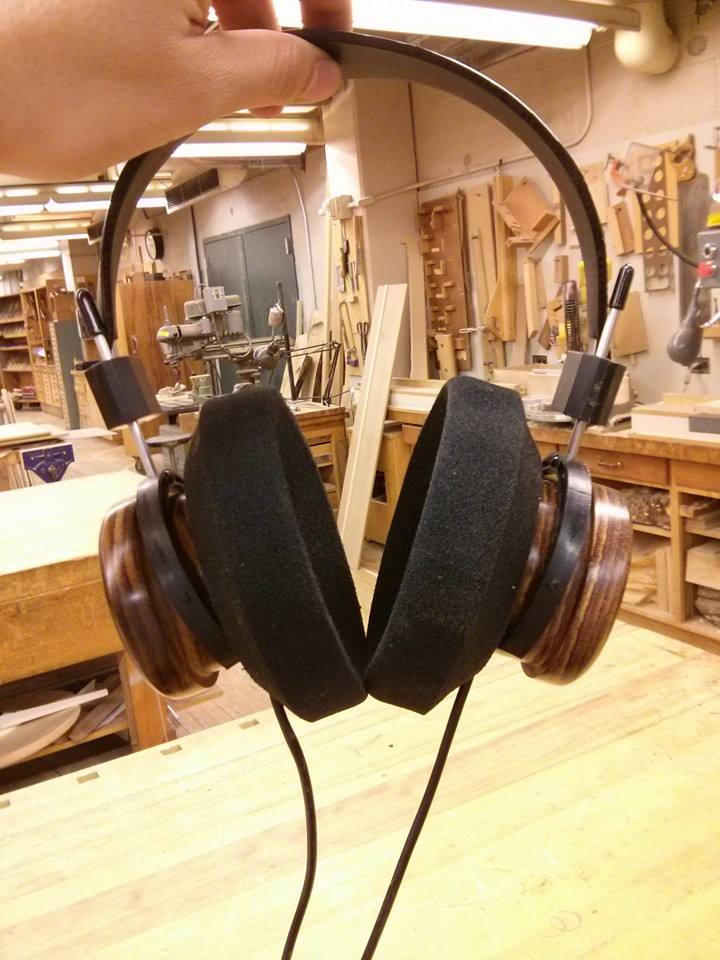
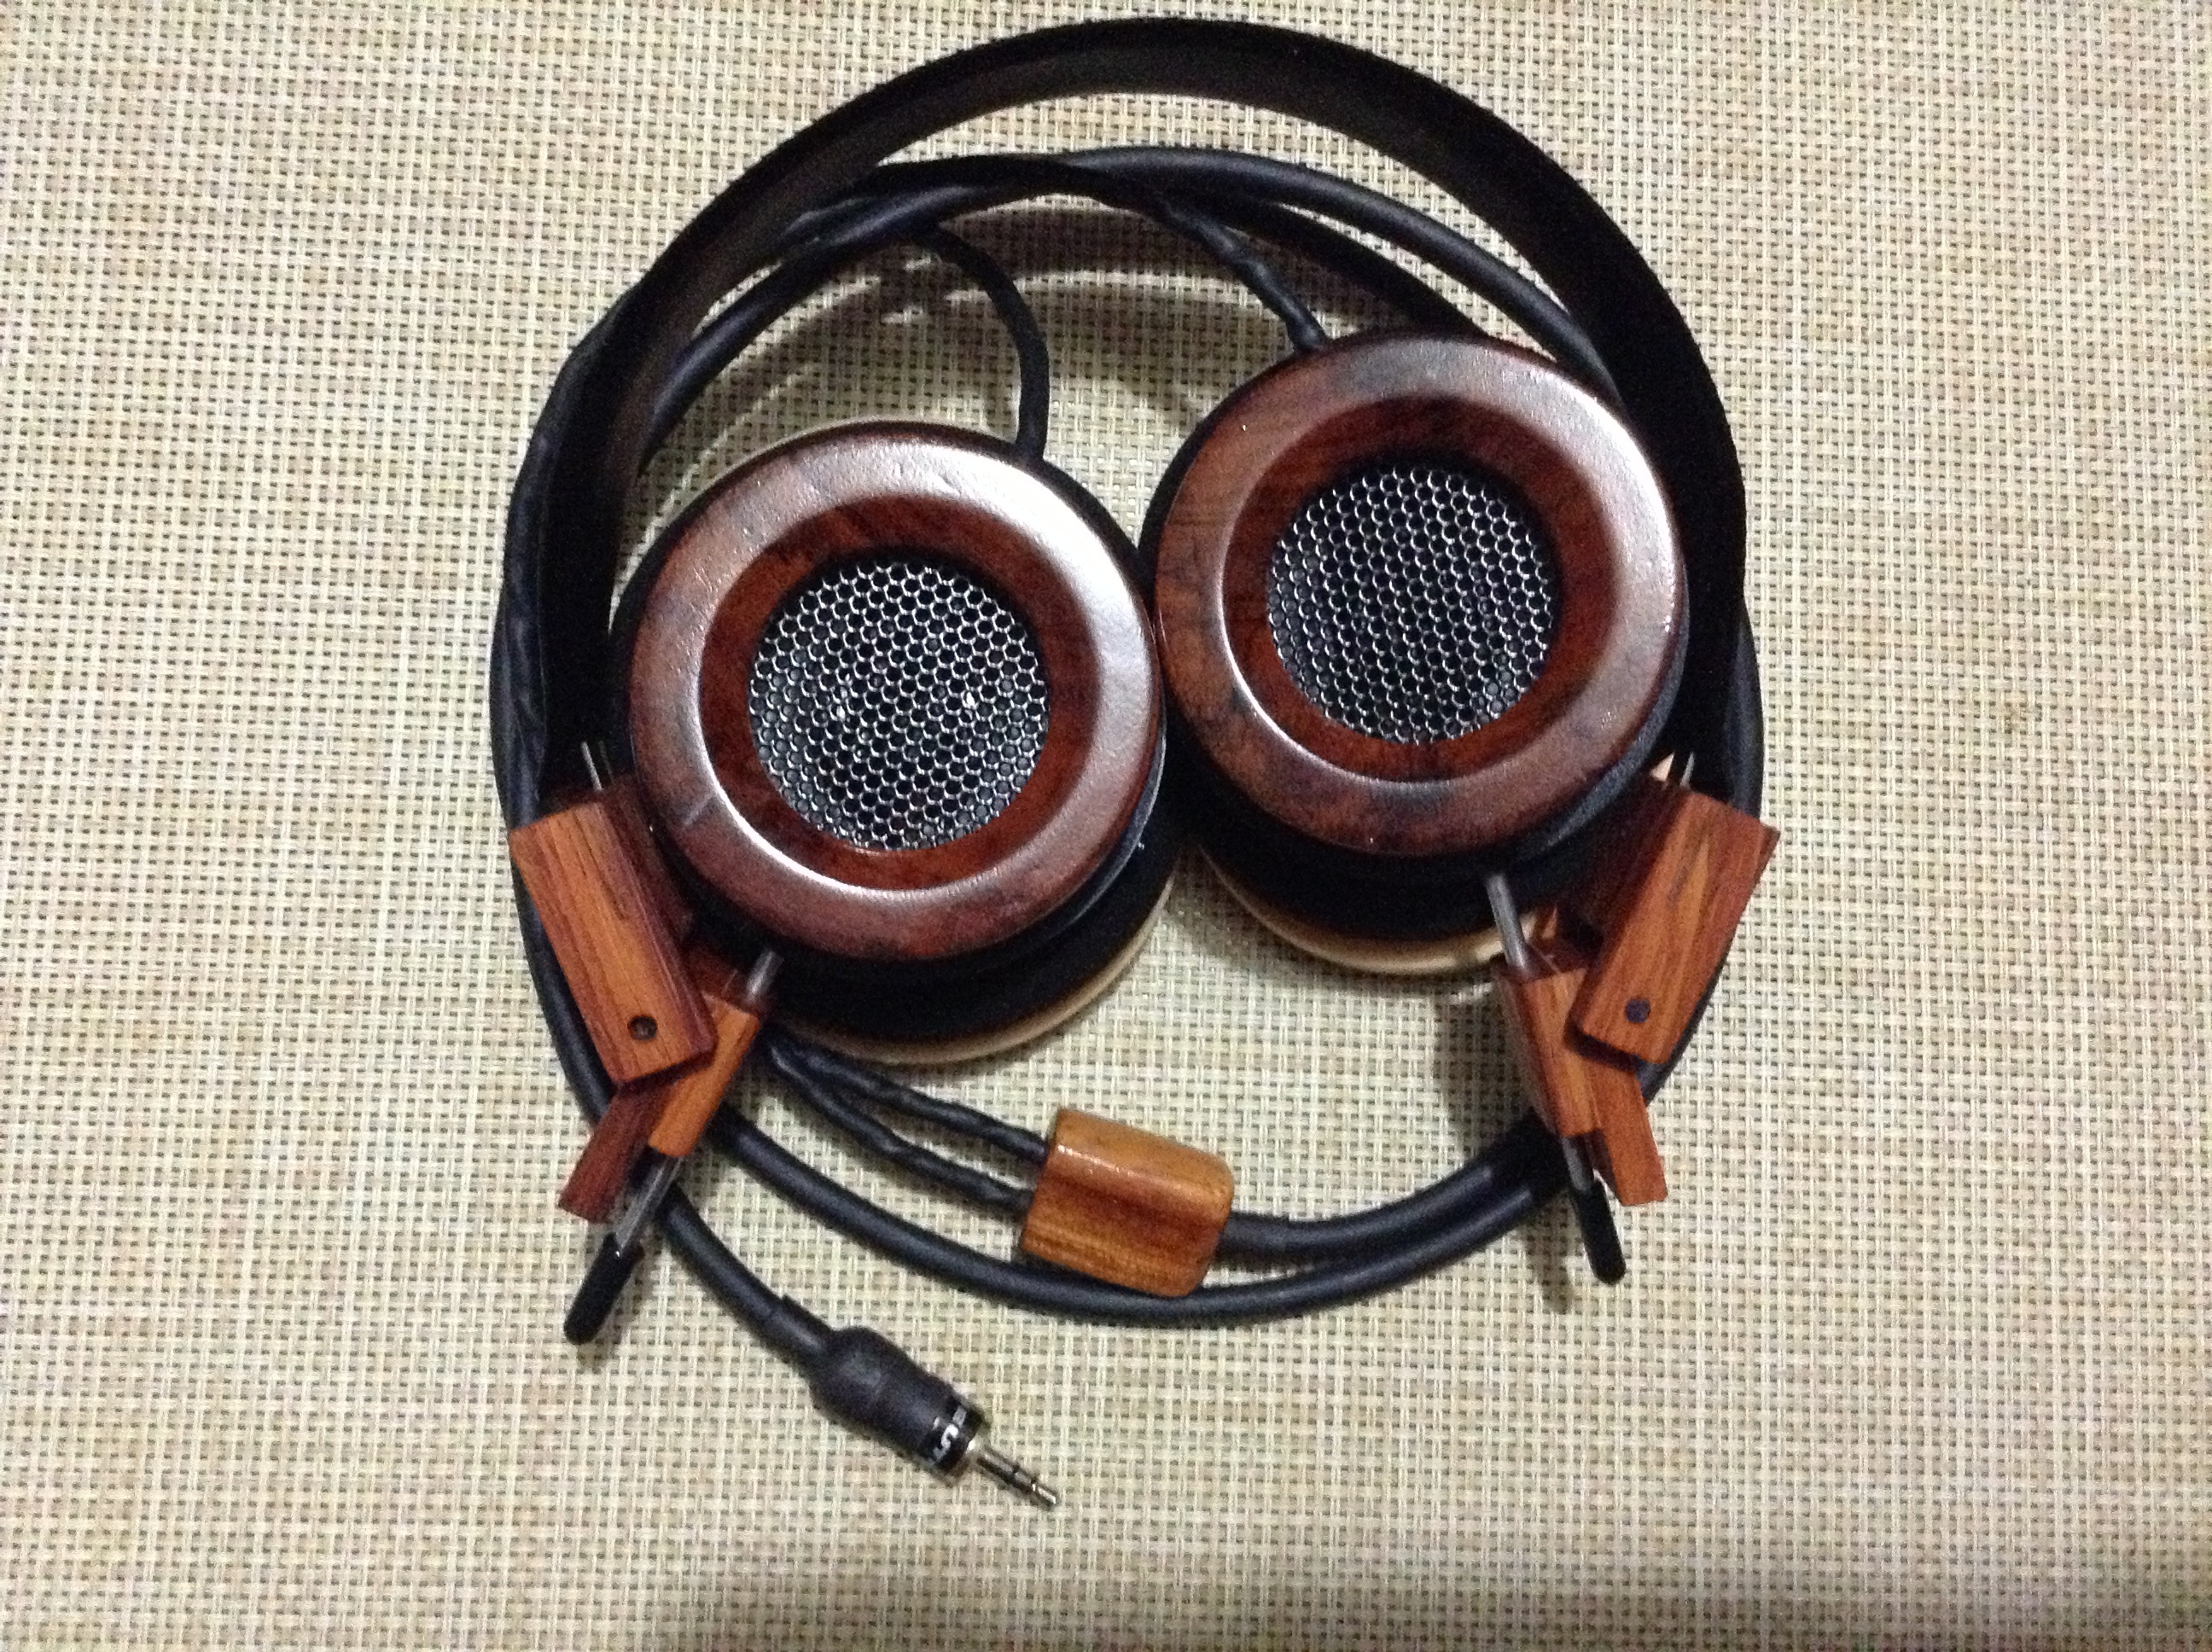
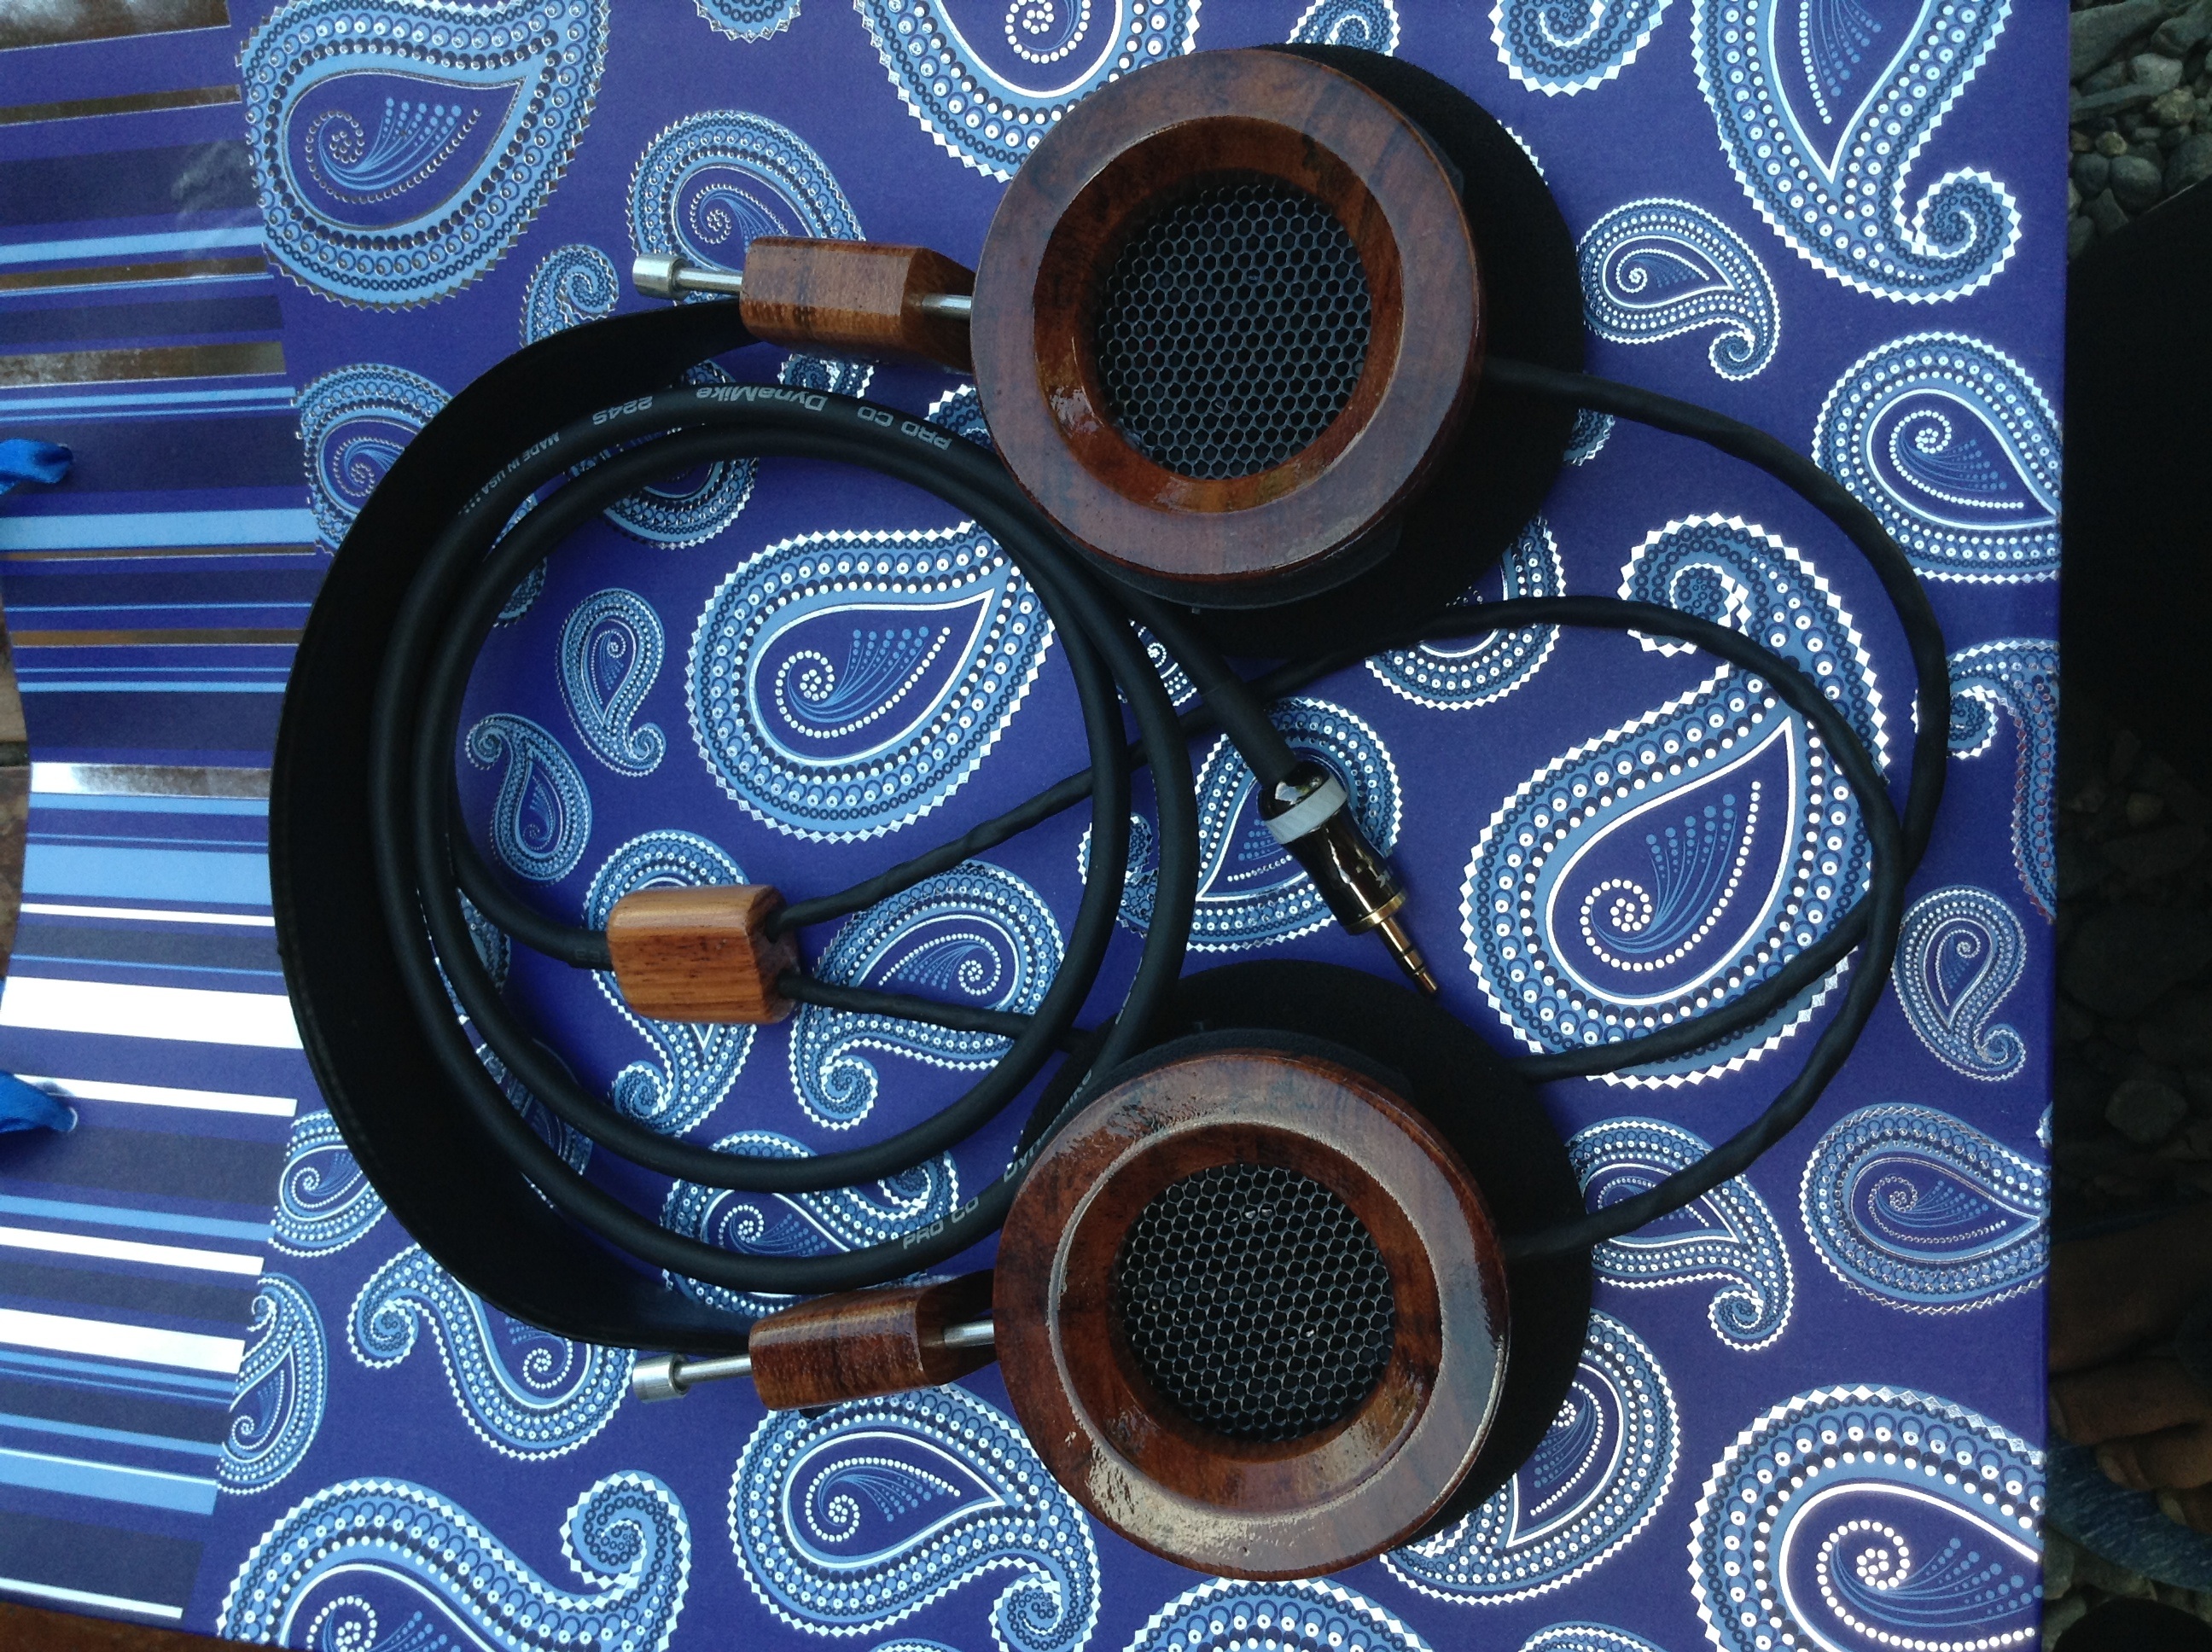
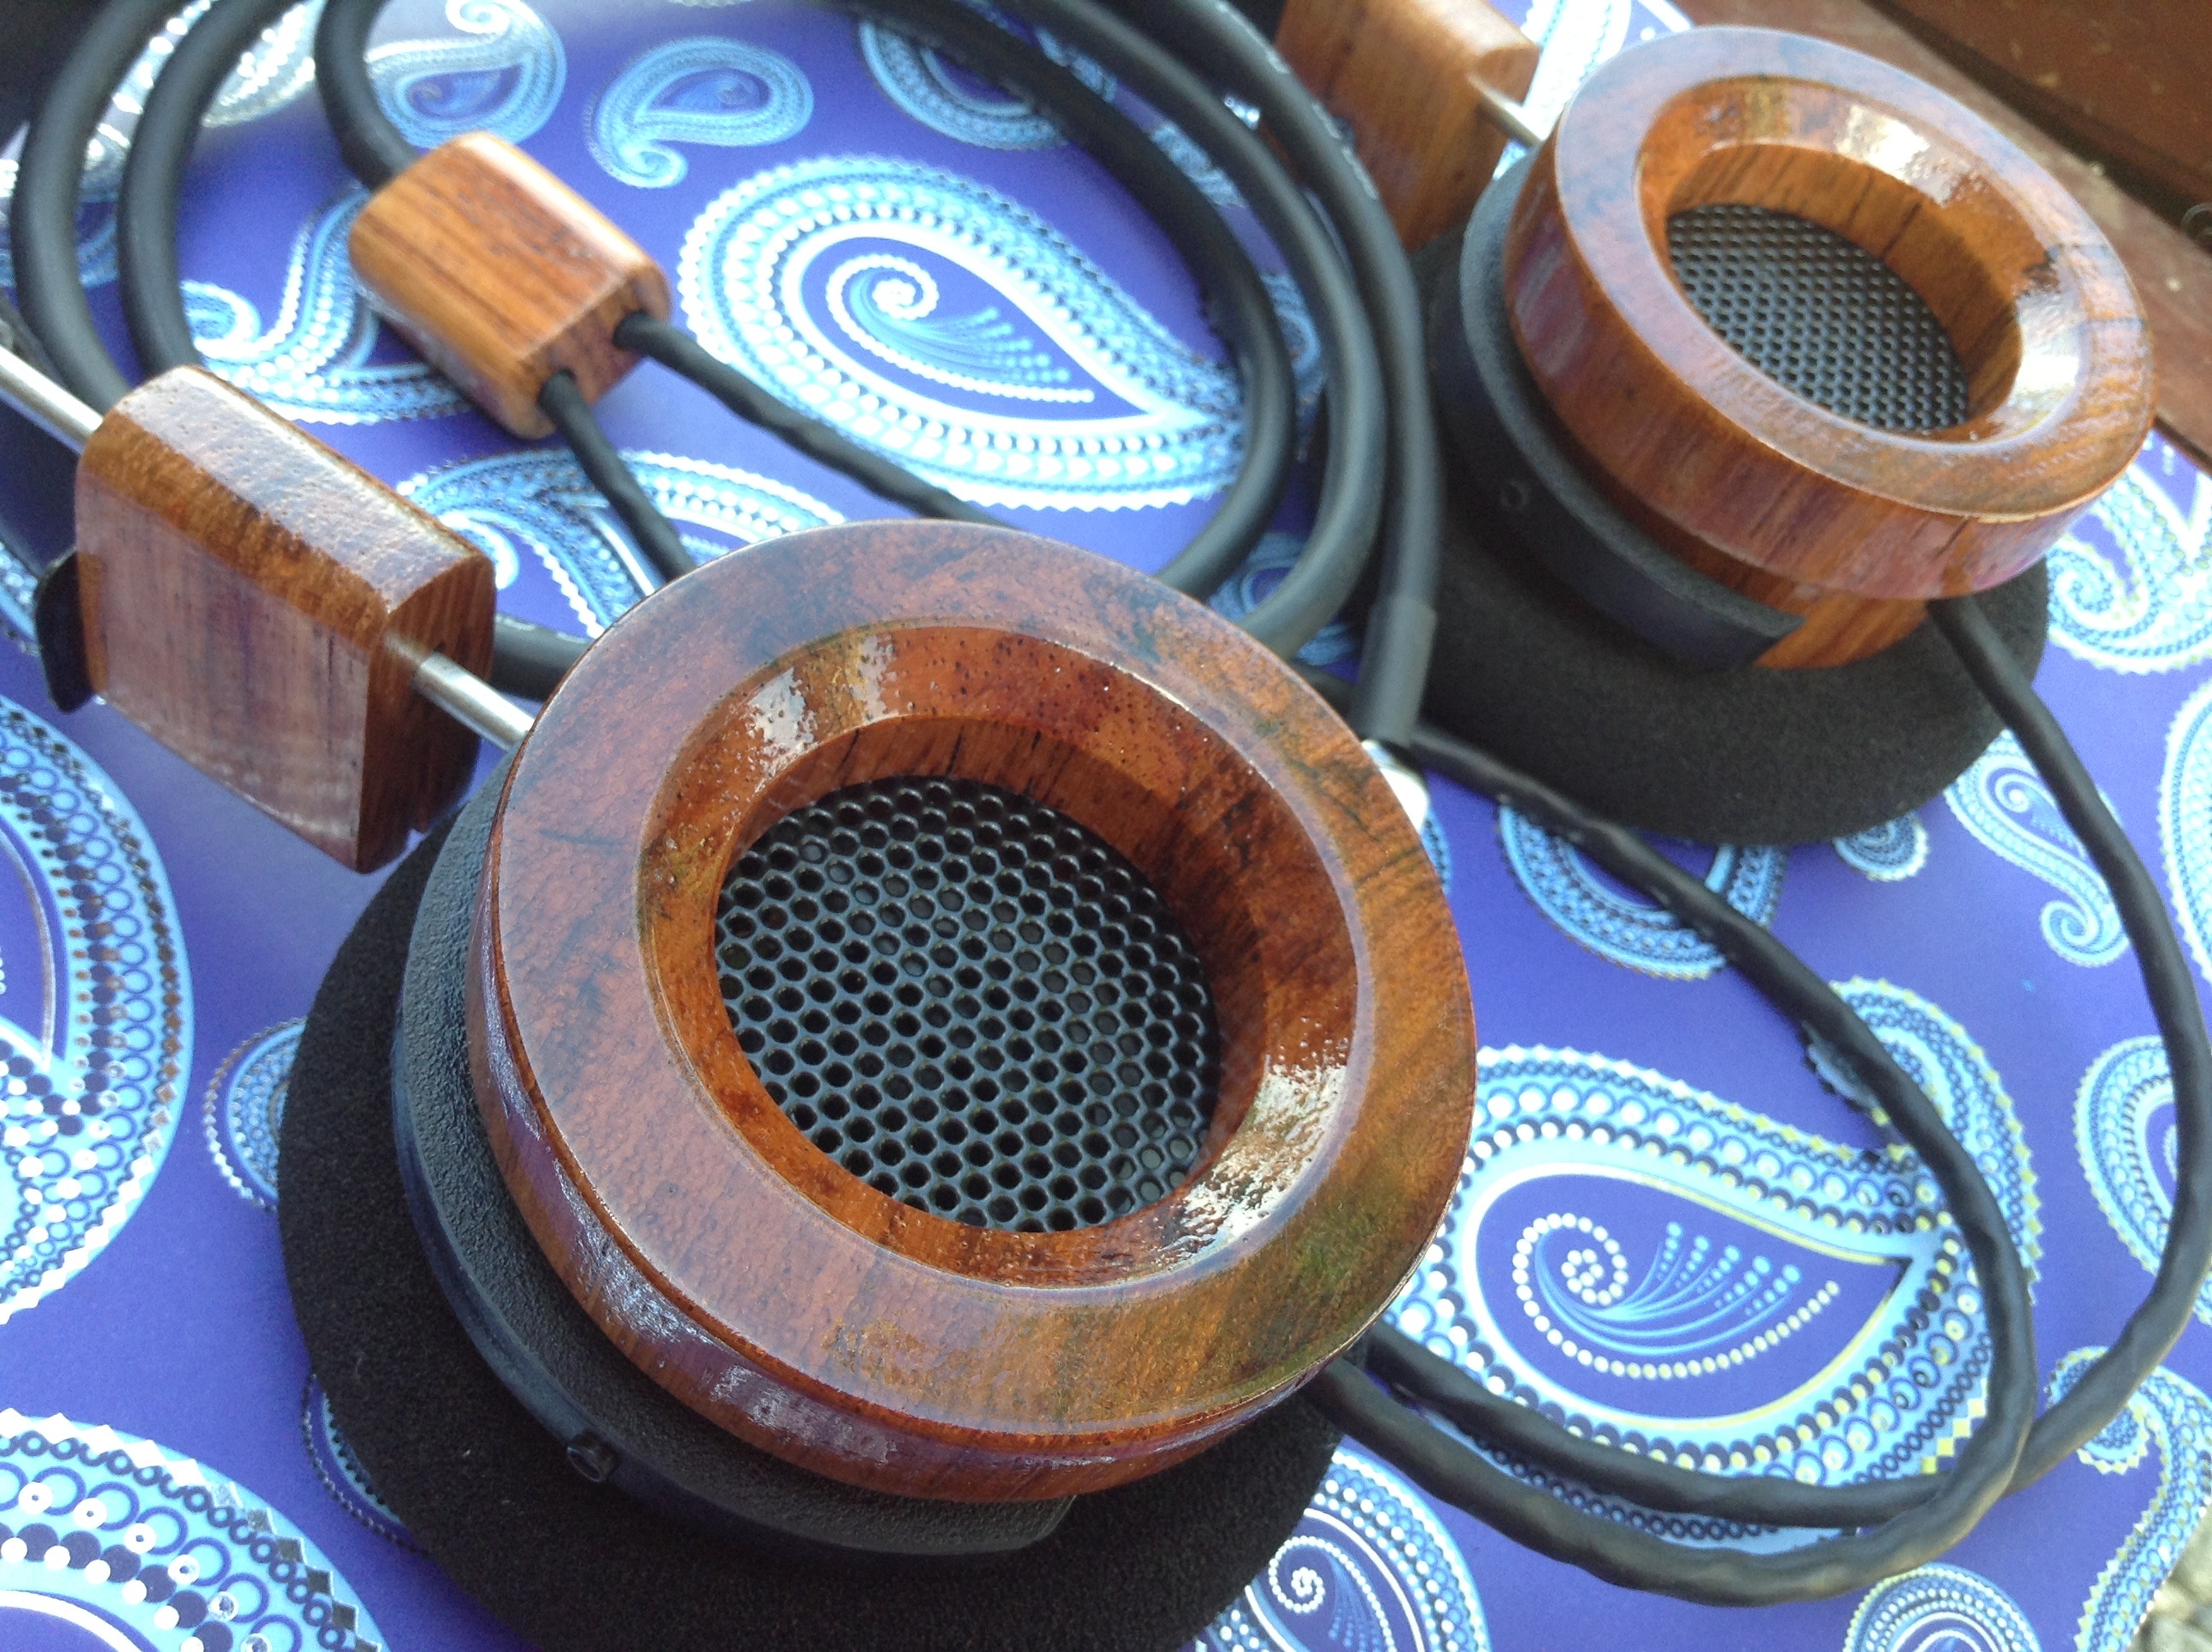
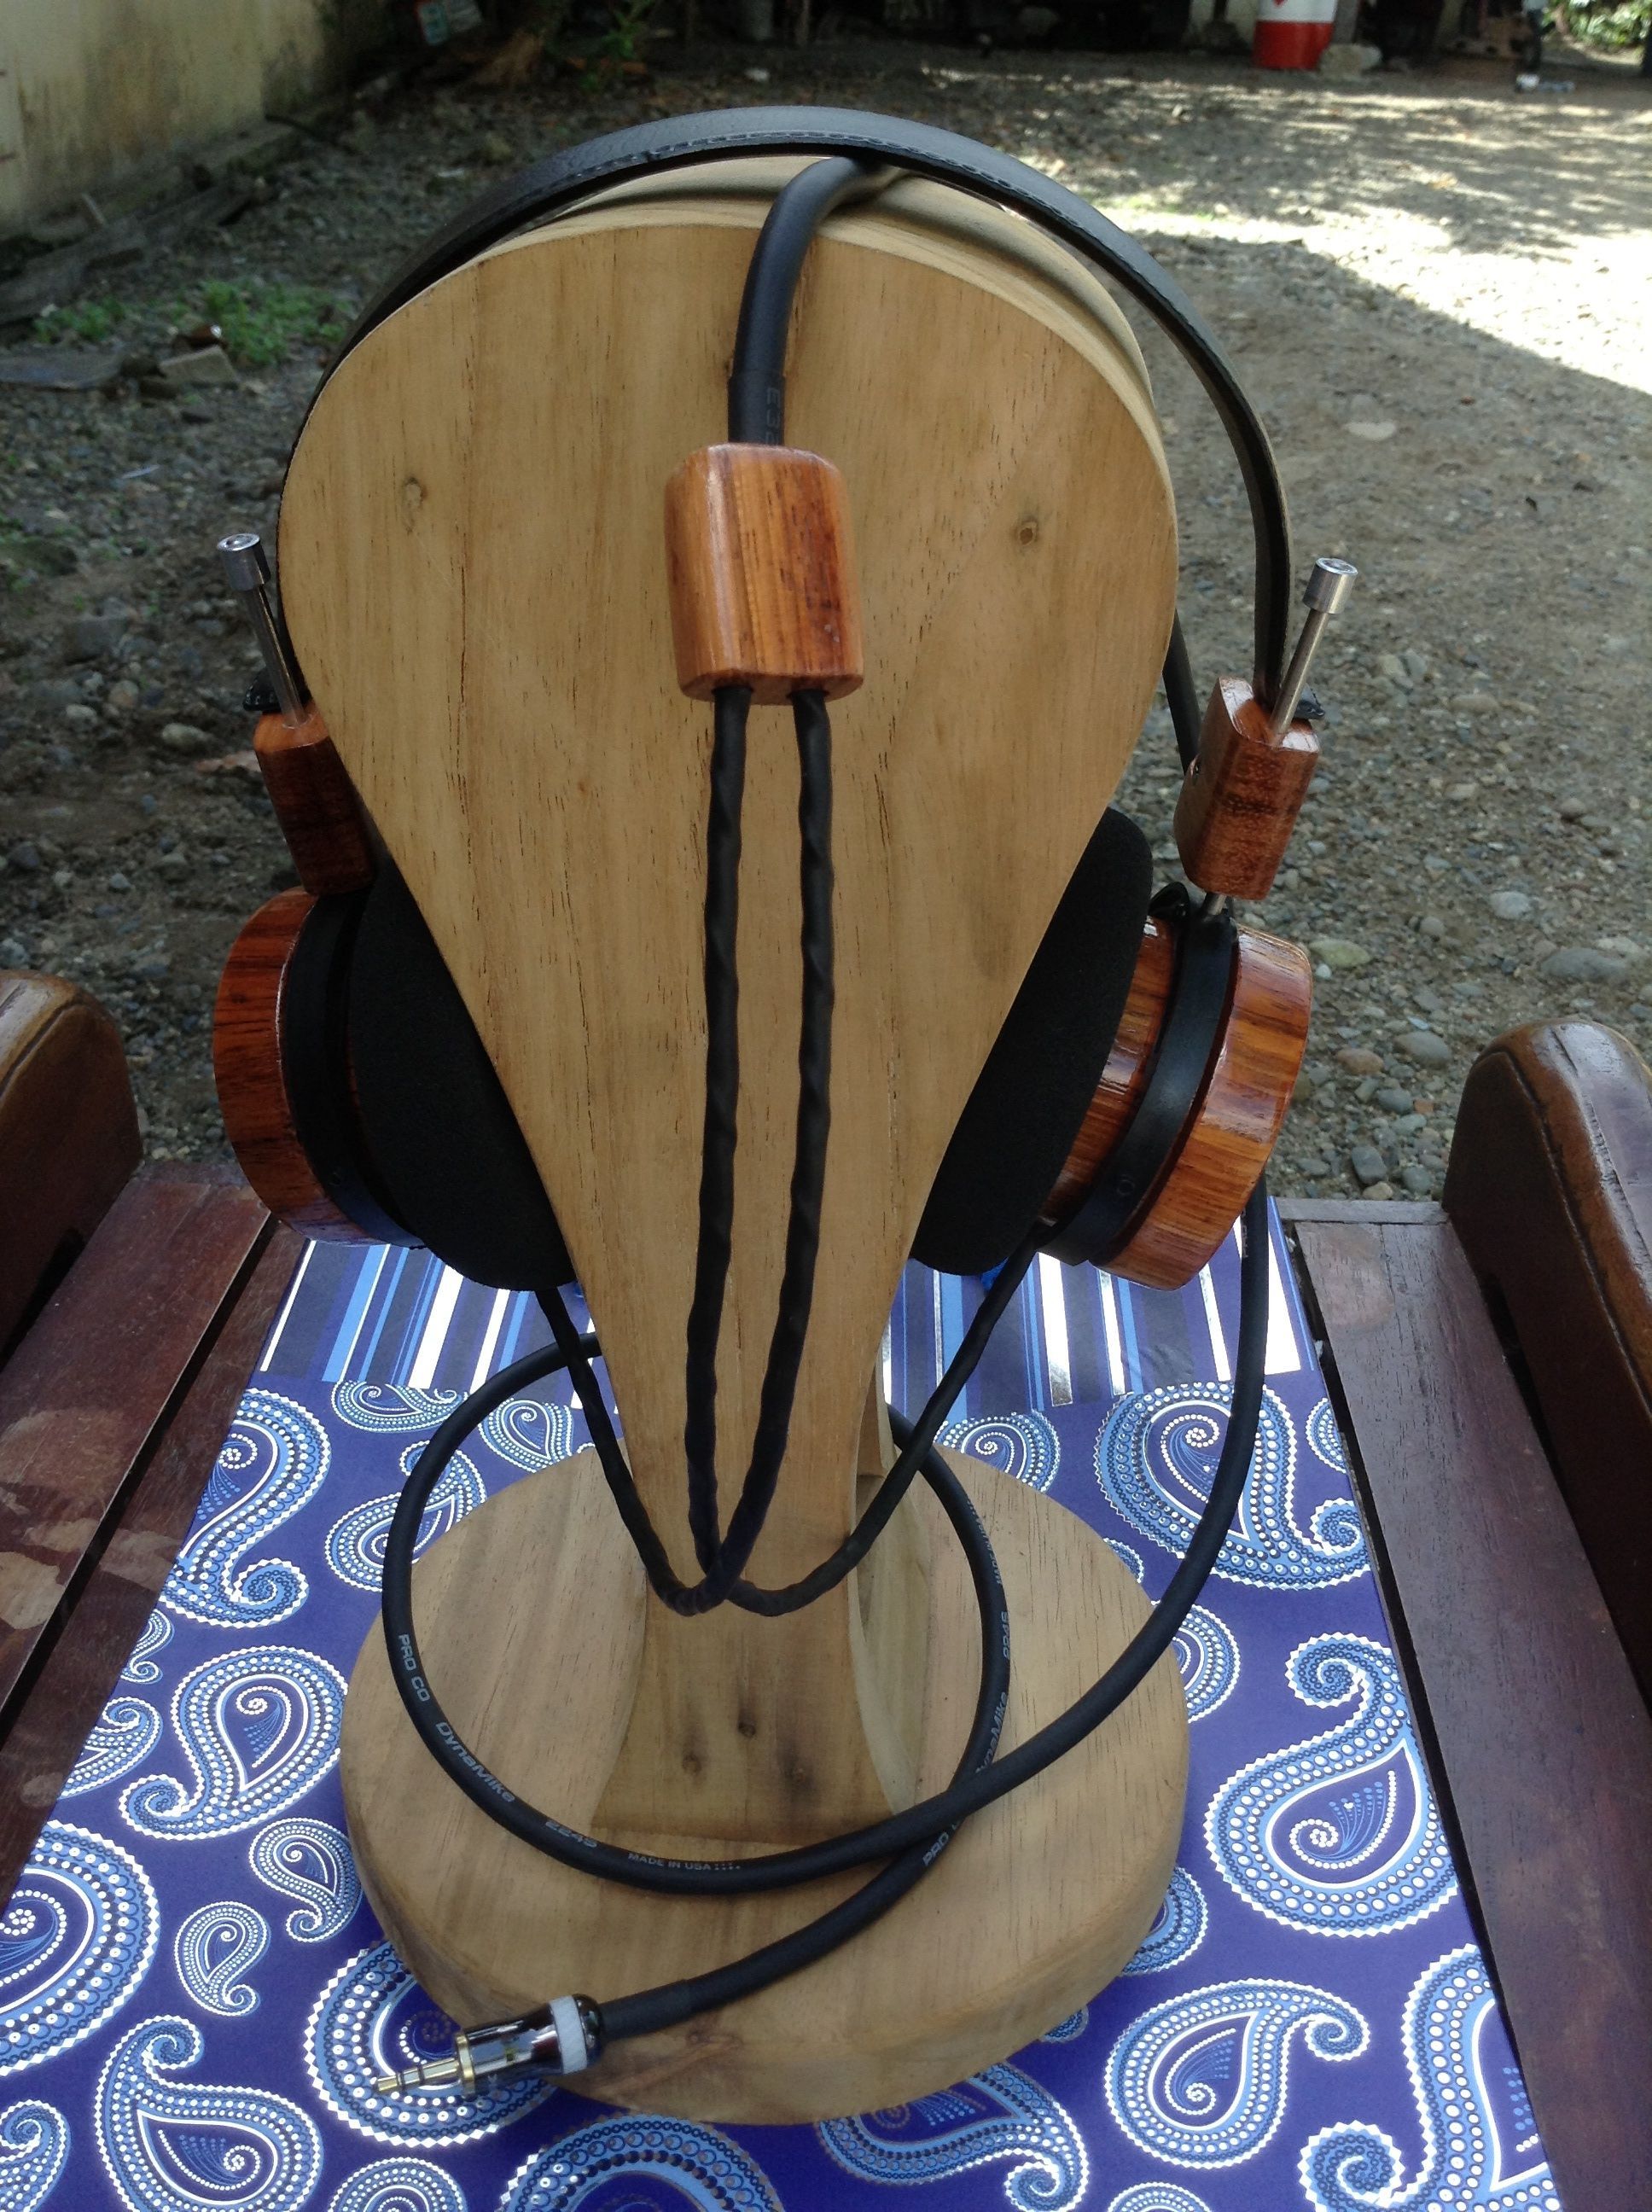
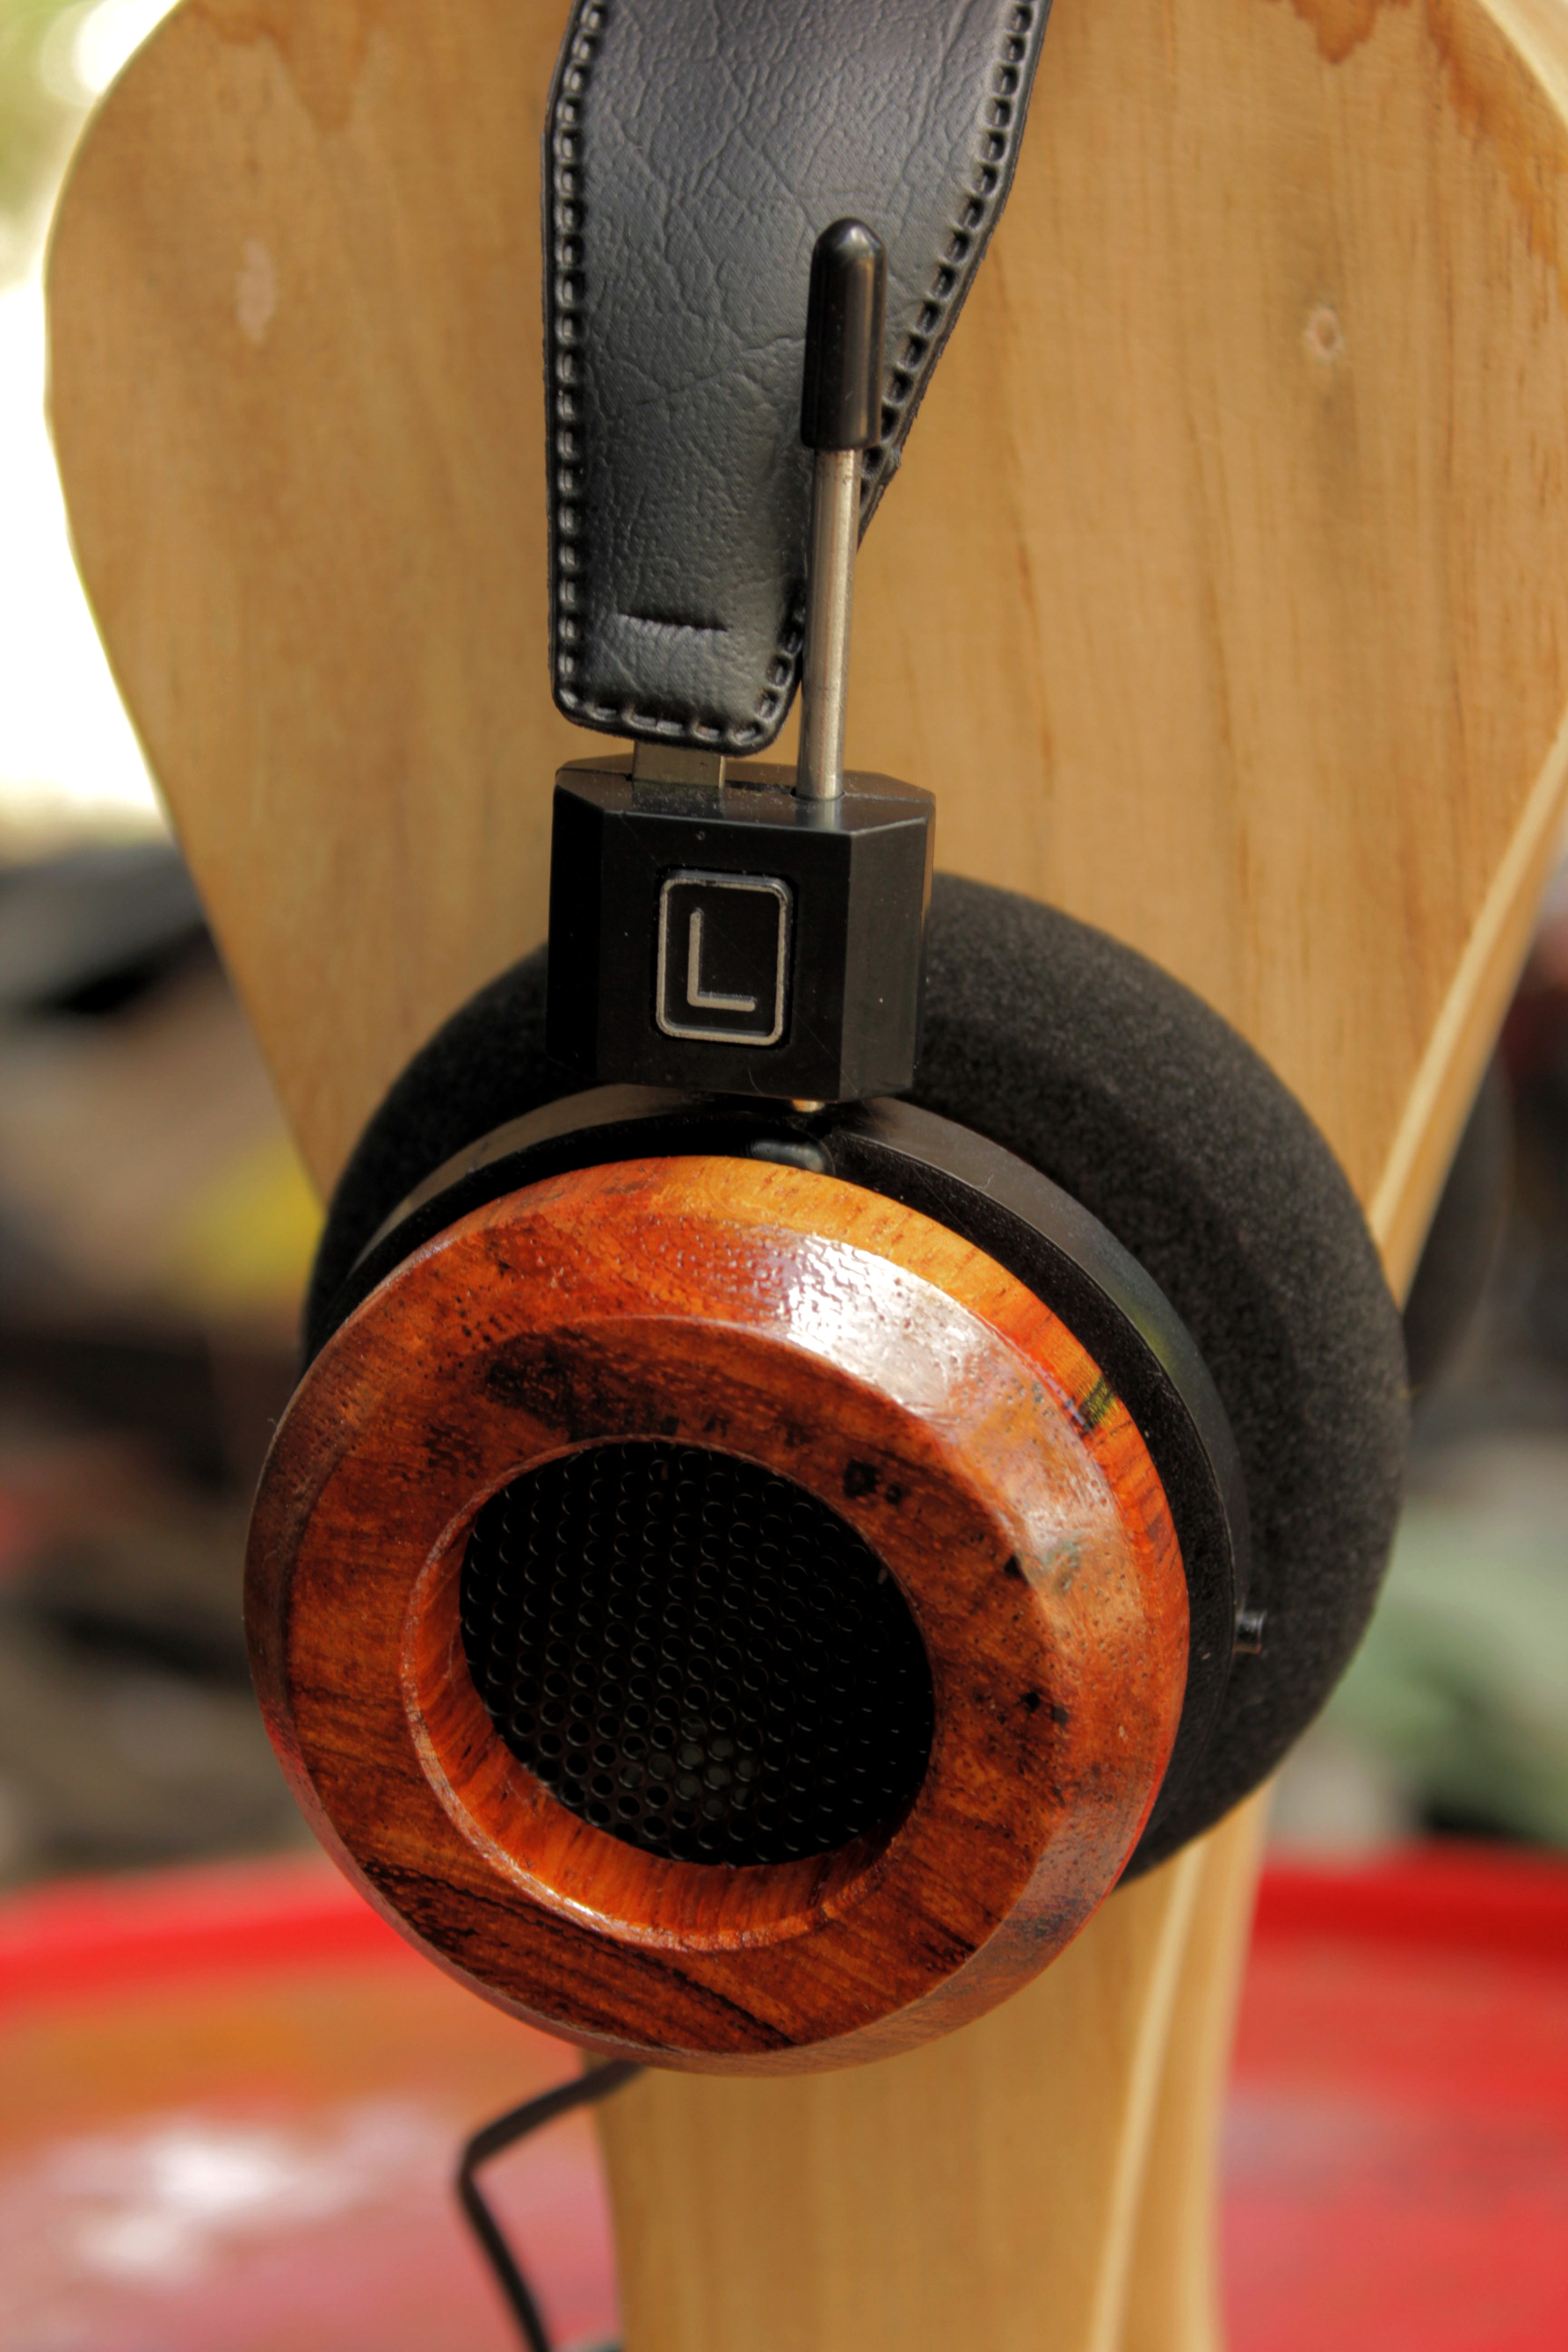
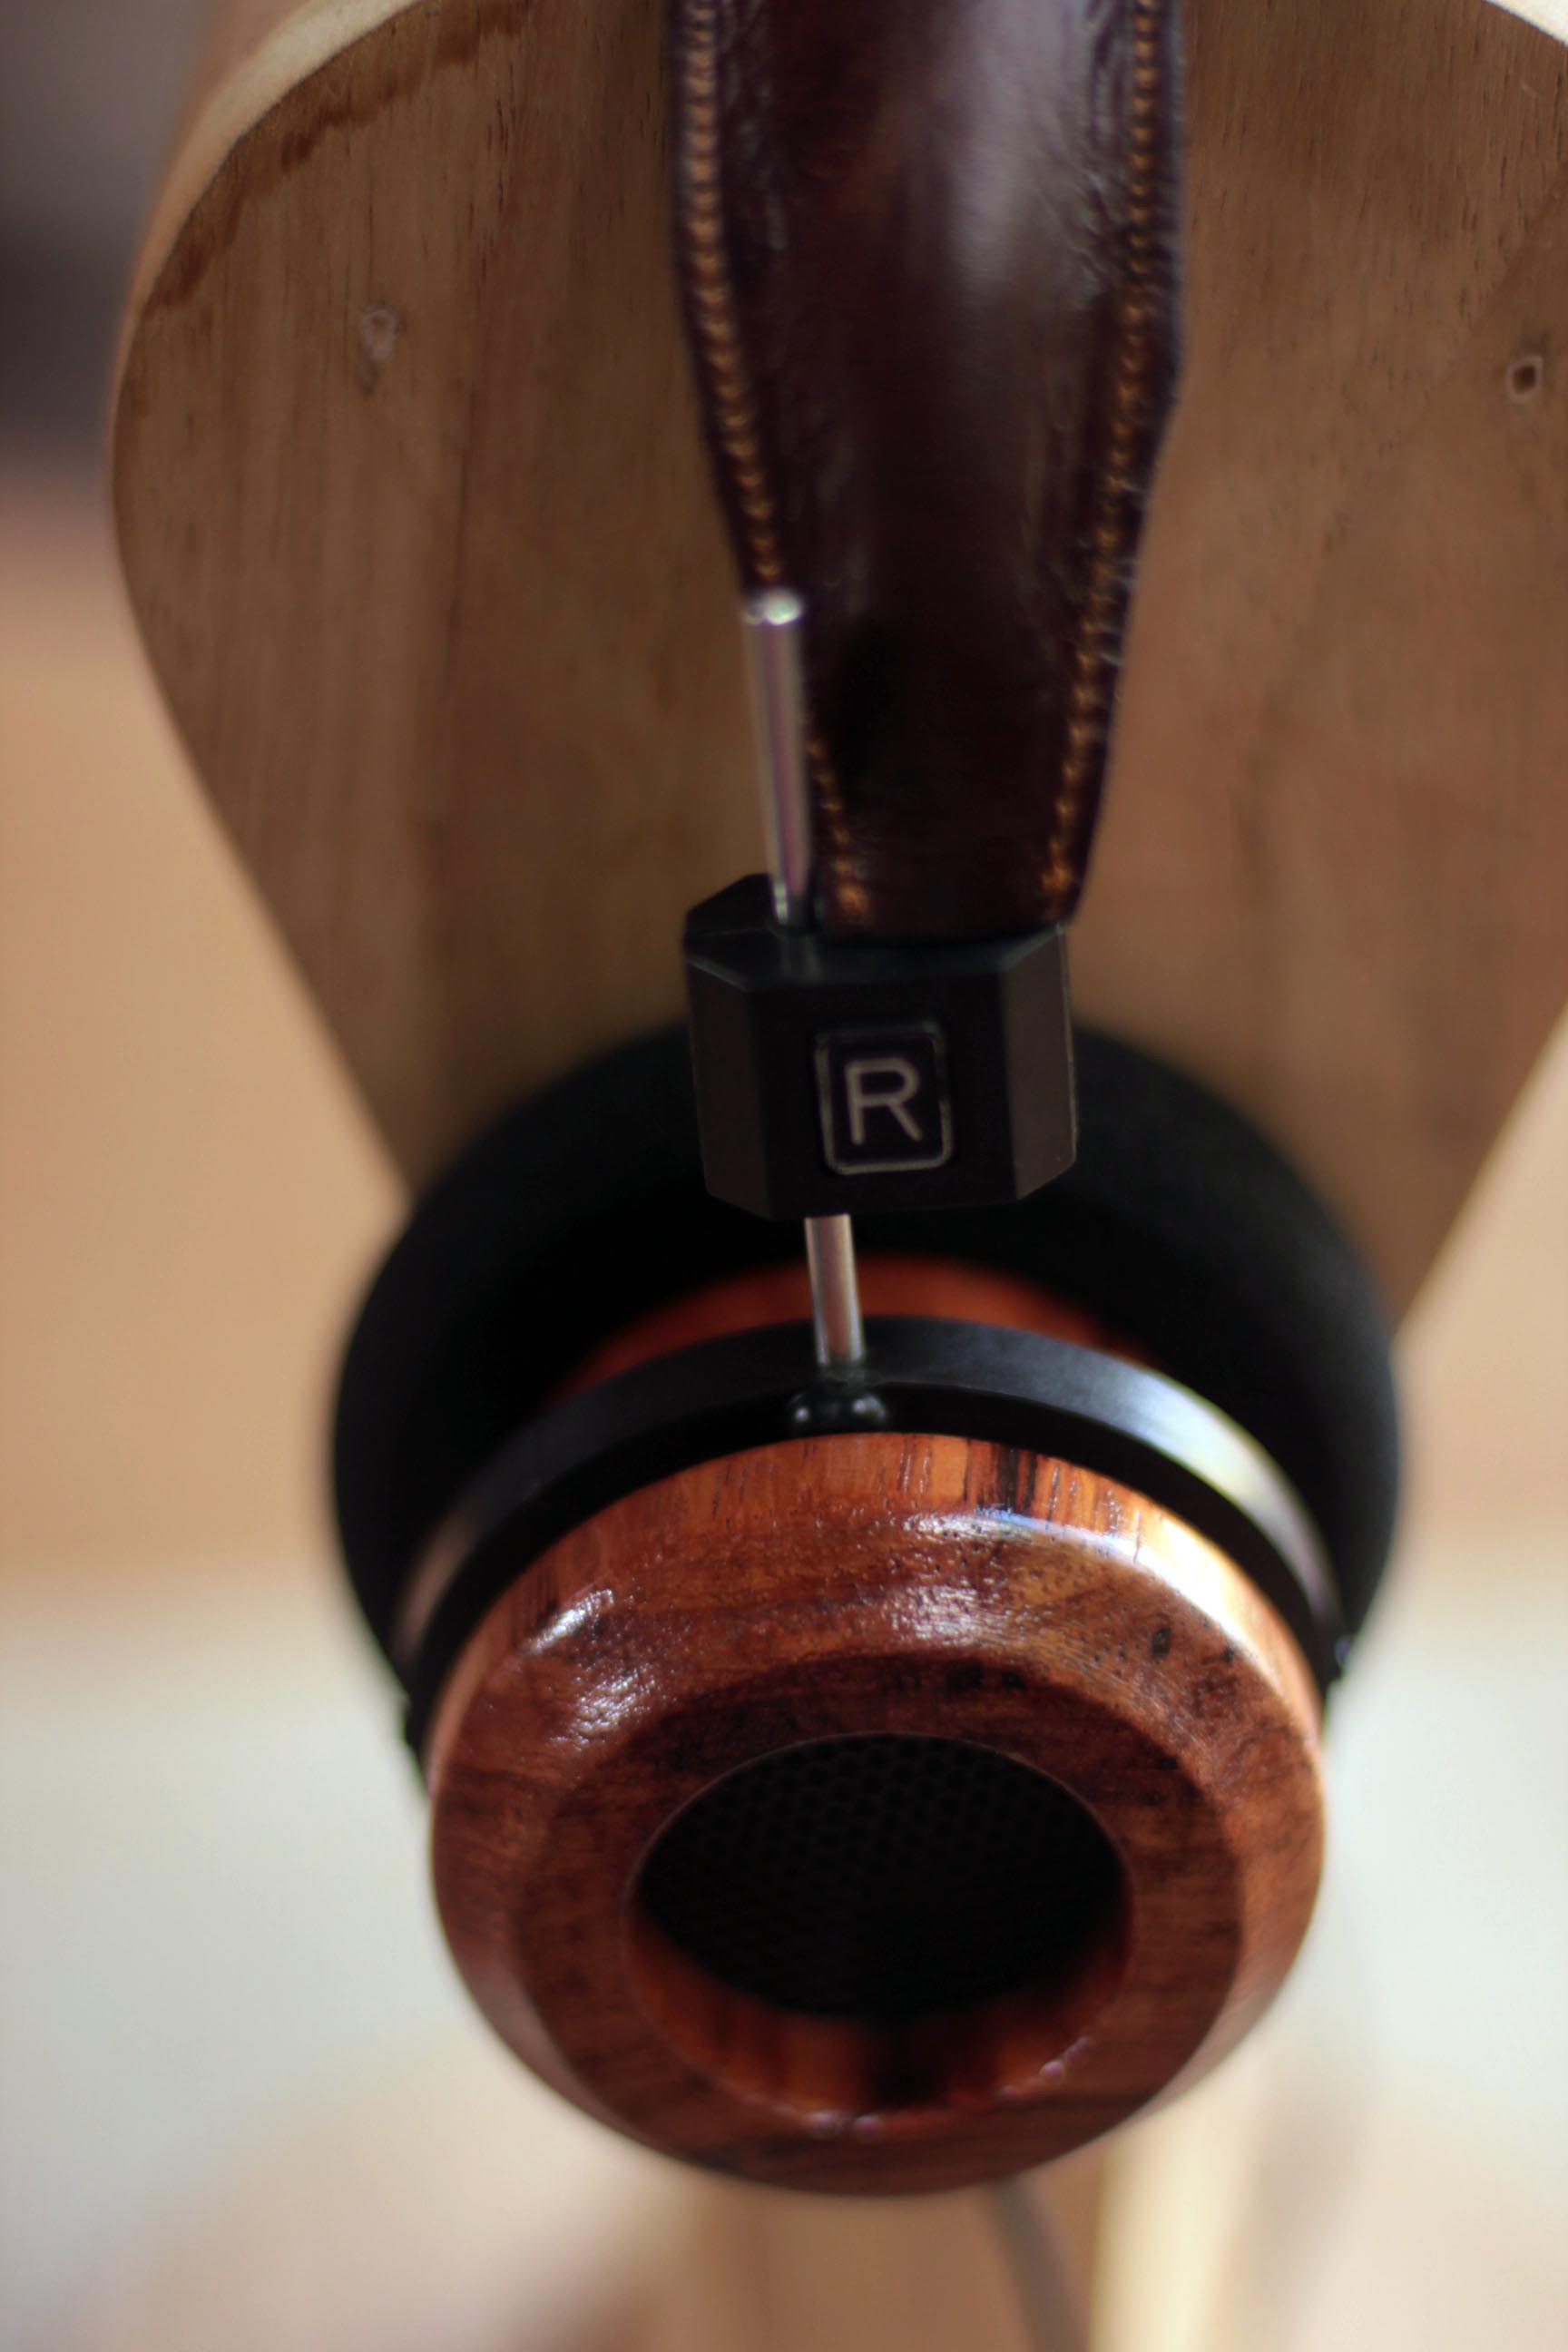
This is the semi-finished product. I have silver cables arriving on Tuesday, so I'm going to upgrade that next. Then I'll start using dynamat and driver venting to tune the sound to my liking.

 
Since I got another pair of headphones, I have an extra headband/gimbals if anyone needs it. Just shoot me a PM with you address and I'd be happy to send it out.
 
As far as sound goes, this driver is brand spanking new. I literally popped them into the woodies before they sang a note. Right off the bat, the high end is a lot smoother, but still detailed. The bottom end has a bit more weight, but also seems to have more room because it is more defined.. I remember the SR-60 being a bit bloated compared to my SR-225s. This one is warm, without seeming quite as bloated as I remember. Still the clarity and sparkle do not compare to my SR-225s. Even switching the pads (L-Cush on the woodied 60, comfies on the 225), the 225 is more lively up top. I imagine the cable has a lot to do with it, so we'll see how things go after a re-cable. Also we'll see how things go after some burn-in as well. These are only at about 1 hour right now. 
 
Anyway, thanks everyone for the support and guidance. I'm very happy with the results so far (busted driver withstanding). 
 
Jul 3, 2011 at 5:08 AM Post #155 of 3,353
Don´t you read my methoth for dismantle drivers?.

 
As you know now I have a Grado SR 225i and as I was here a few days with cool plastic not take it anymore. As the final plastic parts that hold the driver I thought I do not use more easily for removal.
First remove the tops and fixtures, as we know:
http://recopasgrado.blogspot.com/search?updated-max=2010-08-13T12% 3A58% 3A00-07% 3A00 & max-results = 7
In this piece there are recesses to pass the cable, should fix the part with the deepest recess up.


Then with a knife, hacksaw or lightsaber, cut the piece (pastica very squishy), do not forget to stop when you get the driver may be damaged;). Then it splits the piece with a screwdriver at first and then with pliers, separate easy to be open.

The driver comes out perfect, no marks.
Then remove the grids of glass, which has a piece that contains it, is removed with a screwdriver forcing a little.

The 225 drivers are already on the tops of aluminum and wood, though grids of 225 since I have not yet because you have to cut them.

Next are the 325, Phonotone, at his request, of course.

Complate in Spanish: http://www.auriculares.org/foro/index.php/topic,3936.15.html

Greetings.
 
 
Jul 3, 2011 at 7:21 AM Post #156 of 3,353
Quick question, if there's anyone who can please help. I tried searching - but I keep coming up short...
 
I've modded the SR80's, but now I'm trying to open up the 225's - and they're just refusing to budge! I used the steam method last time - is it a different glue in these? And if I'm planning to use wood slip-ons (so damaging the plastic cups isn't as big a deal) is there a better method?
 
Thanks!
 
EDIT: I just noticed Cabillas post above mine, showing a picture of the cup removal...
 
That's really scary looking - or rather, scary to do. Is that really the only way to get the cups off?
 
 
Jul 3, 2011 at 7:46 AM Post #157 of 3,353


Quote:
Thanks for the offer, but I *think* I should be okay. However, I'm probably going to just throw this driver away anyway so I'd be happy to send it to you instead. If you can salvage it, then perhaps you can find a use for it? 
 
-Marvin


Marvin,
 
I think that might be a good idea.  This would mean that we'd have something available for the SR-60, 80 and 125 drivers if someone toasted one in the future.  Was it the "i" version or the older non-"i"?  PM me if you want me to send you a few PayPal bucks for shipping.  Thanks.
 
 
Jul 3, 2011 at 7:52 AM Post #159 of 3,353


Quote:
Quick question, if there's anyone who can please help. I tried searching - but I keep coming up short...
 
I've modded the SR80's, but now I'm trying to open up the 225's - and they're just refusing to budge! I used the steam method last time - is it a different glue in these? And if I'm planning to use wood slip-ons (so damaging the plastic cups isn't as big a deal) is there a better method?
 
Thanks!
 
EDIT: I just noticed Cabillas post above mine, showing a picture of the cup removal...
 
That's really scary looking - or rather, scary to do. Is that really the only way to get the cups off?


There has been some mention of a potentially different type of glue that Grado might be using (sort of like LocTite) that could be causing your issue.  When you steam them, are you grasping the parts with a towel to assist?  That's what I had to do with my MS-1i cups.  I have big arms and still had to pull like a mad dog in order to get mine apart.  The 2nd method - the "Cabillas method" is using a hair dryer, I believe.  However, that picture that you see is actually a picture for liberating a driver from the mini cup.


Jul 3, 2011 at 7:56 AM Post #160 of 3,353
Hey, I have a pair of beats headband material (the pleather thing. only thing I could scrap from a classmates broken headphones.) How do you guys suggest adding it onto the grado headband? should I get some more leather and make a legit headband, sew it on, or glue/tape it on?
 
Jul 3, 2011 at 7:58 AM Post #161 of 3,353


Quote:
I didn't measure mine, but when I was cutting a piece of suede to be used, it didn't fit horizontally on a piece of 8x11 suede. It was pretty noticeably longer too, so as long as the piece was in fact 11" there is no way mine is 10 7/8"


I used the headband on a new pair of MS-1i headphones to provide the dimensions.  Possibly, Grado has made some adjustments over time?
 
Jul 3, 2011 at 8:25 AM Post #162 of 3,353


Quote:
 
There has been some mention of a potentially different type of glue that Grado might be using (sort of like LocTite) that could be causing your issue.  When you steam them, are you grasping the parts with a towel to assist?  That's what I had to do with my MS-1i cups.  I have big arms and still had to pull like a mad dog in order to get mine apart.  The 2nd method - the "Cabillas method" is using a hair dryer, I believe.  However, that picture that you see is actually a picture for liberating a driver from the mini cup.


Thank you!
 
Problem has been solved for now. After the third try with steam, and giving myself one of these:
 

...and no - I wasn't using the towel I had standing by to dry the darn things, because that's just too good an idea and I'm a little soft in the head...
 
Anyway, I just used the screwdriver method and pried them apart - turns out the glue was softening up a bit, there was just a whole lot of it globbed on there in the factory:


The good news is that they still sound great - so it looks like there was no damage to the drivers. Now I just need to painstakingly pull all that glue out, and it will be on to the fun stuff!


Jul 3, 2011 at 8:34 AM Post #163 of 3,353
Thank you!
 
Problem has been solved for now. After the third try with steam, and giving myself one of these:
...and no - I wasn't using the towel I had standing by to dry the darn things, because that's just too good an idea and I'm a little soft in the head...
 
Anyway, I just used the screwdriver method and pried them apart - turns out the glue was softening up a bit, there was just a whole lot of it globbed on there in the factory:
 
The good news is that they still sound great - so it looks like there was no damage to the drivers. Now I just need to painstakingly pull all that glue out, and it will be on to the fun stuff!


Soften up the glue just a bit and it will probably come of easier than when it's hardened completely.

And for mine (which look identical to those 225 in that section) going around the rim where the glue is with a hairdryer somewhat quickly for like 45 seconds while holding it in place by putting the driver side down and pushing on the button (to avoid most of the heat) proved to be the best way until I got all that glue out. Now they pretty much pop apart on command.
 
Jul 3, 2011 at 8:57 AM Post #164 of 3,353


Quote:
Soften up the glue just a bit and it will probably come of easier than when it's hardened completely.

And for mine (which look identical to those 225 in that section) going around the rim where the glue is with a hairdryer somewhat quickly for like 45 seconds while holding it in place by putting the driver side down and pushing on the button (to avoid most of the heat) proved to be the best way until I got all that glue out. Now they pretty much pop apart on command.


Yeah, I was able to soften the glue a little bit, but it was nerve wracking. Still, a zippo was able to help just enough to peel off most of it - using the same flat head screwdrivers that got them open in the first place.
 
Woohoo!
 
Jul 3, 2011 at 10:17 AM Post #165 of 3,353
Oh man, blood blisters hurt like a ... well ... you know.  
mad.gif

 
Quote:
Originally Posted by gamersince1976 /img/forum/go_quote.gif
 
Thank you!
 
Problem has been solved for now. After the third try with steam, and giving myself one of these:


Users who are viewing this thread

Back
Top