Post pics of your builds....
Apr 21, 2009 at 3:31 AM Post #4,876 of 9,811
I would think that an M right over the top of each pair of MOSFETs would be entirely appropriate
smily_headphones1.gif
 
Apr 21, 2009 at 3:45 AM Post #4,877 of 9,811
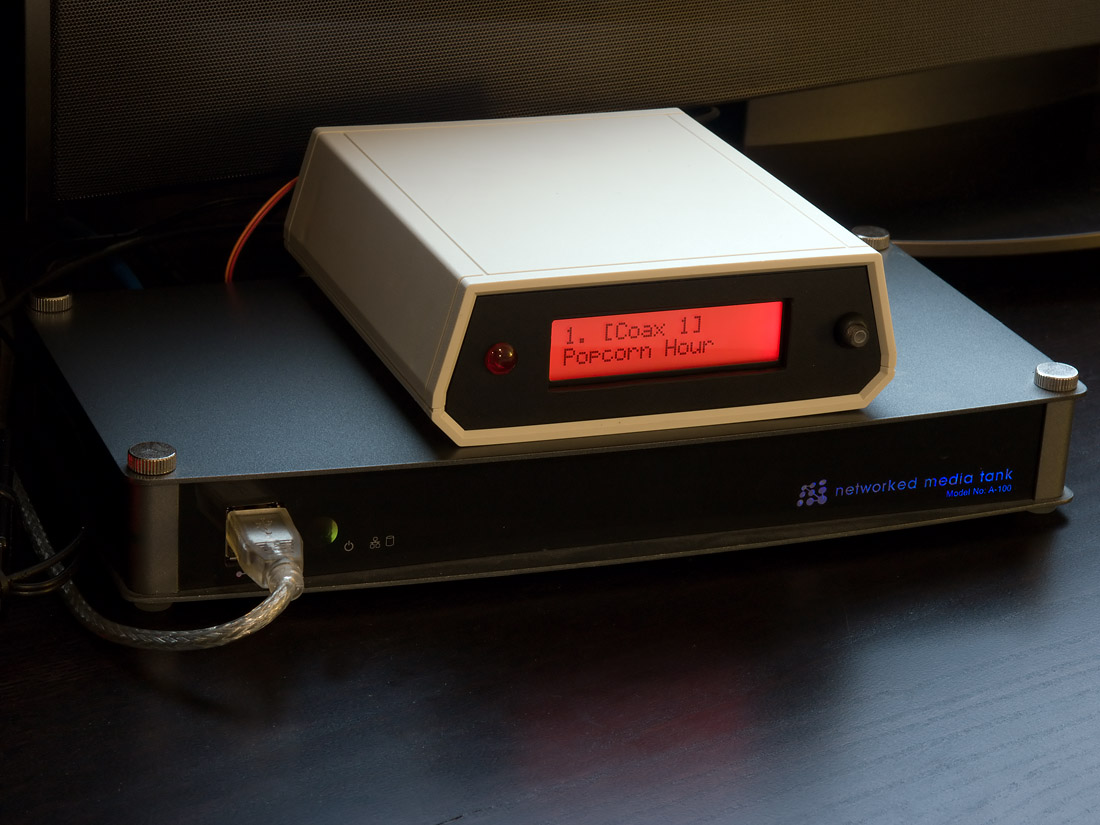
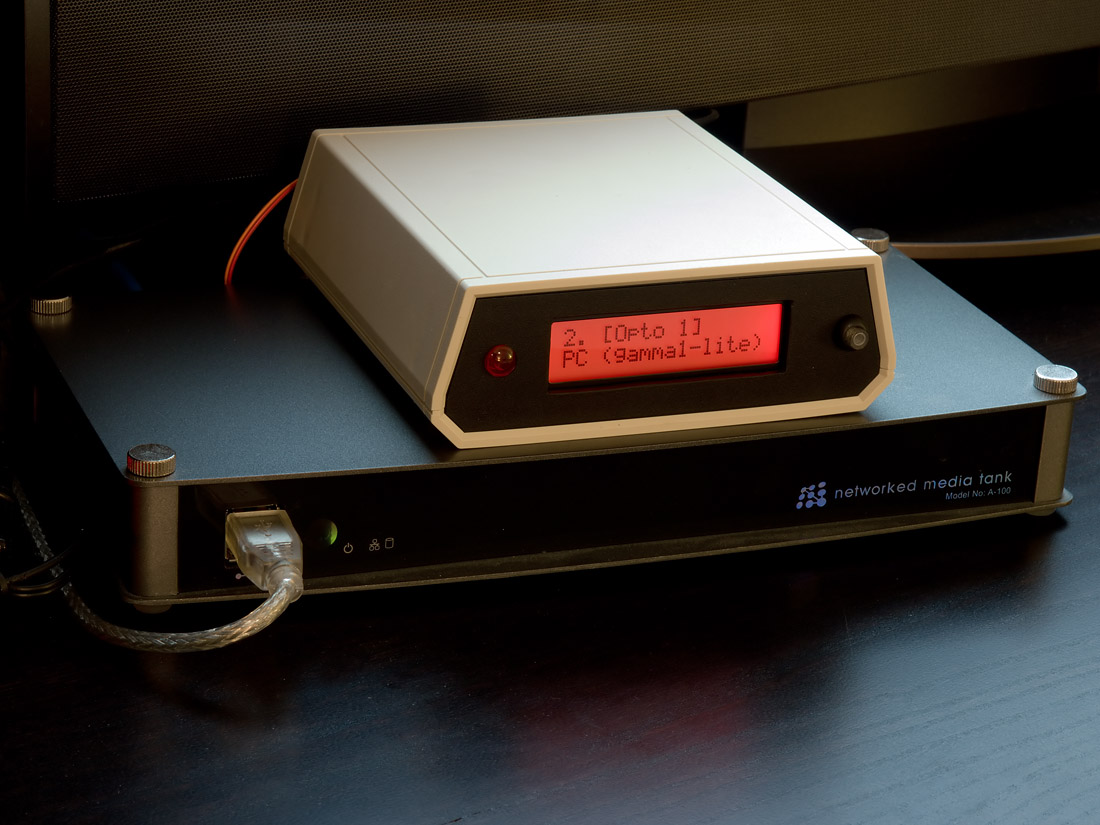
putting some case on my spdif switch (not very fancy but it was all done by hand tools)
wink.gif


3461788816_46b70aa6d3_o.jpg


3460973249_22d73c8356_o.jpg


it supports 4 inputs (currently, 1 coax and 3 opto) and 2 outputs (both kinds).

the red button on the left is actually a radio shack LED assembly that I cut apart just to take the red 'jewel'. I glued the IR receiver module behind the jewel opening.

the thing to the far right is a neat new LED/pushbutton that I got from digikey. haven't connected it yet but its just a momentary PB with an LED you can control independently. this switch will probably cycle around between the inputs.

the lcd display is kind of special; its an RGB display and is really a 4 wire LED, 3 for the R/G/B led parts and one for common. you simply send 2 or 3v to the right r/g/b wires, in combo, to get the color you want. they make them in 'transmissive' (dark background, light letters) and 'transflexive', which is what this is - a solid color background with black letters. this kind (flexive) is intended more for mostly-daylight use (it seems).

anyway, there's a small 4-port spdif switch running on 5v dc (same power supply I use for the gamma1).
 
Apr 21, 2009 at 7:39 PM Post #4,879 of 9,811
So I saw linuxwork's PGA volume control module and decided to make my own. It's nowhere near as fancy (just volume control - no source selector, wireless control, etc), but it does what I need. So I hacked it together and wrote up some really basic (pretty bad) code. Here it is on a breadboard:
pga1s.jpg

From left to right:
Arduino
LCD on breadboard
Volume Up/Down buttons on mini breadboard
PGA chip (next to LCD)
Audio jacks, Shuffle input
Rail splitter and decoupling caps
Tread (supplying +10, broken into +/-5 by the rail splitter)

It's incredibly messy right now - I'm trying to figure out if I can fit it onto an Arduino protoshield for compactness, or maybe eventually put it into a case. It started as a proof of concept, but it actually sounds really great, even at this raw stage. Some people may object to going into positive gain (as it's amplifier is almost certainly worse than, say, a Pimeta), but it certainly sounds as good as my CmoyBB.

Anyways, PGA volume control is awesome. I look forward to seeing a cleaned up, professional version from linuxworks.
 
Apr 22, 2009 at 4:54 AM Post #4,880 of 9,811
Finally got around to posting some pictures of my SOHA

Was a Kit from Jeff At GlassJar Audio and worked a treat from the start and I am still loving it, literally a I type
atsmile.gif


Attachment 16261

Round the Back

Attachment 16260

And the Insides. I put all the tall components on the bottom of the board so that I could have the valve showing out the top.

Attachment 16259

Tis a great amp and really love it. It was the first bit of hardware that really made me understand what people were going on about when they said 'it puts space around the singer' it really does do that.

As you can see I run it from the Line out of my Iriver H140 (modded to 60Gb) and used typically with my Sennheiser HD340 headphones, which while being a bit old now (15years) sound so nice with this amp.

I have a few valves to play with, my favourite is a 1968 Mullard sweet sounding, but with loads of definition in the bottom end, followed by a 1970's Telefunken, RCA Clear Top and then the generic new (which is awful but good to test it with!)


Apr 22, 2009 at 5:45 AM Post #4,881 of 9,811
Quote:

Originally Posted by oneplustwo /img/forum/go_quote.gif
Hey folks,

I finished the boards for my M3 and S11 build. Now I'm getting ready to tackle the casework. The amp and power supply are going into their own Hammond cases. So I was thinking about milling out three M's on top of the amp case right above the heat sinks (one "M" for each pair). (I just picked up a mini mill from Harbor Freight for all of my miscellaneous projects.) I was also going to try some semi-fancy slotting on the sigma. Anyone have any creative ideas I can steal? I haven't seen too much in the area of custom milled casework/vents so I thought I'd poke around for some inspiration.


I like the 3 M's idea. I'm doing something similar with my SOHA II (once my friend that offered to do the machine has time).

If you're looking for ideas for the sigma's enclosure, how about a sigma symbol then 11? Seems appropriate and in keeping with the M3's theme
smily_headphones1.gif
 
Apr 22, 2009 at 8:12 AM Post #4,883 of 9,811
Quote:

Originally Posted by KevCanHead /img/forum/go_quote.gif
Finally got around to posting some pictures of my SOHA

Was a Kit from Jeff At GlassJar Audio and worked a treat from the start and I am still loving it, literally a I type
atsmile.gif


Looks great, How easy is it to change tubes with the tube protector in place?
 
Apr 22, 2009 at 12:06 PM Post #4,884 of 9,811
Quote:

NSX 23 - did the casing come with the panels drilled already?


No did them myself with a hand drill and a file. Tip is to mark what you want to do on paper, stick it on the front of the plastic and then mark and drill through it.
Quote:

NSX 23 - Also, is your H140 painted by any chance?


No the black paint started to peel off so I just rubbed it all off with some fine wire wool, the magnesium alloy underneath then slowly greys with time.

Quote:

Forte - Looks great, How easy is it to change tubes with the tube protector in place?


Thanks as for the tube swapping, pretty easy as your finger can fit between the plates. Just needs a little wiggle and out they pop.

Kevin
 
Apr 22, 2009 at 1:45 PM Post #4,885 of 9,811
I think I might do the uppercase backwards "3" looking sigma (since it's straight lines). I might just do two of those, one for each heat sink. Just because I think the layout makes it look cleaner vs. using an 11.

Also, for the "M" I'm just going to use the font that amb used on the PCB itself. Thankfully, it's also made up of straight lines. I may fatten it up a little bit, but hopefully it stays recognizable as the same font.

I'll try to get to some of it tonight so I have pictures to show.

Quote:

Originally Posted by Hayduke /img/forum/go_quote.gif
I like the 3 M's idea. I'm doing something similar with my SOHA II (once my friend that offered to do the machine has time).

If you're looking for ideas for the sigma's enclosure, how about a sigma symbol then 11? Seems appropriate and in keeping with the M3's theme
smily_headphones1.gif


Apr 22, 2009 at 5:59 PM Post #4,886 of 9,811
Quote:

Originally Posted by KevCanHead /img/forum/go_quote.gif
Finally got around to posting some pictures of my SOHA

Was a Kit from Jeff At GlassJar Audio and worked a treat from the start and I am still loving it, literally a I type
atsmile.gif


Nice Job Kev..

It's nice to see someone else still doing SOHA's.. I've got a couple of them on the go myself +JISBOS and E12.
 
Apr 22, 2009 at 8:03 PM Post #4,887 of 9,811
Quote:

Originally Posted by oneplustwo /img/forum/go_quote.gif
I think I might do the uppercase backwards "3" looking sigma (since it's straight lines). I might just do two of those, one for each heat sink. Just because I think the layout makes it look cleaner vs. using an 11.

Also, for the "M" I'm just going to use the font that amb used on the PCB itself. Thankfully, it's also made up of straight lines. I may fatten it up a little bit, but hopefully it stays recognizable as the same font.

I'll try to get to some of it tonight so I have pictures to show.


Good to have vents on top of your amp and PS, right above the heatsinks, and vents that reflect the name of the amp is of course a big plus!
cool.gif

But better is also to have some vents (ordinary holes) beneath the heatsinks to provide good air convection.

My σ11 PS is housed in an enclosure with good air convection, straight and simple as usual.
smily_headphones1.gif
 
Apr 23, 2009 at 12:33 AM Post #4,889 of 9,811
Ferrari, I was thinking about holes directly under the heat sinks, but the board is in the way so I wasn't sure it was going to make a big difference if they were directly under the heat sinks or off to the side a bit (or even there at all if the slots on top were pretty big.) I guess more venting couldn't hurt anyway. I might as well do both the top and bottom at the same time... just clamp it all in the mill together.
 
Apr 23, 2009 at 4:50 AM Post #4,890 of 9,811
Quote:

Originally Posted by Ferrari /img/forum/go_quote.gif
Good to have vents on top of your amp and PS, right above the heatsinks, and vents that reflect the name of the amp is of course a big plus!
cool.gif

But better is also to have some vents (ordinary holes) beneath the heatsinks to provide good air convection.

My σ11 PS is housed in an enclosure with good air convection, straight and simple as usual.
smily_headphones1.gif


I think Ferrari has a frequent buyer card with FPE
tongue.gif


Quote:

Originally Posted by oneplustwo /img/forum/go_quote.gif
Ferrari, I was thinking about holes directly under the heat sinks, but the board is in the way so I wasn't sure it was going to make a big difference if they were directly under the heat sinks or off to the side a bit (or even there at all if the slots on top were pretty big.) I guess more venting couldn't hurt anyway. I might as well do both the top and bottom at the same time... just clamp it all in the mill together.


I don't think the bottom needs to mirror the top, but a few plain old round holes right under the heatsinks will help. You get airflow through natural convection (I think it's a convection transfer hehe), so the cold air comes in from the bottom and the hot goes out the top. Having the holes in the bottom panel too, right under the heatsinks, will help cool the warmest part of the board.
 

Users who are viewing this thread

Back
Top