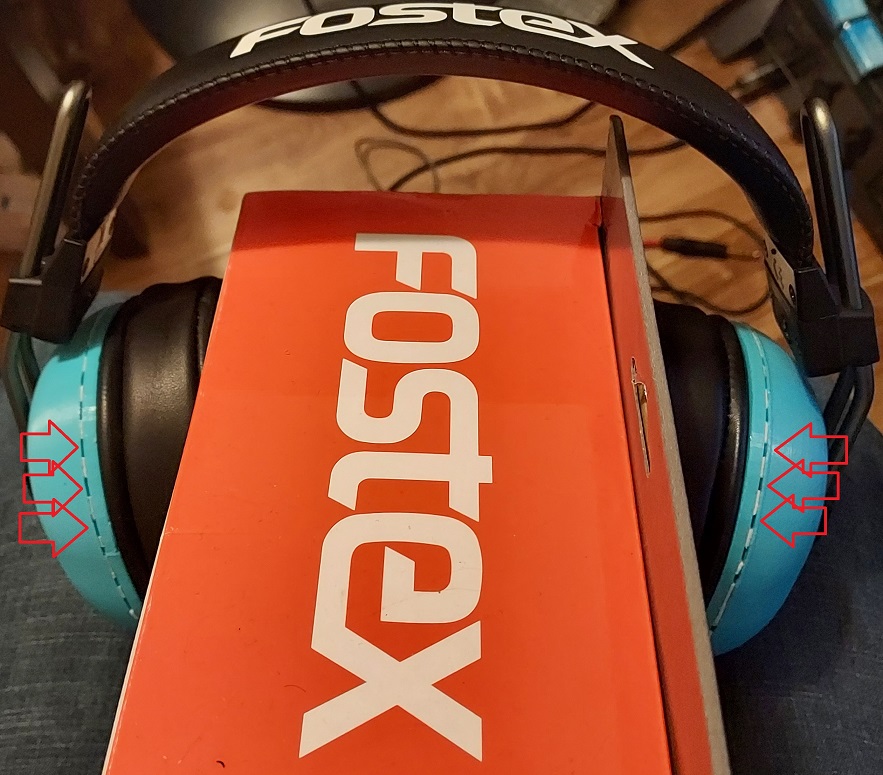
"Open Alpha" T50 3D printed headphone project from MrSpeakers
Nov 20, 2022 at 3:05 PM Post #916 of 979
Thanks - I'm not sure exactly what you mean by stock damping, on which headphone, and where was the glue? Thanks.
2022-11-17 PB170002.JPG


The white filter paper is the stock damping. See those big yellow splotches? That's excess glue that reflects treble back at your ear. You can get a small jeweler's flathead and scrape up a corner of the white filter paper and then just peel the whole thing off. If you don't like the results, there's probably enough stickiness left to replace the stock damping as it was.
 
Nov 20, 2022 at 3:13 PM Post #917 of 979
I did pack the cotton wool pretty well in there, maybe there is too much. I'm certain I should be able to get the open alpha sounding better than the t60....
Cup filler will flatten the bass. If you take most of this cotton filler out you should get a bigger midbass hump, but side affects may occur in the way they sound (cavernous/echo-y, not as good bass extension). Maybe find that fine line between midbass quantity and cavernous.
 
Nov 23, 2022 at 8:27 PM Post #918 of 979
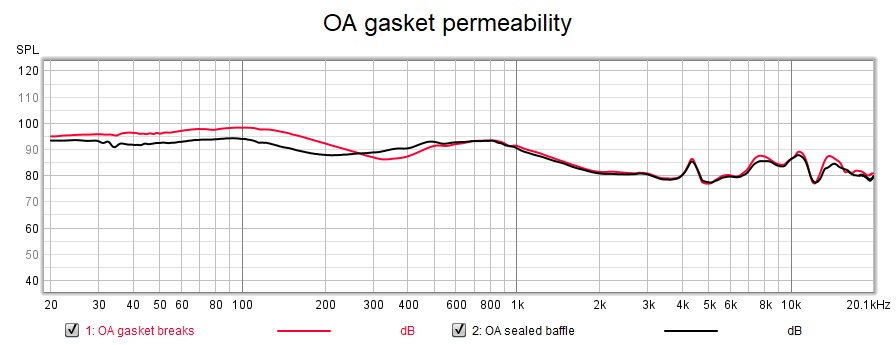
For those wondering how to increase bass response in their Open Alpha's, I have conducted some experiments. Adding venting of some sort should increase the bass. I created a gasket for my baffles and they flattened the bass response tremendously which I originally blamed on the cup filler. I believe this wasn't actually the case. I have decreased Angel Hair filler in both cups from 1g to 0.33grams slowly with virtually no change to response or character. Then I started making breaks in the gasket, see here:

2022-11-23_gasket break edit.jpg


Here are the measurements:
2022-11-23 OA gasket permeability.jpg


Obvious boost to midbass and even sub-bass. Leaves rest of spectrum mostly untouched. Might improve character, too, seems smoother and bolder/more vibrant to my ears. I'd say an obvious improvement to fidelity by adding venting.


If your drivers have any channel imbalance like mine did you can even tune each side slowly until they match (measurement rig recommended).
 
Nov 26, 2022 at 4:30 PM Post #919 of 979
Here are the stl files for heated inserts guys:
Exactly as stock except using a 3.5mm connector, and implementing heated inserts obviously..

https://www.dropbox.com/sh/ddzghyfh2r1nj1k/AABnAwMfcxCW52jYTvR4MSwSa?dl=1

Ive included an stl for the front slider cover, as I managed to strip the thread from my original ones, so might come in useful to someone.

Inserting heated inserts into the cups for beginners: (skip this part if you know what you're doing here)
So I've used 2 different heated inserts on my build, these ones are highly recommended for inserting into the cup as they take a ridiculous amount of force to pull out:
https://www.amazon.co.uk/gp/product/B07PP2SDST/ref=ppx_yo_dt_b_asin_title_o09_s00?ie=UTF8&th=1
I used an old soldering iron (set to around 230) which did the job fine, I know there are special tools and soldering iron bits available for doing this, but I had no problem with an iron.

My method for the cup inserts is to have a perfectly flat piece of metal on a hard surface nearby, then one insert at a time, (if you're using the inserts I've linked to then they should sit nicely in the cup hole), gently place the soldering iron tip into the insert from directly above, dont push down, just use the weight of the soldering iron...when the insert is about 80% submerged quickly put the iron down and flip the cup onto the hard flat surface and push down hard, there will be enough heat to finish the insert and the result will be a perfectly straight, perfectly flush insert.


Inserting heated inserts into the baffle:
These are cheaper ones that are fine for mounting the ring to the baffle, as they are inserted from the cup side of the baffle:
https://www.amazon.co.uk/gp/product/B08H563S9W/ref=ppx_yo_dt_b_asin_title_o02_s00?ie=UTF8&psc=1
Use the same approach to inserting the baffle inserts as above, but because the surface of the baffle isn't flat, instead of flipping over onto a flat surface to finish the insert off, just have a small flat metal object to hand to finish the insert off when it is 80% submerged, again this ensures a straight, flush insert.
I had this set lying around so you dont need all of them, just the M2.5x3.5x3mm ones...remember these need to be mounted from the rear of the baffle, after you have inserted them let them cool down for a few minutes, and before doing anything slowly screw a longer 2.5mm screw all the way through from the same side you inserted them. This will push out any filament that might be blocking the insert and the hole when you mount the baffle.

The screws I have are from this set:
https://www.amazon.co.uk/gp/product/B075WY5367/ref=ppx_yo_dt_b_asin_title_o06_s00?ie=UTF8&psc=1
The screws used for mounting the ring to the baffle are M2.5x8mm
The screws used for mounting baffle to the cups are M2.5x6mm
All screws should be fitted with a M2.5x6x0.5mm washer, I can't link to the washers as I have an old selection box full of them and I have no idea where they came from.

Be careful if not using these exact screw lengths as you could screw straight through the cup.

As far as tightening goes, personally I keep screwing until I start to feel resistance, and then do a quarter turn more. Obviously it would still be possible to over tighten these, because you'll just start to crush the 3d material you used to print.

I felt it best to leave the driver mounting as normal, as without modifying the drivers themselves I couldn't see a way to improve this, so mount the driver to the baffle exactly as per the initial instructions.

Personally I've cut reusable silicone gaskets that sit between the ring and the baffle, and between the baffle and cup, if you dont go down this route then obviously seal/glue these parts as per the initial instructions.

Any questions then just ask, any improvements or suggestions are welcome.

Good Luck !

Edit: Sorry I should point out, in your 3d printers settings, set perimeters to greater than 2, I've set mine to 4 for extra strength around the inserts.
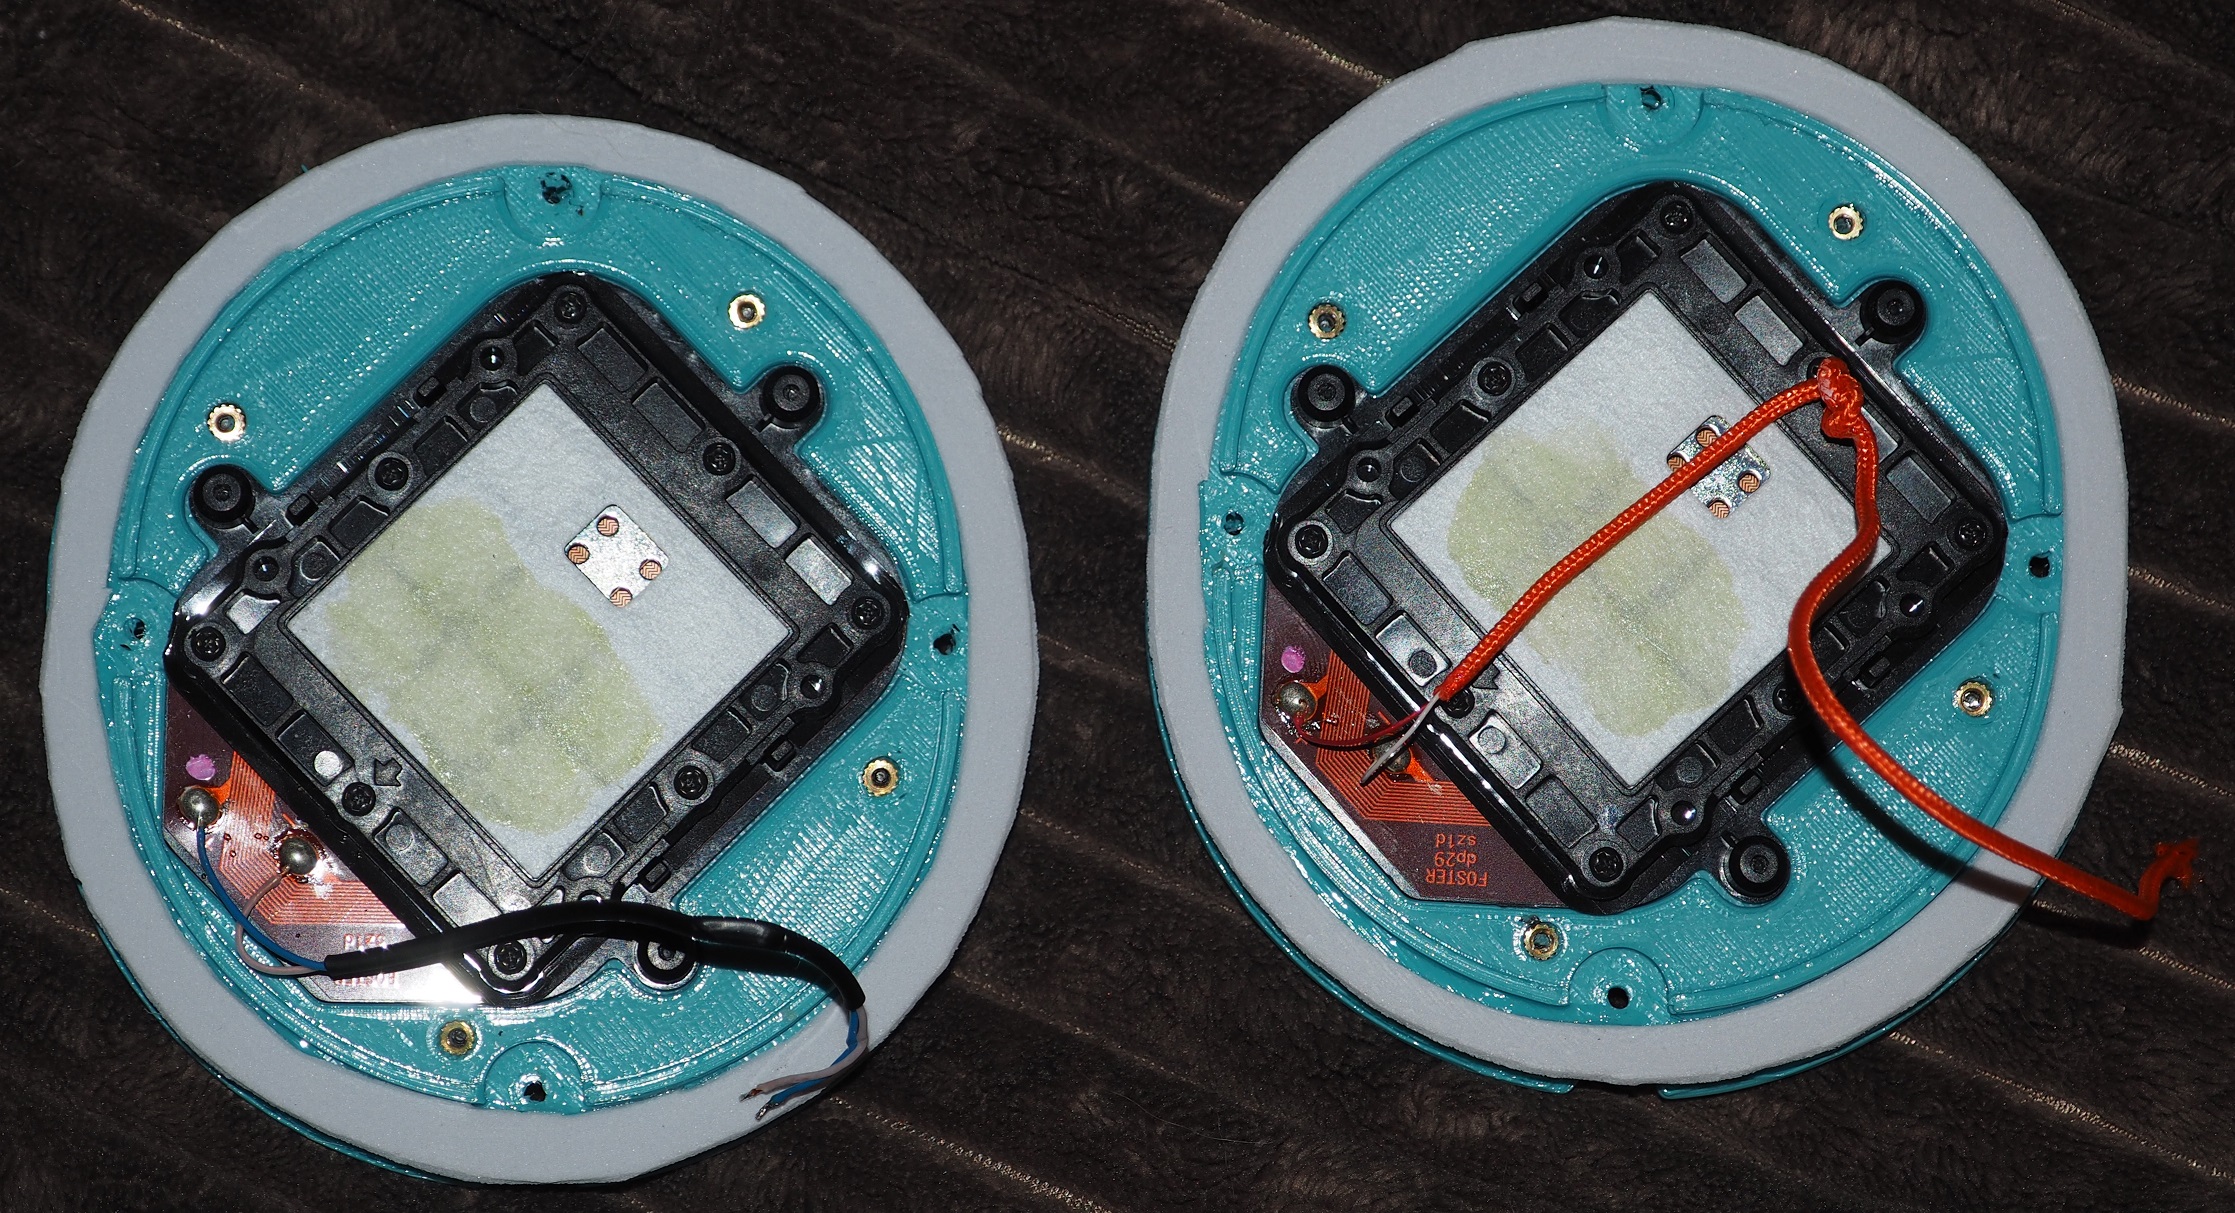
I am just about to use your method, but I don't understand the point of the two types of inserts. Can I not just use either the cheaper or more expensive inserts for both applications, why the need for two sets? I presume if they are both 2.5mm then they should both fit? Thanks.

edit: I think I will just skip the second set of inserts and just glue the two halves of the baffle together with solvent like I did on my current build which worked perfectly. I'll use your design for the baffle to fit into your cups, but the original ring without the additional holes. Thanks.
 
Last edited:
Nov 26, 2022 at 4:42 PM Post #920 of 979
2022-11-17 PB170002.JPG


The white filter paper is the stock damping. See those big yellow splotches? That's excess glue that reflects treble back at your ear. You can get a small jeweler's flathead and scrape up a corner of the white filter paper and then just peel the whole thing off. If you don't like the results, there's probably enough stickiness left to replace the stock damping as it was.
Oh i see. thanks. Kind of janky design they used there.
 
Nov 26, 2022 at 5:08 PM Post #922 of 979
Oh i see. thanks. Kind of janky design they used there.
Look at spectrogram before and after stock damping removal:

Stock damping
2022-11-17 R OA stock damp + Angel Hair Spectrogram.jpg


Arctic Cotton damping
2022-11-18 R OA 1g Angel Hair + Arctic Cotton bass vent + Front Paxmate Spectrogram.jpg


Fair bit cleaner 3kHz on up with stock damping removed. Treble much improved imho.


I am just about to use your method, but I don't understand the point of the two types of inserts. Can I not just use either the cheaper or more expensive inserts for both applications, why the need for two sets? I presume if they are both 2.5mm then they should both fit? Thanks.
Pad rings don't need heat inserts as deeply seated into plastic, it is a thinner component. Heat inserts for the cups need to be taller in order to meld with the plastic as well as still be reachable by 6mm screws.

edit: I think I will just skip the second set of inserts and just glue the two halves of the baffle together with solvent like I did on my current build which worked perfectly. I'll use your design for the baffle to fit into your cups, but the original ring without the additional holes. Thanks.
This is a good idea. Even if you install heat inserts on baffles, the pad rings may not seat 100% flush due to printer imperfections, so by using solvent it will for sure make a 100% seal which is beneficial for channel balance most likely.

Btw I recommend 8mm heat inserts for cups. 6mm is too short ime to seat deeply enough and still be reachable by 6mm screws. If you are able to buy the EXACT heat inserts @gb160 used then they should work, but if you are buying something different I recommend m2.5x8x3.5mm

Wowowow. Super neat and tidy. Good stuff.
 
Nov 26, 2022 at 5:24 PM Post #924 of 979
Nov 26, 2022 at 5:25 PM Post #925 of 979
Look at spectrogram before and after stock damping removal:

Stock damping


Arctic Cotton damping


Fair bit cleaner 3kHz on up with stock damping removed. Treble much improved imho.


Pad rings don't need heat inserts as deeply seated into plastic, it is a thinner component. Heat inserts for the cups need to be taller in order to meld with the plastic as well as still be reachable by 6mm screws.


This is a good idea. Even if you install heat inserts on baffles, the pad rings may not seat 100% flush due to printer imperfections, so by using solvent it will for sure make a 100% seal which is beneficial for channel balance most likely.

Btw I recommend 8mm heat inserts for cups. 6mm is too short ime to seat deeply enough and still be reachable by 6mm screws. If you are able to buy the EXACT heat inserts @gb160 used then they should work, but if you are buying something different I recommend m2.5x8x3.5mm


Wowowow. Super neat and tidy. Good stuff.
Thanks, I don't pretend to understand the spectrogram, but you seem to know your onions! I quickly filled in the additional holes in tinkercad to replace the heated inserts for the baffle. I don't think they are needed and the solvent stuff I used was ansolutely rock solid. The cup ones I think will be vital as I destroyed my old cups taking the screws out, they twisted the old screw mounts right off, I think I didn't do enough walls in the print or somthing. It's a shame as the cups were pretty pretty in two colour filament.

So just to be clear, what are you recommending in terms of damping alterations? I'm a bit confused:

I have akasa paxmate for the cup, I was using cotton wool balls inside the cup, You are using angel hair instead? Is that like the modern version of fiberglass, sort of rockwool stuff from the roof insulation or something else?

I will get some felt damping for the baffle (raid wife's sowing box?!) as the akasa does too much damping.

I think that leaves the stock paper daming with the glue you mentioned - did you replace this with this "arctic cotton"? Whats that big funky spike between 30 and 40hz on your second graph? Thanks! :)

edit: is that the blue sticky tape stuff you put over the driver?
 
Last edited:
Nov 26, 2022 at 7:23 PM Post #928 of 979
So just to be clear, what are you recommending in terms of damping alterations? I'm a bit confused:
If you want my honest opinion, I don't think you need any damping. I have damped with Arctic Cotton and also without anything and I did not hear much difference across entire spectrum. I don't think the damping even sacrificed much bass and you would think no damping has the most amount of bass. I honestly don't think anything is needed, but if that doesn't sit well with you you can probably experiment with the same felt you'll be using for baffle coverage.

I have akasa paxmate for the cup, I was using cotton wool balls inside the cup, You are using angel hair instead? Is that like the modern version of fiberglass, sort of rockwool stuff from the roof insulation or something else?
Angel hair is basically same thing as cotton balls but their fiber thickness is smaller, it's basically acoustic filler for speakers and such. You shouldn't hear much difference between Angel Hair and cotton balls assuming both are done correctly. I have experienced bass loss as well as increased upper mids + treble with overdoing the Angel Hair before in previous builds (non-T50RP builds) so I do know that Angel Hair does have damping qualities, but consider it a very al-dente form of damping, just about the lightest amount possible. Paxmate and cotton balls should do very well.

I think that leaves the stock paper daming with the glue you mentioned - did you replace this with this "arctic cotton"?

[...]
edit: is that the blue sticky tape stuff you put over the driver?
No, the blue stuff over the drivers was @Philimon and he put that painter's tape over his drivers for soldering purposes (so rosin or solder doesn't bubble/pop onto diaphragm). I currently have no damping behind my drivers, just Angel Hair.

Whats that big funky spike between 30 and 40hz on your second graph? Thanks! :)
Not sure. I had channel imbalance between my drivers and subsequently had to reseat my diaphragms numerous times in order to suss out the imbalance as well as induced bass buzz from reseating process (honestly such a pain). Here is a spectrogram graph of my headphones as they stand currently (even clearer treble, and bass distortion is also gone):

2022-11-26 OA diaphragm reseat x4 Spectrogram.jpg


Only thing I can think of that would have caused the bass distortion you mentioned was my magnet assemblies were over-tightened (I think) because loosening the magnet assembly screws (just a smidge, you can even see the Kapton gasket lay flatter by not over-tightening) like 1/16th of a turn has seemed to have solved my bass buzz issues and also possibly helped with imbalance.

-edit- My bass buzz was typically on VERY bass heavy songs with bass boost near maximum on my amplifier. Most people would never run into bass buzz issues, but if you have something like a Loki EQ you could boost the bass and see if your diaphragms need a reseating. This is very dangerous water, though, you have the potential to mess up channel balance with reseating so you could make things worse. Also I had better luck doing what I call "a complete reseat" which is basically taking the screws out completely, removing the rear magnet assembly, extracting the diaphragm and then putting everything back together... The magnets are very strong so if you don't back out the rear magnet assembly perfectly straight it could quickly attract to the other half of the magnets and mar up your diaphragm. Be very careful with this stuff. A quick and easy way to reseat the diaphragm is to unscrew the screws for the magnet assembly HALFWAY and then blow into the rear of the driver somewhat hard. The air pressure should separate the diaphragm from magnet assembly and give you a clean reseat.
 
Last edited:
Nov 26, 2022 at 7:50 PM Post #929 of 979
Btw, if anybody is interested in some earpads for their OA's I compared eBay pads to DCA Alpha pads and preferred the eBay pads. They are pretty cheap, too:
https://www.ebay.com/itm/265928328595?var=565765669995

Not angled. DCA Alpha pads have slightly better center image and imaging imho, but bass is better on eBay pads (louder with more thump and authority in deep sub-bass) and also the midrange sounds cleaner and a little more forward to me, Alpha pads are a smidge dark ime. YMMV but these are hella good pads for $26 shipped.
 
Nov 28, 2022 at 4:14 AM Post #930 of 979
Btw, if anybody is interested in some earpads for their OA's I compared eBay pads to DCA Alpha pads and preferred the eBay pads. They are pretty cheap, too:
https://www.ebay.com/itm/265928328595?var=565765669995

Not angled. DCA Alpha pads have slightly better center image and imaging imho, but bass is better on eBay pads (louder with more thump and authority in deep sub-bass) and also the midrange sounds cleaner and a little more forward to me, Alpha pads are a smidge dark ime. YMMV but these are hella good pads for $26 shipped.
These two pads are excellent quality and materials, and a perfect fit. One is very similar to stock t60rp pads but thicker, the other are more heavily angled.

https://www.amazon.co.uk/Sheepskin-...d=1669626733&sprefix=t50rp+pads,aps,63&sr=8-3

https://www.amazon.co.uk/SHEEPSKIN-...3&sprefix=accessory+house+t50rp,aps,50&sr=8-2
 

Users who are viewing this thread

Back
Top