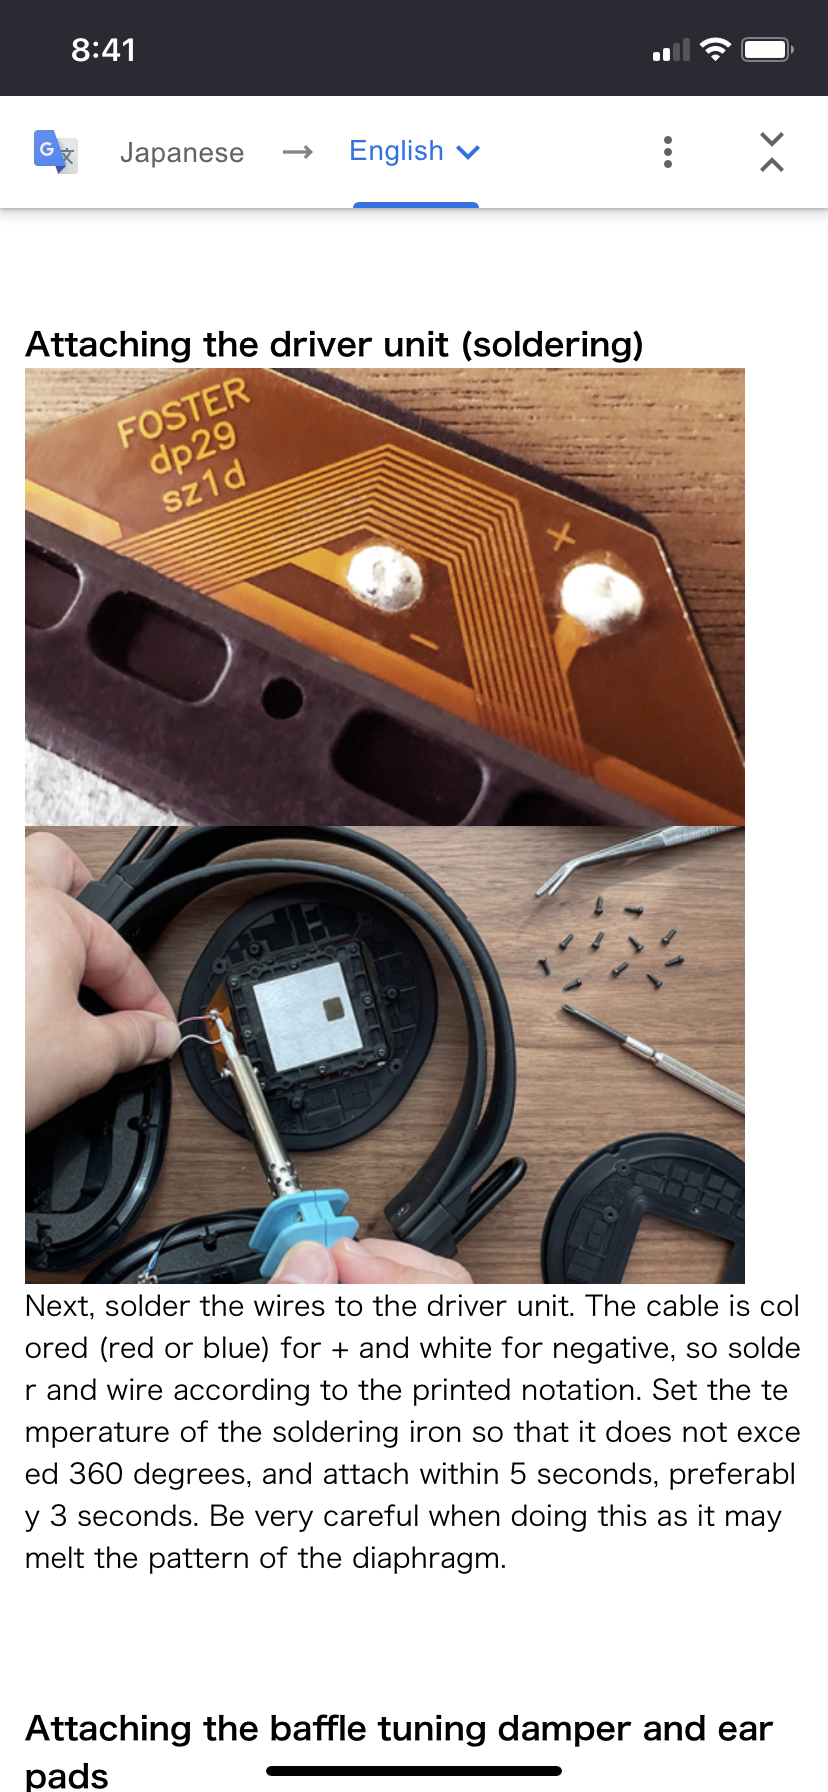
Alright I'll make a small contribution here as this thread has helped me greatly. After about 30 documented variations I've devised a mod that I think (maybe) I'll be sticking with for awhile. I have a 400i with neutral-like bass, so I've been striving for a planar with more bass impact... but at the same time upping the clarity, but
at the same time reducing any harshness – heh.
I've had a few other variations where I've achieved a good balance, like with porous coffee filters as one example (square coffee filter over penny-sized coffee filter reflector):

This one requires there to be some insulation on the non-driver side to tighten things up. I have another really good one I'll probably post here at some point, but I don't have pictures right now. I think my current one is the best so far, so I'll just give a quick recap of some of it...
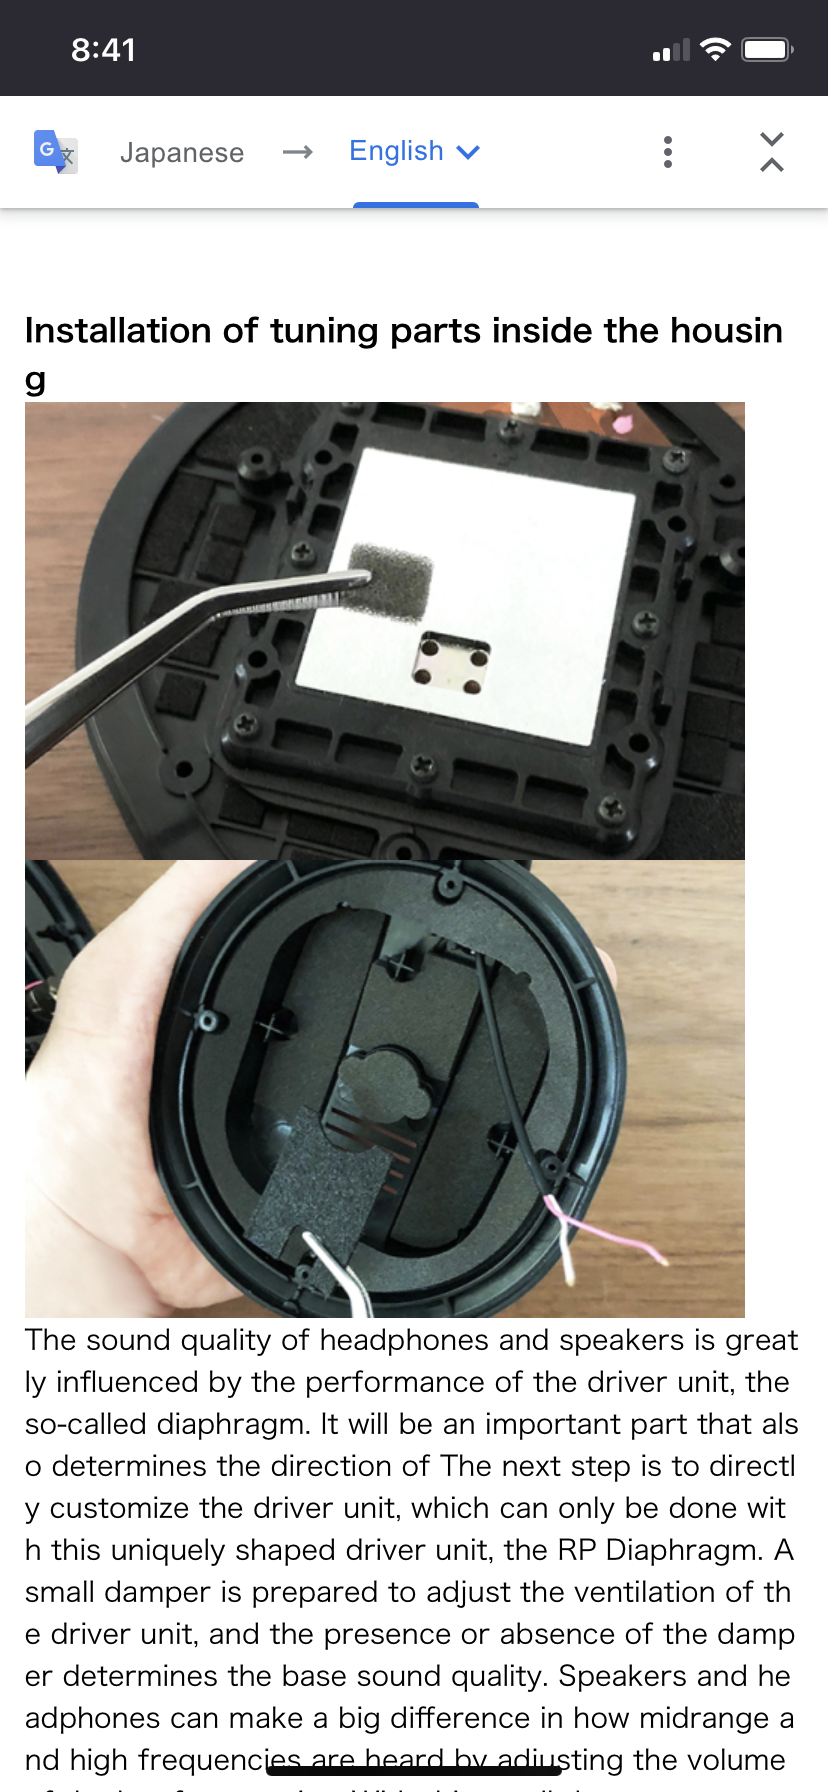
The non-driver side has the BMF stuff like the ladder structure (now pretty flattened btw) etc. with a layer of cotton above it:

I had a layer of insulation over it, and it certainly tightens things up, but as I'm going for more bass impact I ended up removing it. As I said before I've been wanting high clarity/strong bass/low harshness, and it's been a particularly difficult balancing act. Without anything on the driver everything seems muddy but the bass is strong, and if you put on too many things it can become harsh with lessened bass.
I've tried doing various bass holes but most of the time their positions are a little random over the driver, making the sound somewhat uneven to my ears. So I came up with what I think to be a decent solution:

In each of the square driver areas, half of the sound is reflected back for more treble, half is let through for more bass. Pretty simple:

I find though, at least with the insulation removed, that the front/back of a magazine is the best material to use:

Use some tracing paper to get the layout, tape two magazine pieces together to do two at once, transfer the lines and use a razor blade to cut everything out. Double-sided tape with removable backing to put them on. Regular paper lets more sound through for a lighter sound, magazine paper gives a stronger sound/more clarity.
I found that covering up the entire middle driver area makes things a bit sibilant, so with this half and half structure everything seems to be more balanced. It's given me the best of both worlds with strong bass and clear (but not sibilant) highs and mids. The vents are open, and the bass ports are currently closed. I'll be messing around with opening them/putting a small pinprick in the tape, etc. later. Usually opening the bass port tighten things up a bit/reduces the bass very slightly, but it won't have a big impact either way.
So yeah, this is my best mod currently. Should have a kit soon to see how it measures. I would suggest adding insulation over the cotton if you want tighter bass -