The "non-Grado" Driver Grado Thread
Nov 29, 2013 at 2:27 PM Post #46 of 754
Here are some pictures of the Sennheiser PX100 II drivers in action.
 
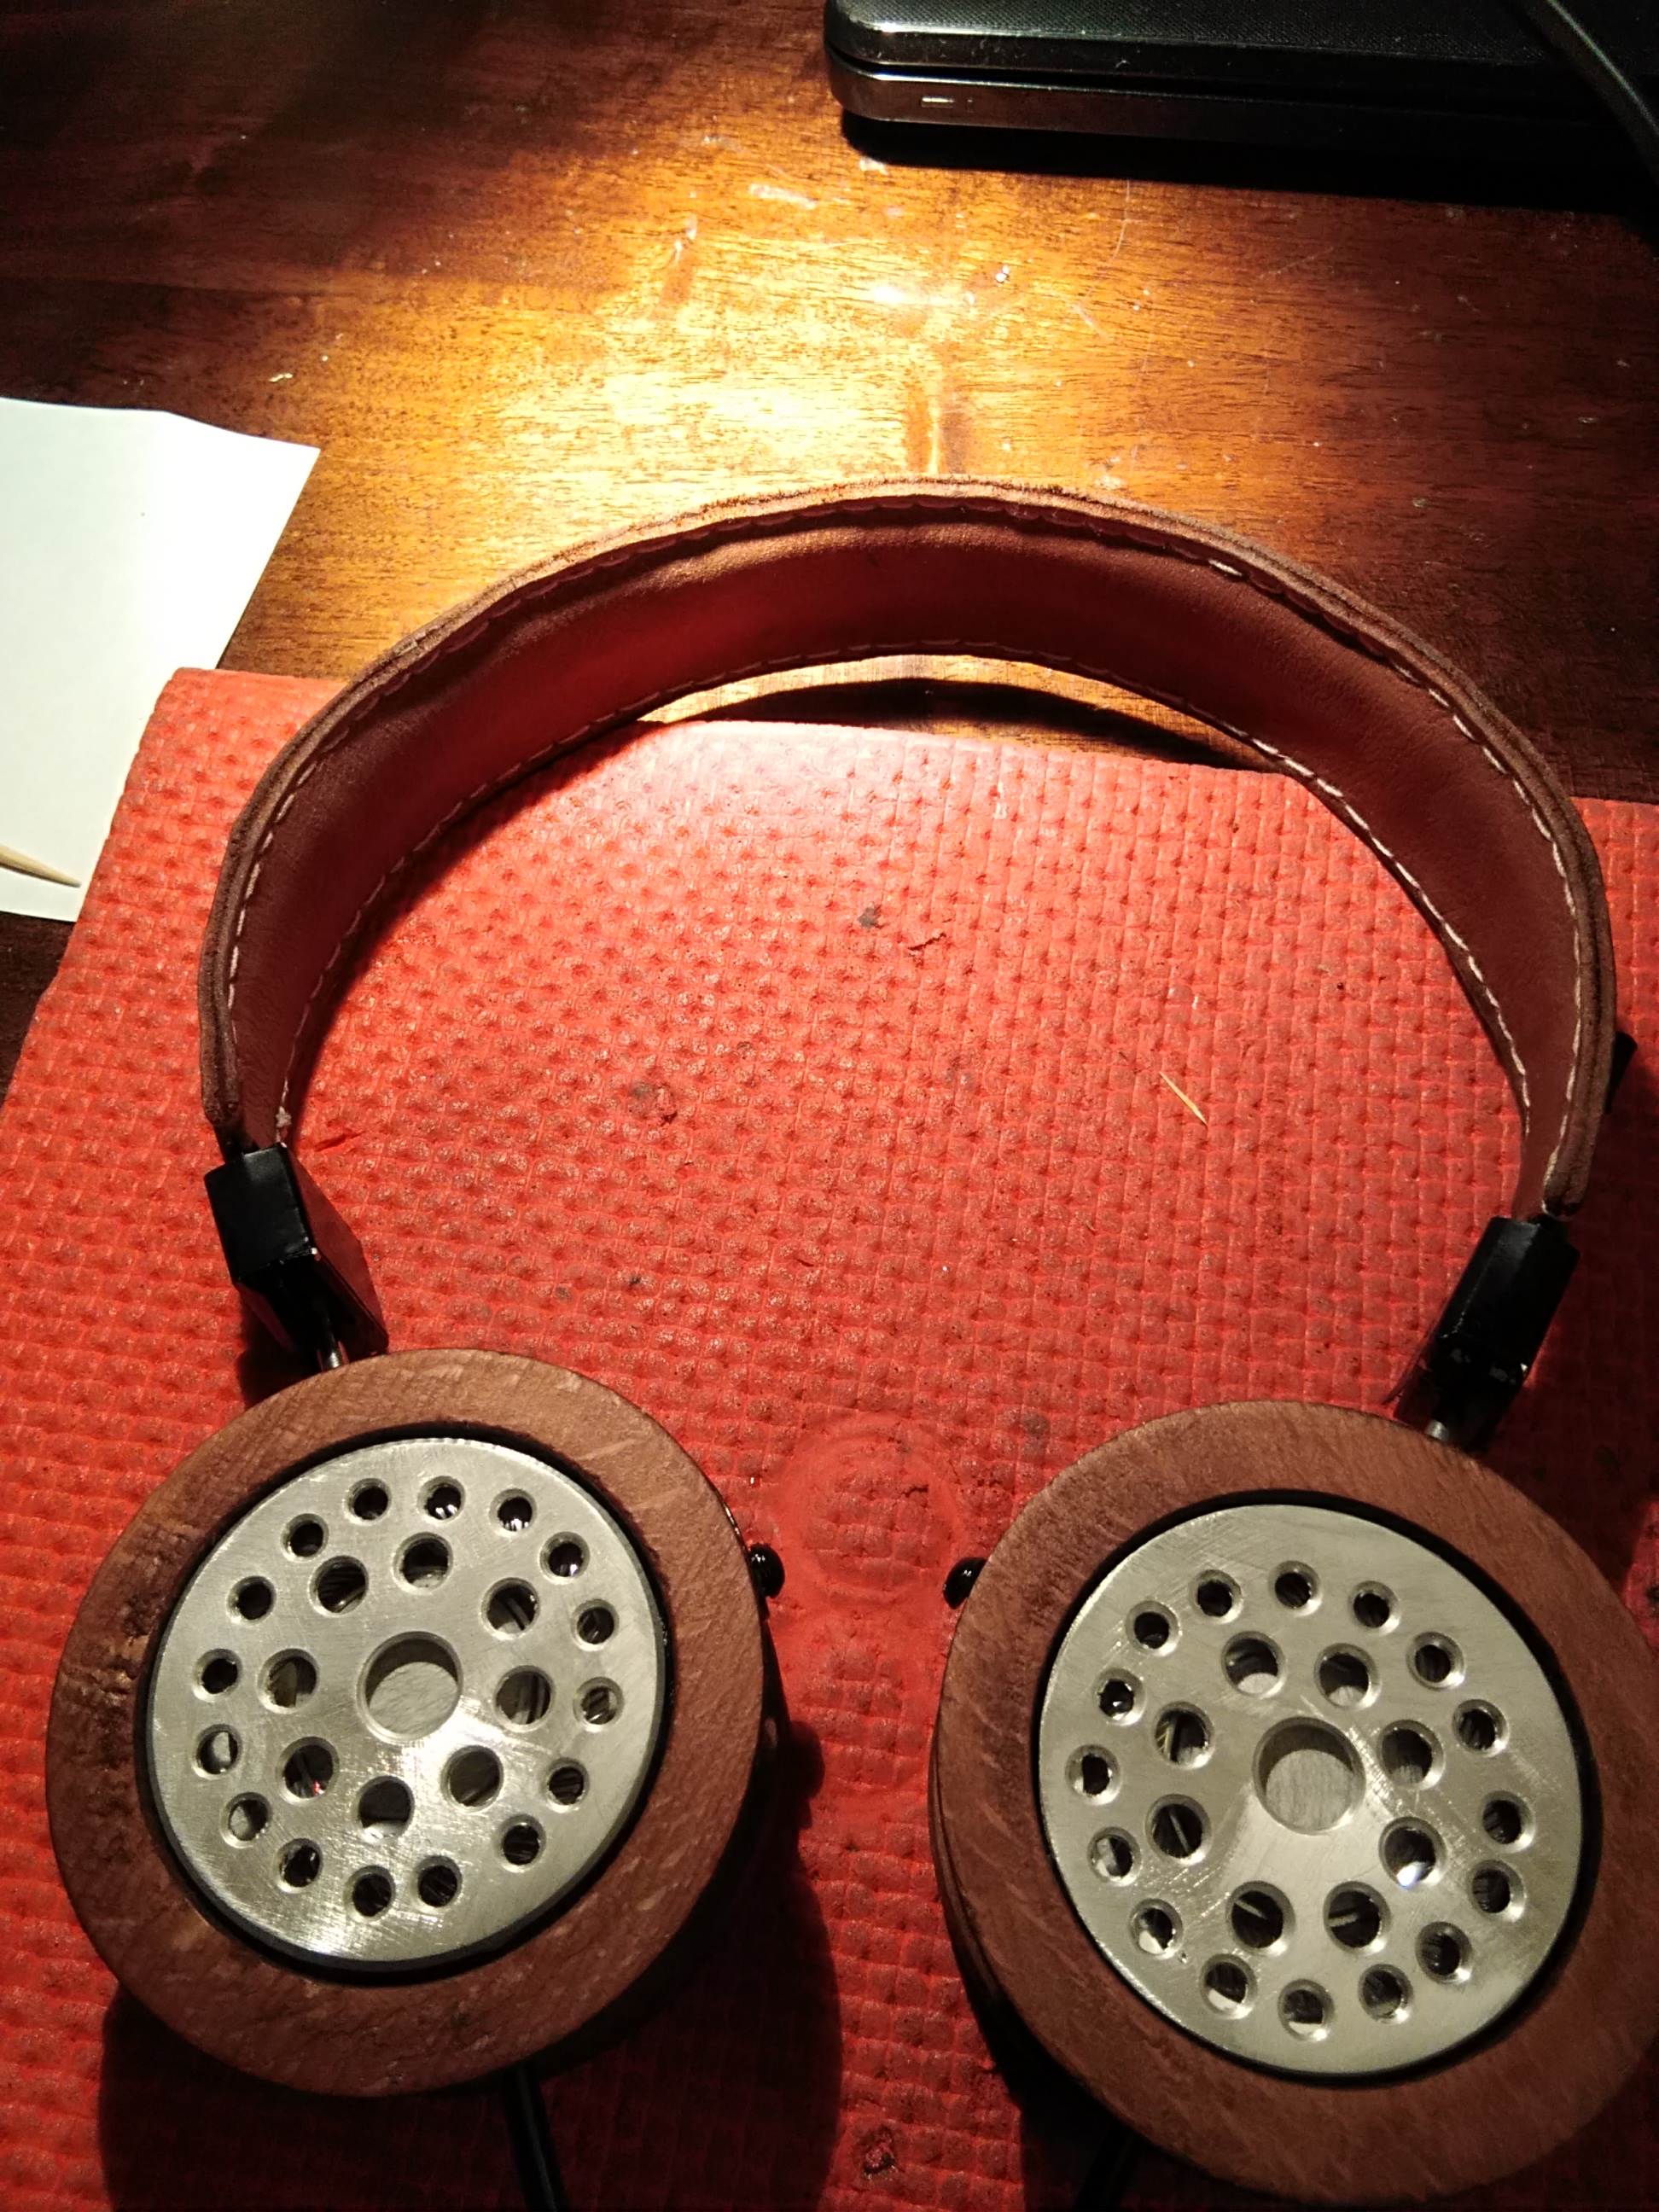
My current pair "in use" as I work to finalize some last-minute decisions on the correct headband to use, along with completing a permanent cable for these.  In this picture, I have the Auvio headband utilized (best $10 I ever spent), the Ear Zonk G-Cush pads (Best $19.99 I ever spent) as well as the Padauk custom crafted cups.  In this picture, you can also see the drivers as they are present at the opening of the G-Cush pads.


Here is a picture of the driver set on the opening of the pair of SR-80i Grado cups.  The existing Grado drivers were liberated from the cups and the Sennehiser PX100 II drivers are just sitting in place.  They are about 1/32" larger than the standard cup openings, so one could just apply a few dabs of hot glue to hold these in place.  I do plan on running a pair of the Sennheiser drivers in the standard plastic cups in the upcoming week so I can share some impressions on the sound.


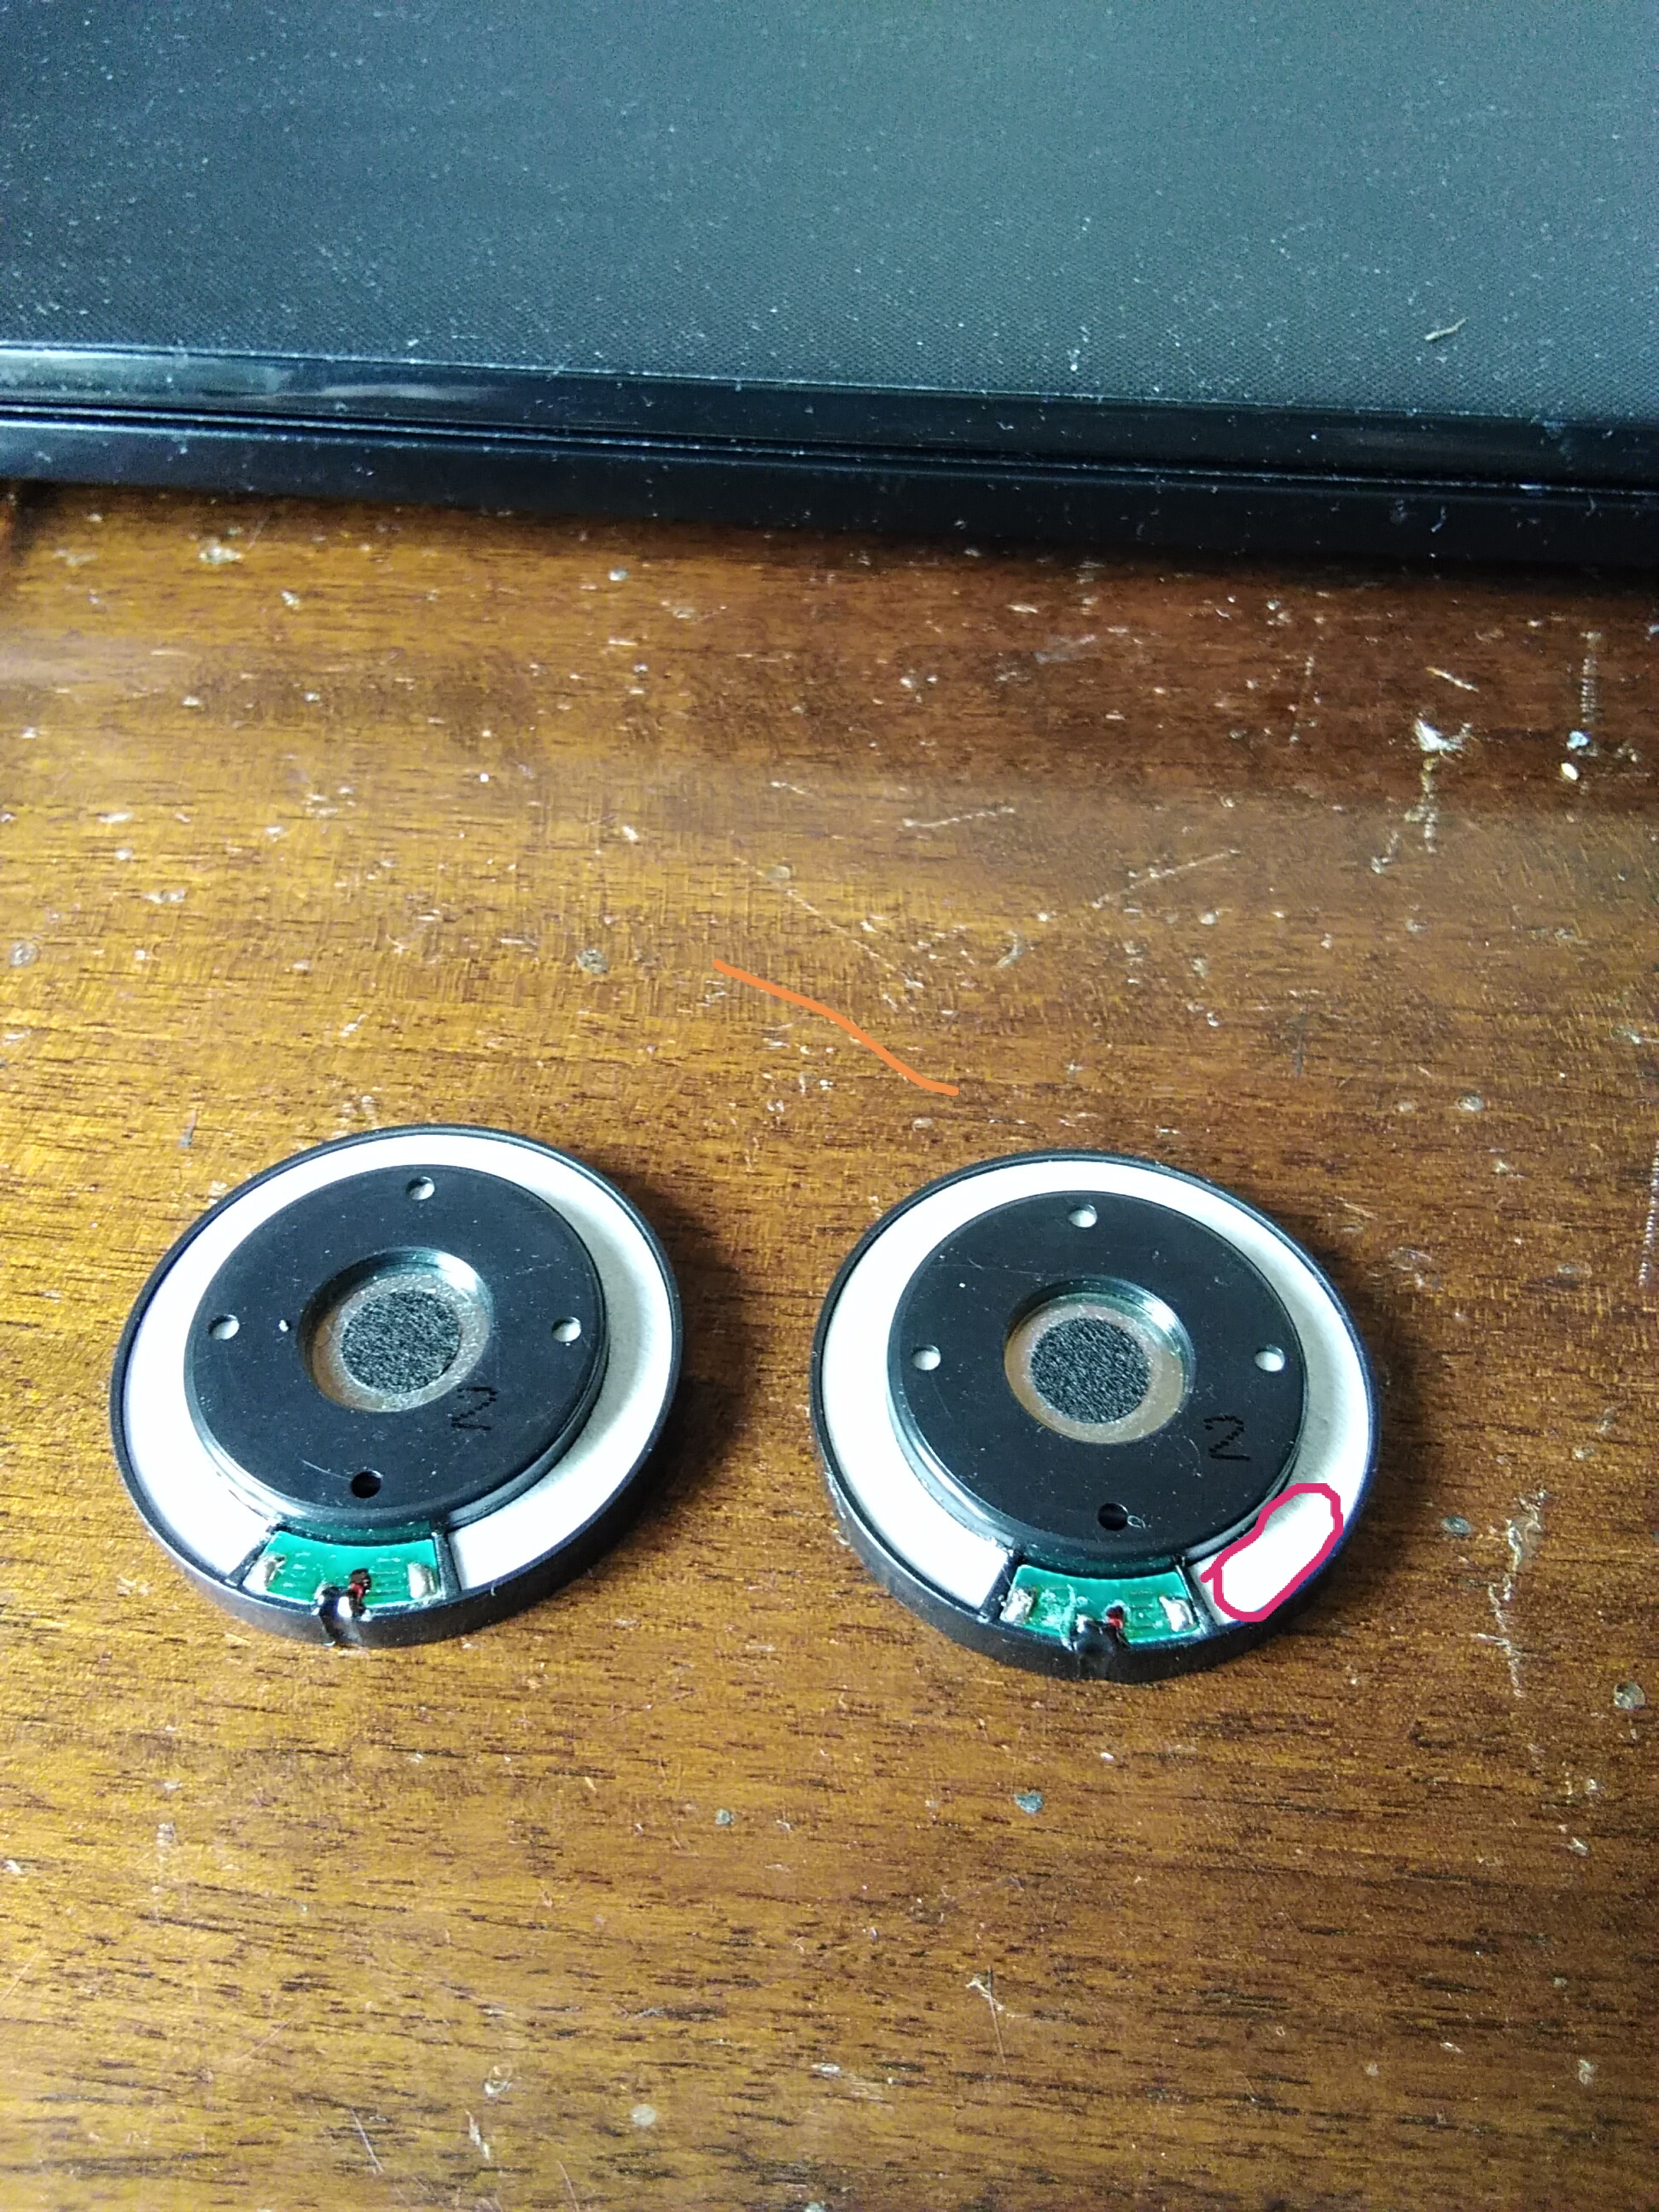
Here is a picture of the Sennheiser driver set into place on a pair of Padauk custom cut cups.  In this particular picture, one can see that a few small dabs of hot glue would easily hold this driver in place.  If the cup openings were cut slightly larger, then only a single layer of electrical tape would be required to hold the drivers into the cups.


A little bit later - I have some additional pictures and instructions to post regarding the careful removal of the Senneheiser drivers from the PX100 II housings, as well as the proper labels to reflect which solder tabs on the back of the driver to utilize for connecting your cable leads to.  Again, a bit later - but before the day is over.
 
Nov 29, 2013 at 2:48 PM Post #47 of 754
Thanks. I think next year i will buy px 100 ii headphones and try what you did.
How do they sound in G-cush pads?

One maybe stupid question - Has Koss Porta Pro a lot smaller drivers? Is it even possible to make cups for them (maybe no one has tried yet)?
 
Nov 29, 2013 at 5:42 PM Post #48 of 754
I did some Sportapro drivers in a pair of Paduaks...they work, but if you remove the plastic screens over the driver's face (think extreme Kramer mod) they cause fatigue. Size-wise they are fine. They work better in the StratoKOSSter configuration...
 
Nov 30, 2013 at 12:20 AM Post #49 of 754
Thanks. I think next year i will buy px 100 ii headphones and try what you did.
How do they sound in G-cush pads?

 
They do quite well with the G-Cush pads.  Some people have noted the experience for them on Grado headphones, yielded a bit less bass and some noticed highs that were bumped up a bit.
 
I've never used the G-Cush pads on lower level Grados.  I've had the GS-1000 with them.  Excellent.  I also liked them with the PS-500 because it tamed some of the bass and provided a slightly better sound signature.
 
With the G-Cush on the Sennheiser driven headphones, they do great.  The slight bit of extra bass works with you on the G-cush pads. Plus, the sound stage seems to be wider when using them to.   In my listening, I've been impressed on how the instruments are separated and with the wider soundstage, some of them are pushed out quite a ways for a great listening experience.
 
Edit: I noticed something else kind of interesting.  I bought 3 pair of the $9.99 Auvio headphones (normally $24.99) at Radio Shack for just the headbands to use.  However, I took the driver housing apart this evening and the driver has a pretty close diameter, too.  It appears to be vented in 3 spots.   A small hole in the plastic covering the magnet, and two others on the opposite sides of the soldering tabs.  I might have to try something with these too a bit down the road.  The Auvio headphones themselves were a bit "hollow" sounding since they were just in smaller plastic cups that were completely closed.  Plus, there was no sort of dampening material in the cups to give the sound any hope at all.
 
Nov 30, 2013 at 12:41 AM Post #50 of 754
Here are a few more informative pictures that I want to share:
 
 
When one is about the disassemble the PX100 headphones to remove the drivers, one has to follow a small basic order to ensure the removal is a success.  In the image below, I've indicted four recessed holes with blue arrows.  Each of those holes have a small bit of adhesive in the holes which basically hold the drivers to the frame / cups.  I get these open, all you need is a small screwdriver to utilize to clear out some of the adhesive and to separate it from the tab that it's bonded to.  It just takes a few seconds each, but it will save the driver.   This is why you can see some of the plastic is a bit roughened up in the tab areas.  I could file that plastic off to clean them up a bit.  Where the green arrow is located, it reflects the area of the outer ring of the driver that could be damaged a bit if you don't release some of the glue in the indentation areas.  
 
Once the glue has been opened up a bit, you can then use something small (e.g. same screwdriver) to gently use in the gap to separate the driver from the rear portion of the cup.  Once opened up, you can then snip the wires (just like tiny threads).


On this second picture, I have more arrows to indicate the correct soldering points.  I removed the wires and freshened up the solder a bit in preparation for connecting my wires.  I've indicated the positive terminal with the red arrow.  The black arrow points to the negative terminal.  Avoid the 4 solder tabs that also exist on the green PCB.  Those are used for connecting the wires that run through the headband and go to the other driver.  However, as you can see, the PCB and solder tabs are pretty robust since they are on the PCB.  I don't suspect any soldering accidents would happen with this driver like sometimes can occur with the Grado or Magnum drivers that a few of us have experienced.  Myself included.


Nov 30, 2013 at 5:54 AM Post #51 of 754
Thanks fleasbaby and wje. I'm glad I registered to this forum. I've learned a lot more about headphones in few months than in my entire life.

By the way, is it true that PX 100ii driver (genuine) has a number written near the center of the driver?
 
Dec 2, 2013 at 12:31 PM Post #52 of 754
Canucks, FutureShop is having a one-day Cyber Monday sale on Senn PX100II. $50. Not bad and certainly not the ridiculous $120 they usually charge.
http://www.futureshop.ca/en-CA/category/headphones/23274.aspx 
 
Dec 2, 2013 at 11:36 PM Post #53 of 754
Thanks fleasbaby and wje. I'm glad I registered to this forum. I've learned a lot more about headphones in few months than in my entire life.

By the way, is it true that PX 100ii driver (genuine) has a number written near the center of the driver?

 
Is the number supposed to be on the mylar of the driver itself?  Or, on the black plastic protecting the front of the driver?  Also, are the fake PX100 II headphones in a Sennheiser box with the band in place that you need to snip like most Sennheiser headphones?   I think we always need to be aware of the potential for fakes all the time as it's always a risk we take.  Hopefully, the 3 pair I've purchased from BH Photo are all authentic - I'm quite sure they are due to the sound quality that I'm achieving.  I'd sure hate to hear the knock-off drivers in the fakes.  I'm assuming that the fake drivers would be pretty horrible performers.
 
Edit: I found a picture on the Web as follows.  This is exactly as my driver appears.  On the 3 pair I purchased, they were all in the Sennheiser box and included the velour carry pouch for the headphones.


Dec 3, 2013 at 3:49 PM Post #55 of 754


 The Sens PX 100-11 arrived in the mail yesterday so I decided to do a fast test last night. I had made a cup for testing with a slot in the side hoping I could keep the original cable attached and just slip them right into the cup like a liberated grado. I was able to do this with the headband of the Sens dangling underneath as you can’t keep the cable attached because of the way it runs through headband. I didn’t liberate the driver out of its plastic sheath as I was able to tightly fit the plastic covering right in the cup which had been fitted for a grado driver.
 
I have three headphones and a couple of IEM’s. I have a virgin SR60I, a modded Fostex T50RP and a Magnum V4. I did a direct comparison between the Sens and the Magnum.
Now maybe it’s because I didn’t fully liberate the driver and tightly fit it in the cup…… or…… possibly it’s because I didn’t change the cheap cable………… but I didn’t find these sens drivers to be giant killers, at least in my configuration.  The Magnum V4’s sounded so much better, in a whole other class.
 
In the next week or two I’ll liberate the sens drivers, fit them to a new cup, add a nice cable and do another test.

 
Dec 4, 2013 at 1:18 AM Post #56 of 754
I don't think it's that easy. In TheLostmidrage topic about cups, even smallest change to the cup made big difference. Ok, if you were lucky first try could give you nice result.
I wish it was so easy.
 
Dec 4, 2013 at 8:30 AM Post #57 of 754
Indeed, the smallest change can make a difference, but I do think that the mounting method used is important. I am willing to wager that removing the pads and dropping the driver into the driver seat (it looks like that didn't happen in 7keys' build above) would change things. I addition, the notch for the wiring as opposed to having a drilled hole might play a role too.
 
I haven't tried the Sennheiser's yet, but they are next on my list after I wrap up another project. I am also woefully ignorant of how G-Cush affect sound, and wje's build used those as well.
 
Dec 5, 2013 at 12:23 PM Post #58 of 754

That’s why I want to test them again, I haven’t noticed a difference switching out a slotted cup to a holed version but I have noticed a difference in the seating the driver. Also one might like a particular sound signature more than another. One sound signature size doesn’t fit all.

 
Dec 8, 2013 at 5:39 PM Post #60 of 754
Those are brilliant...sadly I've no pads to trade though...*sigh*
 

Users who are viewing this thread

Back
Top