


Bilavideo
Caution: Incomplete trades.
- Joined
- Feb 29, 2008
- Posts
- 3,101
- Likes
- 128
HOW'S YOUR MAD SCIENTIST WEEKEND?

So, here's the deal. My wife wants me to go with her to look for a car. I don't want to go because I know what's going to happen. They're going to show her a car she'll fall in love with, then they're going to ask me to pick a penny off the show-room floor. I'll bend over and - well, you get the idea.

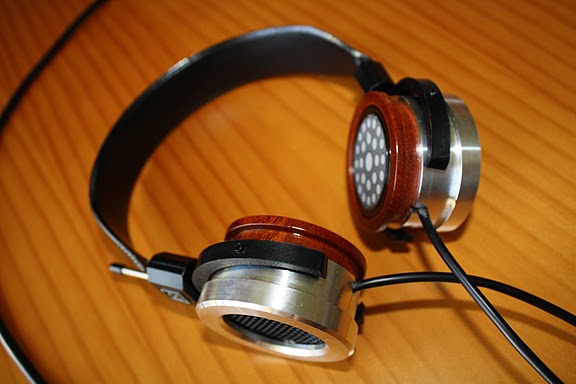
So, I was working at the drill press, stamping out some shells and catching up when I got this idea to make a cover for the plastic, one that would let a person just drop the whole plastic inner in. These aren't sanded or lacquered but thankfully they fit.

I created a lip for the pad and a little - I don't what you call it - but it holds the screen in. I must be getting high off splinters and sawdust (Now, THERE'S a cocktail).

Time to test this little digression.

In like Flynn!

AMBERvision!
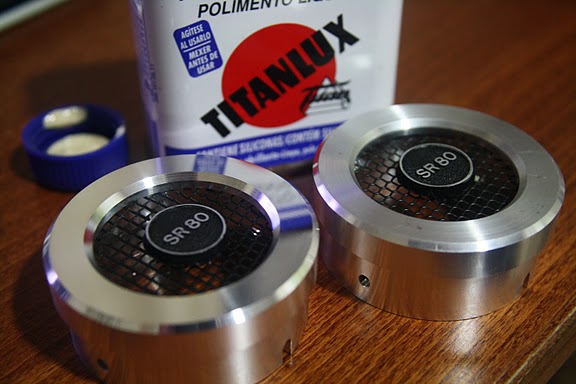
1. The OD uses a 2 5/8" hole saw for the lip (producing a 2 1/2" outer lip).
2. The cavity for the actual plastic lip uses a 2 1/8" hole saw.
3. Flipping the board over, after poking the center hole through for reference, I use a 2 1/2" hole saw to get a 2 3/8" OD on the back.
4. With the board still flipped over, I use a 1 7/8" hole saw to create a window/panel a little smaller on the outside on the inside.
5. Flipping the board face up, I cut an ID at 2", remembering to take it easy as I get to the end so I can stop cutting right before I get to that lip I've created so I've got a nice molding/brace built into the shell. I'll use it to hold the screen.

I didn't set out to make a full shell, just "inners" or inner covers - what I'm playing calling True Hats.

Still, and this is with a one-inch board (nothing deep), you could get away with such a shell and still have something decent to play with.

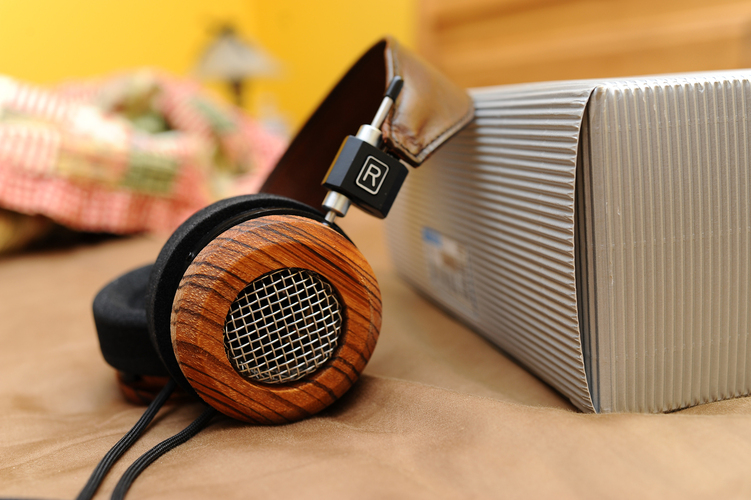
You can see the slim profile these give off. In some situations, that may be all anybody really needs. Otherwise, this is the base from which a larger hat can be built.

I really need that shower - and a comb! - but I can't let this one go just yet. At the risk of losing my modeling contract - ahem - here is what these look like from the side.

It's funny to think that this is basically and inner cover rather than a secondary shell squeezed onto the back of the inner. Basswize, I'm surprised at the amount of bass I'm getting just off this primary stage shell. I'm listening to organ music and I'm getting some decent grumble. I'm not going to say it's HD800 grumble but it sounds like I'm shelled up - and I'm only halfway there.

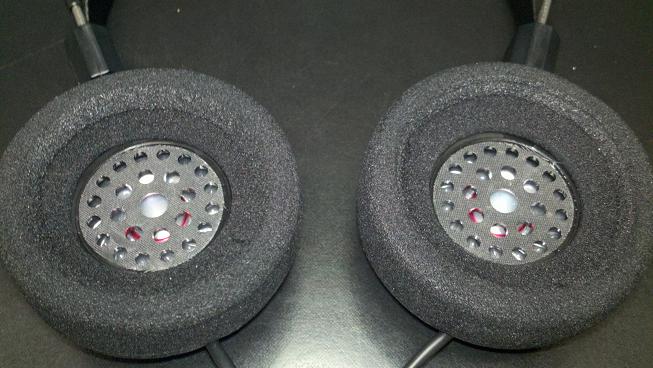
Here they are with screens. They still need to be sanded and lacquered - and that guy in the picture is beginning to creep me out! But this isn't bad for a Saturday afternoon on my way to sell my soul for a trade-in.

If I can do it, you can do it better. Now, off to the shower!
So, here's the deal. My wife wants me to go with her to look for a car. I don't want to go because I know what's going to happen. They're going to show her a car she'll fall in love with, then they're going to ask me to pick a penny off the show-room floor. I'll bend over and - well, you get the idea.
So, I was working at the drill press, stamping out some shells and catching up when I got this idea to make a cover for the plastic, one that would let a person just drop the whole plastic inner in. These aren't sanded or lacquered but thankfully they fit.
I created a lip for the pad and a little - I don't what you call it - but it holds the screen in. I must be getting high off splinters and sawdust (Now, THERE'S a cocktail).
Time to test this little digression.
In like Flynn!
AMBERvision!
1. The OD uses a 2 5/8" hole saw for the lip (producing a 2 1/2" outer lip).
2. The cavity for the actual plastic lip uses a 2 1/8" hole saw.
3. Flipping the board over, after poking the center hole through for reference, I use a 2 1/2" hole saw to get a 2 3/8" OD on the back.
4. With the board still flipped over, I use a 1 7/8" hole saw to create a window/panel a little smaller on the outside on the inside.
5. Flipping the board face up, I cut an ID at 2", remembering to take it easy as I get to the end so I can stop cutting right before I get to that lip I've created so I've got a nice molding/brace built into the shell. I'll use it to hold the screen.
I didn't set out to make a full shell, just "inners" or inner covers - what I'm playing calling True Hats.
Still, and this is with a one-inch board (nothing deep), you could get away with such a shell and still have something decent to play with.
You can see the slim profile these give off. In some situations, that may be all anybody really needs. Otherwise, this is the base from which a larger hat can be built.
I really need that shower - and a comb! - but I can't let this one go just yet. At the risk of losing my modeling contract - ahem - here is what these look like from the side.
It's funny to think that this is basically and inner cover rather than a secondary shell squeezed onto the back of the inner. Basswize, I'm surprised at the amount of bass I'm getting just off this primary stage shell. I'm listening to organ music and I'm getting some decent grumble. I'm not going to say it's HD800 grumble but it sounds like I'm shelled up - and I'm only halfway there.
Here they are with screens. They still need to be sanded and lacquered - and that guy in the picture is beginning to creep me out! But this isn't bad for a Saturday afternoon on my way to sell my soul for a trade-in.
If I can do it, you can do it better. Now, off to the shower!

