SR60-Mod
Mar 7, 2011 at 6:55 AM Post #1,996 of 5,004
It has been my experience making wooden cups, that pure slip ons are the way to start.  I use a 2.5 hole saw for the outer.  For the inner, I used a 2 inch initially, but the fit is sloppy (too loose), and the wall thickness that results is too thin (visually).  That is why I ended up using a variable hole cutter for the inner circle.  Mine were too aggressively sanded with a dremel and not enough test fitting, so they are still a bit loose, but some blu tack holds them in place fine.
 
I made 5 sets before I got what I liked.  I could have experimented with mdf, but thankfully the wood I chose is not that pricey, and the place is literally 5 minutes from my house.
 
Keep at it, it is rewarding when you get it right!
 
I had my 60's recabled yesterday at a local meet, with the Mogami and the Vampire 1/4 plug.  Works great!  Thanks again FallenAngel!
 
Mar 7, 2011 at 8:36 AM Post #1,997 of 5,004
Mar 7, 2011 at 10:18 AM Post #1,998 of 5,004
 
eeek. the voice coil is definitely detached from the wire. i'm not certain what you mean by snapped, but the wires seem to be intact, just a little frayed on the edges. 
 
here are more detail pics: 


what do you think?


can this be fixed????? :frowning2: looks like the coil detached itself from the wire as i was slowly pulling off the mylar. it also looks as if i made an indent on the mylar while i was venting the driver. why did i use a compass??! 
 
could the mylar still be reused?
 
 please help :frowning2:


Send them to me and I'll fix them for you - no charge, just one HeadFier feeling your pain.
 
 
Mar 7, 2011 at 11:08 AM Post #1,999 of 5,004
Hi everyone,
 
Well the next page in the story ended up being the recable.  To tell you the truth this was the most daunting mod for me due to my soldering inexperience (even worse than fully liberating the driver).  Luckily, my brother has no such qualms and is the "master of the iron" and was able to help me.  In the end this is what we came up with.


Cheers,
Al


Mar 7, 2011 at 12:21 PM Post #2,000 of 5,004
Alchieng---I love the Lion/Tiger/Dragon? Ones, they are very cool..how do they sound?? are they bright?? the shells are aluminum? metal?
 
The wood hells also look great but the metal ones really do it for me!!
 
Mar 7, 2011 at 12:27 PM Post #2,001 of 5,004
Ed, good point about the shelf to rest the driver on instead of a full slit. I might need to look into that later, if I can use a 2" forsner bit instead of a hole saw, it would be easier and I might be able to get a tiny bit of wall thickness back on the outer edge. I will have to see if I can get my driver into a 2" hole later tonight...
 
Mar 7, 2011 at 12:28 PM Post #2,002 of 5,004


Quote:
Alchieng---I love the Lion/Tiger/Dragon? Ones, they are very cool..how do they sound?? are they bright?? the shells are aluminum? metal?
 
The wood hells also look great but the metal ones really do it for me!!


Hi Eclein,
 
Thanks for the kind words.  The Lions are a hybrid wood inner wtih aluminum outter.  With the stock cable and all the regular bila mods they sounded great and not bright but very extended from top to bottom.  With the recable however the soundstage increased substantially.  To summarize the sound of each I would say my woodies are more full bodied and laid back.  They have a more midbass presence where the lions are more composed, detailed and extended.  The Lions are on the neutral side of the spectrum.  Both sound fantastic but have very distinct flavours.
 
Mar 7, 2011 at 1:29 PM Post #2,003 of 5,004
If I was a rich guy I would pay to have everybody meet somewhere and bring the Grado's they have been modding so we could all hear them and see or hear what some of these sound like. I think Bill is sending me some more Wood shells for my other pair and I'd like to try something different with these but not sure what. The pair that  await transformation have all mods-10 holes, Dynamatt, no linen, whatever earpads I want to throw on them and 1/4" jack-these are the 125"s I took into the hospital that I raided for the foam when the wood shells showed up. So...What should I do with these??
 I think it would be cool to mod a pair-and the ones I have seem to be the choice I think-and do the mods on some sort of group choices...I'll list all the current mods the current mods to date and what items I have readily available to use and we can make an SR125H-fiMod Edition.
 What do you guys think???
 
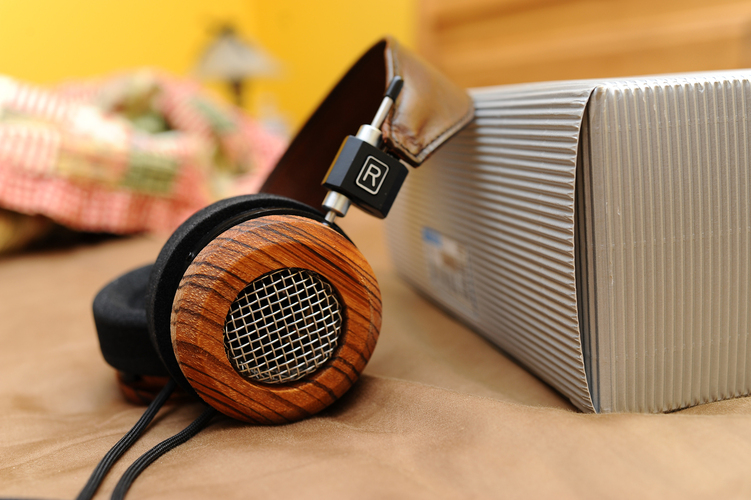
Here is what I have done so far, but first a picture of the victim:

 
Stock Pair of SR125's--
Mods done to date:
1) Linen removed
2) Quarter Mod to earpads but we have choices of Flats, QuarterMods or Lg. Earpads "Bowls"
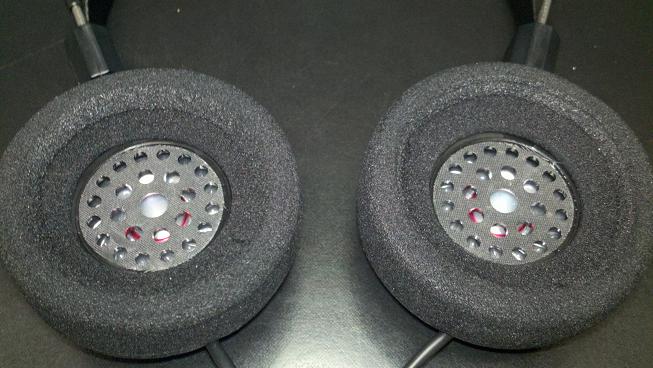
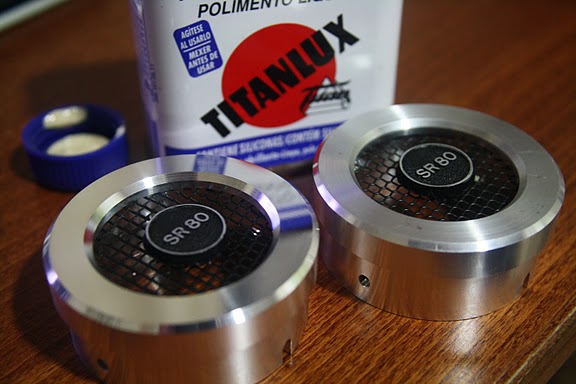
3) Shells opened-Screens and button Logo on each in tack and still in position
4) 10 Holes punched
5) Dynamat apllied to back of each driver
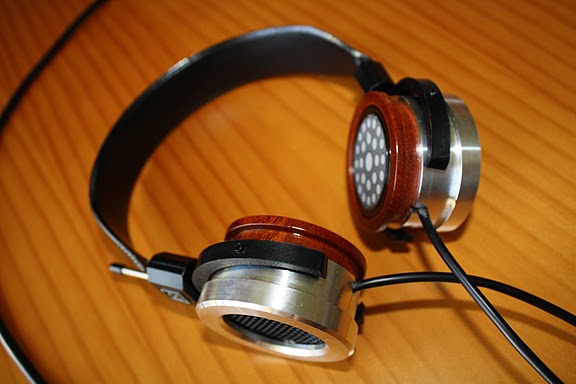
6) Caps removed in tact and lettering and caps themselves along with the screens are all useable.
7) Gimbals all original and clean
8) Headband original and loose on one side ( I think)
9) They sound good the way they are-smooth, neutral but hey we can't just leave them alone!! ***** (I honestly think of all the mods the most effective and beneficial in the long run is the Dynamat applied to the back of each driver--smooths everything out)
10) Stock cable and stock 1/4" plug as shipped
 
So folks lets have at them if you want, Bill told me he is sending some more Wooden Sheels and I'm not sure wht type but I think they are Cocobolo. I have a headband ordered from Big Bill's person for my UBER Grado's but that could be redirected to this project. So brain storm, buil some shells, or whatever you like and lets make these crazy wild, or crazy cool but they must sound crazy good above all. If we do a mod and the sound goes south we nix it if the sound stays the same thats OK...
 Here is a list of what I don't have to use during this project. I have no soldering iron, dremel tool or really anything extensive except my hands a hair dryer if needed and spunk,spirit, creative obsessive drive to build a pair of cans that get the folks here to take notice of either the crazy bunch on the SR60 Mod thread or those insanely bunch of modders and WOW you gotta hear them. When they are done we may start to end them around to the folks that contributed or would like to hear them, I'll pay to have them shipped to firt person, he pays to ship to next, and so on down the line. 
 This crazy idea won't work if we don't try, but if you think about it could be very cool to have a group collaboration on some modded Grado's--total cost so far for these was $21 for the freight from Australia to me and the gentleman from audiocircle.com who sent them to me gratis-JohnR will ideally get a chance also to hear them.
  I hope this works or at lest gets some interest, if its a dumb idea just tell me and I'll take this post down.
 Ed
 
Mar 7, 2011 at 1:38 PM Post #2,004 of 5,004
Here is a question for those who have made their own shells. How have you sanded the rings and finished them once cut out. I have had problems all along with my Mahogany, but even worse with the Padauk I cut yesterday that even after repeated sanding of the sides, I can't get the grain to show like it should/how I want it to. The front face (flat portion) is no problem, it comes out looking great. However the sides of the ring are another story.
 
I started out rotating the ring in some 120 grit to smooth down the inherent rings from the hole saw. Then have moved to 400 grit trying to follow the grain (which isn't easy on a ring), then to 600 grit to finish. But I always get some fuzziness in the wood and a lack of nice stand out grain, something that I see Bill's Coco cups or Al's dont seem to be lacking. I have even tried a thin coat of lacquer before sanding to try to seal things, but that really hasn't worked.
 
Any suggestions how to get a great finish like you others are getting would be hugely apprecaited. I am really getting discouraged.
 
Mar 7, 2011 at 2:40 PM Post #2,005 of 5,004


Quote:
Here is a question for those who have made their own shells. How have you sanded the rings and finished them once cut out. I have had problems all along with my Mahogany, but even worse with the Padauk I cut yesterday that even after repeated sanding of the sides, I can't get the grain to show like it should/how I want it to. The front face (flat portion) is no problem, it comes out looking great. However the sides of the ring are another story.
 
I started out rotating the ring in some 120 grit to smooth down the inherent rings from the hole saw. Then have moved to 400 grit trying to follow the grain (which isn't easy on a ring), then to 600 grit to finish. But I always get some fuzziness in the wood and a lack of nice stand out grain, something that I see Bill's Coco cups or Al's dont seem to be lacking. I have even tried a thin coat of lacquer before sanding to try to seal things, but that really hasn't worked.
 
Any suggestions how to get a great finish like you others are getting would be hugely apprecaited. I am really getting discouraged.


Hi Sharkz,
 
imho I would try a hole saw slightly larger from the one you are using to make your outter shells.  Then you will have more material to play with to uncover the grain.  Additionally, your finish you apply to your cups also effects the amount of grain and shine you see.  I use a spray based lacquer and it allows me to get light even coats which I sand inbetween to get just the effect I'm looking for.
 
Hope this helps...
 
Al


Mar 7, 2011 at 2:59 PM Post #2,006 of 5,004
Al, I am using a 2.5" outer. That gives me plenty to sand off. My problem is the more I sand, the worse looking things get. I start with some defined grain after cutting, but even starting with a rough grit (~120 or so) and working down to 600 (cleaning with denatured alcohol in between) things look fuzzier and my grain is less well defined. I need to have some good looking grain before I lacquer, otherwise I will just be coating bad looking wood with more and more coats of laquer.
 
Mar 7, 2011 at 3:34 PM Post #2,009 of 5,004
More connections are the last thing most people want. They provide more areas for failure and I really don't see the need for them. Plus there are areas of increased resistance (for each joint soldered and differing connectors). I can make one nice cable and stick with it, I don't need to change it all the time.
 

Users who are viewing this thread

Back
Top