

TopPop
Headphoneus Supremus
Okay, I just finished doing the permanent mods on my RX900s (well, to be honest, I just finished enjoying listening to a bunch of music after finishing the mods!), and I'd like to put together a little bit of a picture guide for anyone who's interested in doing the same.
Materials:
-1/2 sheet of Dynamat
-Small amount of acoustic stuffing (like the kind found at craft stores, used to stuff dolls)
Tools:
-Knife/scissors
-Small Phillips screwdriver
Okay, here we go...
Step 1: Remove earpads
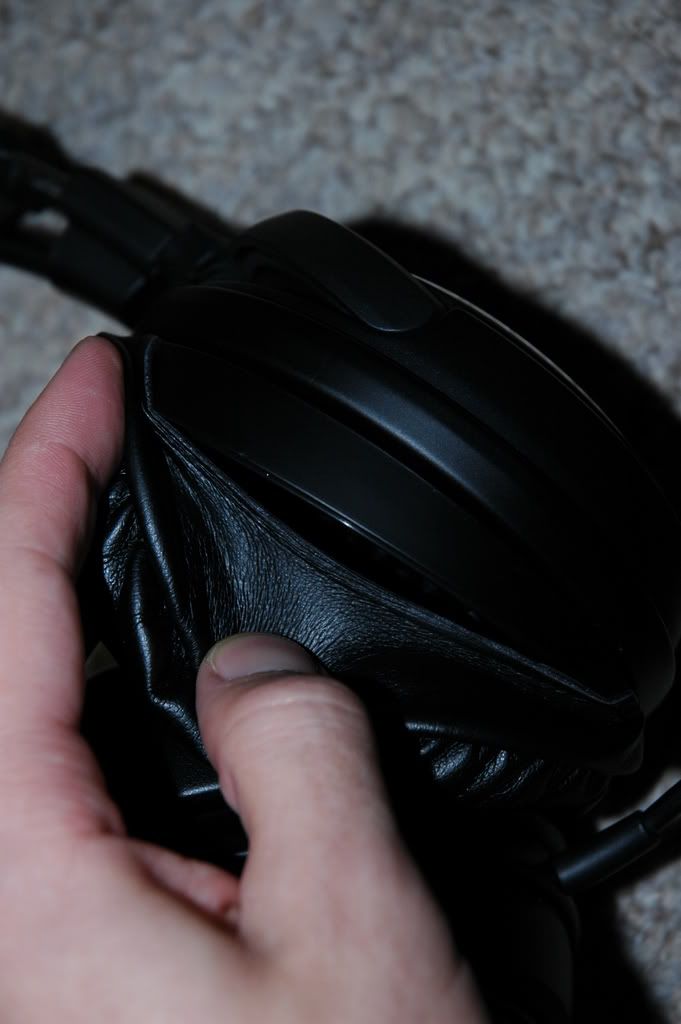
This may seem a bit tricky to anyone who's already tried it, but if you're careful, you can get them off just fine. First, tug slightly at the material (I would recommend starting at the smaller end of the taper [i.e. the opposite of what I've demonstrated in the picture], at the front of the phones), until you can see the edge of the fabric, like so:

Next, continue gently tugging at the material, until you have managed to get the whole pad off:
Step 2: Remove felt driver cover
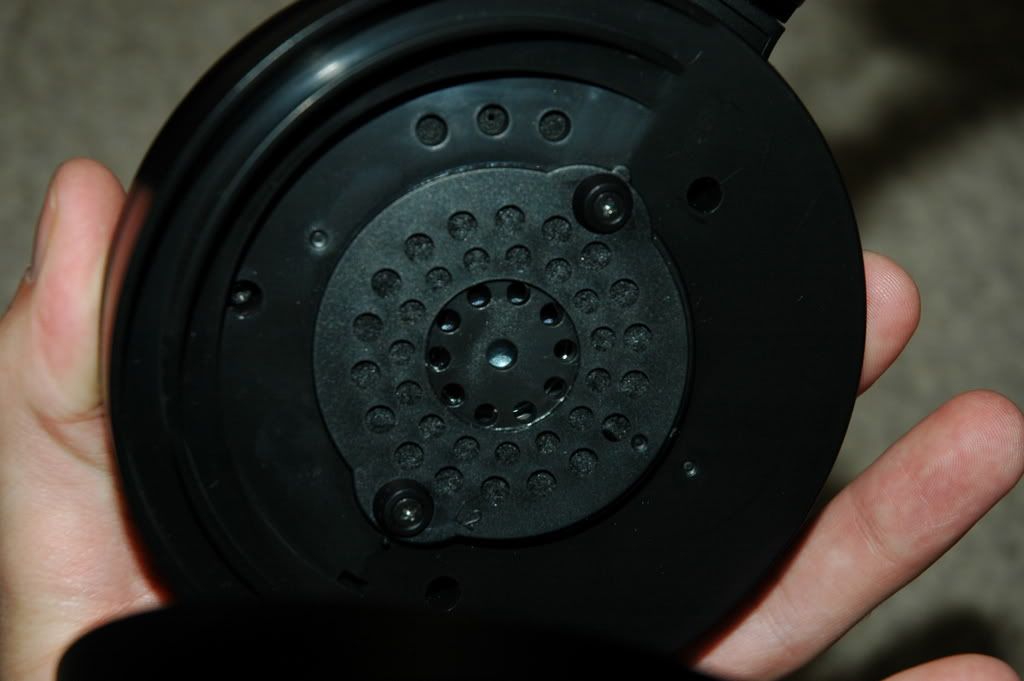
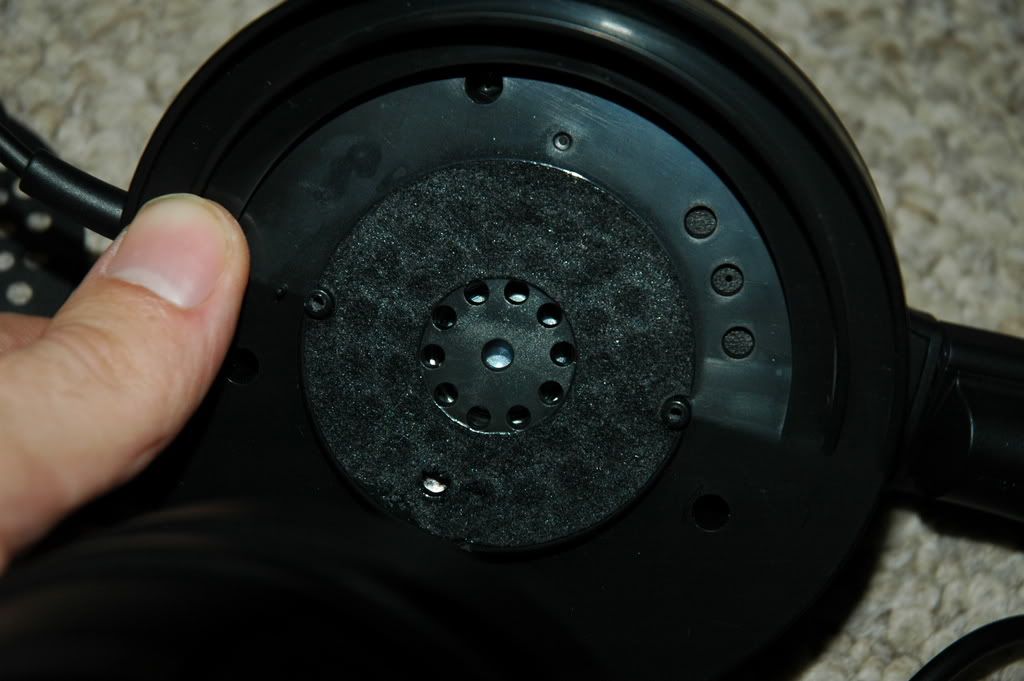
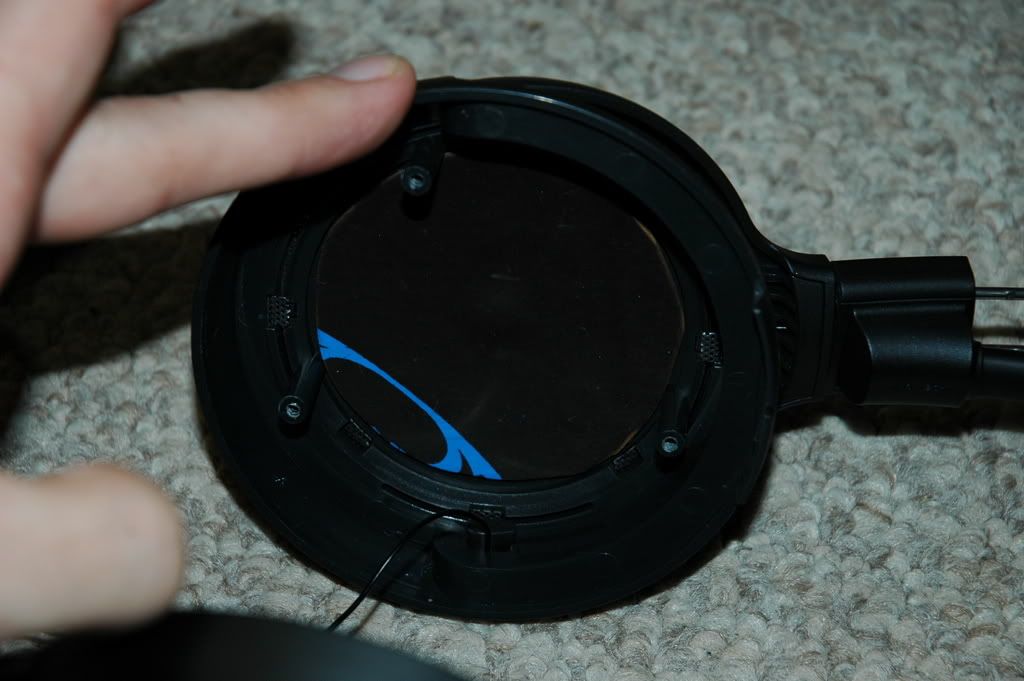
When you get the pads off, the first thing you'll notice is the "acoustic lens", which is basically a piece of plastic with holes which covers the driver:
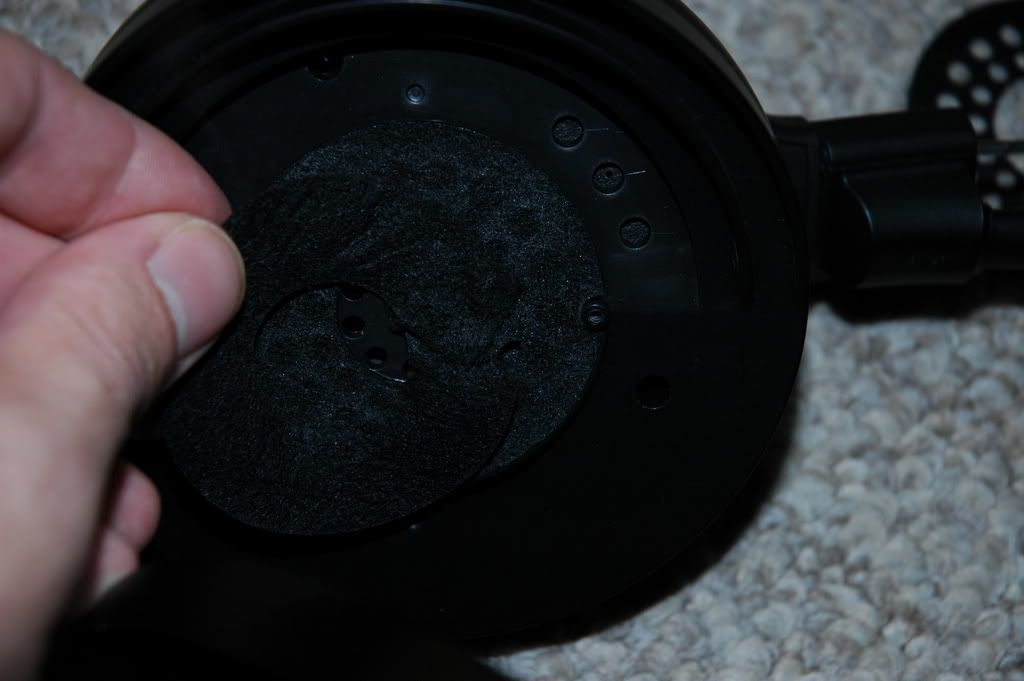
There are two screws on the top and bottom of the acoustic lens. Use a small Phillips screwdriver to remove these. When the acoustic lens has been removed, you can see the black felt cover that covers the driver holes, causing the recess in the midrange and treble that people have noticed with these headphones. Here begins the tricky part: with your fingernail, gently scratch at the edge of the felt until it starts to come off. Do not try to scratch the entire felt off, only the bulk of it (it will separate from the bottom layer fairly easily):
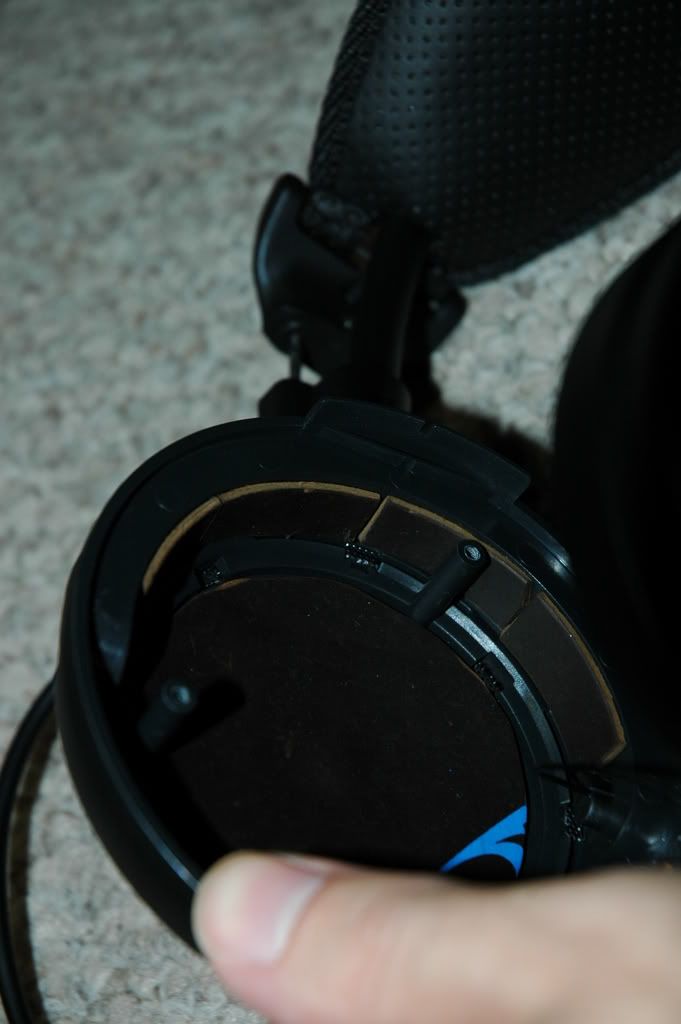
Toss the felt ring that comes off:
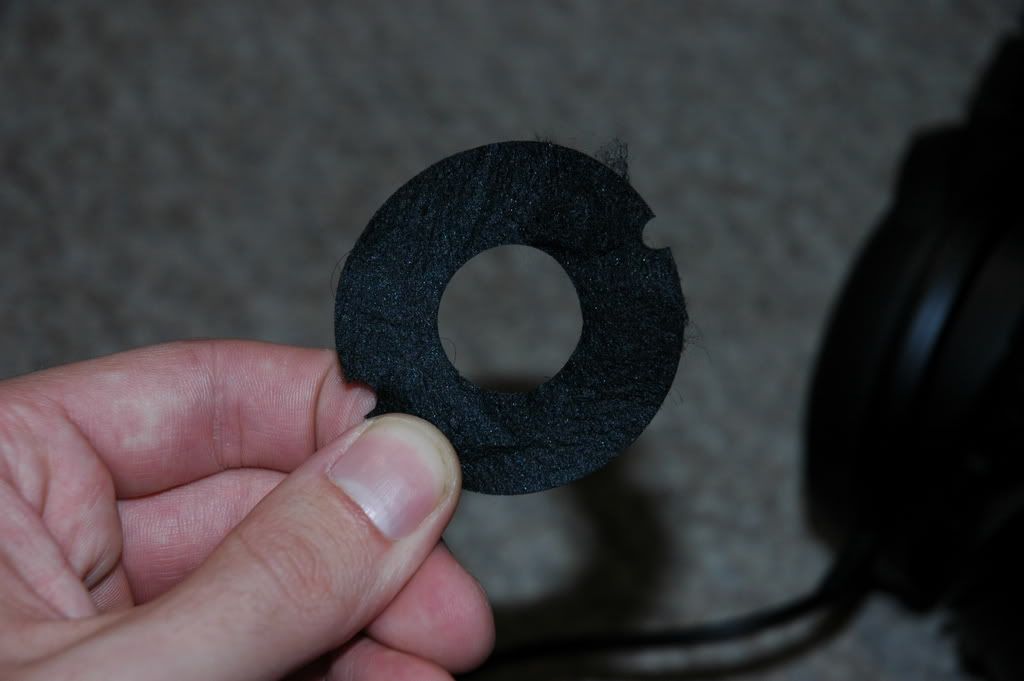
You will be left with a thin layer of felt which is glued onto the driver housing. In theory, you could try to cut out the rest of the felt, to get that extra nth level of detail (you can see that I already tried to do this with one hole before rethinking that move), but I would recommend leaving it on to help protect the driver from hair and dust:
Screw the acoustic lens back on.
Step 3: Dynamat the cup
There are three screws that hold together the two halves of the cup, and they can only be reached with a small Phillips screwdriver. Once the halves are separated, be very careful when you pull them apart! The signal wire is extremely thin, and will break easily:
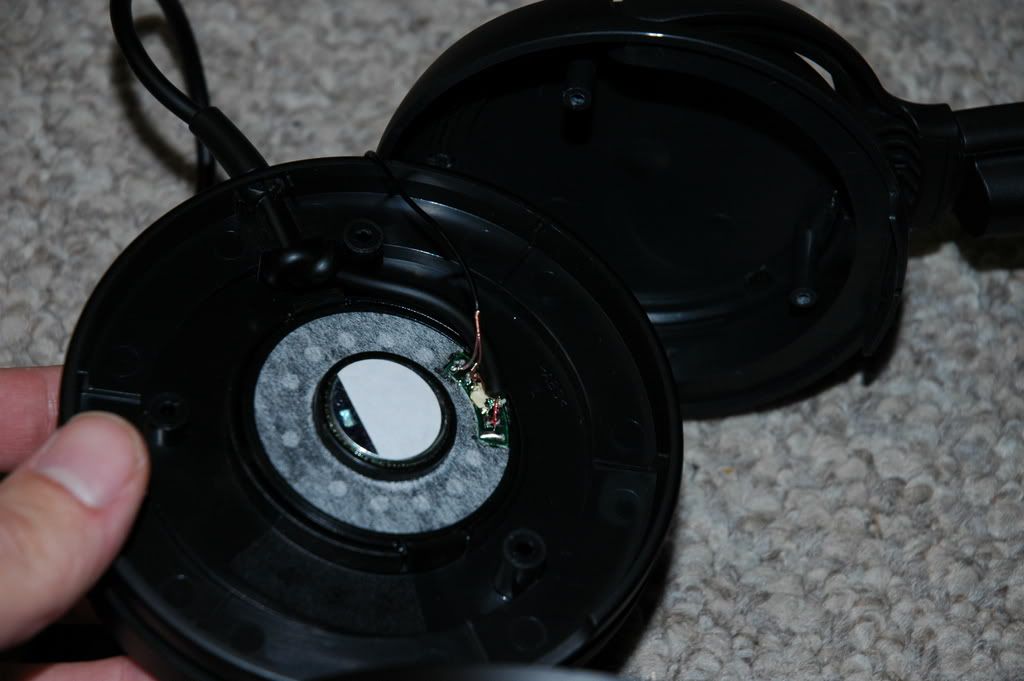
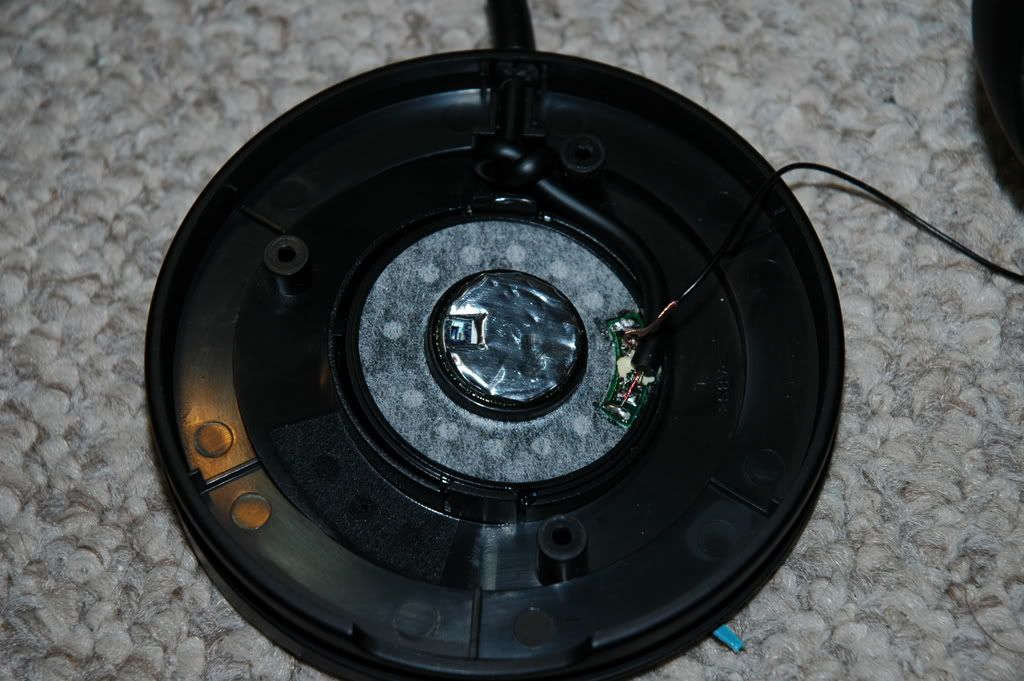
You can see from the next picture that one of the main issues that I've tried to address with these mods is the problem with resonance of the large cup made of thin plastic:
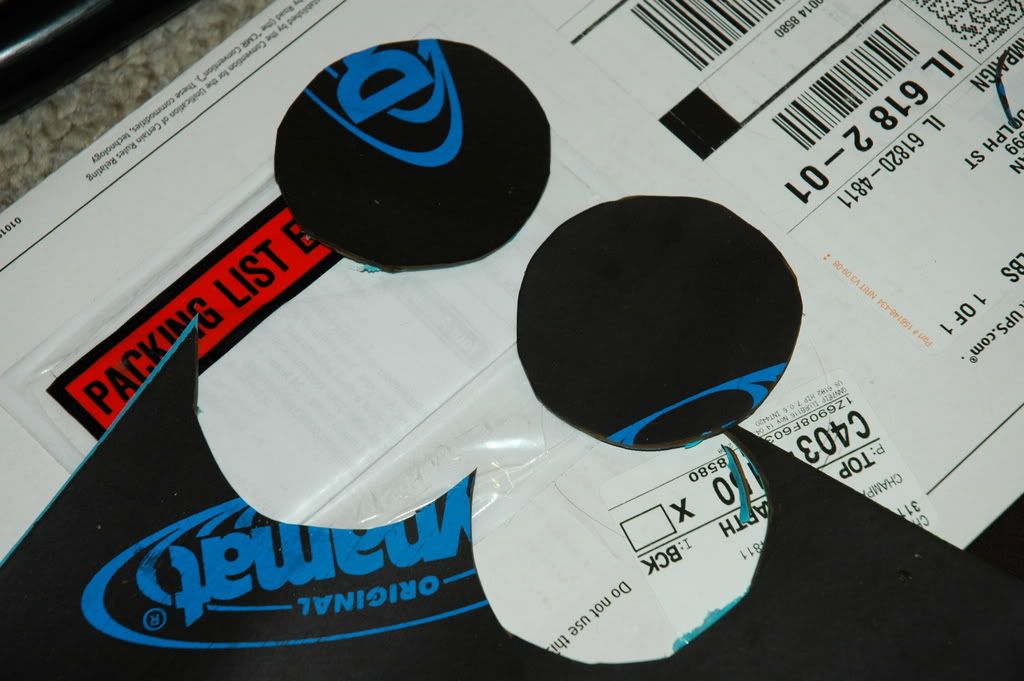
This is where you will first use the Dynamat. Cut out two circles with a 2 1/2" diameter (one for each cup):
Pull off the backing of the Dynamat to reveal the sticky face, and place this circle in the inside of the cup, pressing firmly all around to make sure all of the air is out (this is especially important with Dynamat Extreme):
Step 4 (optional): Dynamat the ring of the cup
Given that the Dynamat will add weight to the headphones, this next step could be optional, or partially completed. Cut out small strips of Dynamat that are 1/2" wide, and place them around the side of the cup:
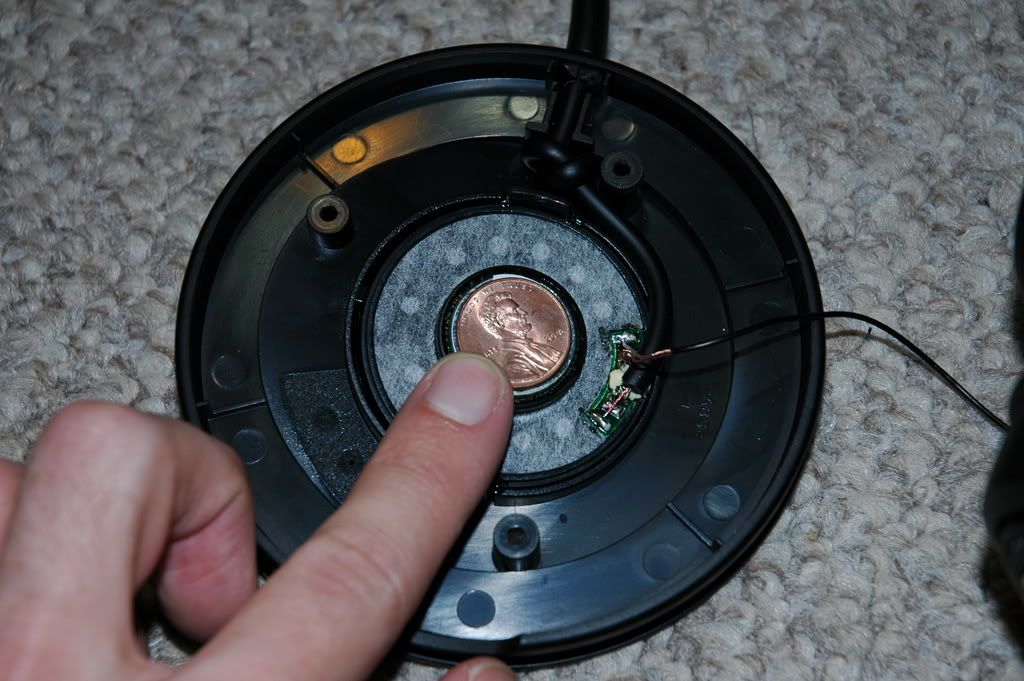
Step 5: Dynamat the back of the driver magnet
I had some extra pieces of Dynamat Extreme lying around, so I decided to use it for this next step. The size of the back of the driver magnet is a little larger than a penny:
Cut out a small circle of Dynamat of this size, making sure to cut a small notch on one side, which will allow for the hole in the back of the magnet to remain uncovered:
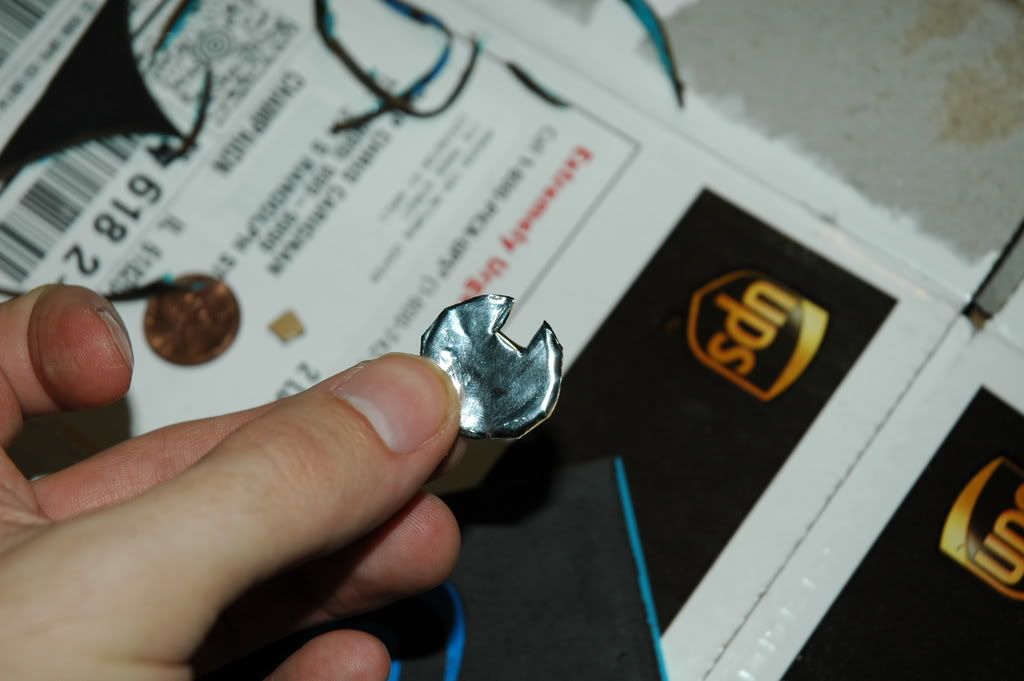
Place it on the back of the magnet, pressing firmly over the entire surface:
Step 6 (optional): Dynamat the back of the driver-side cup
Again, due to weight, this step can be omitted or partially completed. The basic idea is to damp more of the resonant thin plastic, in order to further clear up the midrange. Cut small strips of Dynamat, and place them where you wish:
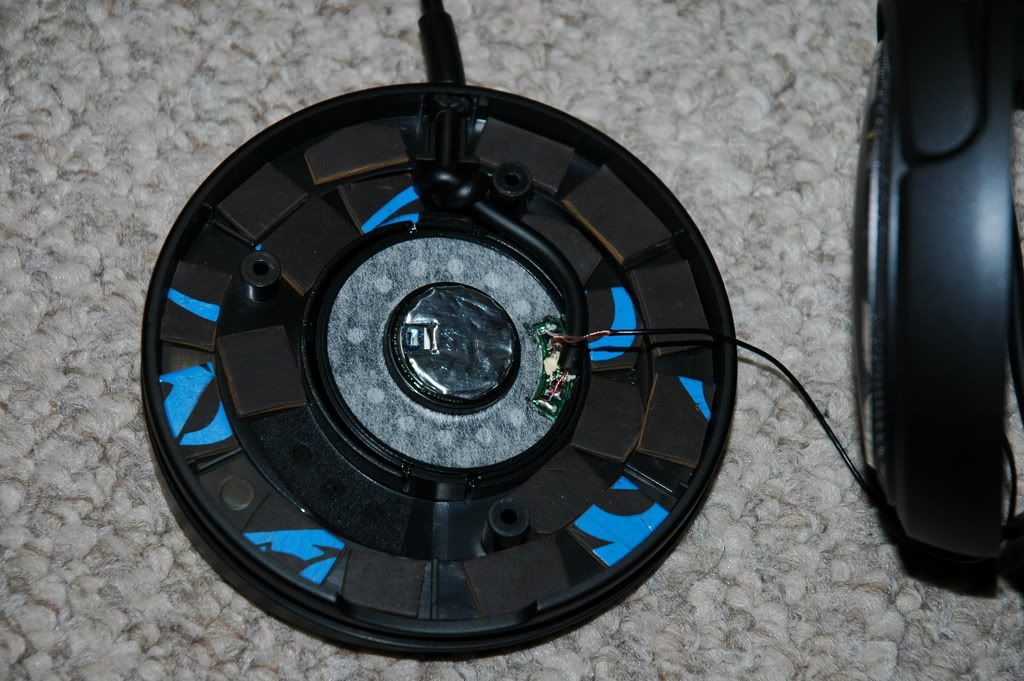
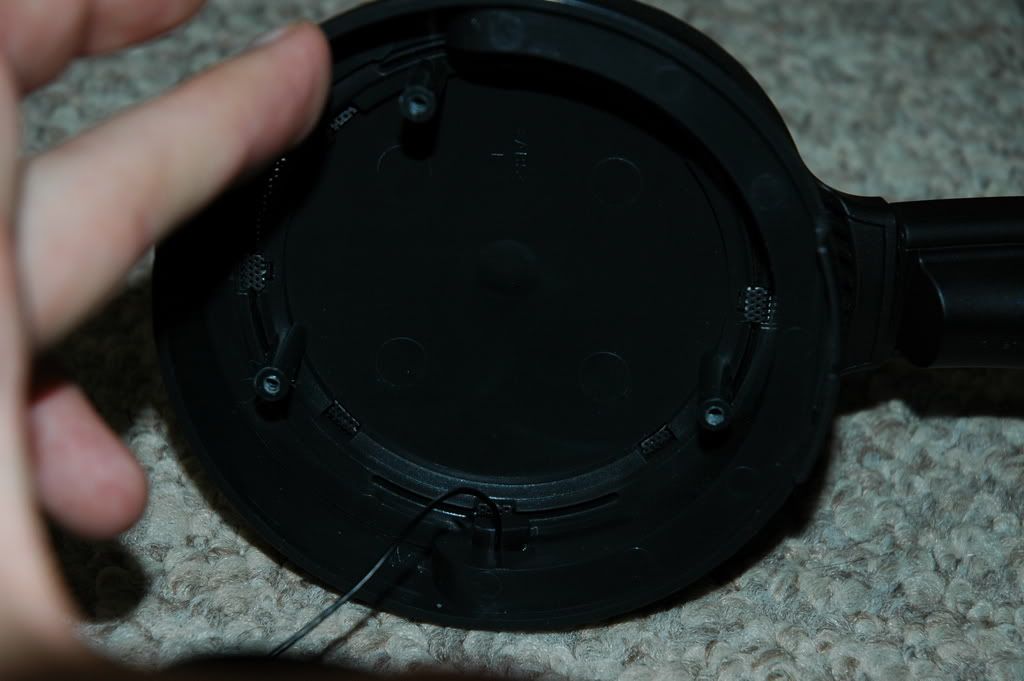
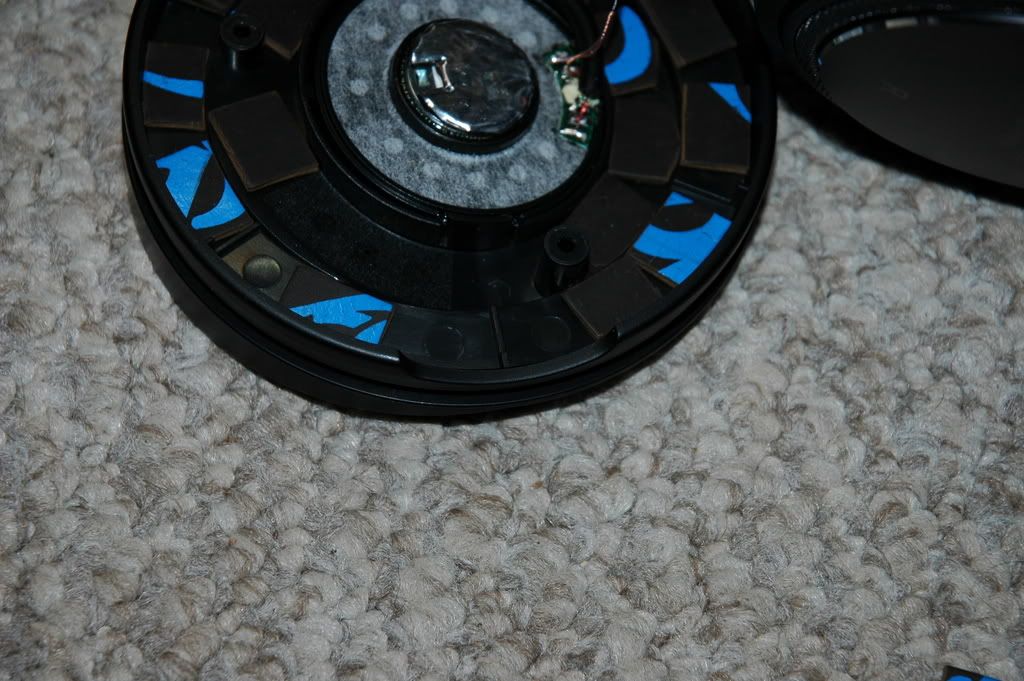
Make sure to leave two areas uncovered, however. The first section is the part with the three holes that are covered with felt. These allow for air flow, and free movement of the driver, and I'm fairly certain that covering them would have detrimental effects to the sound. The second section is the part of the outer ring of the cup that lines up with the notch at the top. If this is covered, the two halves will not fit correctly when you try to put the cup back together (I learned this the hard way, as you can see by comparing the last pic with this next one):
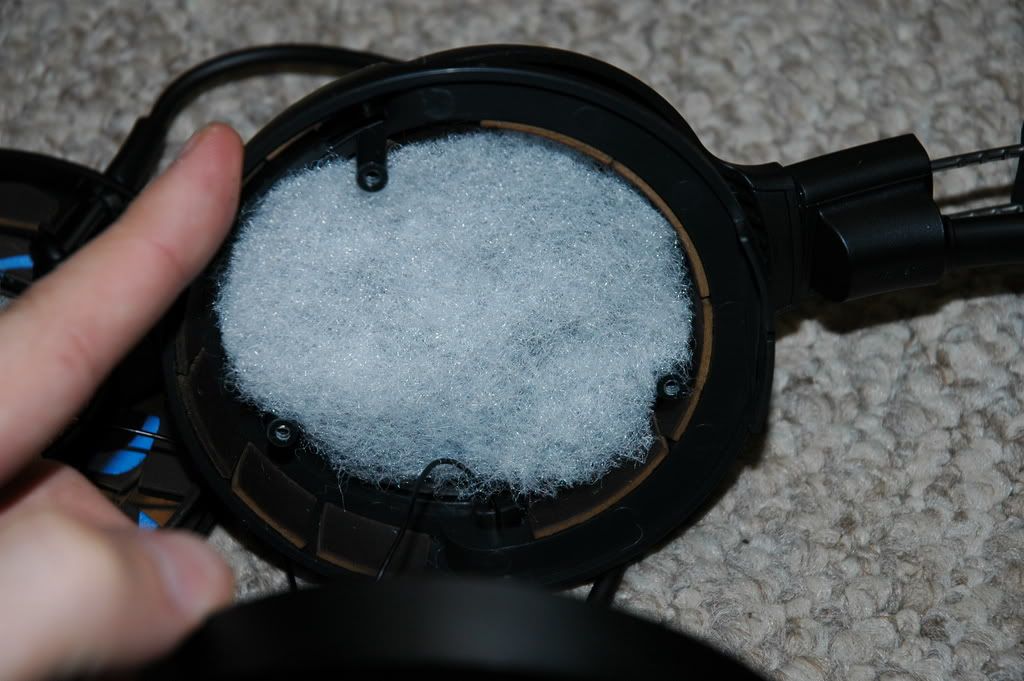
Step 7: Acoustic stuffing
Add a thin layer of acoustic stuffing into the cup before you put the two halves back together. As markl noted in his D5000 mod post (where I originally got the idea for these mods... thanks, markl!), it is important to only put a thin layer of stuffing in the cup, since putting too much in will kill the bass response. You can tune this to your personal preference:
Step 8: Put the headphones back together
All you have left to do at this point is put the two halves of the cup back together, being careful not to tug on the thin wire. As far as putting the pads back on is concerned, I would recommend doing this very carefully, as it will be easier to rip the pads while putting them on than while taking them off. Once all of the material is back in the groove, twist the pad back and forth a few times to let the material slip into place.
That's it! Now kick back and enjoy the new sound, and be amazed at what $60 phones, a few bucks in material, and about a 30-40 minutes of your time can sound like!
As far as the sound goes, I'm fully convinced that no headphone can be found that can compete with these modded RX900s anywhere near their price. To be honest, in many ways, I prefer them over both my Alessandro MS-1s and my Beyerdynamic DT-880s... which obviously says a lot. They give a naturalness to acoustic guitar and acoustic bass that the other two simply can't touch. Also, the bass impact, even at very low volume, is fantastic. I've never heard bass punch come through at low level listening like this before. If you've tried these headphones, and were disappointed with their overwhelming, uncontrolled bass and recessed midrange, I'm sure that you will be pleasantly surprised at how drastically these simple modifications can change the stock sound!

Note on Dynamat: not knowing the difference between Dynamat Original and Dynamat Extreme, I ordered the Original for this project in order to save money. I find now that the advantage of the Original is that it has a rubber face, which will do a better job at absorbing sound, and not reflecting it back to the driver/ear (Extreme has a foil face). The disadvantage, however, is that it seems to be heavier than the Extreme.
Note on weight: the first thing you will notice when you put your modified RX900s on is the added weight. This is why I've left some of the steps as optional. I believe that performing them in the way that I have will help the overall sound, but I'm not convinced that it's the best thing to do. They are fairly heavy, and may make your neck sore after extended use. My plan is to give them a few days, and if I find that they are, indeed, too heavy, I will open them back up and remove every other strip from Steps 4 and 6.
Materials:
-1/2 sheet of Dynamat
-Small amount of acoustic stuffing (like the kind found at craft stores, used to stuff dolls)
Tools:
-Knife/scissors
-Small Phillips screwdriver
Okay, here we go...
Step 1: Remove earpads
This may seem a bit tricky to anyone who's already tried it, but if you're careful, you can get them off just fine. First, tug slightly at the material (I would recommend starting at the smaller end of the taper [i.e. the opposite of what I've demonstrated in the picture], at the front of the phones), until you can see the edge of the fabric, like so:
Next, continue gently tugging at the material, until you have managed to get the whole pad off:
Step 2: Remove felt driver cover
When you get the pads off, the first thing you'll notice is the "acoustic lens", which is basically a piece of plastic with holes which covers the driver:
There are two screws on the top and bottom of the acoustic lens. Use a small Phillips screwdriver to remove these. When the acoustic lens has been removed, you can see the black felt cover that covers the driver holes, causing the recess in the midrange and treble that people have noticed with these headphones. Here begins the tricky part: with your fingernail, gently scratch at the edge of the felt until it starts to come off. Do not try to scratch the entire felt off, only the bulk of it (it will separate from the bottom layer fairly easily):
Toss the felt ring that comes off:
You will be left with a thin layer of felt which is glued onto the driver housing. In theory, you could try to cut out the rest of the felt, to get that extra nth level of detail (you can see that I already tried to do this with one hole before rethinking that move), but I would recommend leaving it on to help protect the driver from hair and dust:
Screw the acoustic lens back on.
Step 3: Dynamat the cup
There are three screws that hold together the two halves of the cup, and they can only be reached with a small Phillips screwdriver. Once the halves are separated, be very careful when you pull them apart! The signal wire is extremely thin, and will break easily:
You can see from the next picture that one of the main issues that I've tried to address with these mods is the problem with resonance of the large cup made of thin plastic:
This is where you will first use the Dynamat. Cut out two circles with a 2 1/2" diameter (one for each cup):
Pull off the backing of the Dynamat to reveal the sticky face, and place this circle in the inside of the cup, pressing firmly all around to make sure all of the air is out (this is especially important with Dynamat Extreme):
Step 4 (optional): Dynamat the ring of the cup
Given that the Dynamat will add weight to the headphones, this next step could be optional, or partially completed. Cut out small strips of Dynamat that are 1/2" wide, and place them around the side of the cup:
Step 5: Dynamat the back of the driver magnet
I had some extra pieces of Dynamat Extreme lying around, so I decided to use it for this next step. The size of the back of the driver magnet is a little larger than a penny:
Cut out a small circle of Dynamat of this size, making sure to cut a small notch on one side, which will allow for the hole in the back of the magnet to remain uncovered:
Place it on the back of the magnet, pressing firmly over the entire surface:
Step 6 (optional): Dynamat the back of the driver-side cup
Again, due to weight, this step can be omitted or partially completed. The basic idea is to damp more of the resonant thin plastic, in order to further clear up the midrange. Cut small strips of Dynamat, and place them where you wish:
Make sure to leave two areas uncovered, however. The first section is the part with the three holes that are covered with felt. These allow for air flow, and free movement of the driver, and I'm fairly certain that covering them would have detrimental effects to the sound. The second section is the part of the outer ring of the cup that lines up with the notch at the top. If this is covered, the two halves will not fit correctly when you try to put the cup back together (I learned this the hard way, as you can see by comparing the last pic with this next one):
Step 7: Acoustic stuffing
Add a thin layer of acoustic stuffing into the cup before you put the two halves back together. As markl noted in his D5000 mod post (where I originally got the idea for these mods... thanks, markl!), it is important to only put a thin layer of stuffing in the cup, since putting too much in will kill the bass response. You can tune this to your personal preference:
Step 8: Put the headphones back together
All you have left to do at this point is put the two halves of the cup back together, being careful not to tug on the thin wire. As far as putting the pads back on is concerned, I would recommend doing this very carefully, as it will be easier to rip the pads while putting them on than while taking them off. Once all of the material is back in the groove, twist the pad back and forth a few times to let the material slip into place.
That's it! Now kick back and enjoy the new sound, and be amazed at what $60 phones, a few bucks in material, and about a 30-40 minutes of your time can sound like!
As far as the sound goes, I'm fully convinced that no headphone can be found that can compete with these modded RX900s anywhere near their price. To be honest, in many ways, I prefer them over both my Alessandro MS-1s and my Beyerdynamic DT-880s... which obviously says a lot. They give a naturalness to acoustic guitar and acoustic bass that the other two simply can't touch. Also, the bass impact, even at very low volume, is fantastic. I've never heard bass punch come through at low level listening like this before. If you've tried these headphones, and were disappointed with their overwhelming, uncontrolled bass and recessed midrange, I'm sure that you will be pleasantly surprised at how drastically these simple modifications can change the stock sound!
Note on Dynamat: not knowing the difference between Dynamat Original and Dynamat Extreme, I ordered the Original for this project in order to save money. I find now that the advantage of the Original is that it has a rubber face, which will do a better job at absorbing sound, and not reflecting it back to the driver/ear (Extreme has a foil face). The disadvantage, however, is that it seems to be heavier than the Extreme.
Note on weight: the first thing you will notice when you put your modified RX900s on is the added weight. This is why I've left some of the steps as optional. I believe that performing them in the way that I have will help the overall sound, but I'm not convinced that it's the best thing to do. They are fairly heavy, and may make your neck sore after extended use. My plan is to give them a few days, and if I find that they are, indeed, too heavy, I will open them back up and remove every other strip from Steps 4 and 6.


