![IMG_20230528_190205916_HDR[1].jpg](https://cdn.head-fi.org/a/12078064.jpg)


Introduction/Preface:
Hello again, for those that don't know me I am the creator of the HEKV1 mods:
** "Rear strips" mod
** "Acoustic Coupler" mod
** "Rear damping" mod
They have been out about a year but only on *(redacted).
I had planned to post these here quite a while ago so apologies for delay.
They will be here soon for those with original HEK.
I have so many mods I will be posting on other headphones too,
*Pic*
but the HEKV2 is the most requested, so Now onto the only HEKV2 Mod...
Update:
For newer HEKSE & future versions, please refer to member "TheAttorney" version of the porting mod, in this link..
**Disclaimer**:
I take no responsibility for those willing to take on this part of the MOD.
It needs a steady hand and technical/mechanical experience.
I will try my best to show you how to proceed, BUT
You need to be good at handling delicate small objects (like a jeweler),
So proceed at your own risk..
I will be using a methodology of giving all my mods names for easier recognition.
So I will now give this HEKV2 mod the name:
Feilian port Mod...
Feilian means "Wind", which is basically what we are dealing with (air pressure), with this mod.
We will relieve, and funnel the air pressure damping... a pressure created by the pad-to-head coupling, which impedes the thin/sensitive driver membrane.
As you know, the HEK &HEKV2 driver membrane have only single sided magnets and using driver tensioning for control,
(instead of dual sided magnets for control)..
These conditions make thinner membrane planars more susceptible to air pressure than others.
You can observe this when lifting the cup away from ear, how the drivers move more in "free air".
This actually also occurs on other new planars like Susvara and Abyss Phi, (which I had on hand at times for this mod.)
For the HEKV2, this "Feilian mod" will result in relieveing this air coupling pressure,
Which will then result in the membrane being less affected by the enclosed air pressure inside the cup.
This internal air space inside the pad-to-head coupling results in a form of frontal damping that all the new thin membrane headphones have (HEK,HeKV2,HEX, Susvara).
Relieving this "air pressure" resuts in a membrane that is more optimally affected by the magnets instead of the internal cup air pressure..
Sonic reults are:
More ambiance,
More 3Dspace,
More natural depth
More natural tonailty,
More and greater nuance and definition across the board, from bass to trebles.
Overall I would say a 20% step up (yet still in not at Susvara/ABYSS Phi level that I did compare results to)...
Feilian Mod:
OK so onto the mod , which will definitely seem simple enough, but is actually a delicate procedure, which has specifically chosen materials and two specific shapes.
It is imperitive for success of this mod to follow the details as there are specific reasons to not deviate, as the space we are making is only about 2-3mm thick..
STEP ONE:
First buy this:
NEOPRENE WASHERS...
*PIC*

Yes, it looks like a simple small piece.
This neoprene type material was chosen specifically for its flexibility/density/durometer,
and center hole (for centering/positioning onto the chosen location. )..
So any alternate chosen compatible materials must to be of similar "soft" durometer density (like sorbothane),
Which do well in vibrations and pressures applied when installed.
The washers chosen are most durable and easier to work with.
It will gently flex the black plastic piece It goes under a few millimeters.
Step Two:
Cut the two pieces as illutrated in picture for optimal air flow.
*pic*

One (top) piece more longer, two pieces stacked
*Pic*

Cut exactly as seen, Four pieces total.
Reasoning is not only for creating the port,
But also for a wave/pressure guide, as it will act as so.
An analogy is like what a rudder in a boat does as it guides the water(and thus the boat).
All areas of the diaphragm will benefit from the release of this pressure.
Another analogy is like the tensioned inner surface of a blown balloon, (pressure created during driver excursion) when you open hole to let pressure out.
Not the best analogy, but you get the point that it is this internal pressure on the membrane,
Which is creating a type of damping that is holding your planar driver down from moving it best..
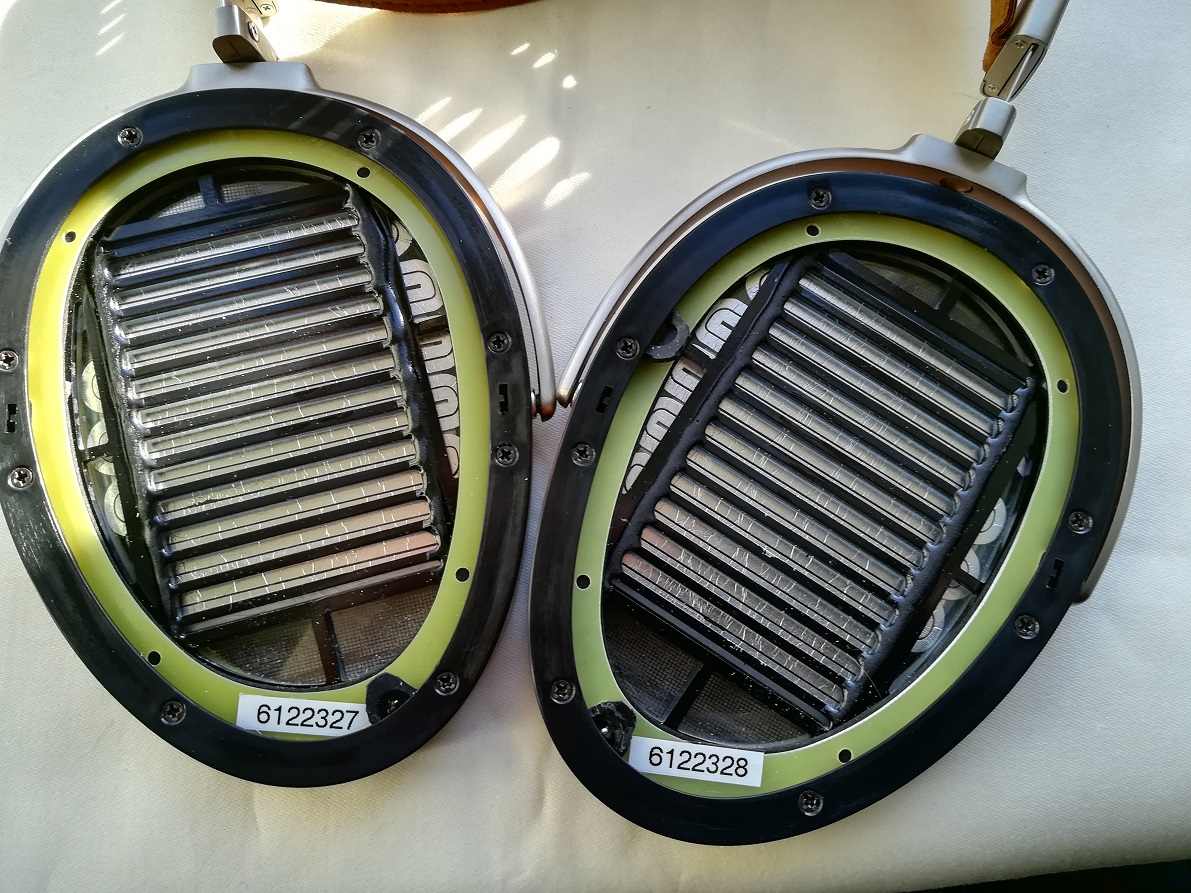
Step Three:
Ready for placement.
Remove half the bottom screws, CAREFULLY,
By holding the whole driver unit aways above the screwdriver,
So both screw and screwdriver cannot FALL INTO THE CENTER...
Remember, the diaphragm covers the whole area, and is thin and invisible on top and bottom,
Which also may look oily/dirty, but as explained in my HEK "Acoustic Coupler" mod thread,
DO NOT TOUCH the membrane..!
Step Four:
Once you loosen the black plastic ring,
Now you can slip both rubber pieces right over the socket solder connection... AS PICTURED.

*Pic*

Notice now why the center hole of this "washer" is intended to rest on the soldering point of the headphone jack,
And holes help with positioning.
Both pieces rest exactly in this position.
Step Five:
Start screwing back the screws...
Make sure the black plastic riing tabs are going in all the way before screwing down, by pressing down on them to make sure they go in freely.
The two closest screws on either side of the socket will not be screwed down all the way,
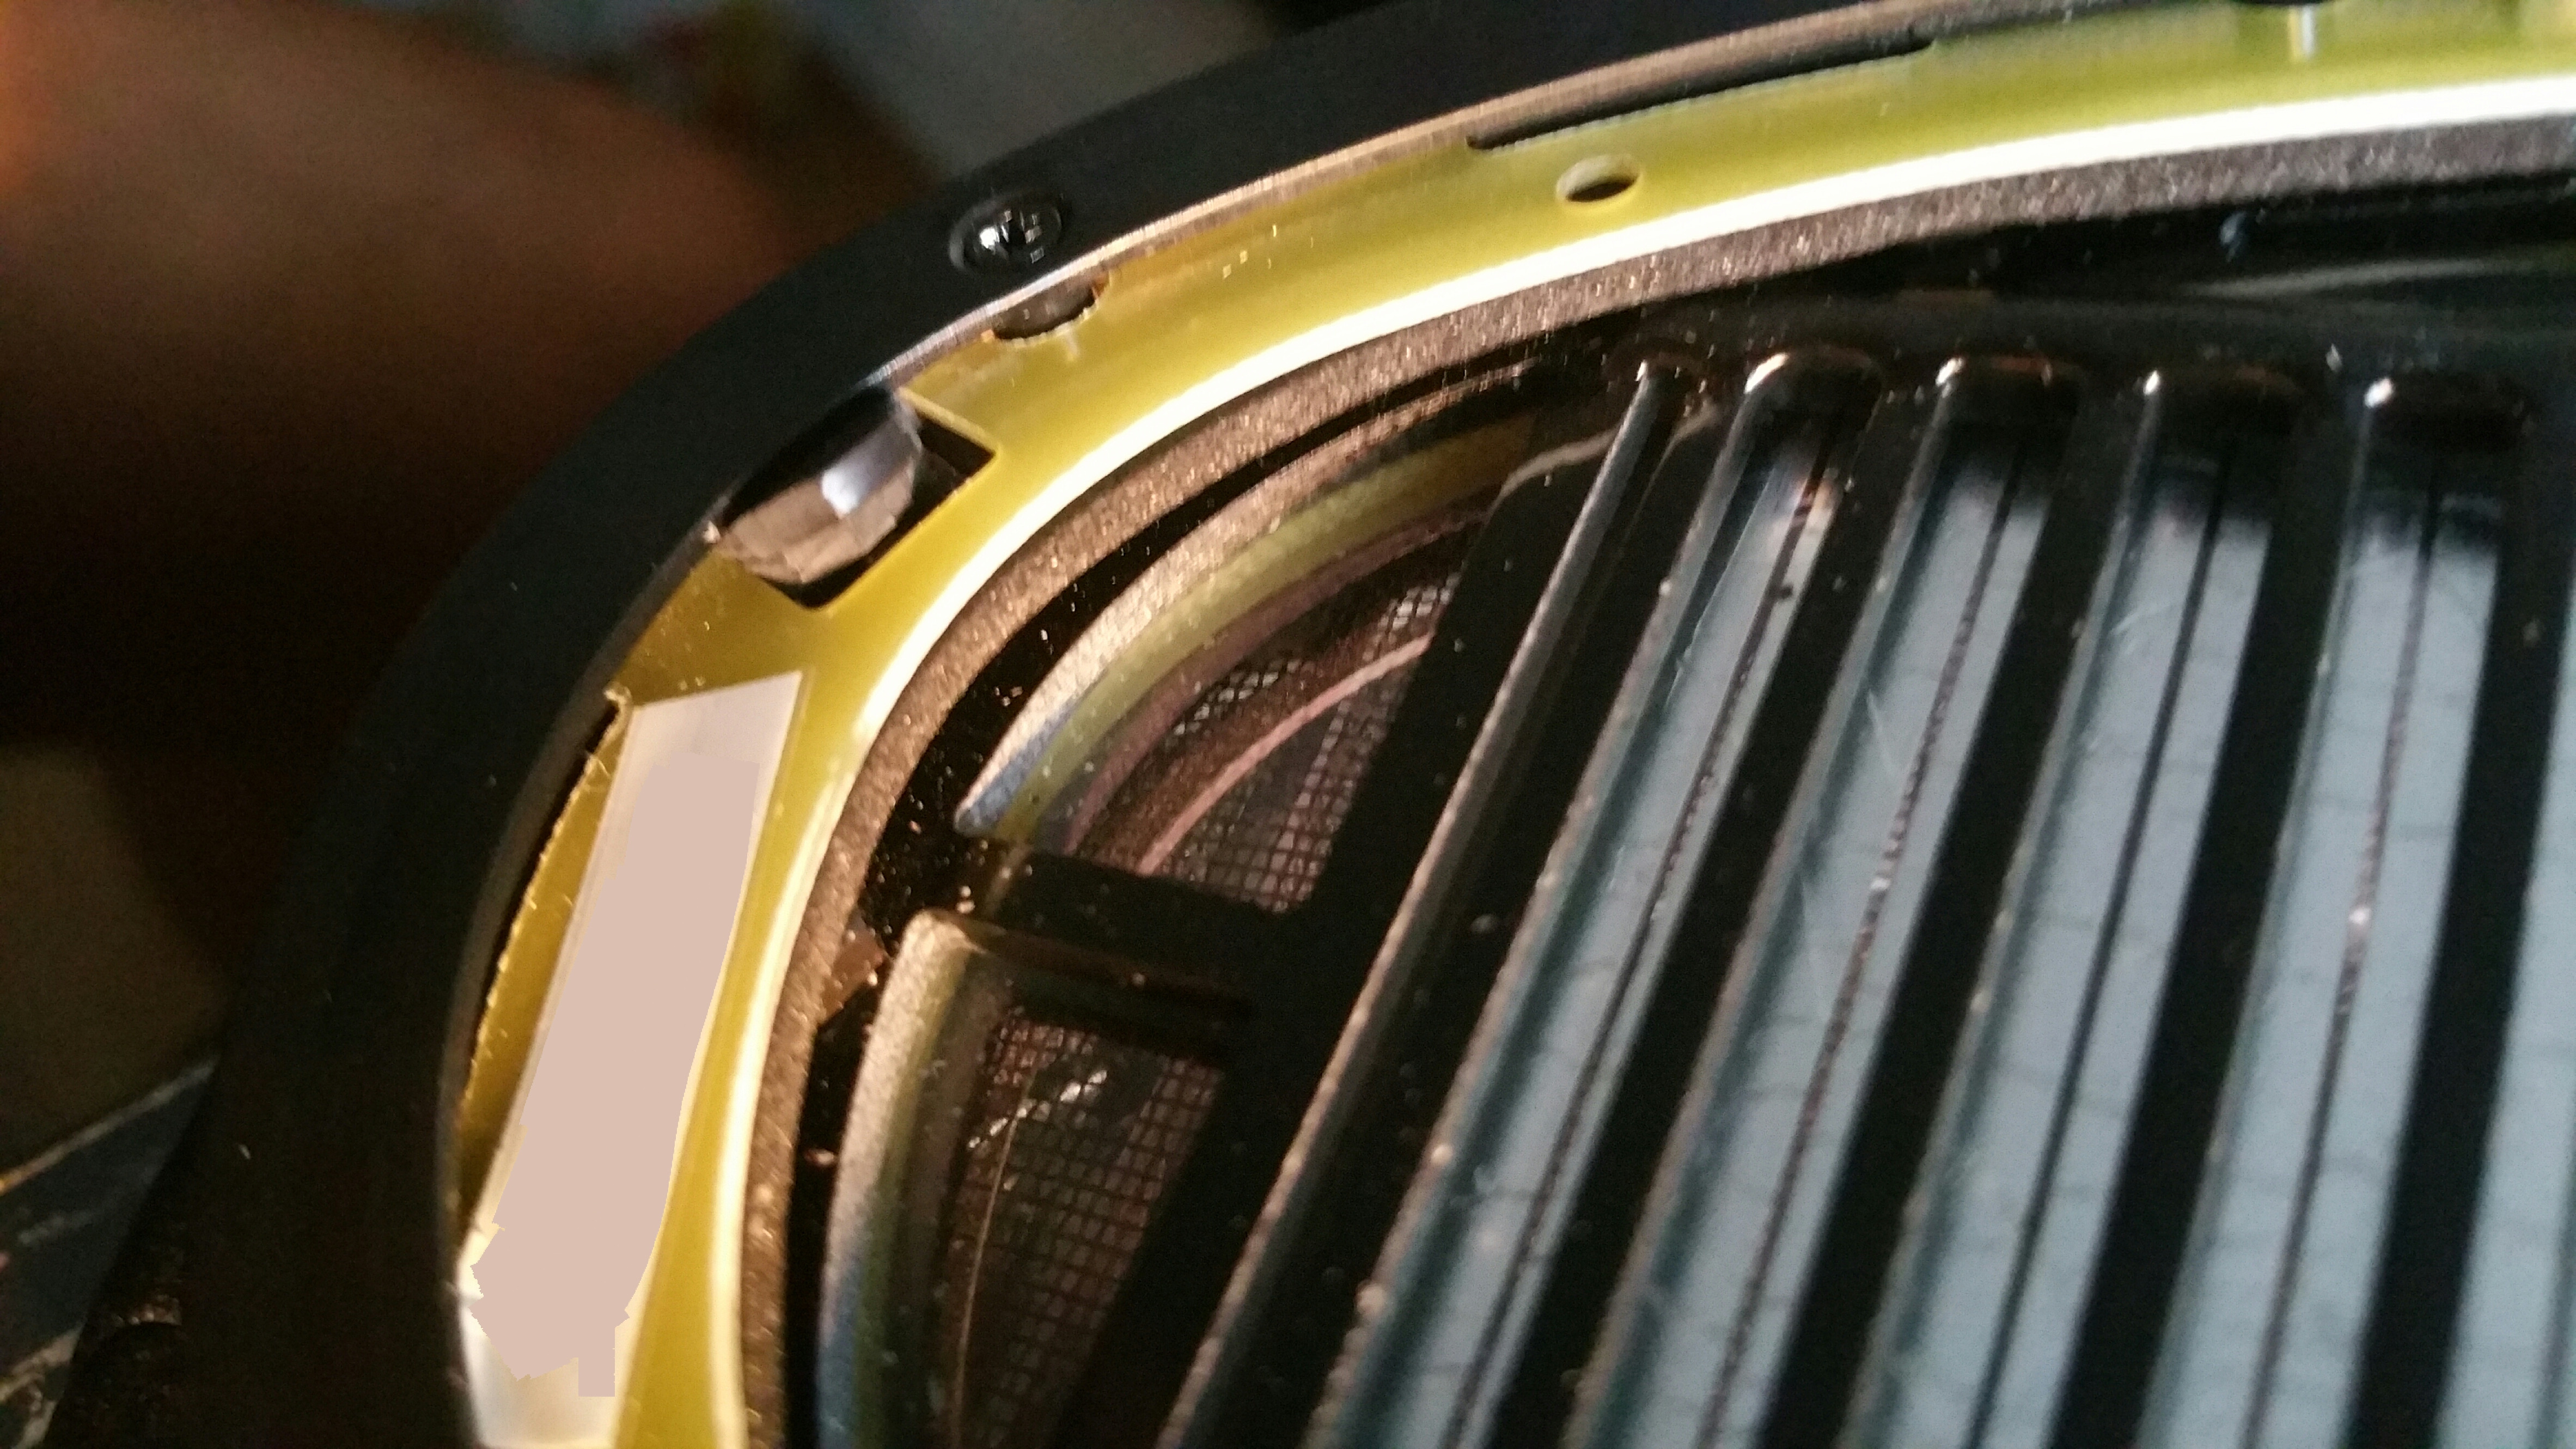
as the material will be creating a lift for the gap/port there..
The black plastic will be lifted there by about 2-3mm
You will need a flashlight next to check.
*pic*

This will not even be visible or detectable once pads are on ,
Shown in next pic..
Step Six:
So remember to Shine light inside as pictured above,
to see the gap and visibly guage to compare and make both sides similar.
Place the earpad on to protect driver, and then do the other side.
*Pic*

See how invisible (but effective) it is!
Patience is a virtue so no rushing as this is delicate work which is worth the effort involved.
Step Seven:
Enjoy your new sounding HEKV2 Feilian Port Mod.
Enjoy!
Hello again, for those that don't know me I am the creator of the HEKV1 mods:
** "Rear strips" mod
** "Acoustic Coupler" mod
** "Rear damping" mod
They have been out about a year but only on *(redacted).
I had planned to post these here quite a while ago so apologies for delay.
They will be here soon for those with original HEK.
I have so many mods I will be posting on other headphones too,
*Pic*
but the HEKV2 is the most requested, so Now onto the only HEKV2 Mod...
Update:
For newer HEKSE & future versions, please refer to member "TheAttorney" version of the porting mod, in this link..
**Disclaimer**:
I take no responsibility for those willing to take on this part of the MOD.
It needs a steady hand and technical/mechanical experience.
I will try my best to show you how to proceed, BUT
You need to be good at handling delicate small objects (like a jeweler),
So proceed at your own risk..
I will be using a methodology of giving all my mods names for easier recognition.
So I will now give this HEKV2 mod the name:
Feilian port Mod...
Feilian means "Wind", which is basically what we are dealing with (air pressure), with this mod.
We will relieve, and funnel the air pressure damping... a pressure created by the pad-to-head coupling, which impedes the thin/sensitive driver membrane.
As you know, the HEK &HEKV2 driver membrane have only single sided magnets and using driver tensioning for control,
(instead of dual sided magnets for control)..
These conditions make thinner membrane planars more susceptible to air pressure than others.
You can observe this when lifting the cup away from ear, how the drivers move more in "free air".
This actually also occurs on other new planars like Susvara and Abyss Phi, (which I had on hand at times for this mod.)
For the HEKV2, this "Feilian mod" will result in relieveing this air coupling pressure,
Which will then result in the membrane being less affected by the enclosed air pressure inside the cup.
This internal air space inside the pad-to-head coupling results in a form of frontal damping that all the new thin membrane headphones have (HEK,HeKV2,HEX, Susvara).
Relieving this "air pressure" resuts in a membrane that is more optimally affected by the magnets instead of the internal cup air pressure..
Sonic reults are:
More ambiance,
More 3Dspace,
More natural depth
More natural tonailty,
More and greater nuance and definition across the board, from bass to trebles.
Overall I would say a 20% step up (yet still in not at Susvara/ABYSS Phi level that I did compare results to)...
Feilian Mod:
OK so onto the mod , which will definitely seem simple enough, but is actually a delicate procedure, which has specifically chosen materials and two specific shapes.
It is imperitive for success of this mod to follow the details as there are specific reasons to not deviate, as the space we are making is only about 2-3mm thick..
STEP ONE:
First buy this:
NEOPRENE WASHERS...
*PIC*
Yes, it looks like a simple small piece.
This neoprene type material was chosen specifically for its flexibility/density/durometer,
and center hole (for centering/positioning onto the chosen location. )..
So any alternate chosen compatible materials must to be of similar "soft" durometer density (like sorbothane),
Which do well in vibrations and pressures applied when installed.
The washers chosen are most durable and easier to work with.
It will gently flex the black plastic piece It goes under a few millimeters.
Step Two:
Cut the two pieces as illutrated in picture for optimal air flow.
*pic*
One (top) piece more longer, two pieces stacked
*Pic*
Cut exactly as seen, Four pieces total.
Reasoning is not only for creating the port,
But also for a wave/pressure guide, as it will act as so.
An analogy is like what a rudder in a boat does as it guides the water(and thus the boat).
All areas of the diaphragm will benefit from the release of this pressure.
Another analogy is like the tensioned inner surface of a blown balloon, (pressure created during driver excursion) when you open hole to let pressure out.
Not the best analogy, but you get the point that it is this internal pressure on the membrane,
Which is creating a type of damping that is holding your planar driver down from moving it best..
Step Three:
Ready for placement.
Remove half the bottom screws, CAREFULLY,
By holding the whole driver unit aways above the screwdriver,
So both screw and screwdriver cannot FALL INTO THE CENTER...
Remember, the diaphragm covers the whole area, and is thin and invisible on top and bottom,
Which also may look oily/dirty, but as explained in my HEK "Acoustic Coupler" mod thread,
DO NOT TOUCH the membrane..!
Step Four:
Once you loosen the black plastic ring,
Now you can slip both rubber pieces right over the socket solder connection... AS PICTURED.
*Pic*
Notice now why the center hole of this "washer" is intended to rest on the soldering point of the headphone jack,
And holes help with positioning.
Both pieces rest exactly in this position.
Step Five:
Start screwing back the screws...
Make sure the black plastic riing tabs are going in all the way before screwing down, by pressing down on them to make sure they go in freely.
The two closest screws on either side of the socket will not be screwed down all the way,
as the material will be creating a lift for the gap/port there..
The black plastic will be lifted there by about 2-3mm
You will need a flashlight next to check.
*pic*
This will not even be visible or detectable once pads are on ,
Shown in next pic..
Step Six:
So remember to Shine light inside as pictured above,
to see the gap and visibly guage to compare and make both sides similar.
Place the earpad on to protect driver, and then do the other side.
*Pic*
See how invisible (but effective) it is!
Patience is a virtue so no rushing as this is delicate work which is worth the effort involved.
Step Seven:
Enjoy your new sounding HEKV2 Feilian Port Mod.
Enjoy!
Attachments
Last edited:

