This is the PART 2 for 130ohm Beryllium driver but this time I will explain my mod for "medium" cavity size shell.
Previous posts
INTRO,
PART 1
Before I start, I would like to dedicate this post to Thomas Wilson aka.
@HungryPanda, one of the most significant members of this community and a man who loved the good earbud "mods". RIP Thomas.
What is special about this mod? This mod had two revisions (the first one is MMCX) and this is the first time that
I prefer the "no-mmcx" version with a simple rubber "neck". Also, this shape and cavity size make this earbud one of my favorites in terms of comfort and sound reproduction.
For this mod, I choose this
shell. I bought silver and black shells without the driver from
DIY Earphone Tribe Store, but I think they're sold out. When I use this original model, similar to the
YMHFPJ Store model but with 130ohm beryllium driver,
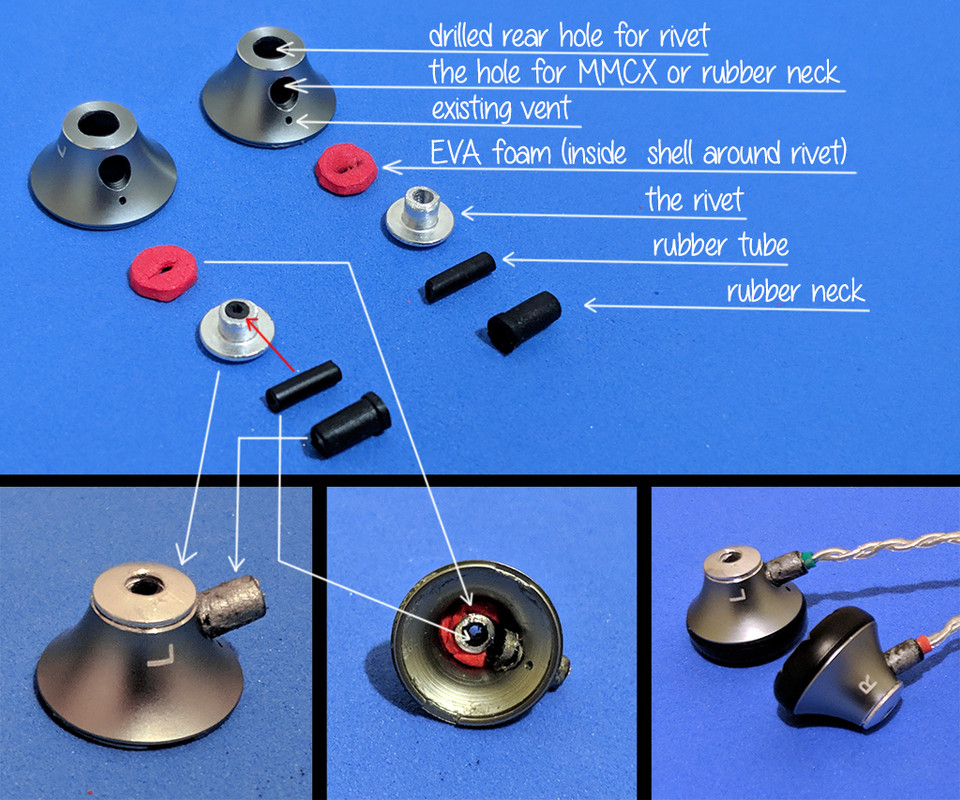
the sound was quite congested, with no spaciousness, so I decided to drill the back hole and install the rivets
but I needed also to remove MMCX socket. The following picture shows all the parts intended for this mod.
To better explain what are the pros and cons of this type of shell with mmcx socket and without, I'll use this illustration.
Blue text represents
PROS, red
CONS, and
BLACK shared opinion or comments.
1. "Concave arc" shape allows a very comfortable fit, personally, this is my favorite
2.
The angle between the shell and the neck axis is not 90 degrees with mmcx socket
which is also a major problem when it comes to the "rigid connection" between shell and "neck".
By using a rubber "neck" ("elastic connection") this problem can be avoided even if the angle is not
90 degrees as the cable is easily adjustable even when worn str8-up or over-ear.
3. The existing vent is not sufficient to provide adequate airflow for a large driver.
4. Foam width is optimal.
5. "
A-detail" shows no space between the shell and cover, and the connection between shell and driver cover is "light",
means that you can remove the driver very easy which is god for "modding"
and you can always use glue for permanent connection.
6. "B-detail": MMCX the connector that comes bundled with the shell makes a "rigid connection" but after a while,
this connection becomes loose as the screw rests on the curved surface of the shell.
7. I mentioned earlier the problem with a "rigid connection" when not at a 90-degree angle.
This is not a natural position of the hanging cable, and as you can see there is a rotation of the shell
and perfect sealing is lost.
8. Closed back of the shell, small vent, mmcx and screw cause chaotic reflection of the sound waves
and almost non-existing airflow.
9. The point of rotation is pushed by the width of male mmcx shell.
10. Now we have improved airflow which can be controlled by changing the diameter of the rivet hole.
11. The weight distribution, in this case, is better and we have no problem with the drag due to the weight of the cable
and male mmcx shell. Therefore, better sealing is achieved because the highest weight is at the speaker position
I wear them often over-ear but str8-up is also comfortable.
12. In this case point of rotation is closer to the small vent but this not have any effect on airflow.
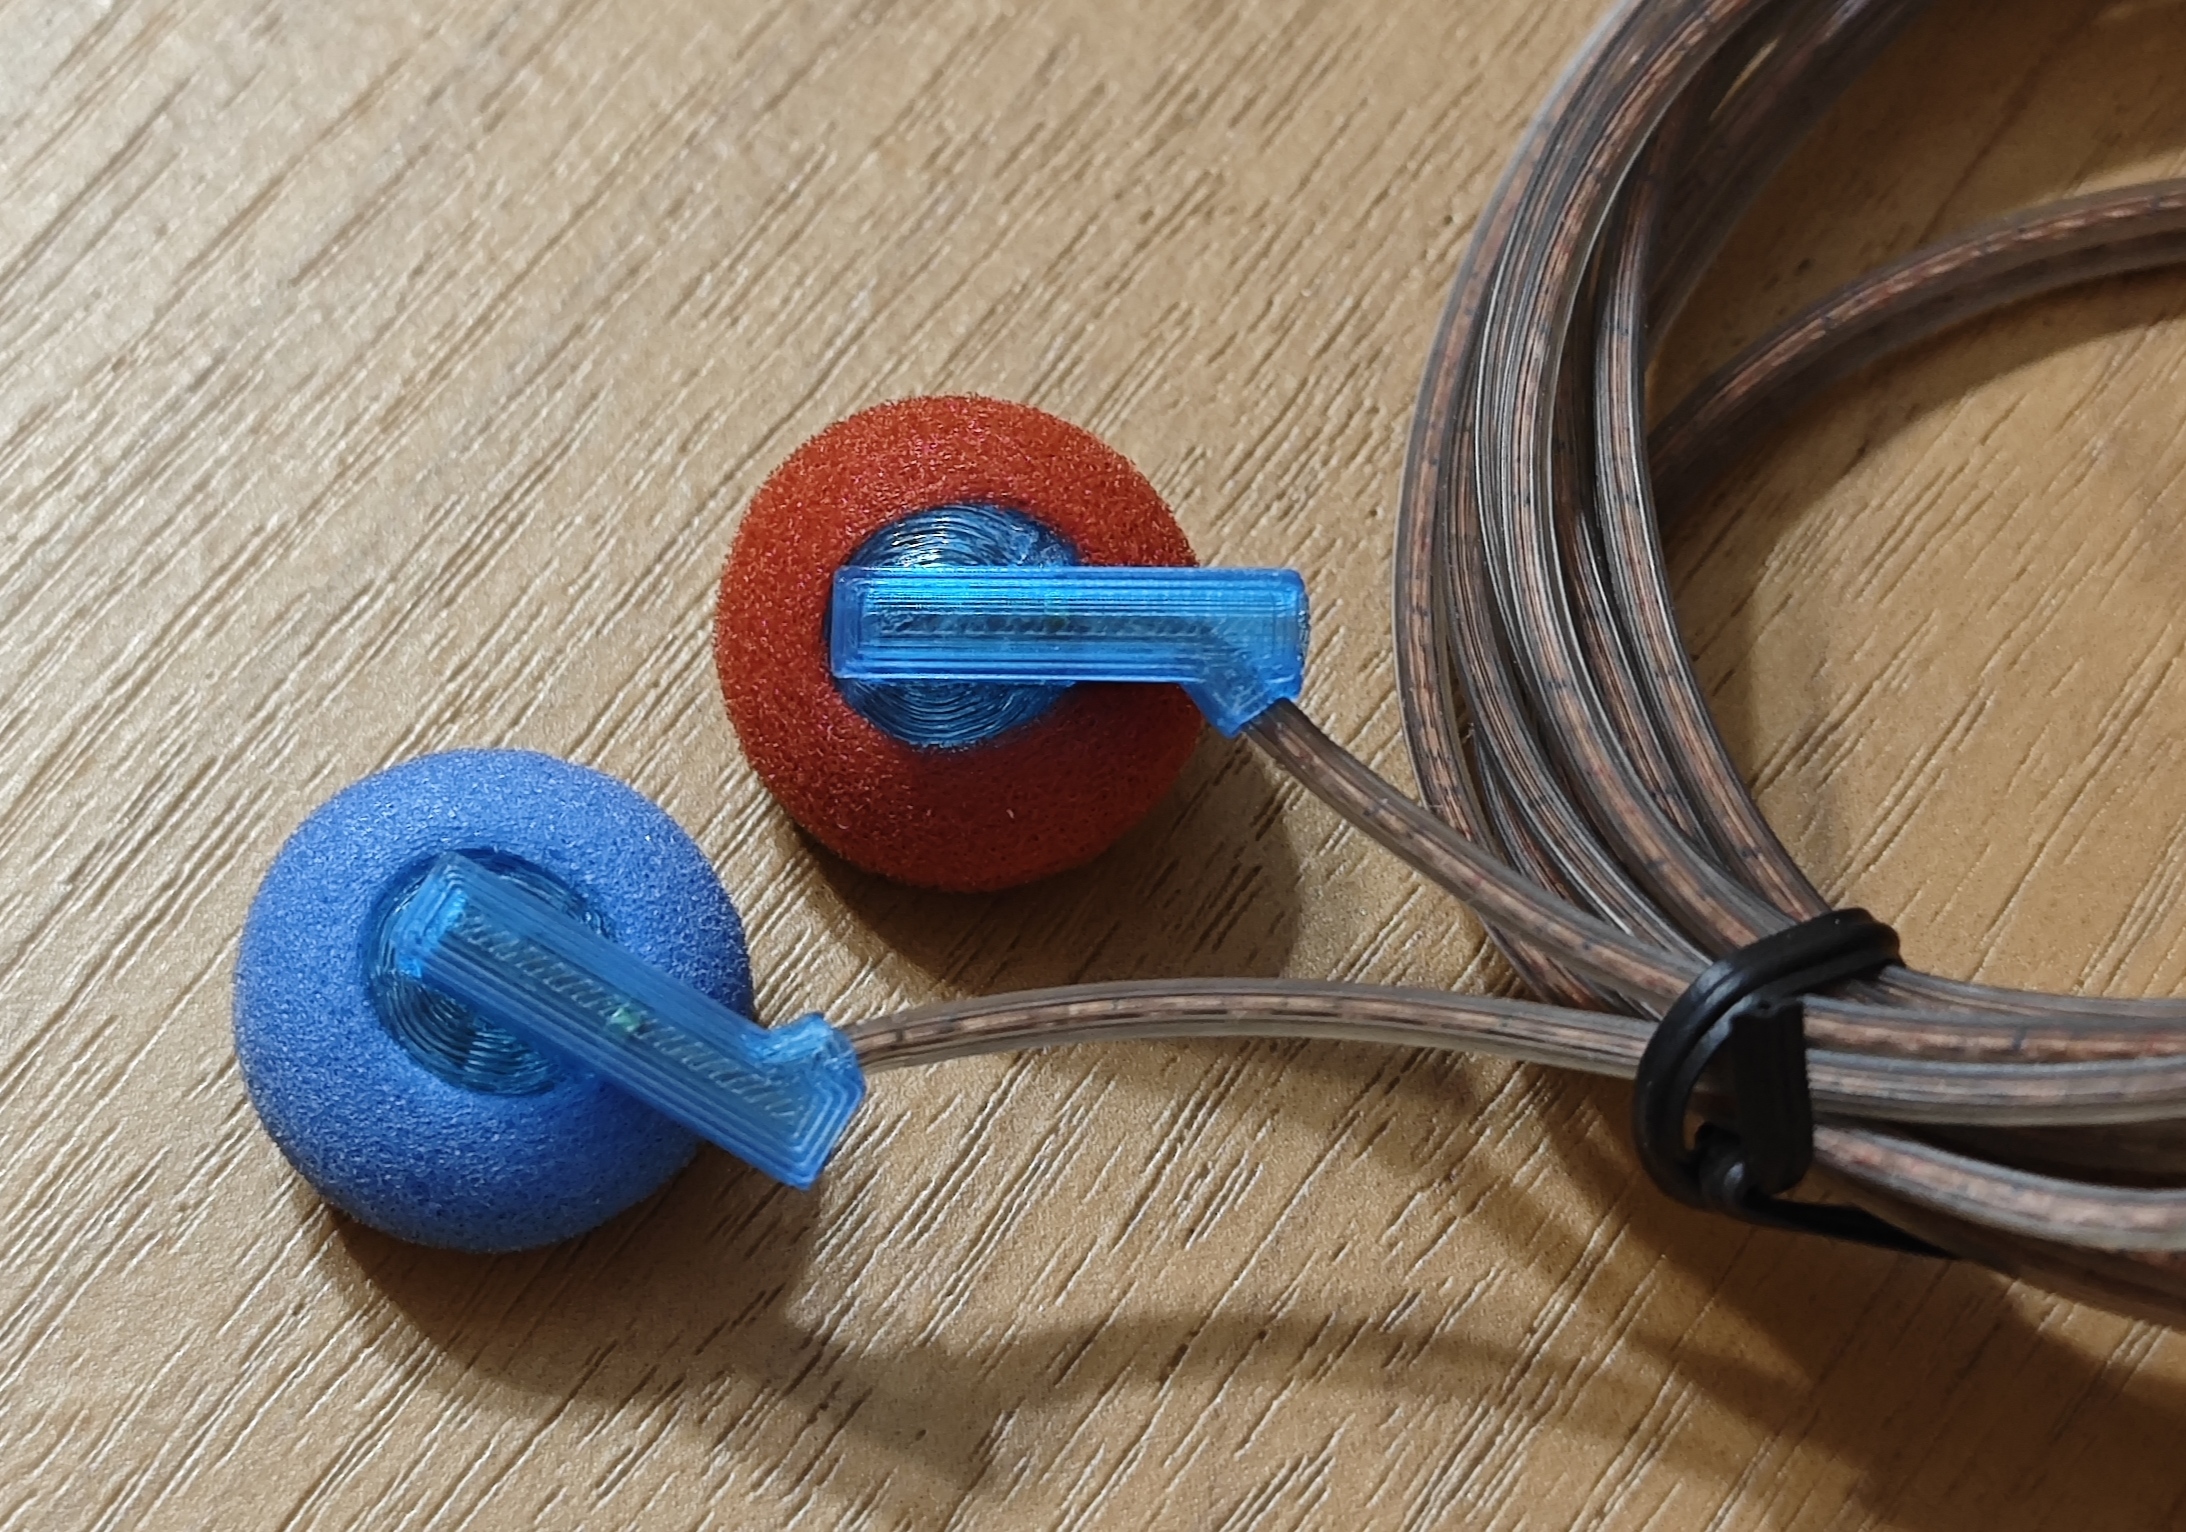
"C-detail" shows all mod elements. Instead of using knot on cable, I added green and red shrinking tubes to block
the cable pull and mark the left and right sides at the same time.
With this mod, you can easily tune the sound by changing the diameter or partially block rivet hole.


I have one additional pair on its way too. I will try it in the 6-hole wooden shell and the new plastic nsc shell when it arrives.
 they are all OK, hopefully the sound will remains the same

 . With the mx500 shell raise the trebe at 2khz and reduce the bass at around 100hz make vocal more clear and airy.

