ericj
Headphoneus Supremus
- Joined
- Aug 2, 2005
- Posts
- 8,356
- Likes
- 273
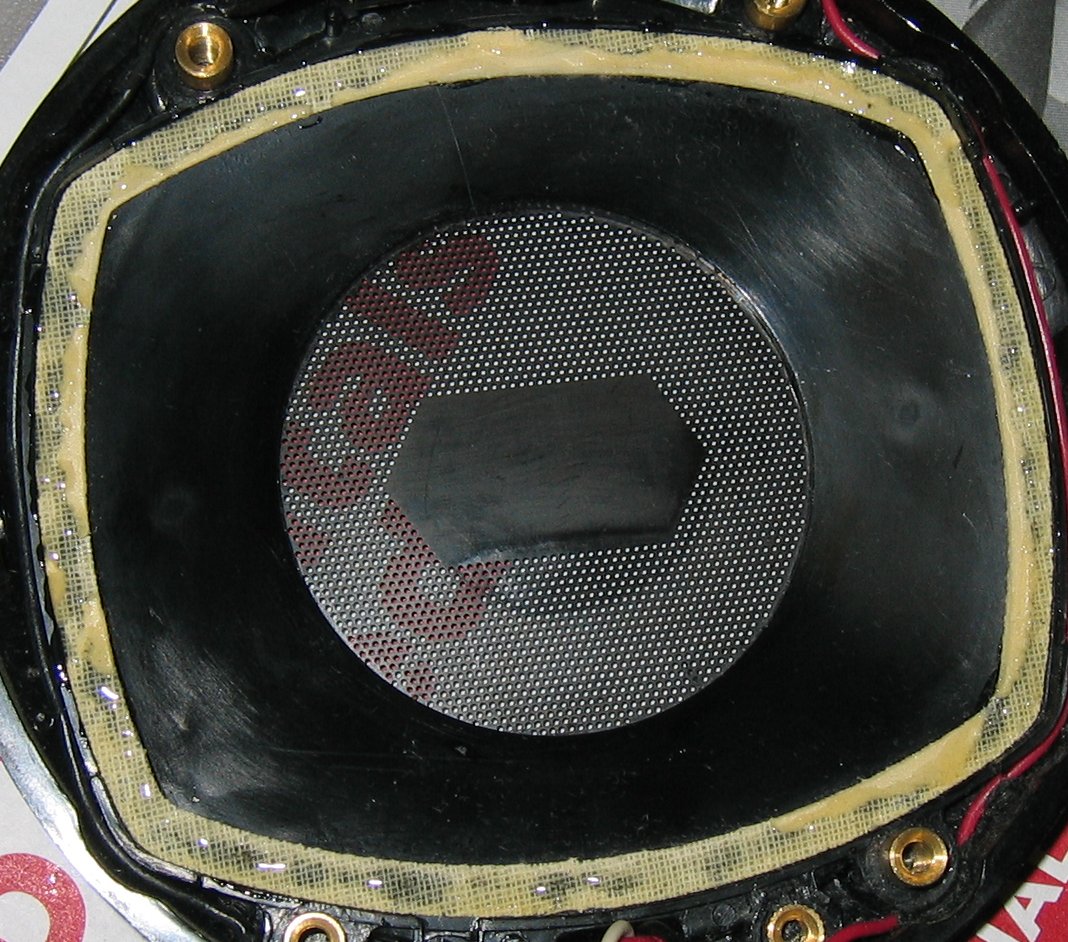
I bought a pair of conceptually fascinating pair of headphones recently - the top of the line of Pioneer's piezoelectric film headphones. These are fairly unique, if anybody else attempted to use this technology in headphones I haven't heard about it.
This thread is not about the amazing technology (No magnets! No electrostatic fields!) - this thread is about taking a 30+ year old pair of headphones that look like hell and turning them into something presentable.
The thing is, I got them cheaply. I paid about $30 shipped for three pairs of old headphones, including this one pair i really wanted. Other members of head-fi have paid as much as $100 for a pristine pair of SE-700's.
This first post covers my rebuild of the headband. I peeled the wretched vinyl off of the frame and cleaned off some of the dried out contact cement that Pioneer apparently assembled the entire headphone system with.
I prefer double-sided tape for this sort of thing, and i have a few hundred yards of two-inch-wide double-sided adhesive nonwoven fabric tape, with impressive bonding characteristics. This is Tesa(r) tape, manufactured by Bergdorf in Germany. It's the european version of the stuff that half of japan is held together with.
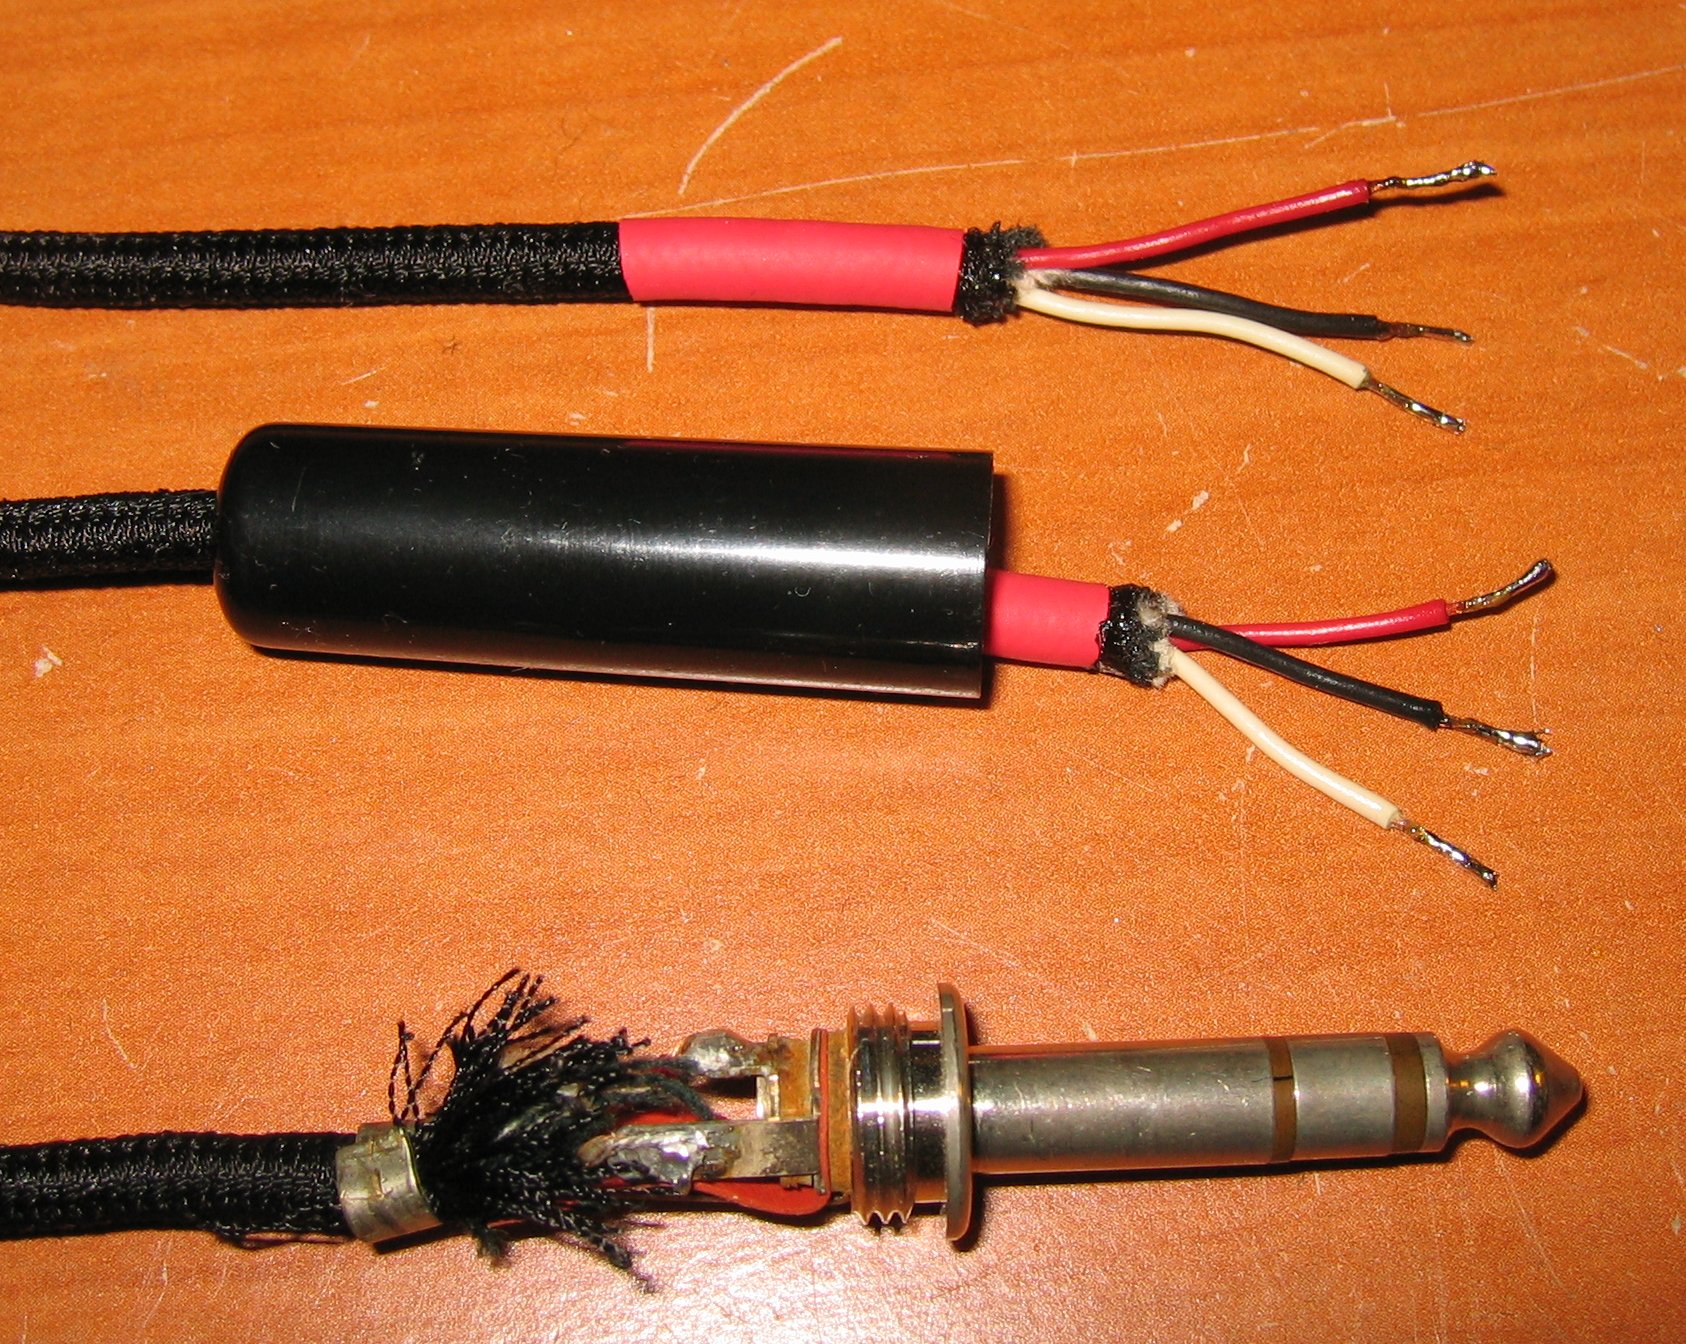
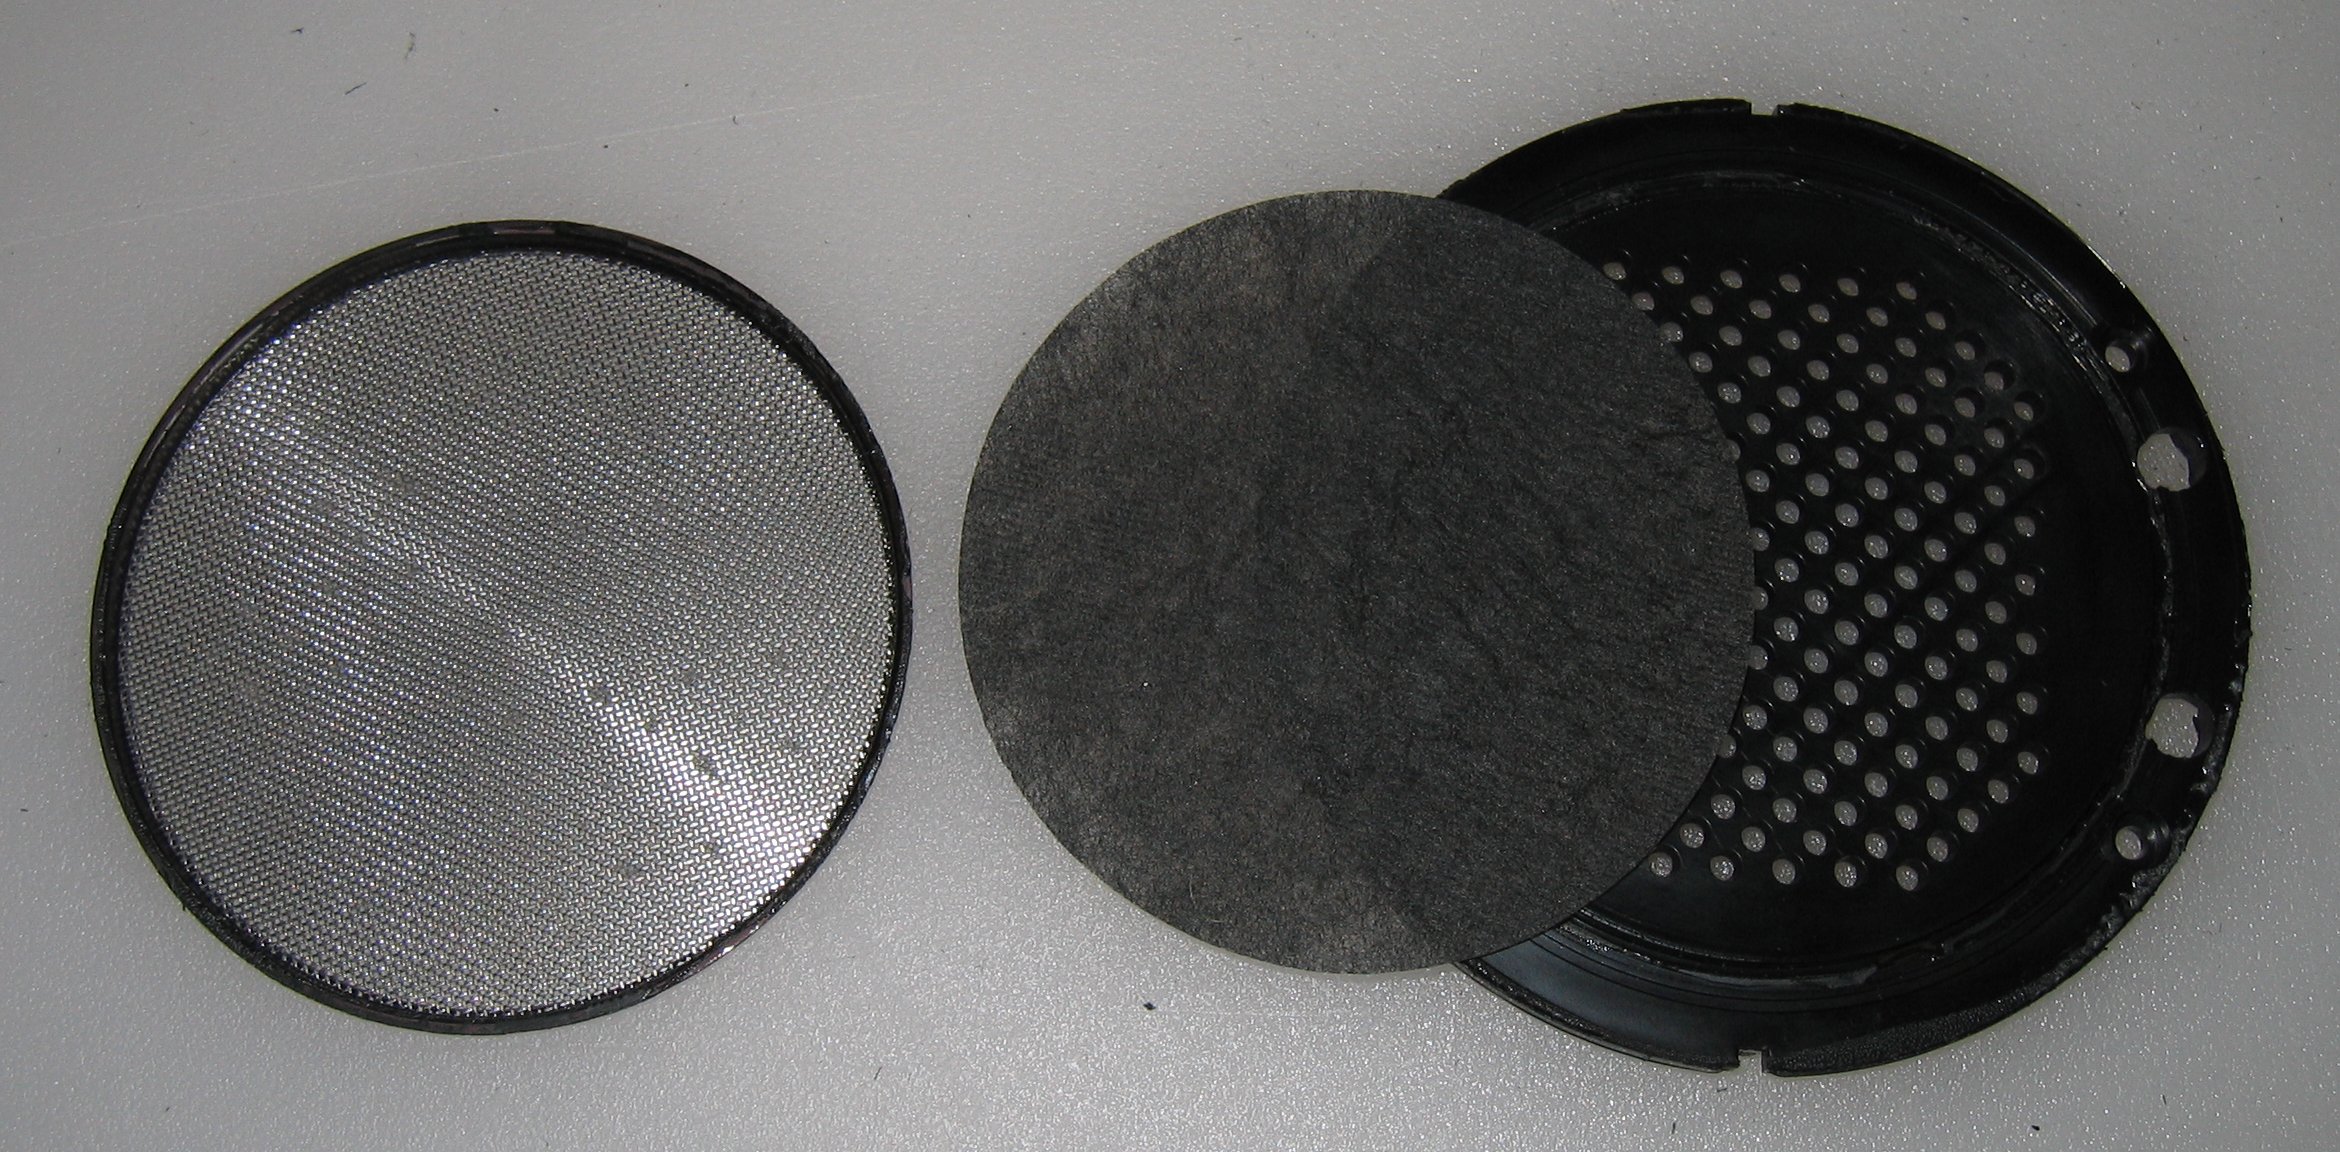
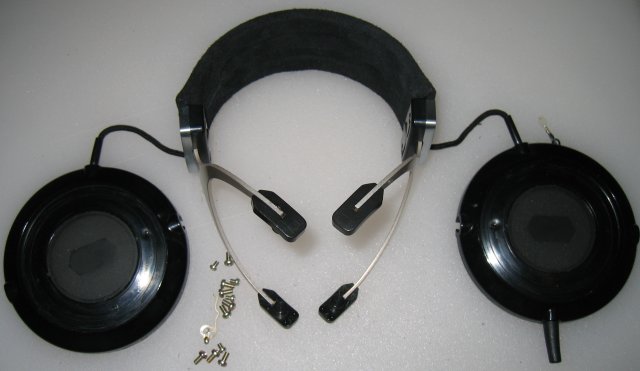
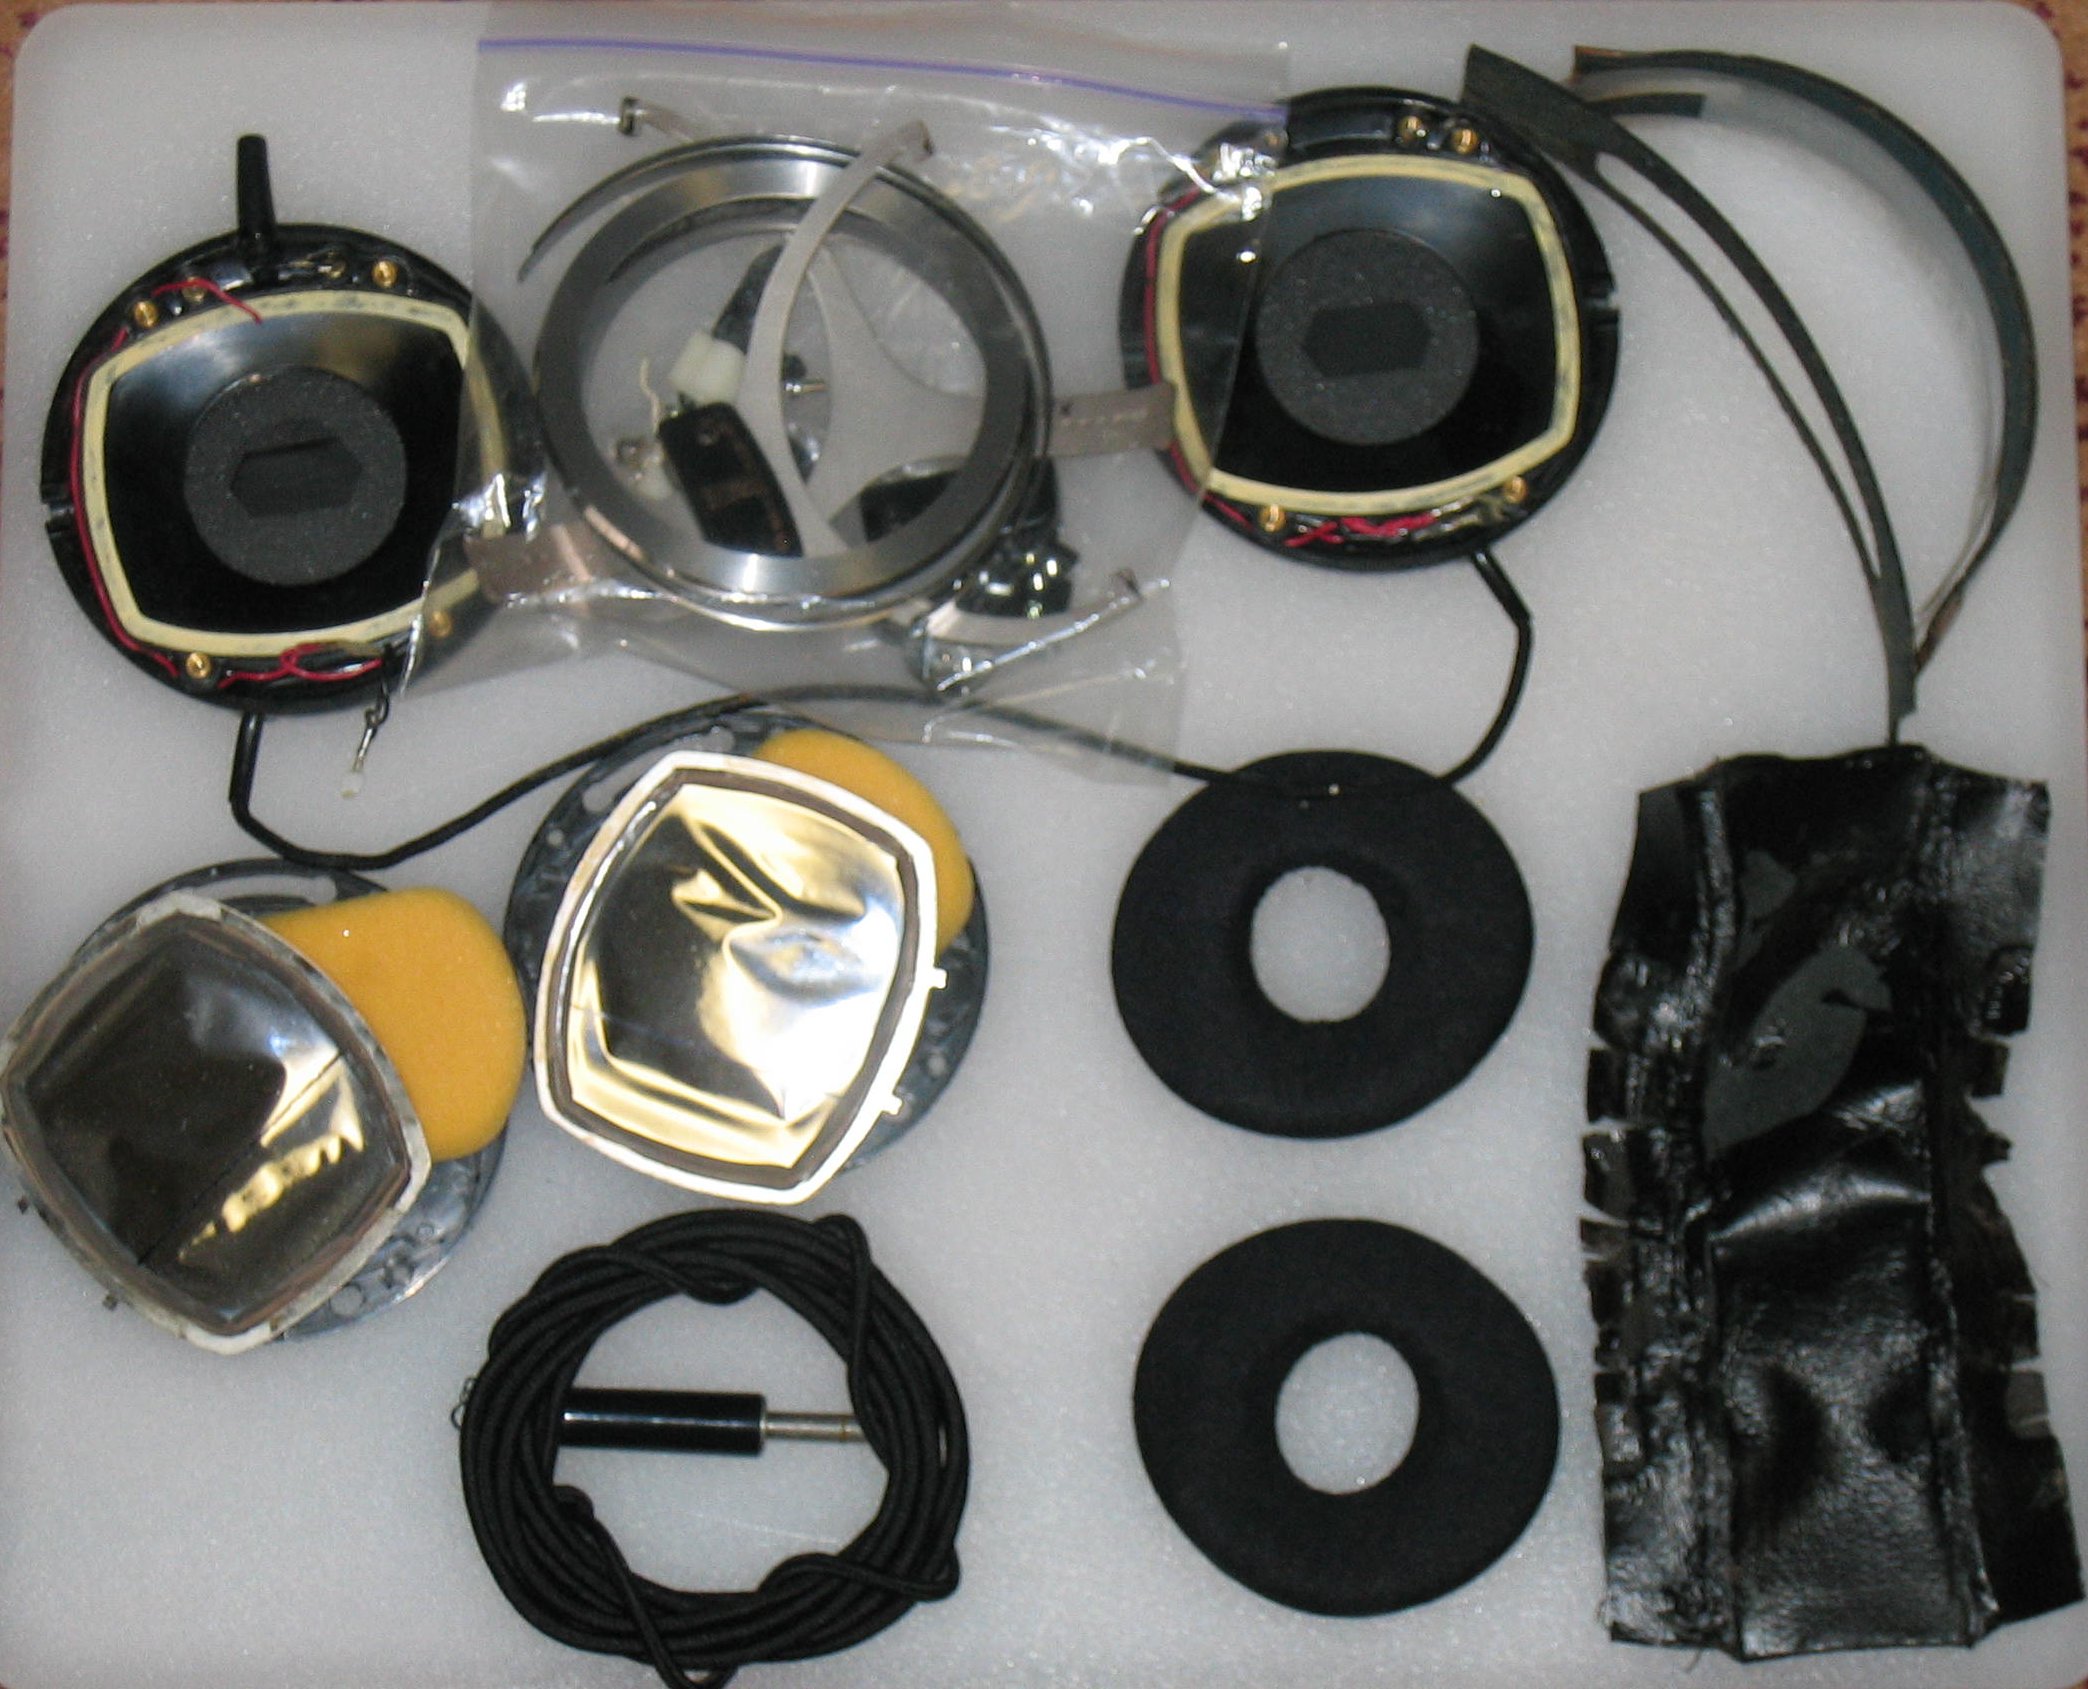
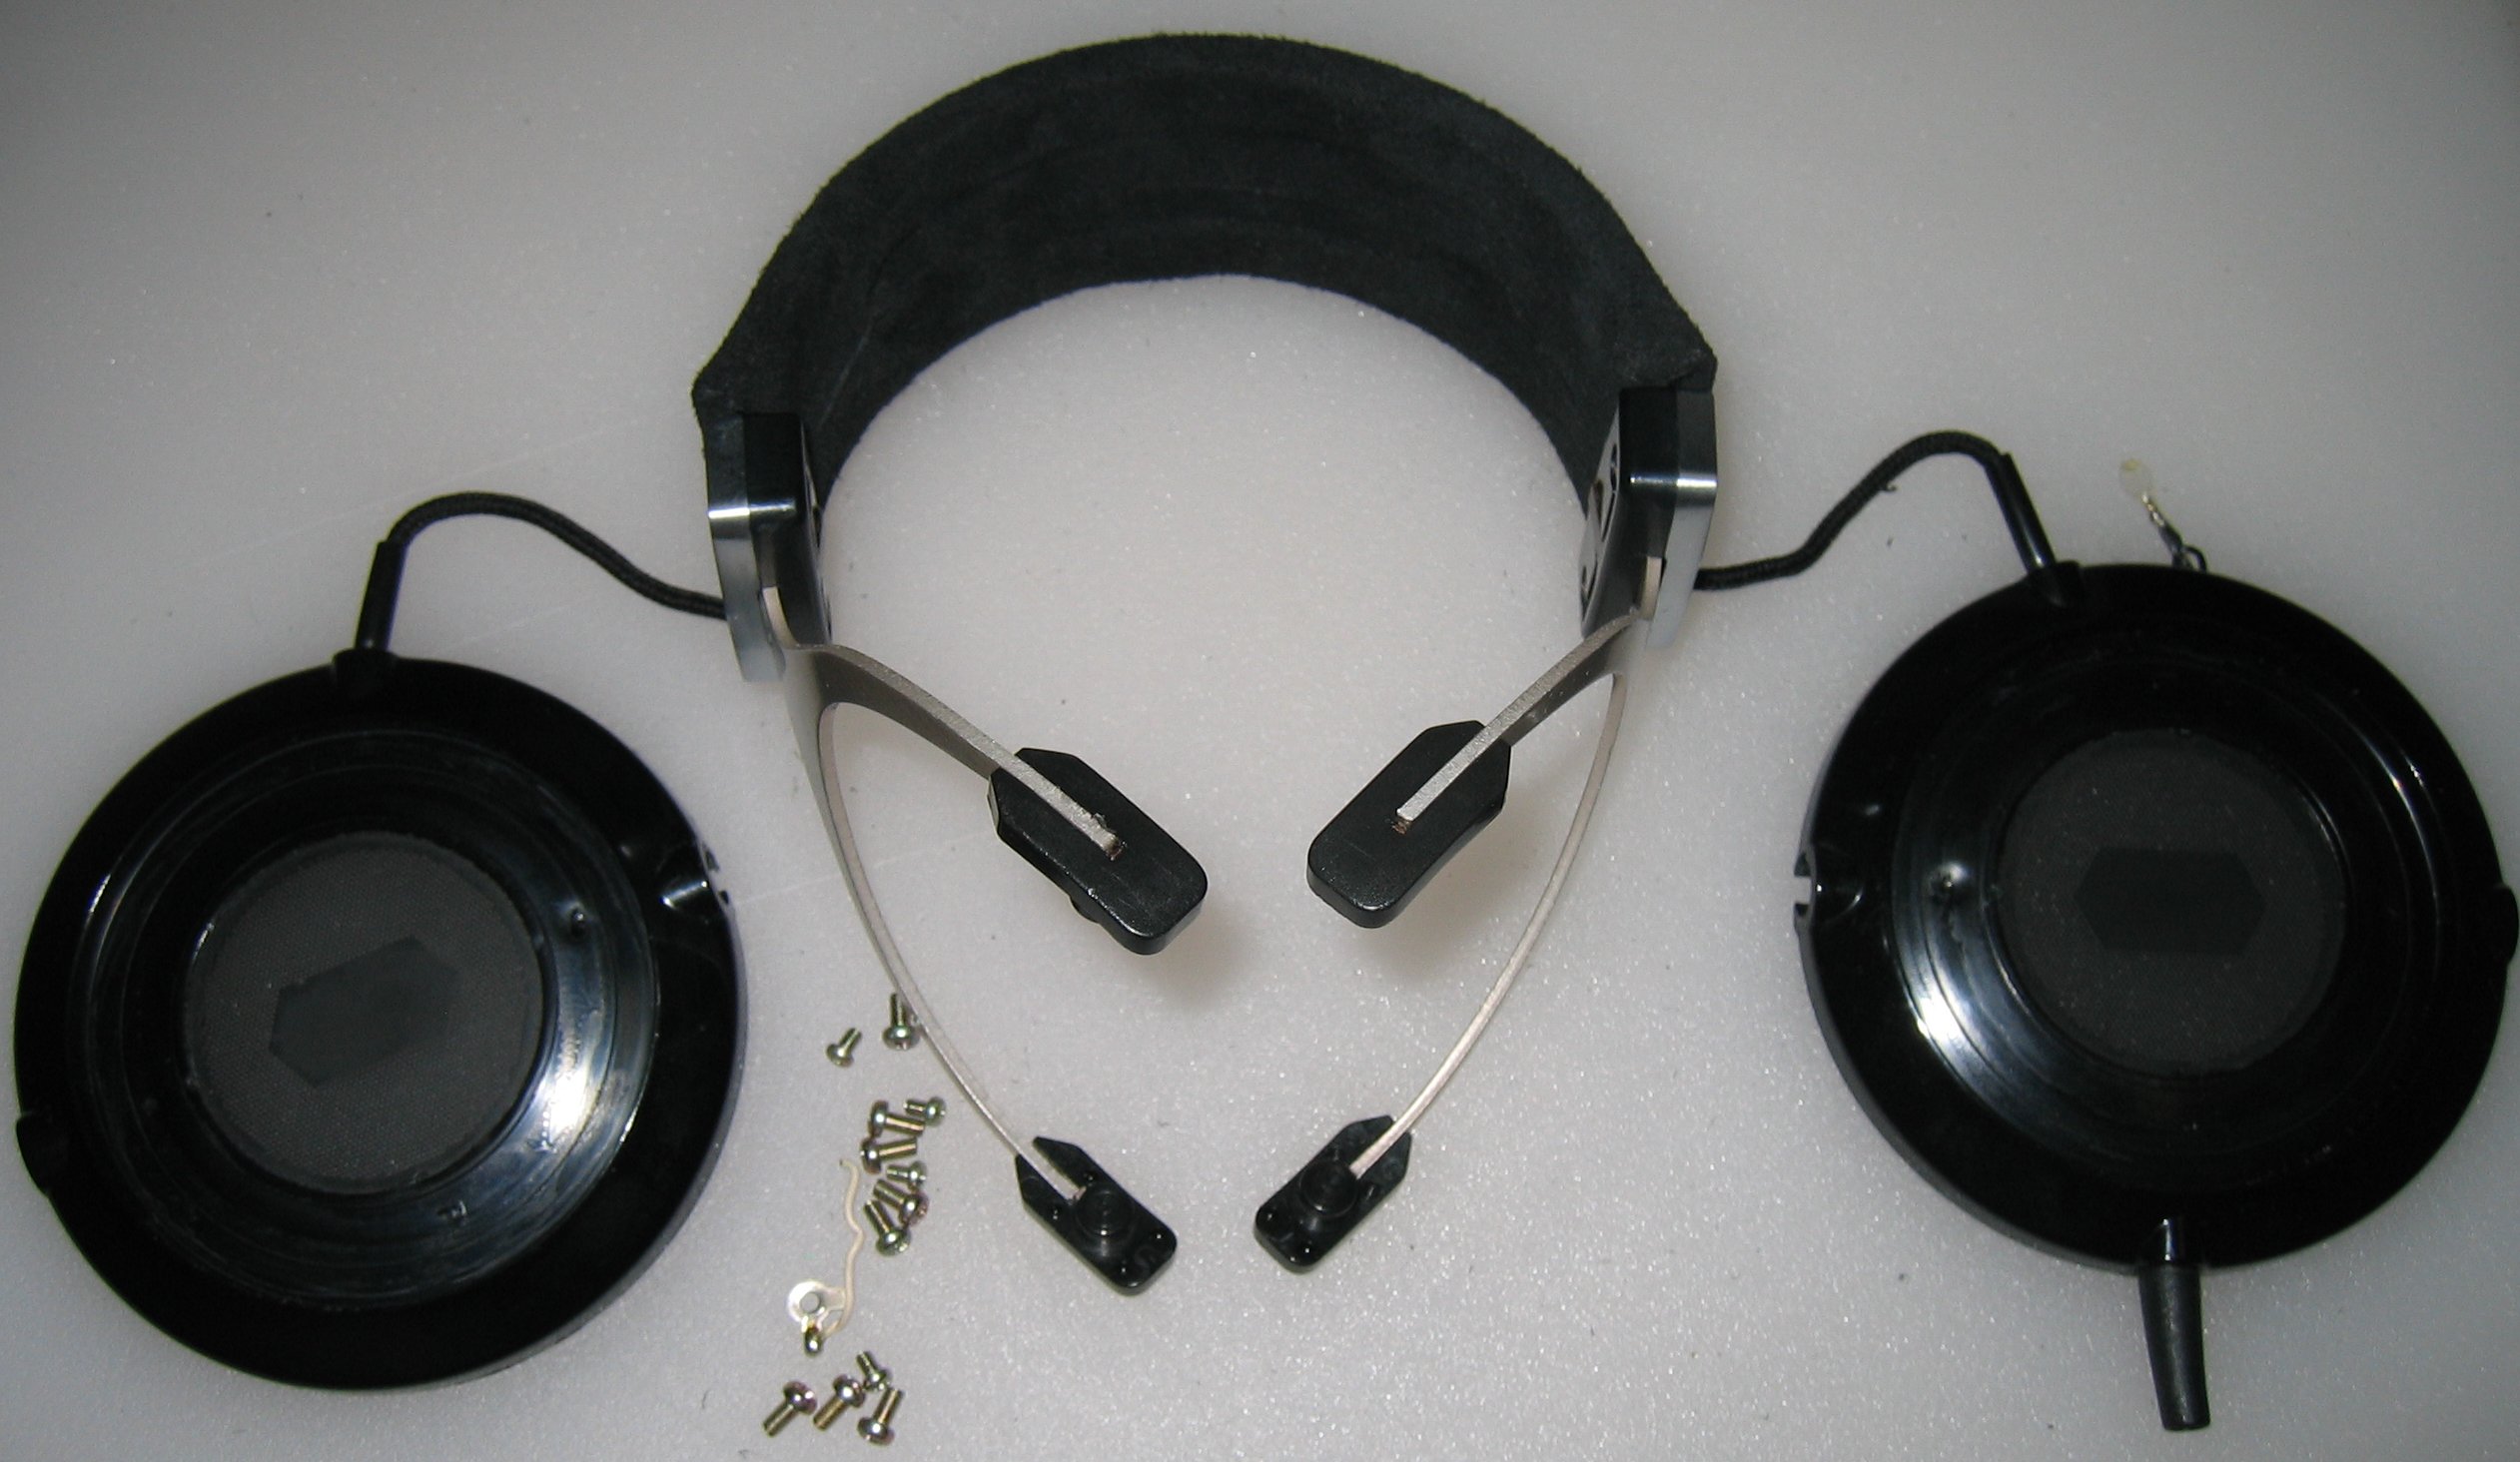
The entire rebuild procedure took about an hour and a half, with me stopping frequently to take pictures. I had previously disassembled the headphones to bare components and cleaned everything - including the piezo film.
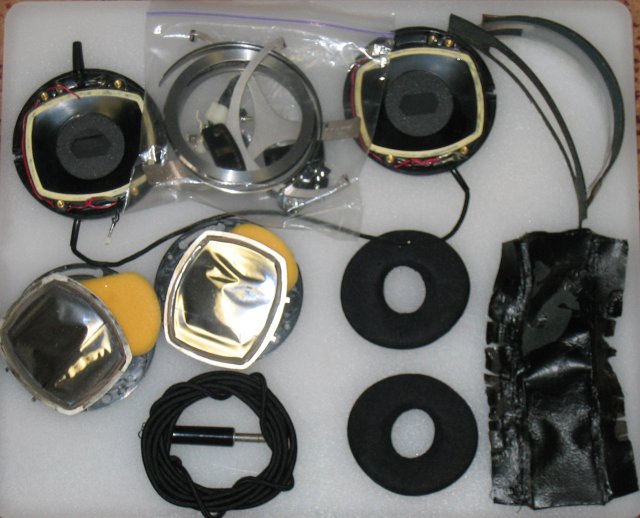
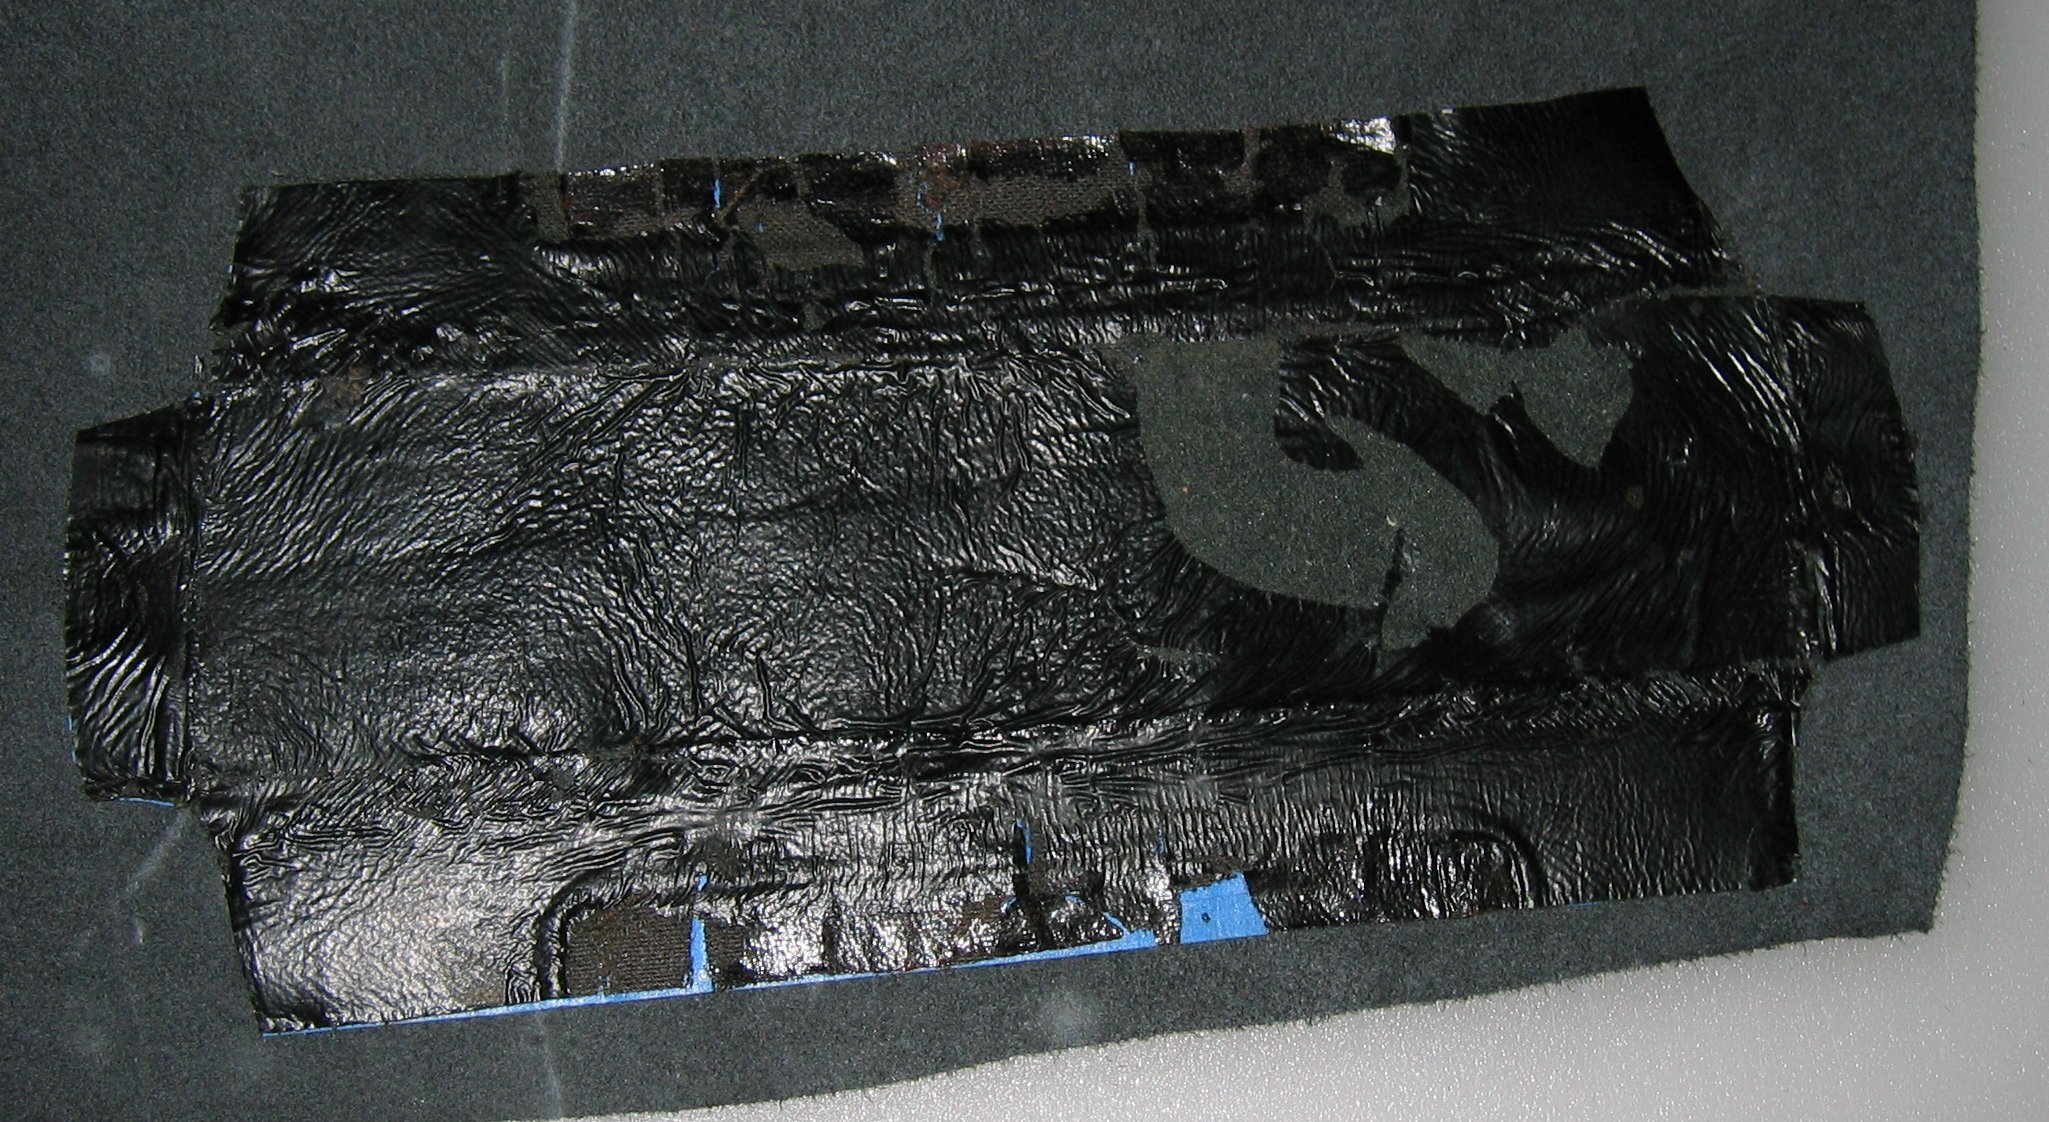
Here's what I started with tonight:
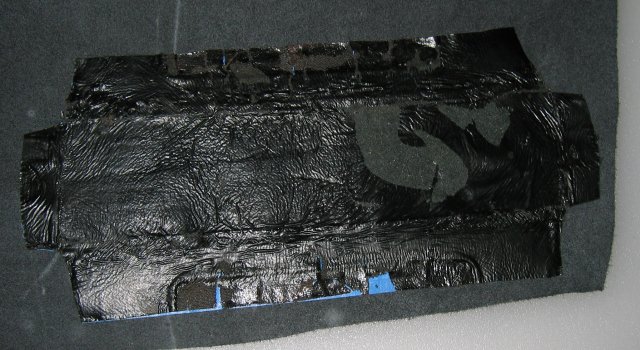
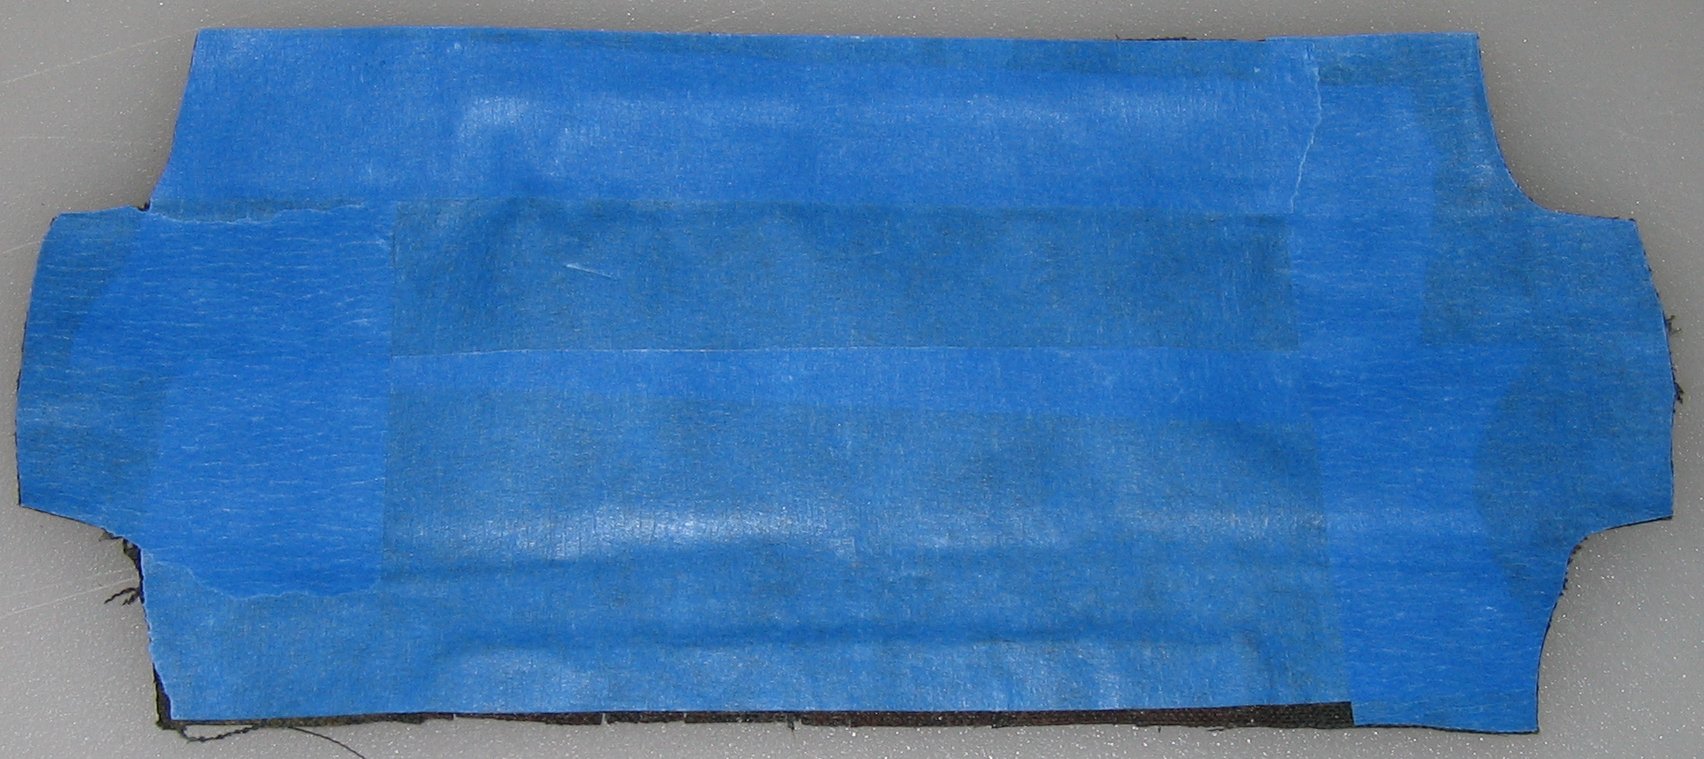
That headband fabric won't lay flat, so, i laminated it with painter's tape.

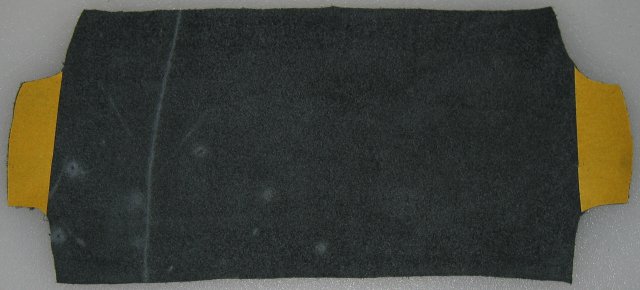
Much better. Here it is overlaying the meat side of the deerskin suede I'm replacing it with.
I've stuck it to the suede with some lousy 3M double-sided cellotape so it doesn't move around while i cut with the x-acto blade.
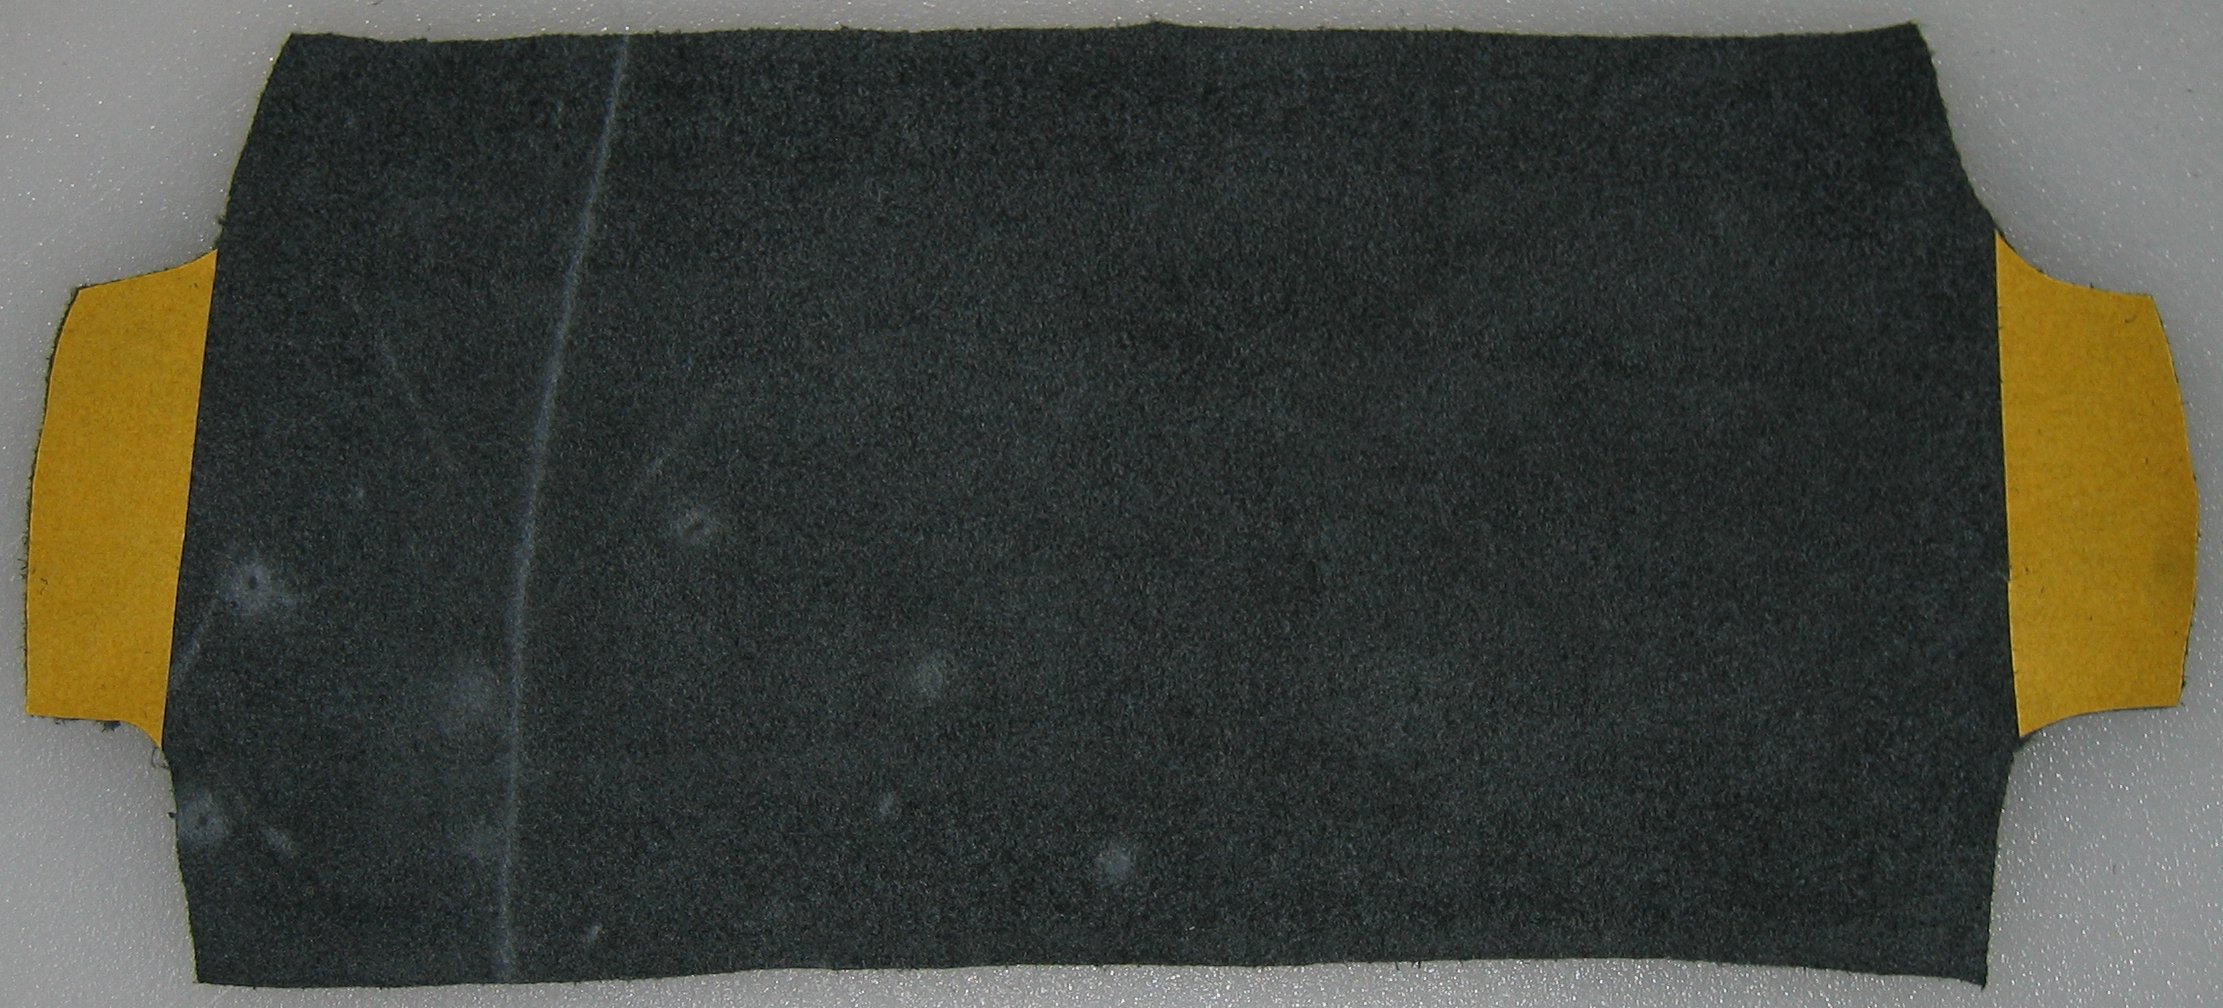
And here's the cut out piece:
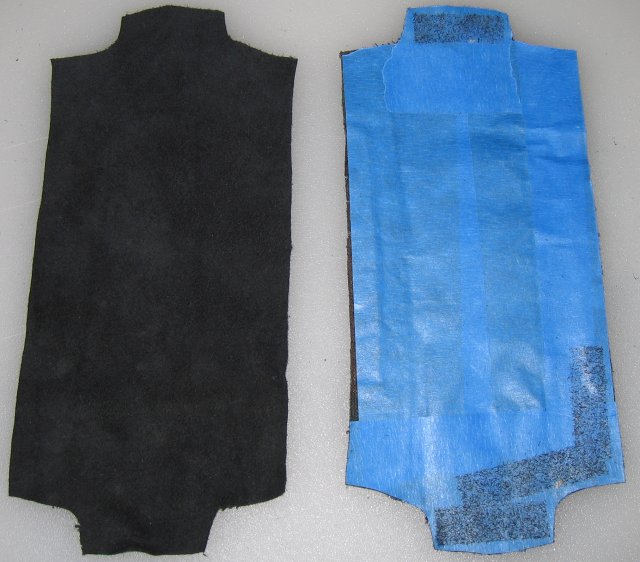
Looks great, no? This is really nice suede. It's very thin and supple. I've considered making earpads out of it.
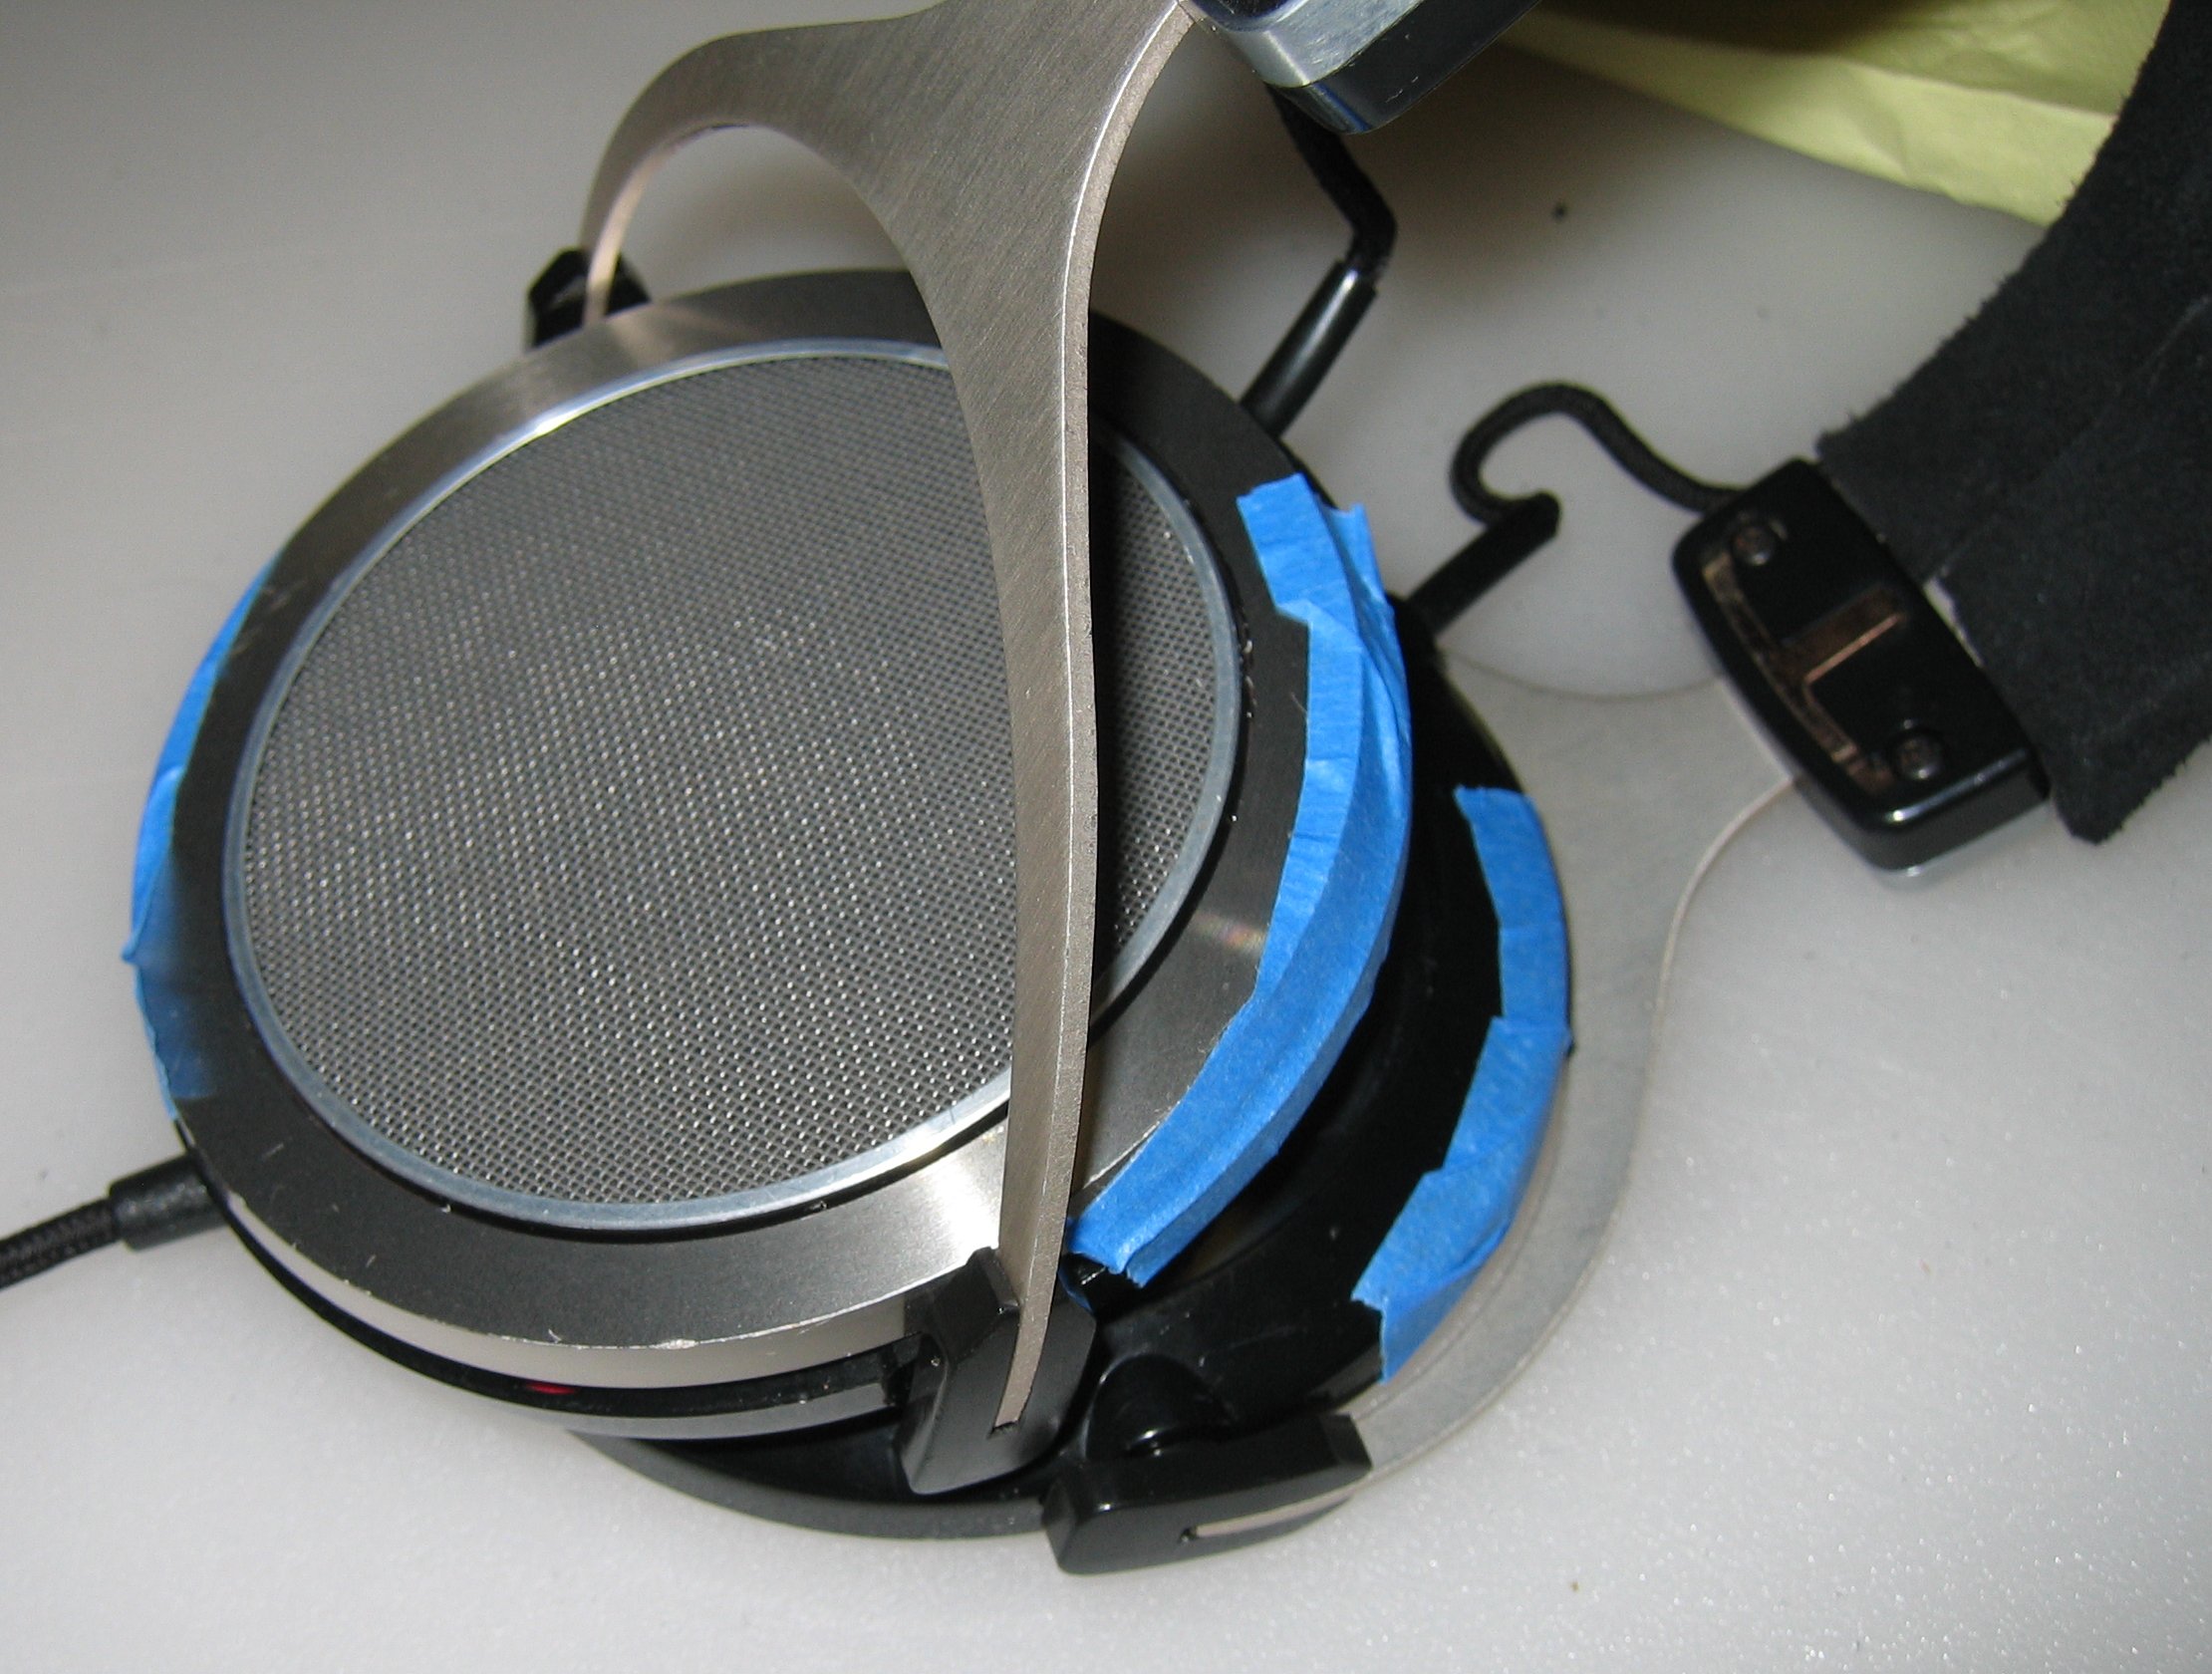
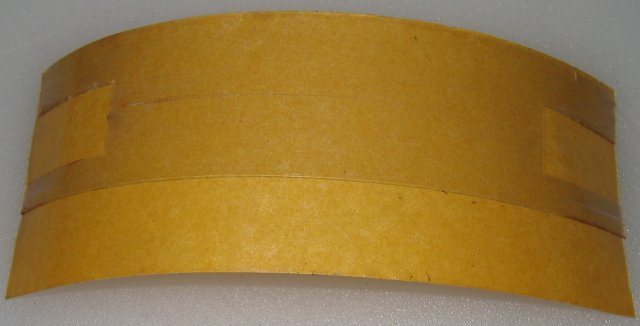
Here's one of the internal pieces of the headband with mounting tape applied but not yet trimmed:
Here's the same piece, trimmed and peeled, along with one of the internal pieces of vinyl from the headband, with the backing still on it's mounting tape. You'll notice one edge is thinner than the other - that's where the cable runs.
I've cut the backing around the middle of the plastic piece because this will be the last part i stretch the suede over.
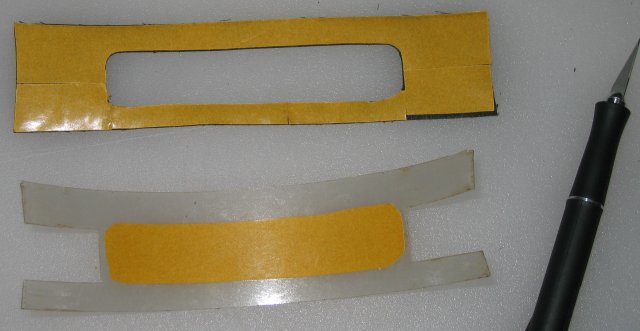
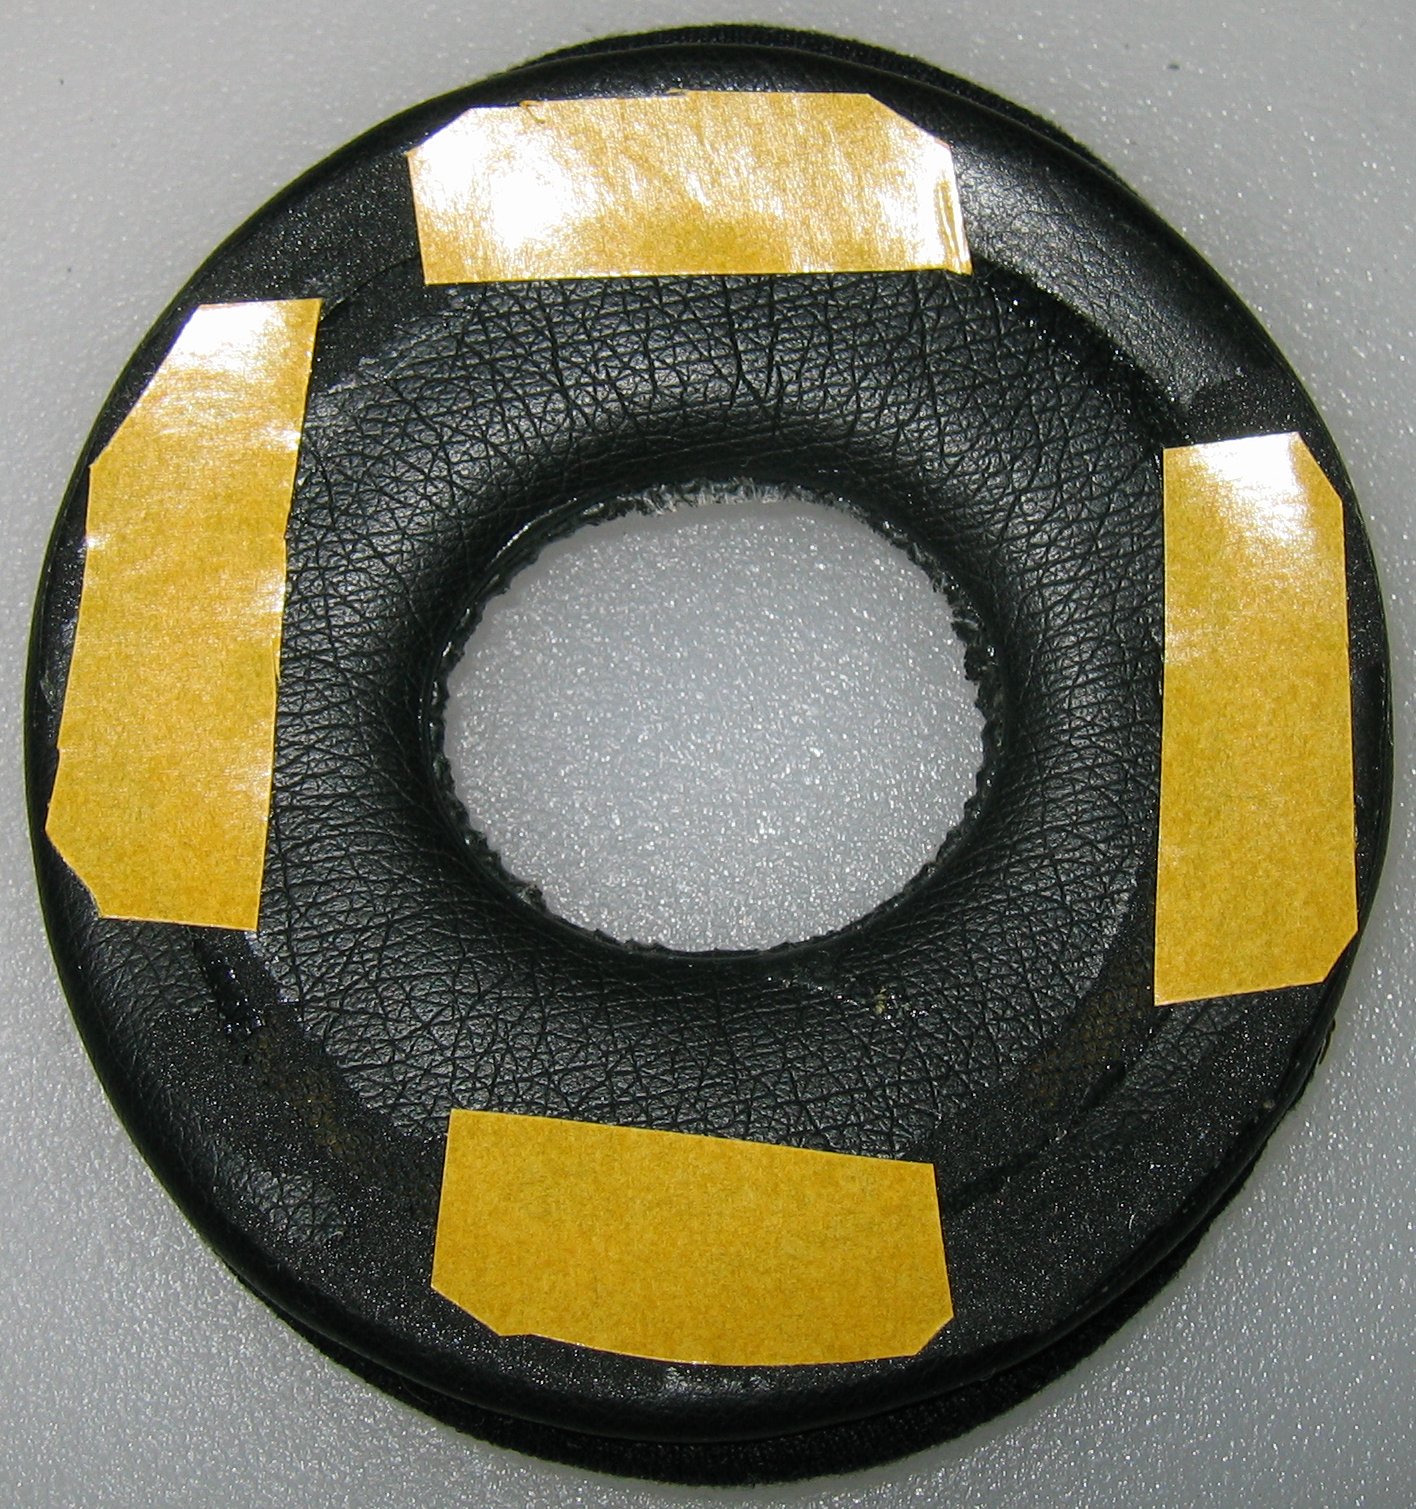
I forgot to take a picture of these stuck together. So here's a picture of the suede piece with mounting tape applied to the tabs on the ends.
The tabs get stretched over the ends of the top inner piece of the headband. I didn't separate the vinyl from the plastic here because the bond was good and clean.
The suede is NOT adhered to the top of the headband on the outside. This is very important for the fit and feel.
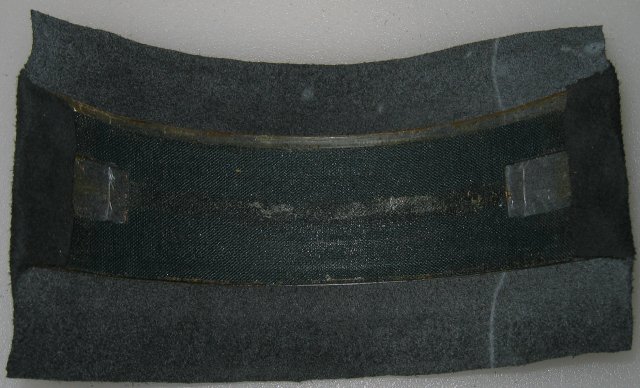
Here the suede is stretched over one side of the inner headband piece. See the channel for the cable? Holding the cable in place while stretching over the other side was kind of a pain in the butt.
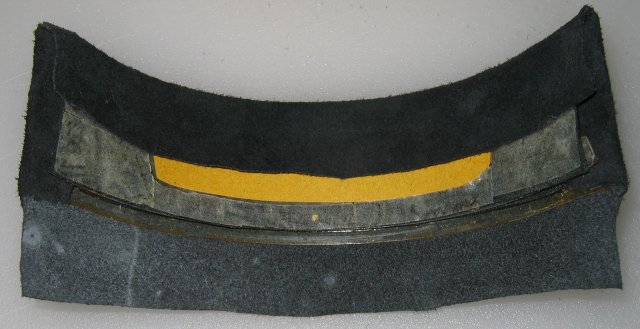
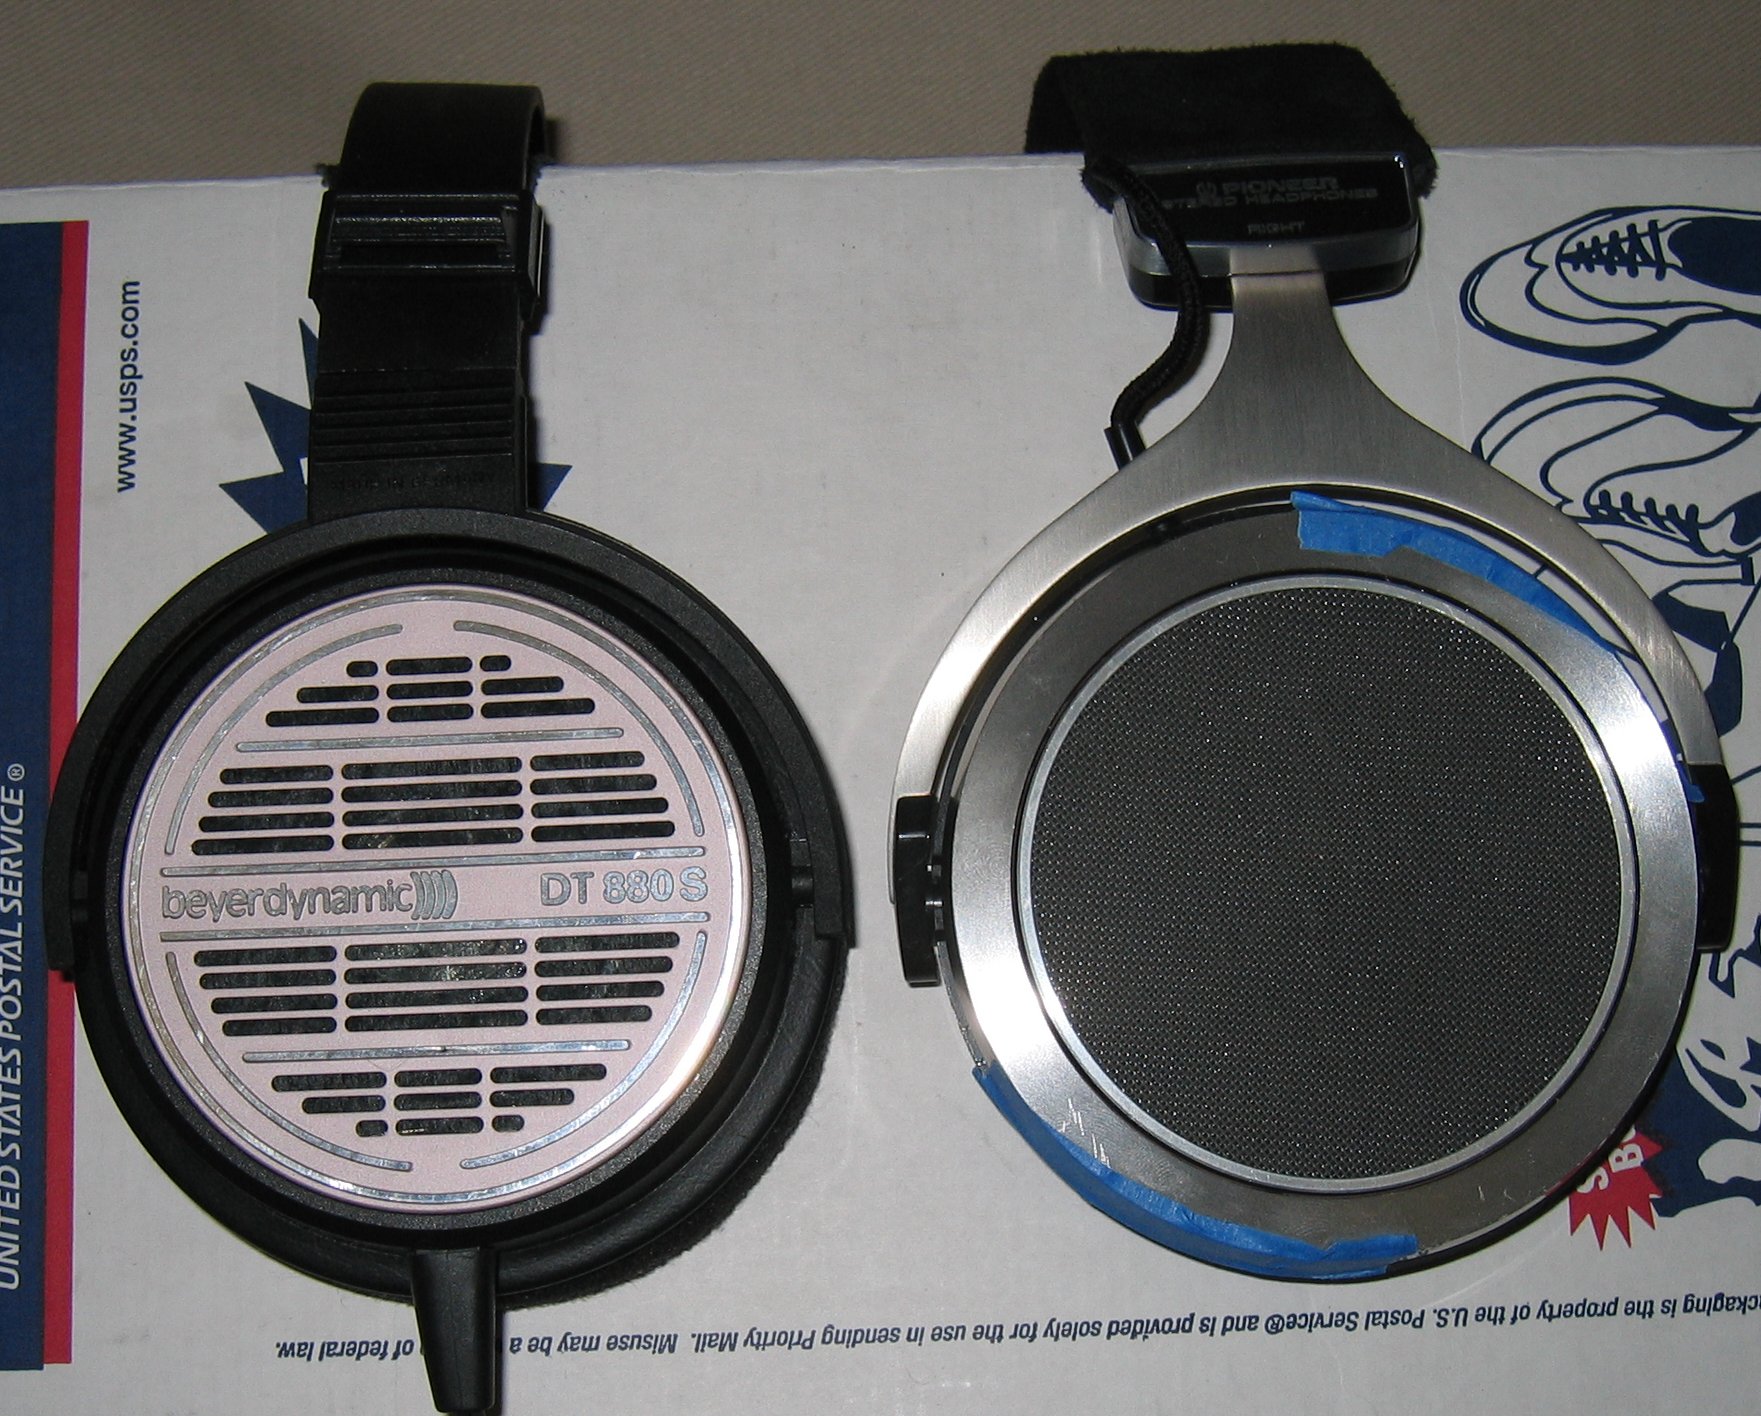
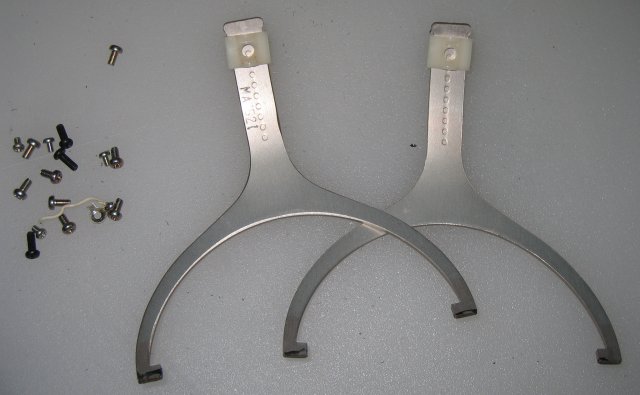
Almost done. So here's the struts. fwiw these are significantly larger than Beyer struts. I'll post a side-by-side with my DT-880 Studio later so you can see what i mean.
And here's the completed headband:
There is another piece of suede that needs to go in the channel in the middle on the inside, to cover the seam. I'll stick that on later.
Stay tuned for the rest of the assembly - I'm gonna take off for a while and do that.
All pics are clickable, the big versions average half a megabyte (at 85% quality, no less) so they are pretty much for broadband users only. Me, I have multi-gigabit fiber run into my basement.
This thread is not about the amazing technology (No magnets! No electrostatic fields!) - this thread is about taking a 30+ year old pair of headphones that look like hell and turning them into something presentable.
The thing is, I got them cheaply. I paid about $30 shipped for three pairs of old headphones, including this one pair i really wanted. Other members of head-fi have paid as much as $100 for a pristine pair of SE-700's.
This first post covers my rebuild of the headband. I peeled the wretched vinyl off of the frame and cleaned off some of the dried out contact cement that Pioneer apparently assembled the entire headphone system with.
I prefer double-sided tape for this sort of thing, and i have a few hundred yards of two-inch-wide double-sided adhesive nonwoven fabric tape, with impressive bonding characteristics. This is Tesa(r) tape, manufactured by Bergdorf in Germany. It's the european version of the stuff that half of japan is held together with.
The entire rebuild procedure took about an hour and a half, with me stopping frequently to take pictures. I had previously disassembled the headphones to bare components and cleaned everything - including the piezo film.
Here's what I started with tonight:
That headband fabric won't lay flat, so, i laminated it with painter's tape.
Much better. Here it is overlaying the meat side of the deerskin suede I'm replacing it with.
I've stuck it to the suede with some lousy 3M double-sided cellotape so it doesn't move around while i cut with the x-acto blade.
And here's the cut out piece:

Looks great, no? This is really nice suede. It's very thin and supple. I've considered making earpads out of it.
Here's one of the internal pieces of the headband with mounting tape applied but not yet trimmed:

Here's the same piece, trimmed and peeled, along with one of the internal pieces of vinyl from the headband, with the backing still on it's mounting tape. You'll notice one edge is thinner than the other - that's where the cable runs.
I've cut the backing around the middle of the plastic piece because this will be the last part i stretch the suede over.

I forgot to take a picture of these stuck together. So here's a picture of the suede piece with mounting tape applied to the tabs on the ends.
The tabs get stretched over the ends of the top inner piece of the headband. I didn't separate the vinyl from the plastic here because the bond was good and clean.
The suede is NOT adhered to the top of the headband on the outside. This is very important for the fit and feel.
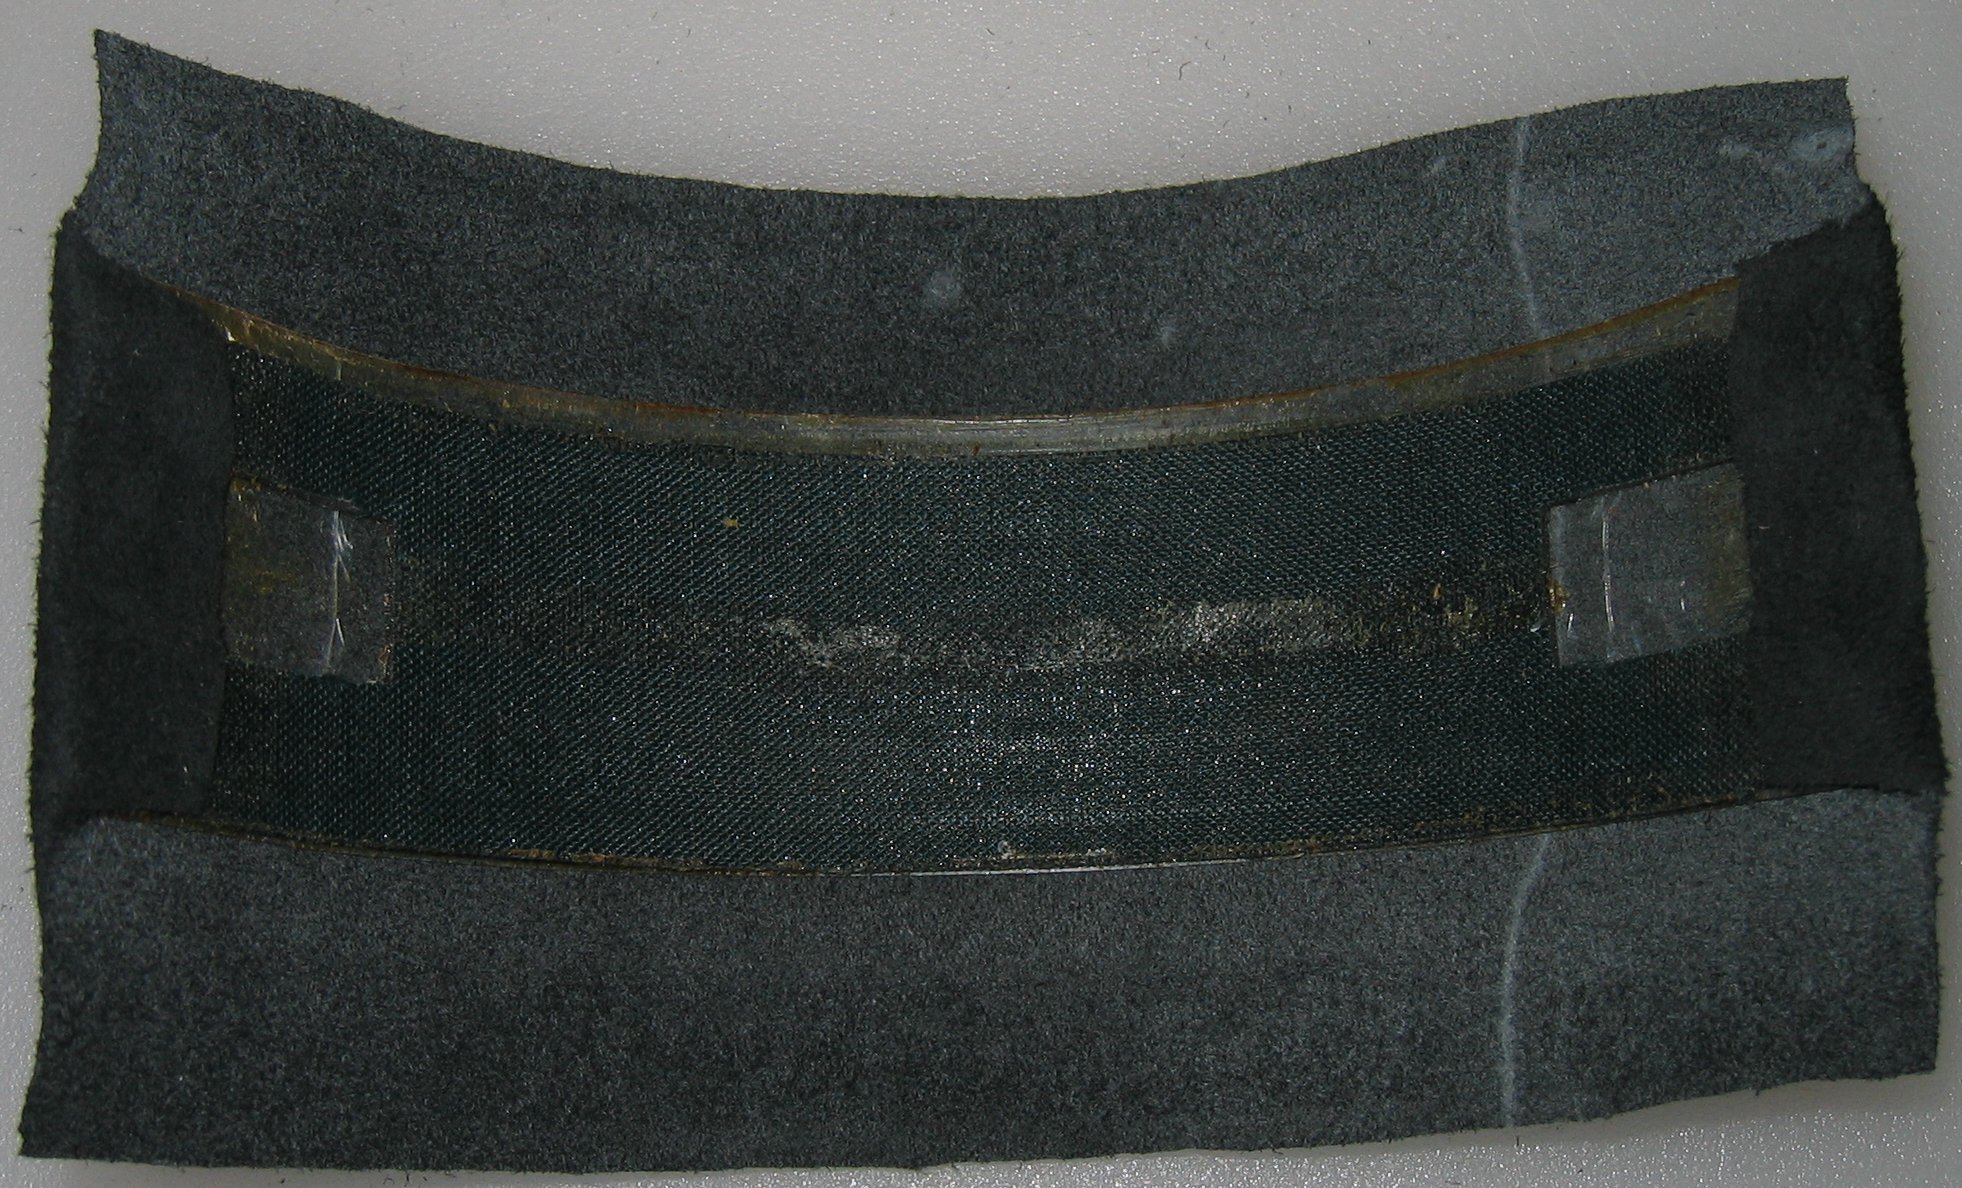
Here the suede is stretched over one side of the inner headband piece. See the channel for the cable? Holding the cable in place while stretching over the other side was kind of a pain in the butt.

Almost done. So here's the struts. fwiw these are significantly larger than Beyer struts. I'll post a side-by-side with my DT-880 Studio later so you can see what i mean.

And here's the completed headband:
There is another piece of suede that needs to go in the channel in the middle on the inside, to cover the seam. I'll stick that on later.
Stay tuned for the rest of the assembly - I'm gonna take off for a while and do that.
All pics are clickable, the big versions average half a megabyte (at 85% quality, no less) so they are pretty much for broadband users only. Me, I have multi-gigabit fiber run into my basement.