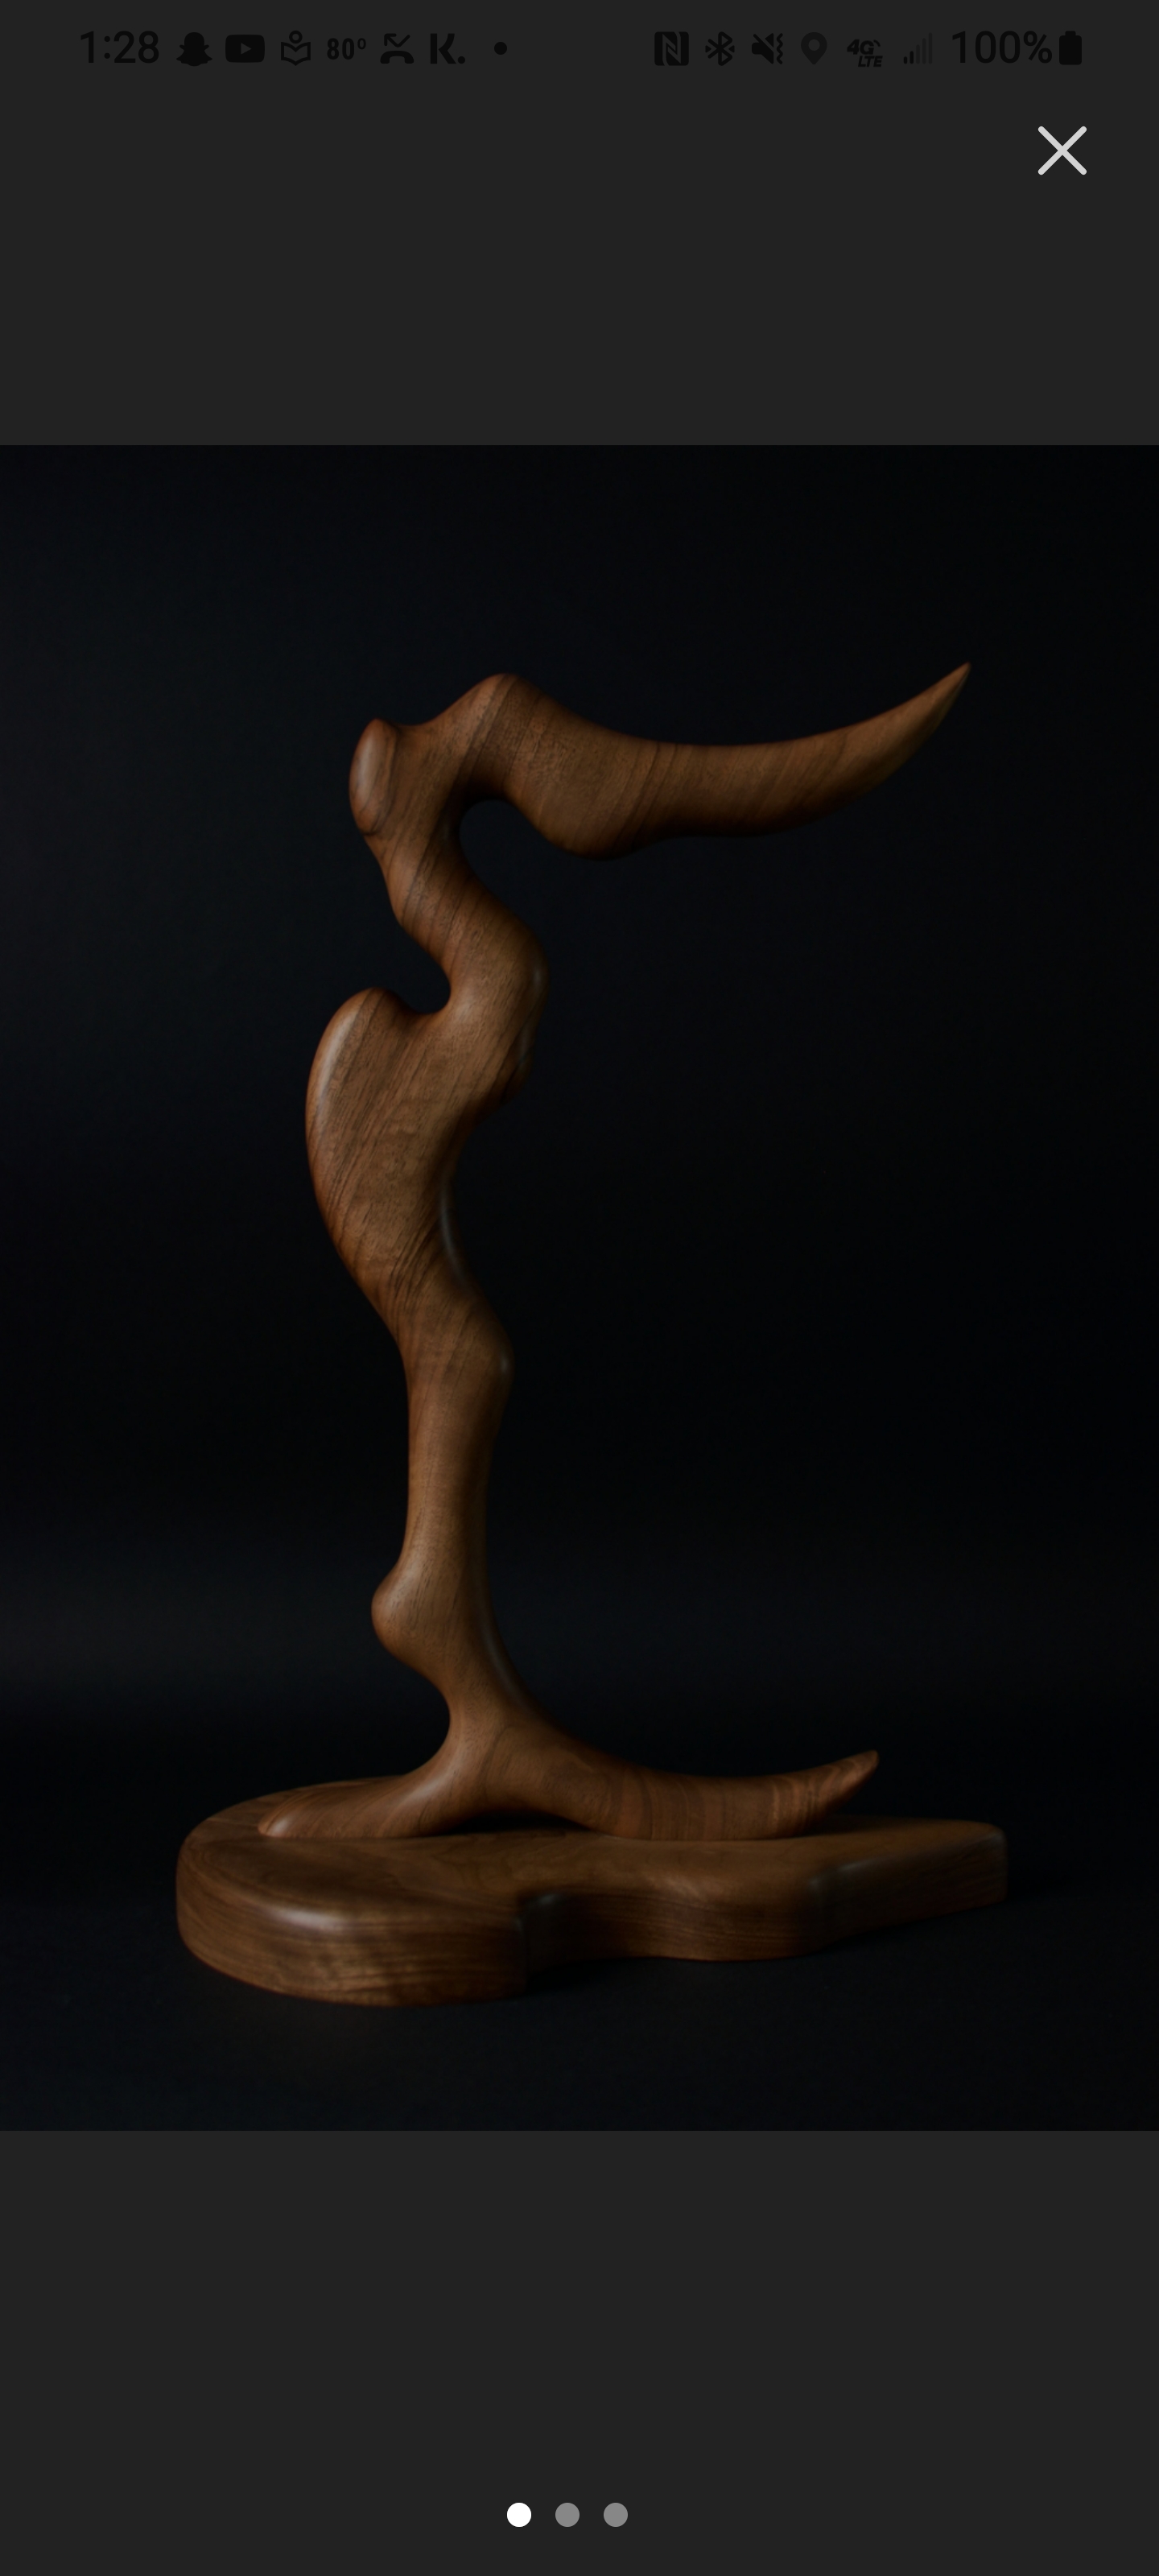
I've read this thread for quite some time for inspiration, and I finally finished after about a month (still in high school, unfortunately). I did a quick mock-up of the design in Google SketchUp to make sure all of the dimensions worked, so if anyone wants the design, just contact me (can't post attachments apparently). The stand is designed specifically for Sennheiser HD598's and the FIIO E7.
Left-Side View: There's a little hole for the 1/4" to 3.5 mm adapter to sit in, and the E7 lies just below the surface of the stand's body so the front plate is less likely to get scratched.

Right-Side View: Cord is easily wrapped around some poles on the other side. I wrap mine in a figure-8 so that the cord does not twist after each loop.

Without Headphones or amp: The curve for the headband is made from 4 strips of1/32" Birch plywood cold-formed (the "wright" way) to eliminate any pressure points.

Below: The nice and shiny metal rods are actually some old stainless steel tubes that I scrapped from an old umbrella and polished up with some steel wool. The black stuff in the place where the amp goes (I really don't think it has a name, possibly "amp pocket"?) is some faux-leather that I cut out of one of those Bank of America calendars you get for signing up for an account. The ends of the faux-leather strips are curved in between wood layers, so there's no exposed edges.

Below: A side view, because something about a slight angle forward makes the stand look so much cooler. The curve in the arm is matched to the 598's, so when the headphones are in place, there is a constant 3/4" gap in between the two. Also, there are four rubber feet in each corner to protect the nightstand, and the wood border levitates just about a millimeter above the surface.

Total Cost: $0. Everything was laying around my house, mostly because I don't throw things out that I see value in.
Total Time: Probably about 20-25 hours. 15 pieces of hardwood (I really don't know what kind) make up this project, so cutting and sanding took the longest by far. I didn't use power tools because all this wood is old and dry, so it splinters at the edges very easily. Enjoy, and good luck with your own projects.