I thought I would share the mods I did to my Philips SHL3300.
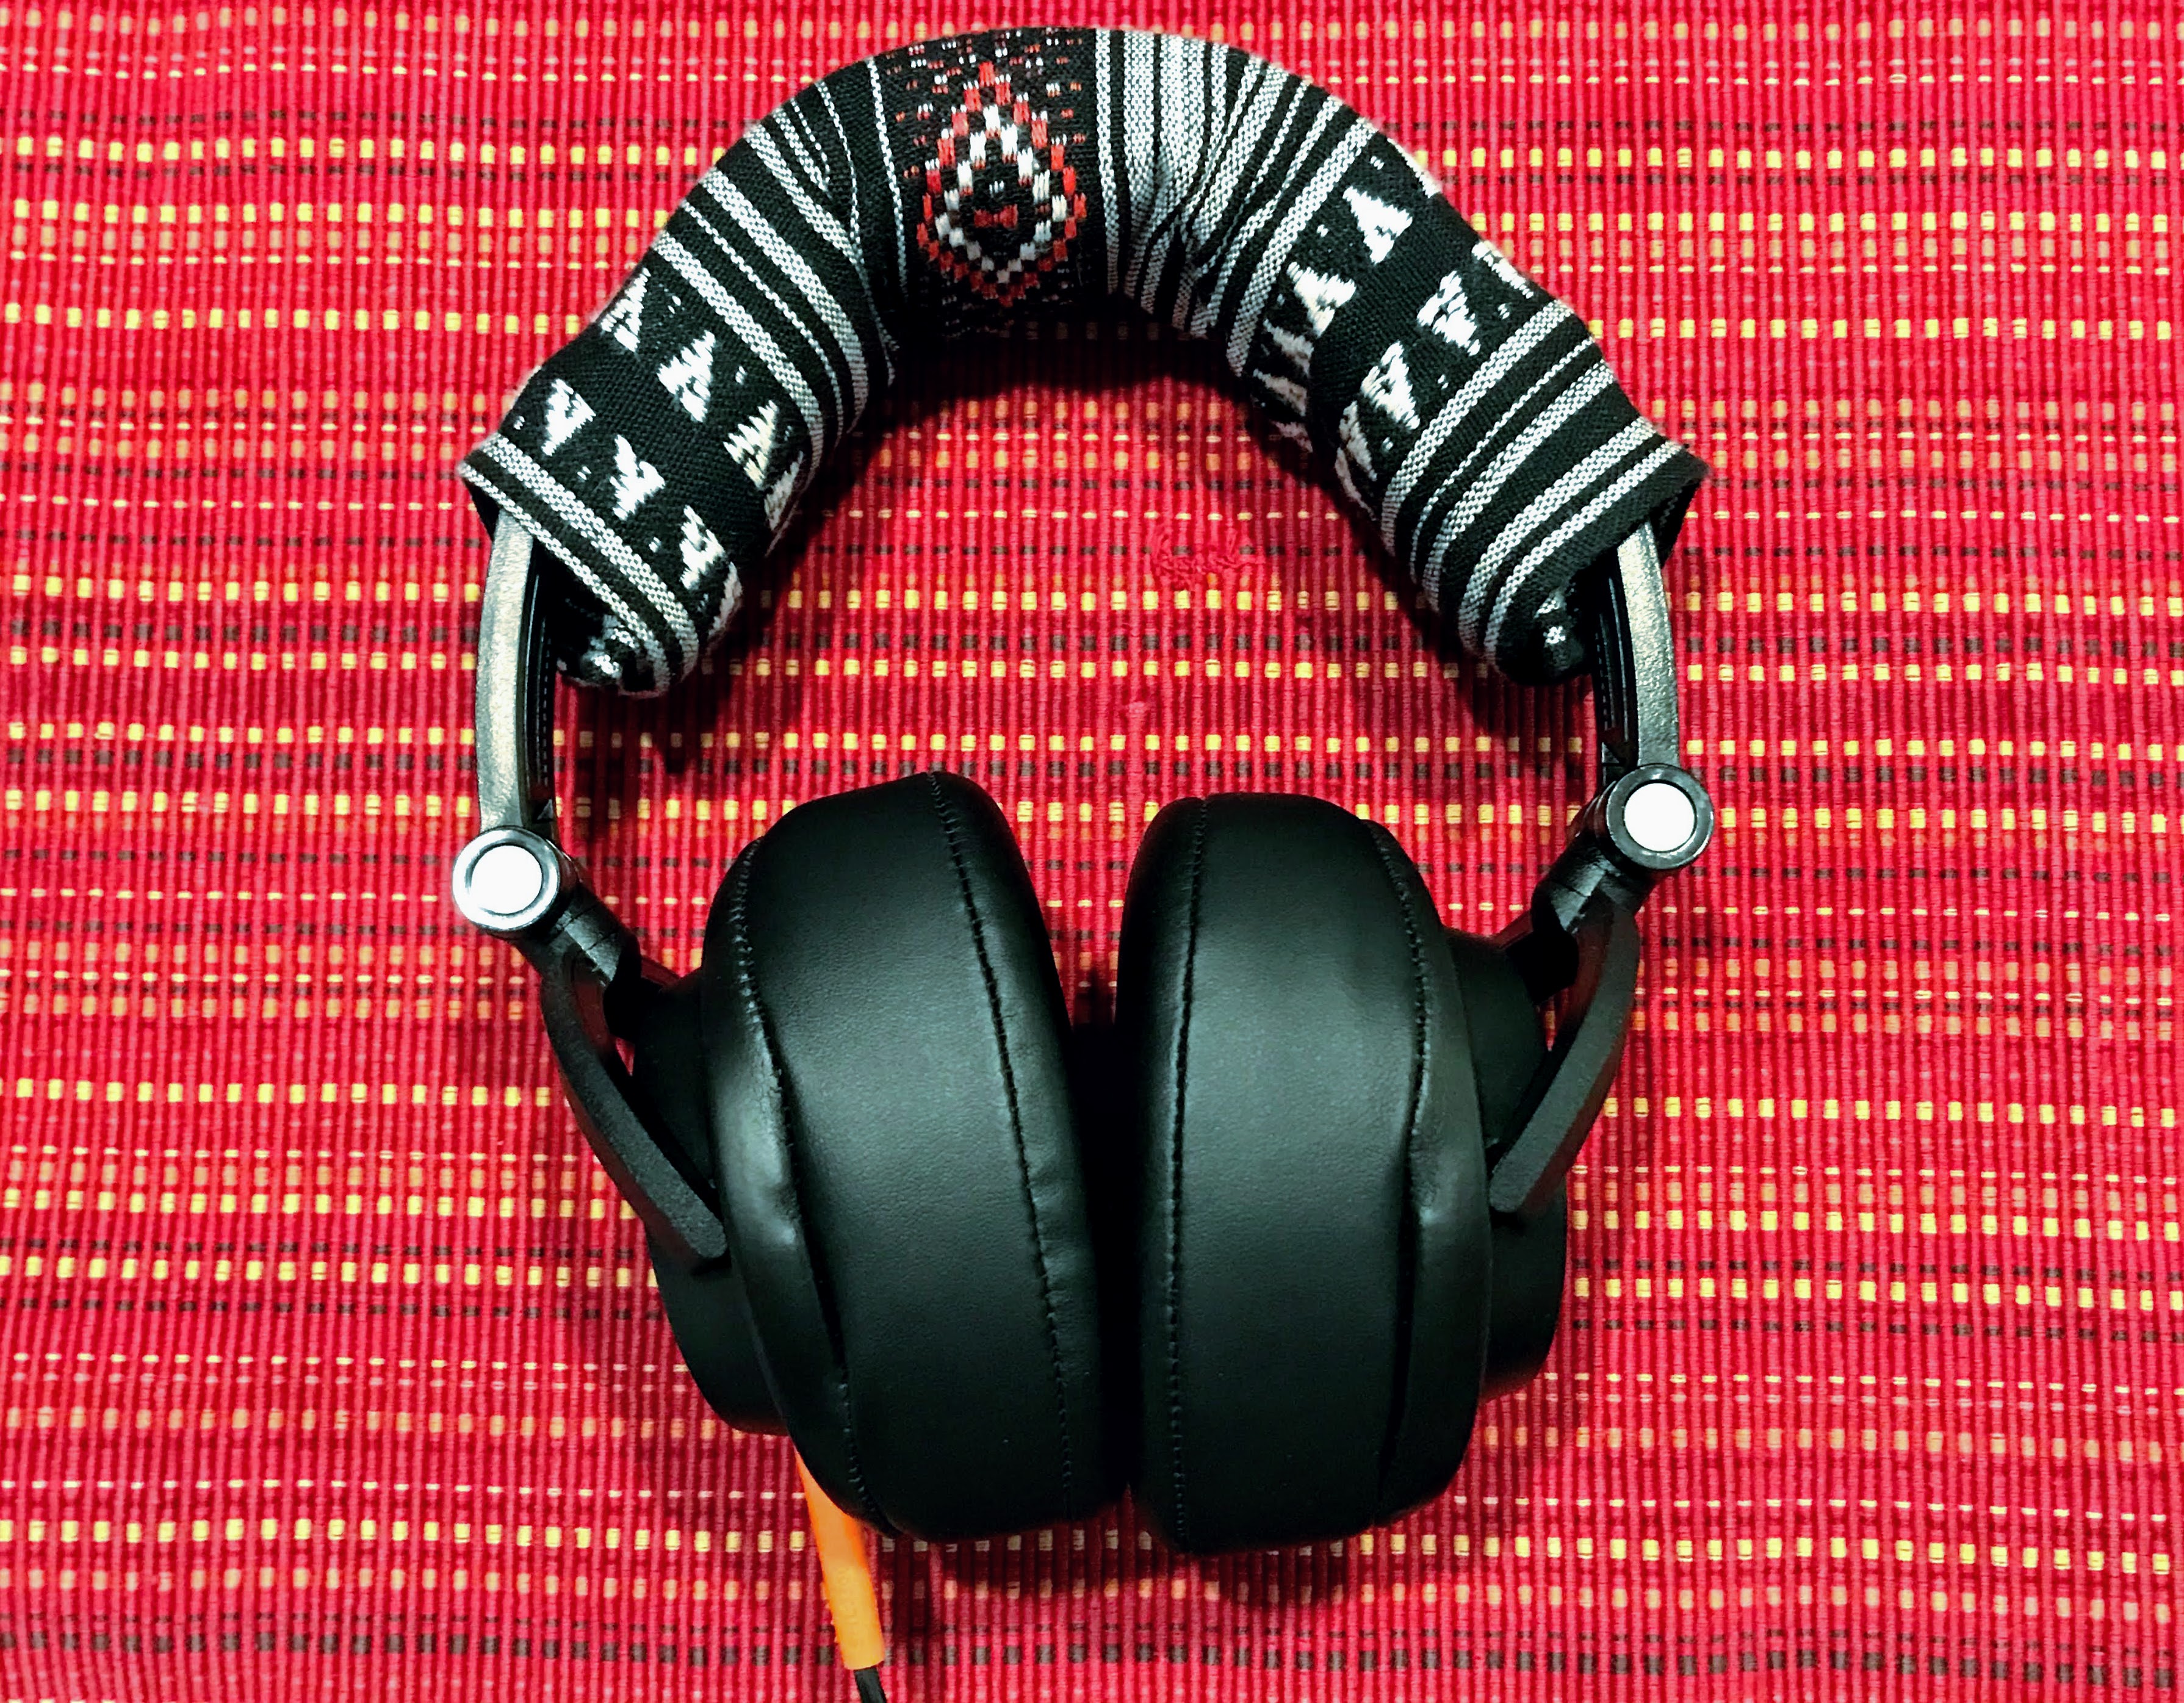
1. Like most I installed Brainwavz HM5 pads. Big improvement in sound. Even if you feel like the stock pads are "just fine", be aware that while the pad swap improves the comfort factor by 200%, it also improves the sound by an unbelievable amount. Do yourself a favor and change the stock pads. If you are on an uber-budget, you can get good quality "generic" round pads for $10 from ebay/aliexpress. I have HM5s on one of my SHL3300 sets, and generic round pads on another. If you do get generic round pads, the size you want is 90mm round (stretch to fit), 95mm round (perfect fit), and 100mm round (pretty loose fit but still works as long as pads have a wide lip on the back). You also want to make sure the generic round pads are 30mm thick (the same thickness as HM5 pads). You are cheating yourself out of the true capabilities of these headphones by using the junk stock pads.
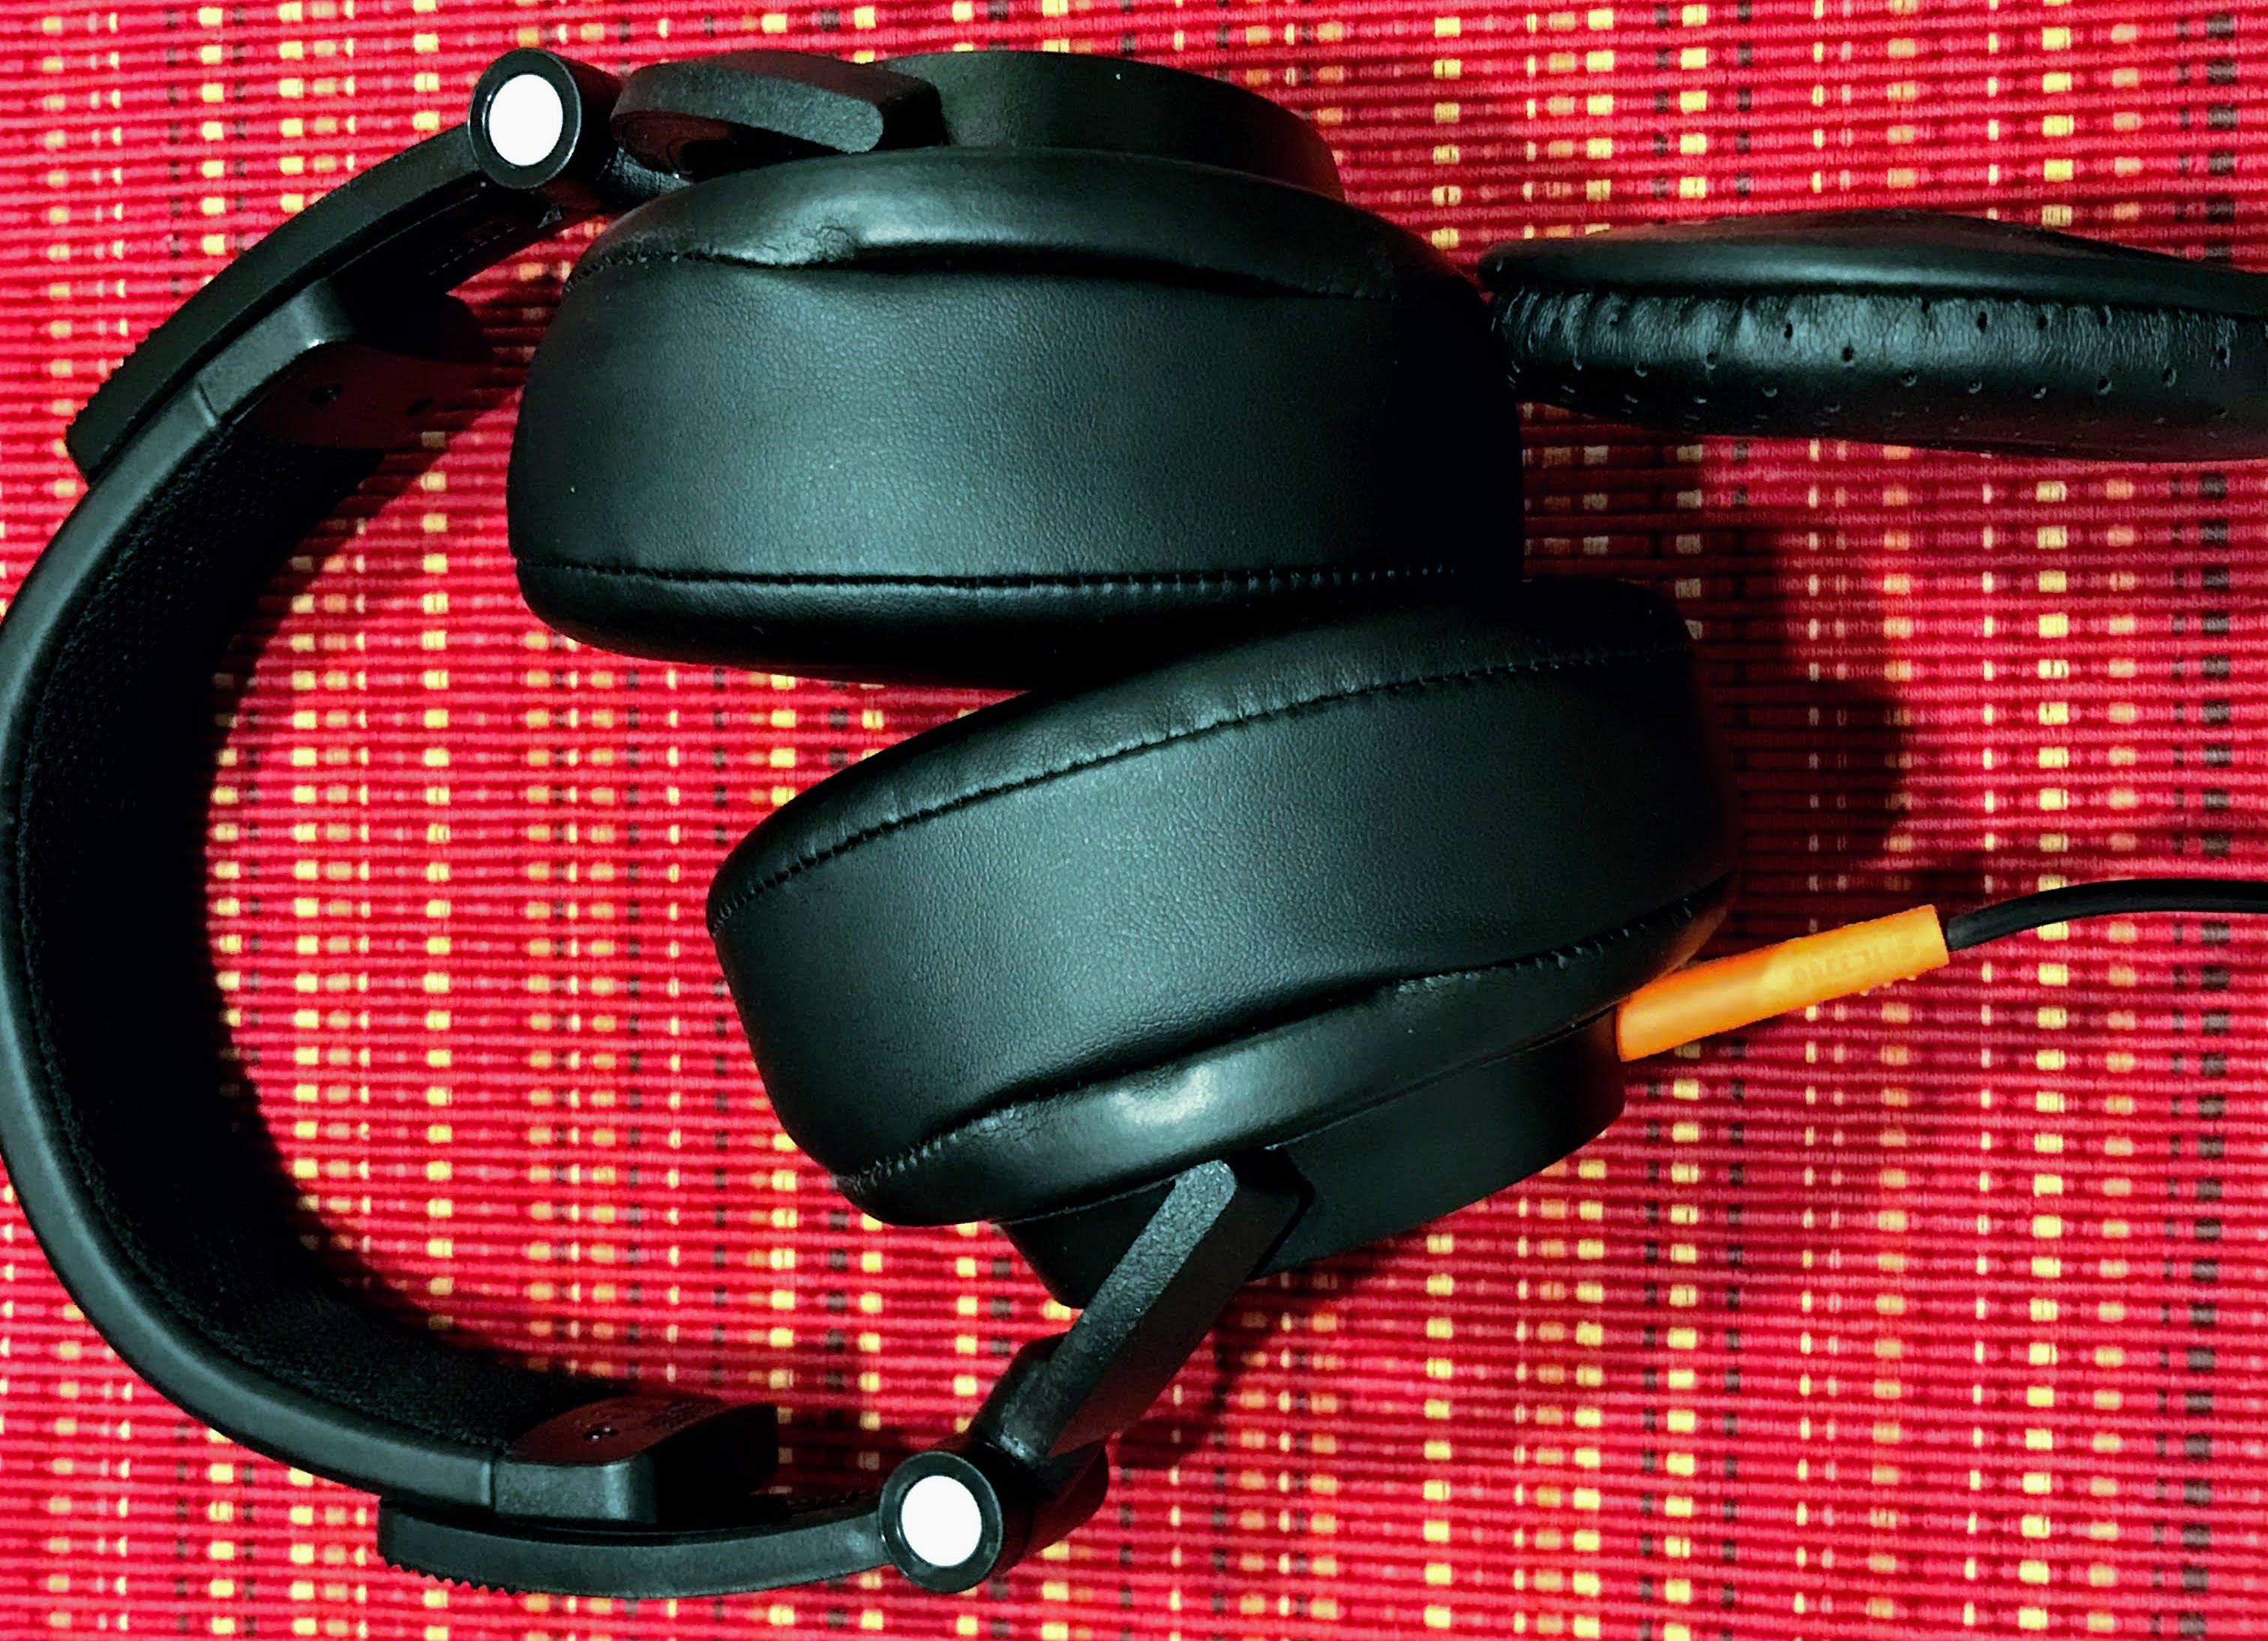
2. I completely ditched the plastic grilles. The difference was immediate, like you removed cotton balls from your ears. If you thought swapping out the stock pads was an improvement, wait until you remove the grilles. This shouldn't even be optional - you need to remove your plastic grilles. Like right now. The easiest way to remove them (once the pads are off) is to locate the small "v" shaped notch on the face of the cups. Look at the edge of the "v" notch and you'll be able to see where the grilles are sitting on top (they are about 2mm thick). Stick the tip of a paper clip or tiny flat head screwdriver under the grilles and lift them up slightly. Now rotate the grille COUNTERCLOCKWISE and it will pop right off.
Here's what they look like with the grilles removed:
http://imgur.com/TWj8nVY
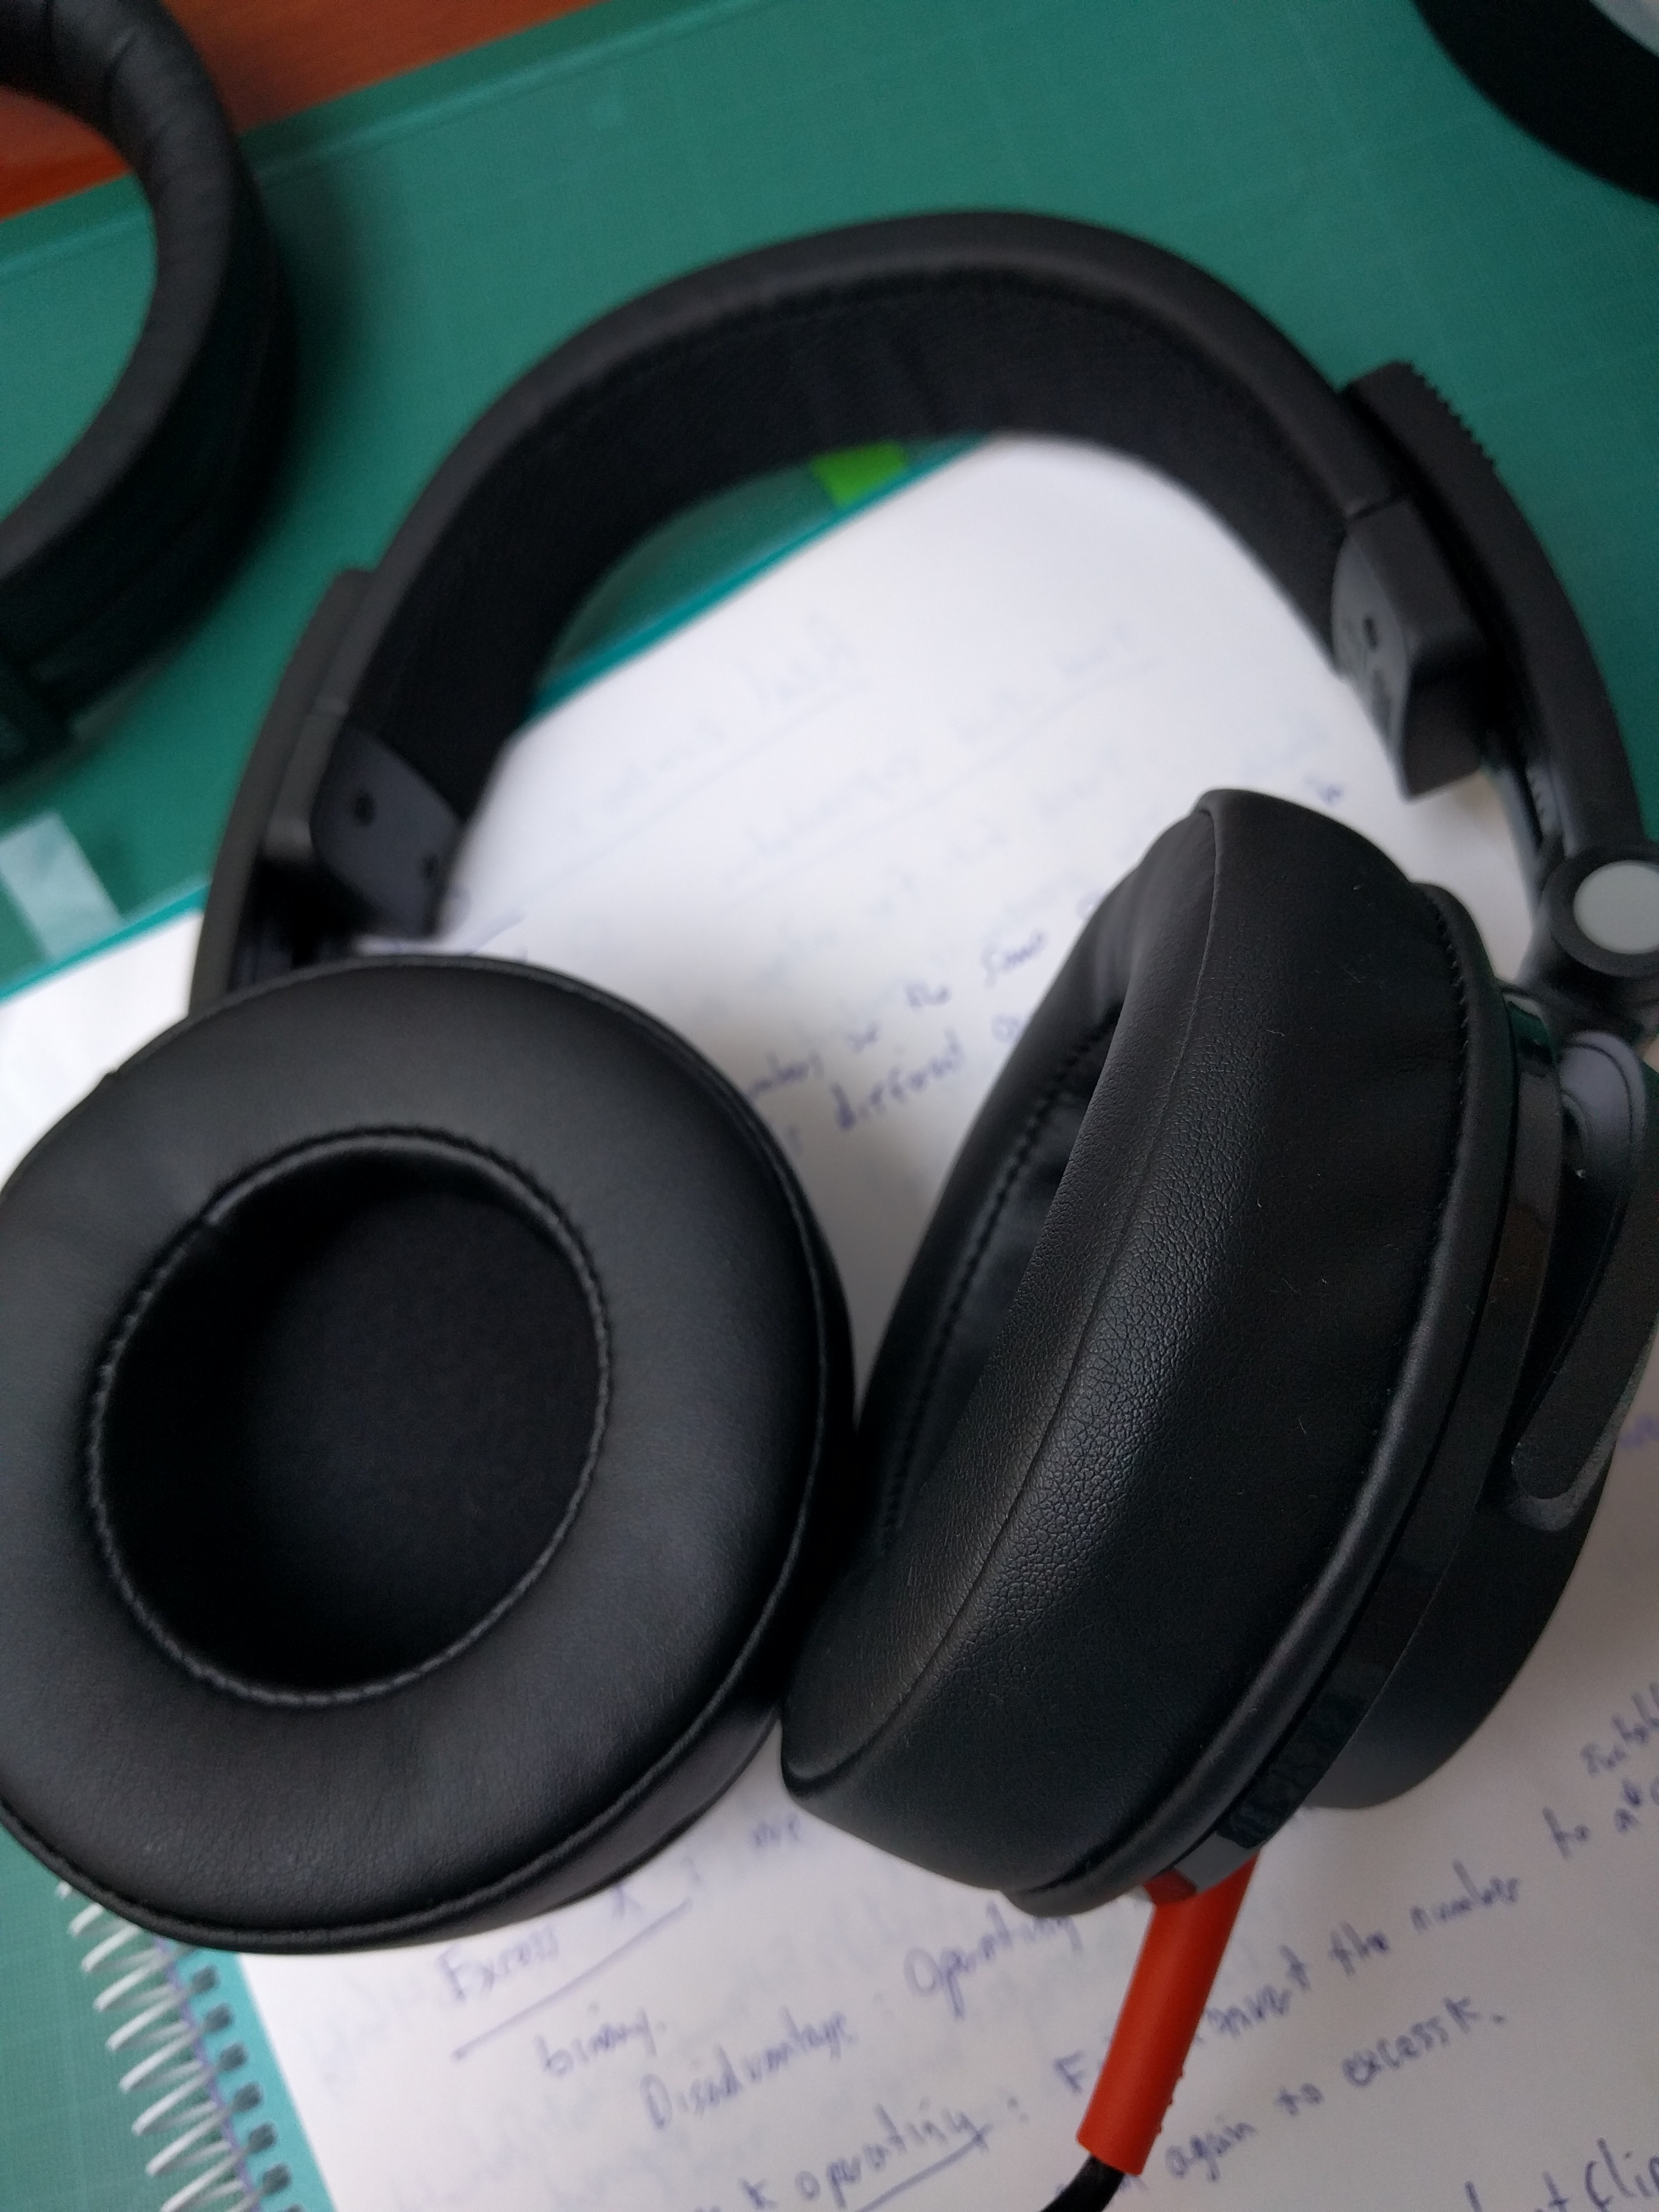
3. Now to do something about the uncomfortable rubber headband. I ordered a generic Sennheiser HD600 headband cushion from ebay ($1). It's the perfect length and width. There's no adhesive on the back of the replacement cushion, but even if there was the bottom of the SHL3300 headband is fabric so it wouldn't stick anyways. So to attach it I made a lambskin headband cover. It's simply a piece of lambskin scrap I had, cut to a 11cm x 21cm rectangle, then wrapped around and attached to itself with a few tiny strips of adhesive-backed velcro placed along the long edge. There were no issues with the adhesive sticking to either side the lambskin - I've used this method when making costumes & props before with good success. The velcro is not the standard thick stuff, this was very thin ie 1mm thick and has weaker hold, but works fine for this purpose. Velcro brand part number 91332. ). The stock headband adjustment sliders still function perfectly, and the headband is 3xs more comfortable thanks to the new cushion & buttery soft lambskin.
Here's what the Sennheiser HD600 headband cushion looks like:
http://imgur.com/hnN4SJJ
Here you can see how the velcro is set up:
http://imgur.com/a/jl2CV
And here's what the final product looks like:
http://imgur.com/uGlJtlH and
http://imgur.com/gIkXrOs
4. As suggested by dhruvmeena96, I added a layer of dynamat to the outer face of the cups. I also opened up the cups (held together by 4 plastic clips), and lined the bottom floor of the cups and the driver magnet with small pieces of dynamat as well. Make sure you don't cover any vent holes (the exception is the 3 slots where the stock grilles slides into - you want to cover those slots back up since there's no more grilles).
When you separate the cups, there are plastic tabs located at 10, 2, 4, & 8 o'clock. Use a flat head screwdriver & pry gently at each tab notch (which will be apparent when looking through the crevice where the back of the pad goes. Some or all of the plastic tabs WILL break as seen here (
http://imgur.com/JoScUmH). However, you can easily glue the cups back together once you are finished using a few strategically placed drops of glue as indicated here (
http://imgur.com/wmnj05u).
Make sure to remove all of the little pieces of broken tabs that will fall to the bottom of the cups as seen here (
http://imgur.com/RsHaW2x). The hinges on the inside of the cups have grease on them, which will make some of the pieces of broken tabs stick. You don't want to forget a piece and have them rattling around after you're done modding!
I don't have any shots of the dynamat inside of the cups, but here's one showing the dynamat on the outside:
http://imgur.com/v4CwOuf
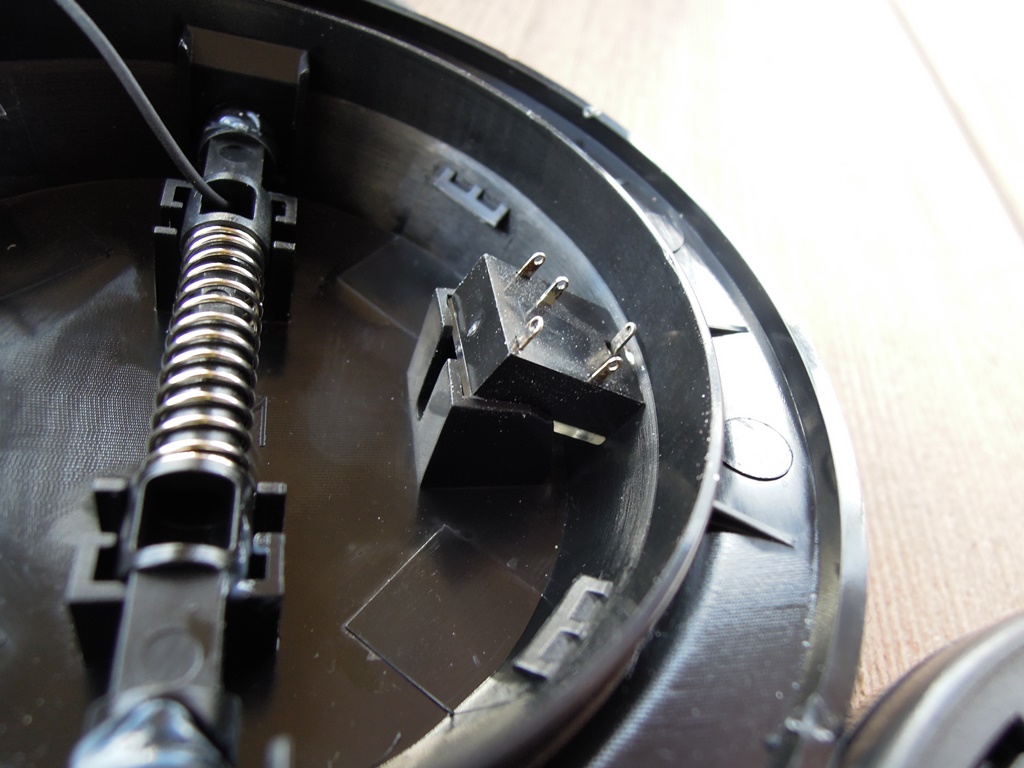
5. Since I had the cups apart anyways, I decided to add a removable cable jack. This was actually the easiest mod of all. I ordered "PCB Panel Mount 3.5mm Stereo Jack" from ebay ($3 for qty 20 pcs). Once the stock orange strain relief is removed, the jack fits perfectly and tightly into a molded "well". You don't even need to use the threaded nut either - it's like this headphone was made for this jack! There are a few different styles of the "PCB Panel Mount" jack, so it's important to verify the measurements to ensure it fits.
Here's what the jacks look like:
http://imgur.com/Ywklm5z
The dimensions of the jack can be seen here (length=14.2mm, width=11.5(11.6mm), height=6.0mm):
http://imgur.com/FzRODwp
I just cut the stock cable right where it exits the orange strain relief as seen here (
http://imgur.com/CXMrGRM). Then once you slide the cable out of the strain relief and into the inside of the cup, you are able to remove the orange strain relief. What you will see now is this hole (
http://imgur.com/1cwNJVu). The little square "well" you see is where the new PCB female jack will go.
You insert it at a slight angle, so that the 3.5mm hole goes through the hole in the headphone cup as seen here (
http://imgur.com/Ft2SP5O). Then simply push the rear edge of the PCB jack downwards using a pencil eraser or some similar tool, taking care not to damage the solder pins. What you end up with is this (
http://imgur.com/8gqTZJg). A perfect fit! The jack is wedged into the "well", reinforced by the plastic walls. There's no way the jack can fall out, and it is rock solid when inserting and removing the cable. You'd have to run the headphones over with a car to get that jack to budge!
I find it's easiest to solder the pins onto the jack when the jack is loose. Then once all soldered, install the jack in the little "well" and you're ready to go.
Here's a handy reference of the wiring & colors etc:
http://imgur.com/SpRbtjj
Once the wiring is soldered as seen here (
http://imgur.com/OYWlls9), test the jack to make sure it works. Then reinforce the jack with a bit of hot glue/epoxy on the inside of the cups as seen here (
http://imgur.com/sY3ouny). This serves to both reinforce the jack/wiring as well as seal the gap where the strain relief was (because the strain relief hole is slightly larger than the female jack's 3.5mm hole).
Then glue the cups back together with a few drops of superglue/hot/glue/epoxy in the spots indicated here (
http://imgur.com/wmnj05u). Once the glue is cured, fill in the gap around the jack on the outside of the cup where the strain relief was with a bit of hot glue/epoxy, as indicated here (
http://imgur.com/sYltoBp).
Here's the completed result (the jack sits flush with the cups, and looks like it could have come stock this way):
http://imgur.com/MPmYYWK
6. The stock cable was actually decent enough to reuse, so I terminated it with a male end where I had cut the cable earlier. One nice thing about the cable being removable is that you can choose which side you want the coiled section to be - up at the top like it was stock, or down at the bottom by your music source. Here's the completed cable (
http://imgur.com/m76wRJB).
* Update * Even though I terminated the end of the stock cable, I ended up using a "Beats" style cable and using the terminated stock cable as an aux cable in my car. The reason is because once you do the removable cable mod you'll now have FULL WIRED CONTROL using an appropriate TRRS cable. That means on an Apple product you'll have full microphone, volume control, pause/play/skip, etc. On Android you'll have microphone & play/pause. Nice!
Here's the final result, getting ready to enjoy the spoils of my labor:
http://imgur.com/Jfw3By1


") http://www.newegg.com/Product/Product.aspx?Item=N82E16826138187R
http://www.newegg.com/Product/Product.aspx?Item=N82E16826138187R