


Thanks buddy, but ideally I would like them as close to the originals as possible, apart from the connector.You can use the modded cups that I did with adjustable bass ports.
You are using an out of date browser. It may not display this or other websites correctly.
You should upgrade or use an alternative browser.
You should upgrade or use an alternative browser.
"Open Alpha" T50 3D printed headphone project from MrSpeakers
- Thread starter mrspeakers
- Start date
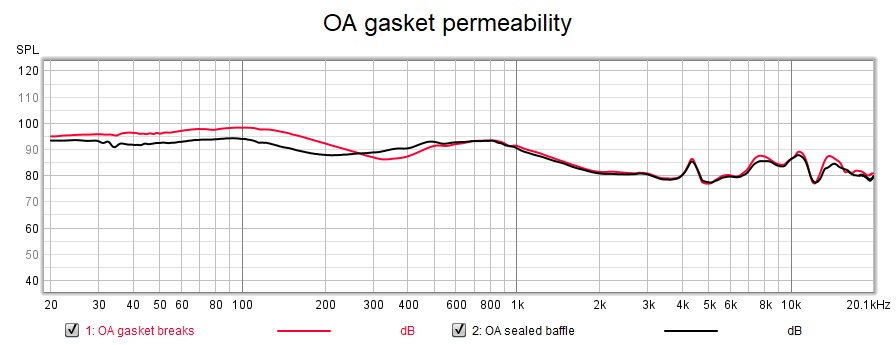
Guys is this 4mm acoustic foam ok to use?
https://www.scan.co.uk/products/aka...ound-proofing-kit-for-case-midi-to-full-tower
or
https://www.ebay.co.uk/itm/Akasa-AK...uction-Mat-for-Midi-ATX-PC-Case-/302908258438
https://www.scan.co.uk/products/aka...ound-proofing-kit-for-case-midi-to-full-tower
or
https://www.ebay.co.uk/itm/Akasa-AK...uction-Mat-for-Midi-ATX-PC-Case-/302908258438
Last edited:
VanHai
500+ Head-Fier
They are the same, so you can use either. Pax-mate is very good for damping material, i use it for modding all my T20,T40,T50 and Open Alpha.Guys is this 4mm acoustic foam ok to use?
https://www.scan.co.uk/products/aka...ound-proofing-kit-for-case-midi-to-full-tower
or
https://www.ebay.co.uk/itm/Akasa-AK...uction-Mat-for-Midi-ATX-PC-Case-/302908258438
Excellent, thanks mate.They are the same, so you can use either. Pax-mate is very good for damping material, i use it for modding all my T20,T40,T50 and Open Alpha.
Edit: @VanHai the first link is AK-PAX-2, the second one is AK-PAX-1...are they definitely the same?
Last edited:
VanHai
500+ Head-Fier
Pax-mate 2 is a new version of Pax-mate 1. They have the same thickness 4mm, i am not sure any better damping for small dimension of the cups. I would use the less expensive and save money, but it is up to you. Either one is alright.Excellent, thanks mate.
Edit: the first link is AK-PAX-2, the second one is AK-PAX-1...are they definitely the same?
socks2sound
Head-Fier
- Joined
- Jun 24, 2012
- Posts
- 73
- Likes
- 28

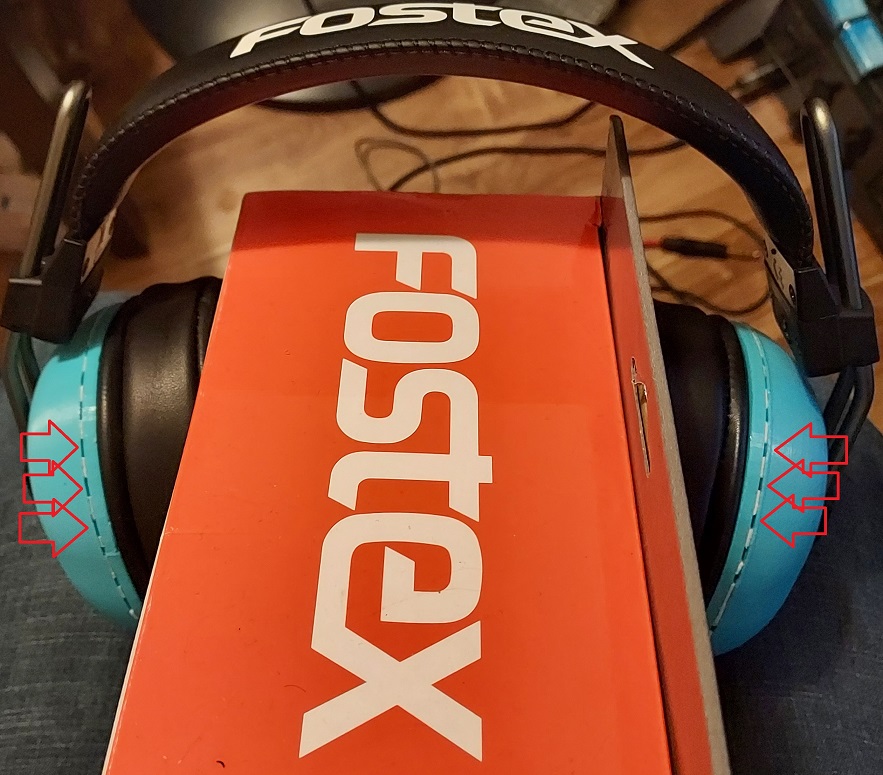
Urushi is fun.
Sanding for a couple hours after it's been cured is...not LOL
i need longer 2 longer screws for my diy leatherstrap but cant find any infos about the correct screwsize. Can someone help me please?
dnalekaw
Head-Fier
https://www.ebay.co.uk/itm/322518595045i need longer 2 longer screws for my diy leatherstrap but cant find any infos about the correct screwsize. Can someone help me please?
These are almost identical to the headband screws for the T60rp, anything that's 3.5x19mm or similar should work.
thank you bro 
musicfan145
100+ Head-Fier
- Joined
- Apr 4, 2016
- Posts
- 148
- Likes
- 78
Thanks buddy.
I've had a quick look but the only ones I could see on there (with 3.5mm connectors) were the ones with the 'bass screw' modification.
Ideally I want to keep these as close to the Mr Speakers originals as possible (but with 3.5mm connectors).
It could well be the case that I didn't search thingiverse thoroughly enough, so I'll have another look on there.
I created a modified version of the original bass port design, which used a 2.5mm connector. I believe a 3.5mm connector would work as well. Mine have reinforced screw bosses to prevent them from twisting off so easily. (I have also created reinforced versions of the original hirose model and the @Balazar screw model with hirose connectors.)
I also made a one-piece baffle that works well if printed vertically and a few printable templates to help with cutting the soft parts. I posted the TinkerCAD links a long time ago, but I just now uploaded all these to Thingiverse as well.
Thingiverse link (all files):
https://www.thingiverse.com/thing:4743583
TinkerCAD links:
Left Cup (2.5 mm jack, reinforced):
https://www.tinkercad.com/things/cJ1mDoeQ3Wt
Right Cup (2.5 mm jack, reinforced):
https://www.tinkercad.com/things/a9SVYG23nyC
Left Cup (Hirose jack, reinforced):
https://www.tinkercad.com/things/ac2ObwHCaCz
Right Cup (Hirose jack, reinforced):
https://www.tinkercad.com/things/bFkIVDMiapl
Left Cup (Hirose, Balazar bass adjustment screw, reinforced):
https://www.tinkercad.com/things/ktqwlRUPsY5
Right Cup (Hirose, Balazar bass adjustment screw, reinforced):
https://www.tinkercad.com/things/aRpowoEi5KQ
One-piece Baffle:
https://www.tinkercad.com/things/aB857ReKDy8
Ear side felt cutting template:
https://www.tinkercad.com/things/67PFtjAkzmN
Cup gasket cutting template:
https://www.tinkercad.com/things/0oTNXVKIY0O
Interesting...Ive finished my first pair, but there are a few slight imperfections that I'd like to address in my second attempt.I created a modified version of the original bass port design, which used a 2.5mm connector. I believe a 3.5mm connector would work as well. Mine have reinforced screw bosses to prevent them from twisting off so easily. (I have also created reinforced versions of the original hirose model and the @Balazar screw model with hirose connectors.)
I also made a one-piece baffle that works well if printed vertically and a few printable templates to help with cutting the soft parts. I posted the TinkerCAD links a long time ago, but I just now uploaded all these to Thingiverse as well.
Thingiverse link (all files):
https://www.thingiverse.com/thing:4743583
TinkerCAD links:
Left Cup (2.5 mm jack, reinforced):
https://www.tinkercad.com/things/cJ1mDoeQ3Wt
Right Cup (2.5 mm jack, reinforced):
https://www.tinkercad.com/things/a9SVYG23nyC
Left Cup (Hirose jack, reinforced):
https://www.tinkercad.com/things/ac2ObwHCaCz
Right Cup (Hirose jack, reinforced):
https://www.tinkercad.com/things/bFkIVDMiapl
Left Cup (Hirose, Balazar bass adjustment screw, reinforced):
https://www.tinkercad.com/things/ktqwlRUPsY5
Right Cup (Hirose, Balazar bass adjustment screw, reinforced):
https://www.tinkercad.com/things/aRpowoEi5KQ
One-piece Baffle:
https://www.tinkercad.com/things/aB857ReKDy8
Ear side felt cutting template:
https://www.tinkercad.com/things/67PFtjAkzmN
Cup gasket cutting template:
https://www.tinkercad.com/things/0oTNXVKIY0O
I'll definitely be taking a look at your modified designs.
Thanks.
Out of interest what are you using to make the gaskets from?...in the end I managed to cast a couple in silicone using a mould I made, it was a complete pita, but they worked out pretty good all things considered...they make tuning so much easier now.
Last edited:
Glad to see that this thread is still alive.
Does anyone have 3d files for 4 pin mini xlr earcups (audeze, zmf style) instead of the traditional hirose?
Does anyone have 3d files for 4 pin mini xlr earcups (audeze, zmf style) instead of the traditional hirose?
Pars
Can Jam '10 Organizer
- Joined
- Oct 28, 2003
- Posts
- 4,133
- Likes
- 62
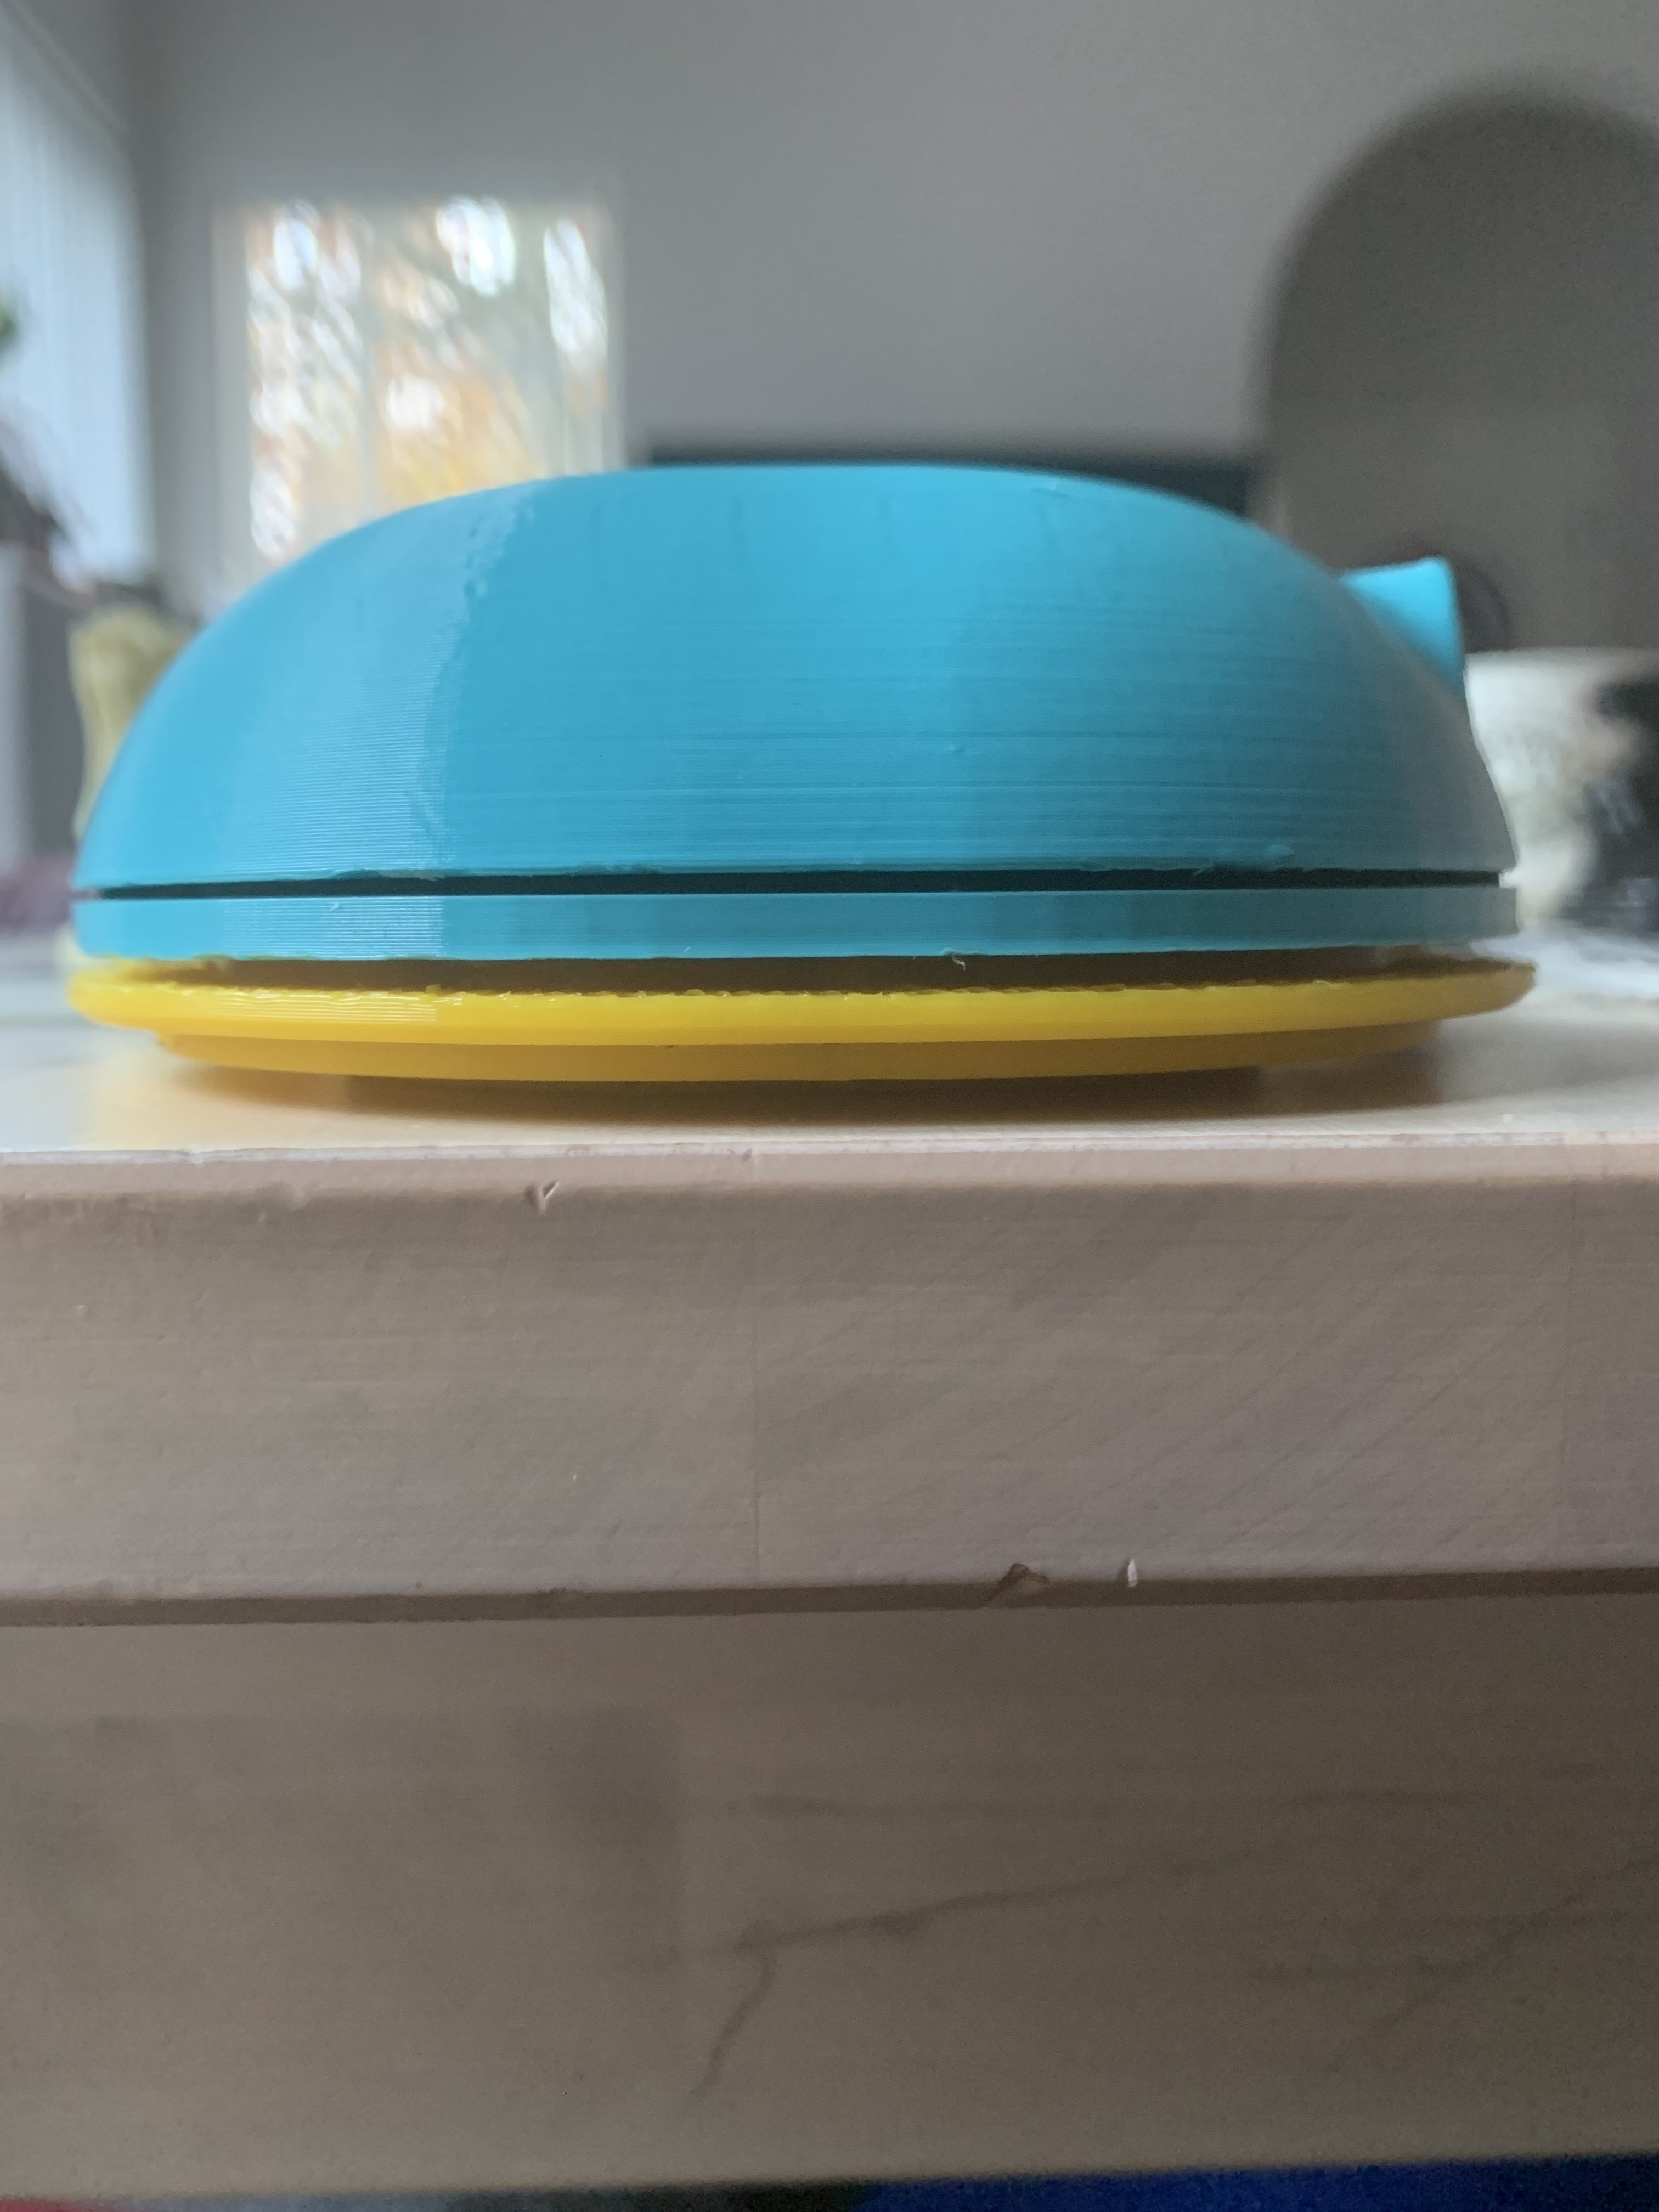
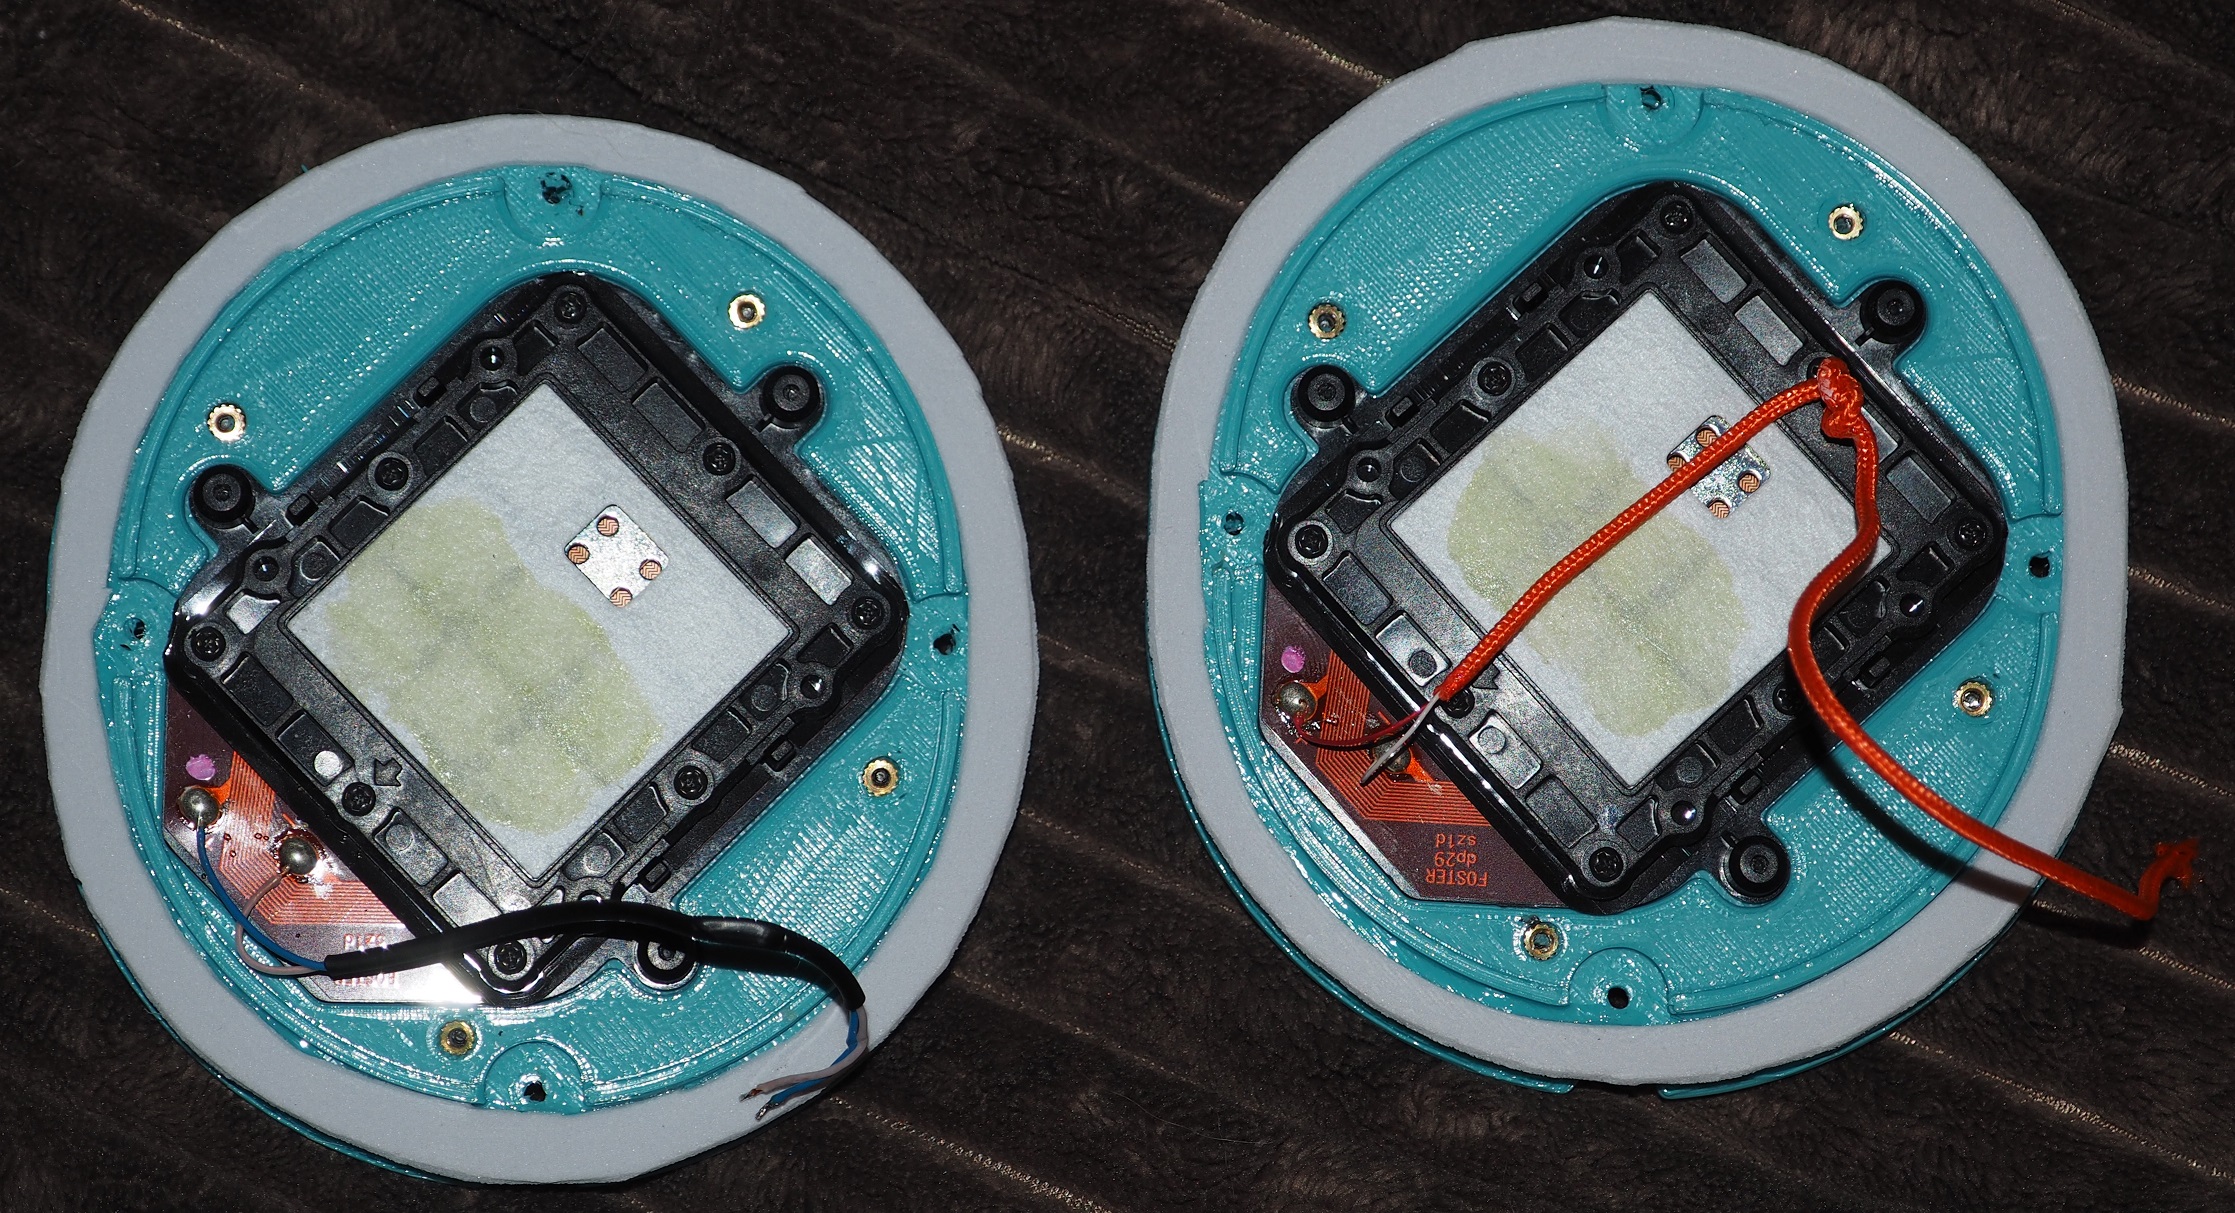
A friend of mine printed these for me using PLA (and the original files). They look a bit rough on the inside, and considerable clean-up to do on them (started half-assed on one of the cups). I should have used the modified files with the adjustable bass port, etc. Do these look worth the effort for clean-up and use? It looks like I will need to drill the screw holes out, but that isn't a problem. I'll probably get some of the McMaster Carr screws (in stainless) and use those. I don't know much of anything regarding 3D printing. I have a couple of pairs of T50RP Mk2s, so one set will get modified into Open Alphas... maybe both of them dependent on how that goes. I prefer the Hirose connectors; the pair of Massdrop HE4XXs I had with 2.5mm cut out everytime I moved my head. The 3.5mm version I had Massdrop replace them with were better, but I got rid of them as I liked my modded T50s better.
Attachments


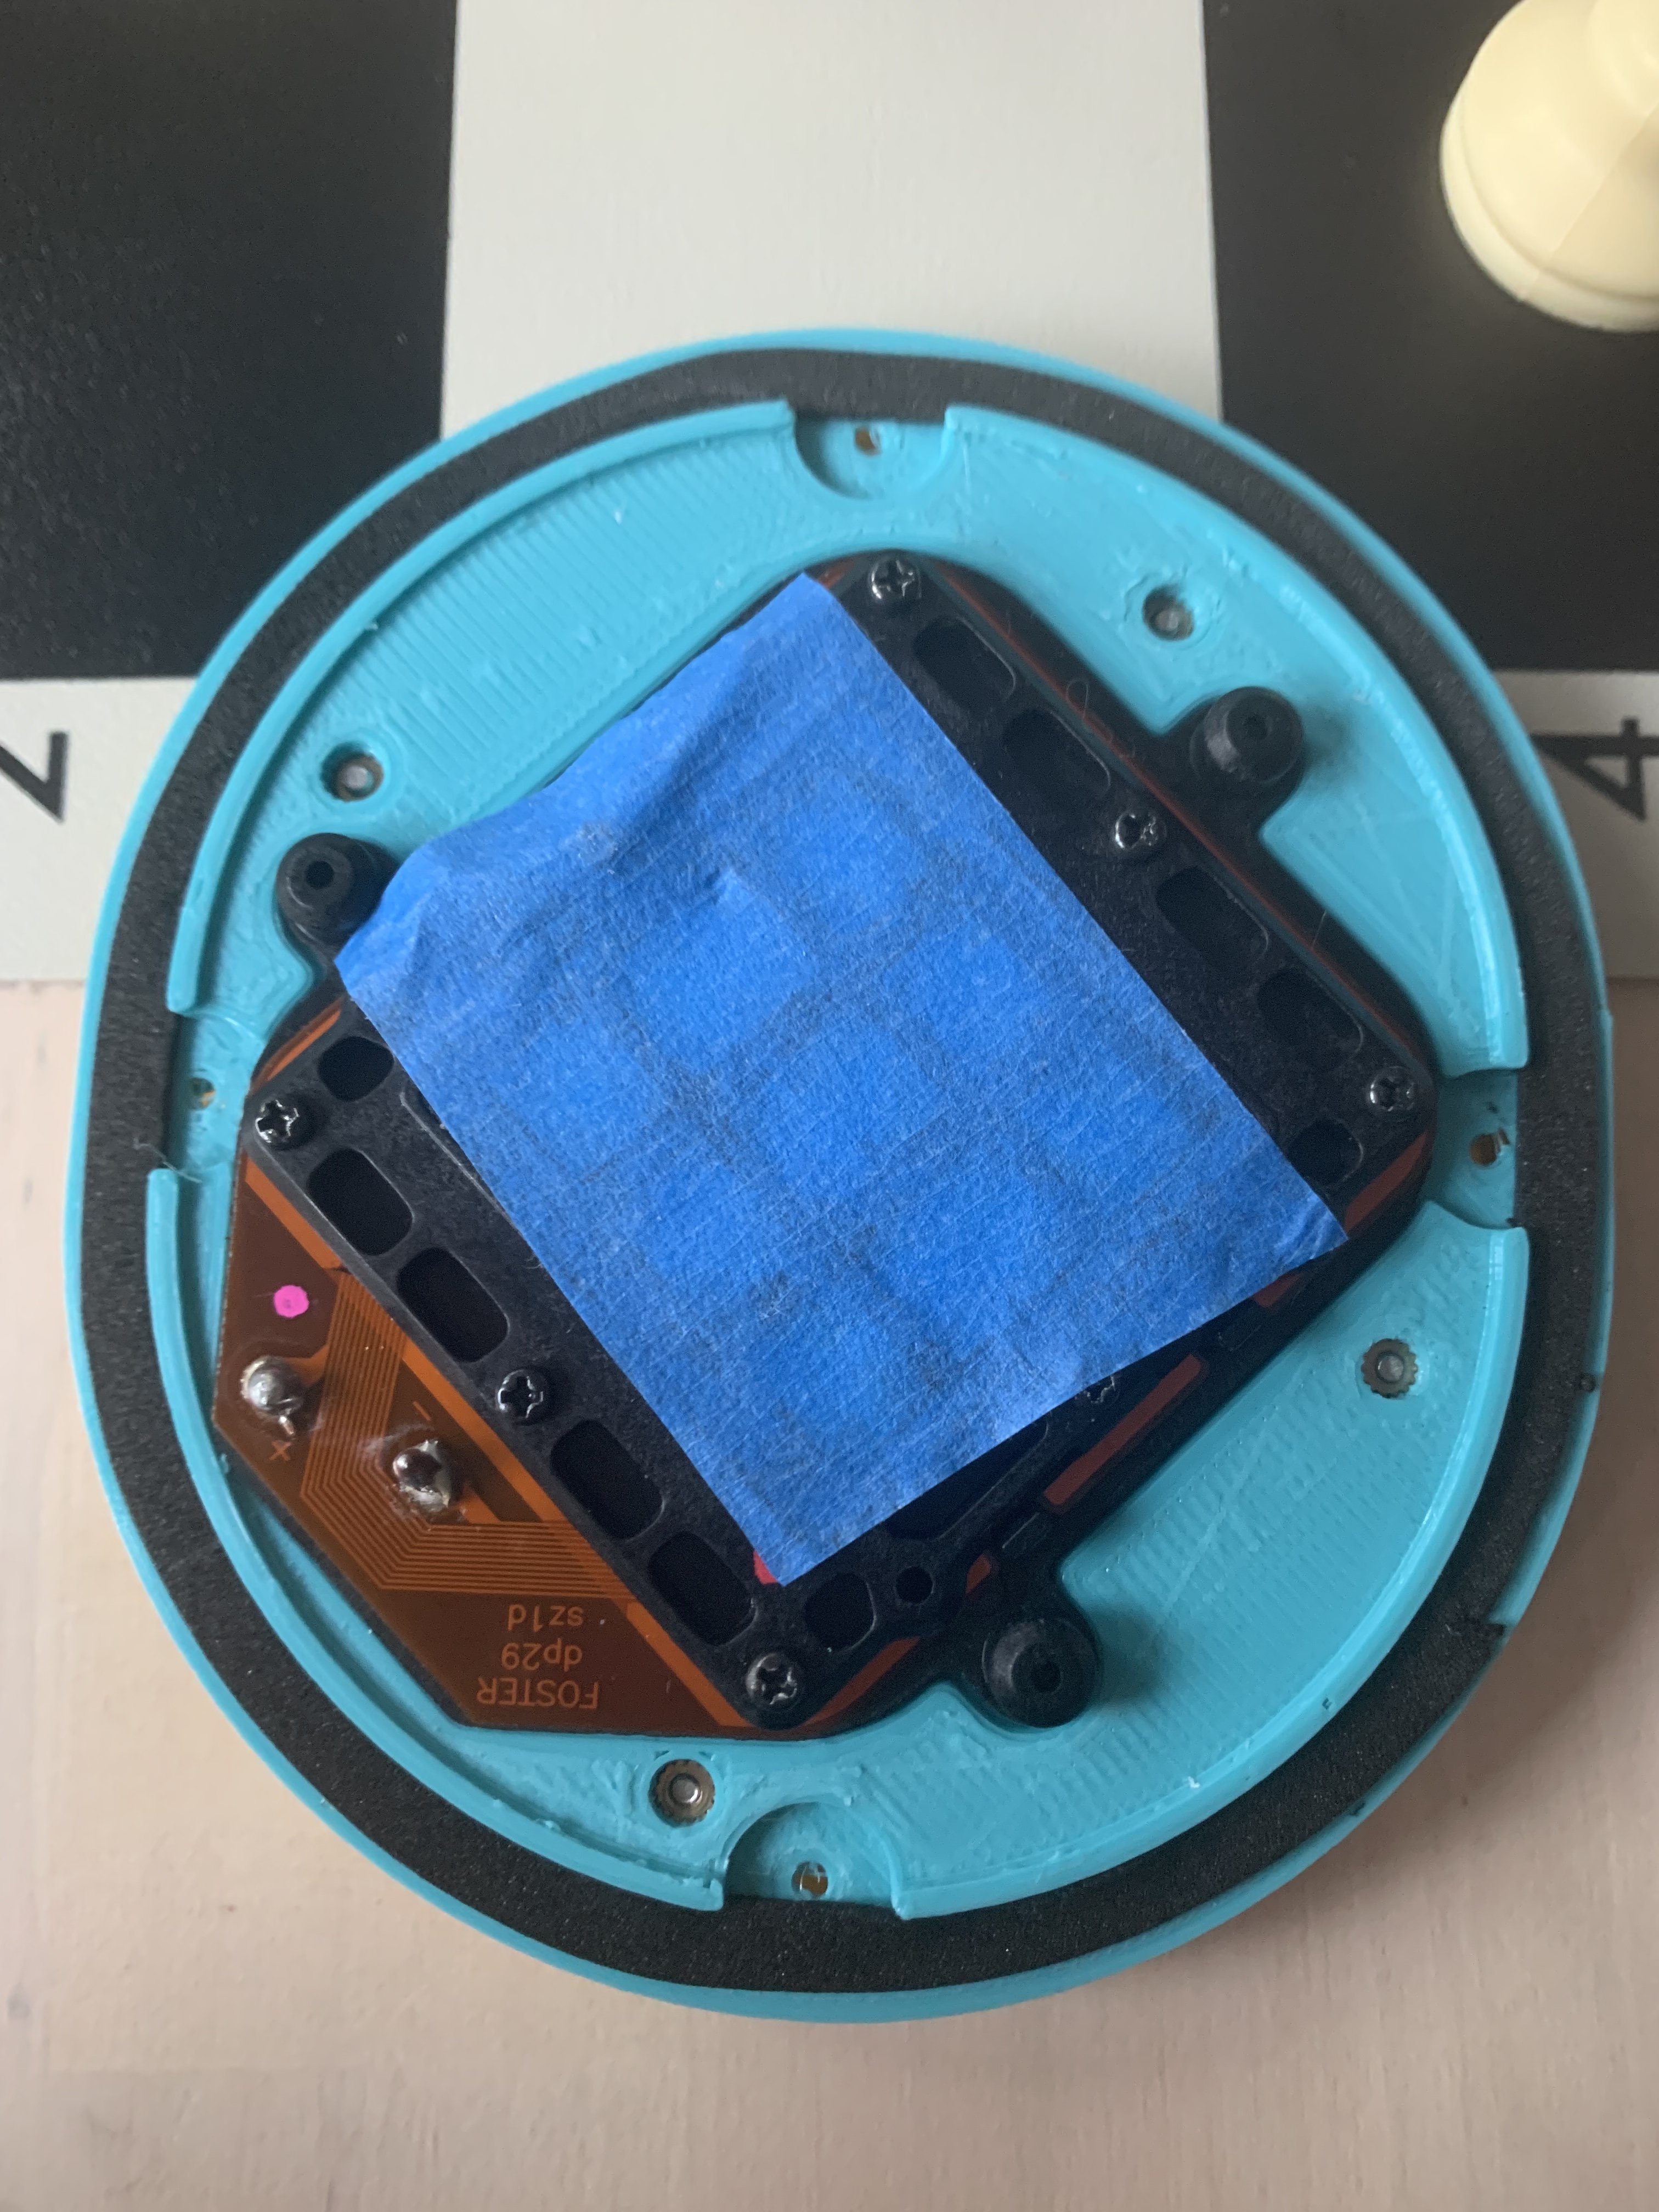
@Pars
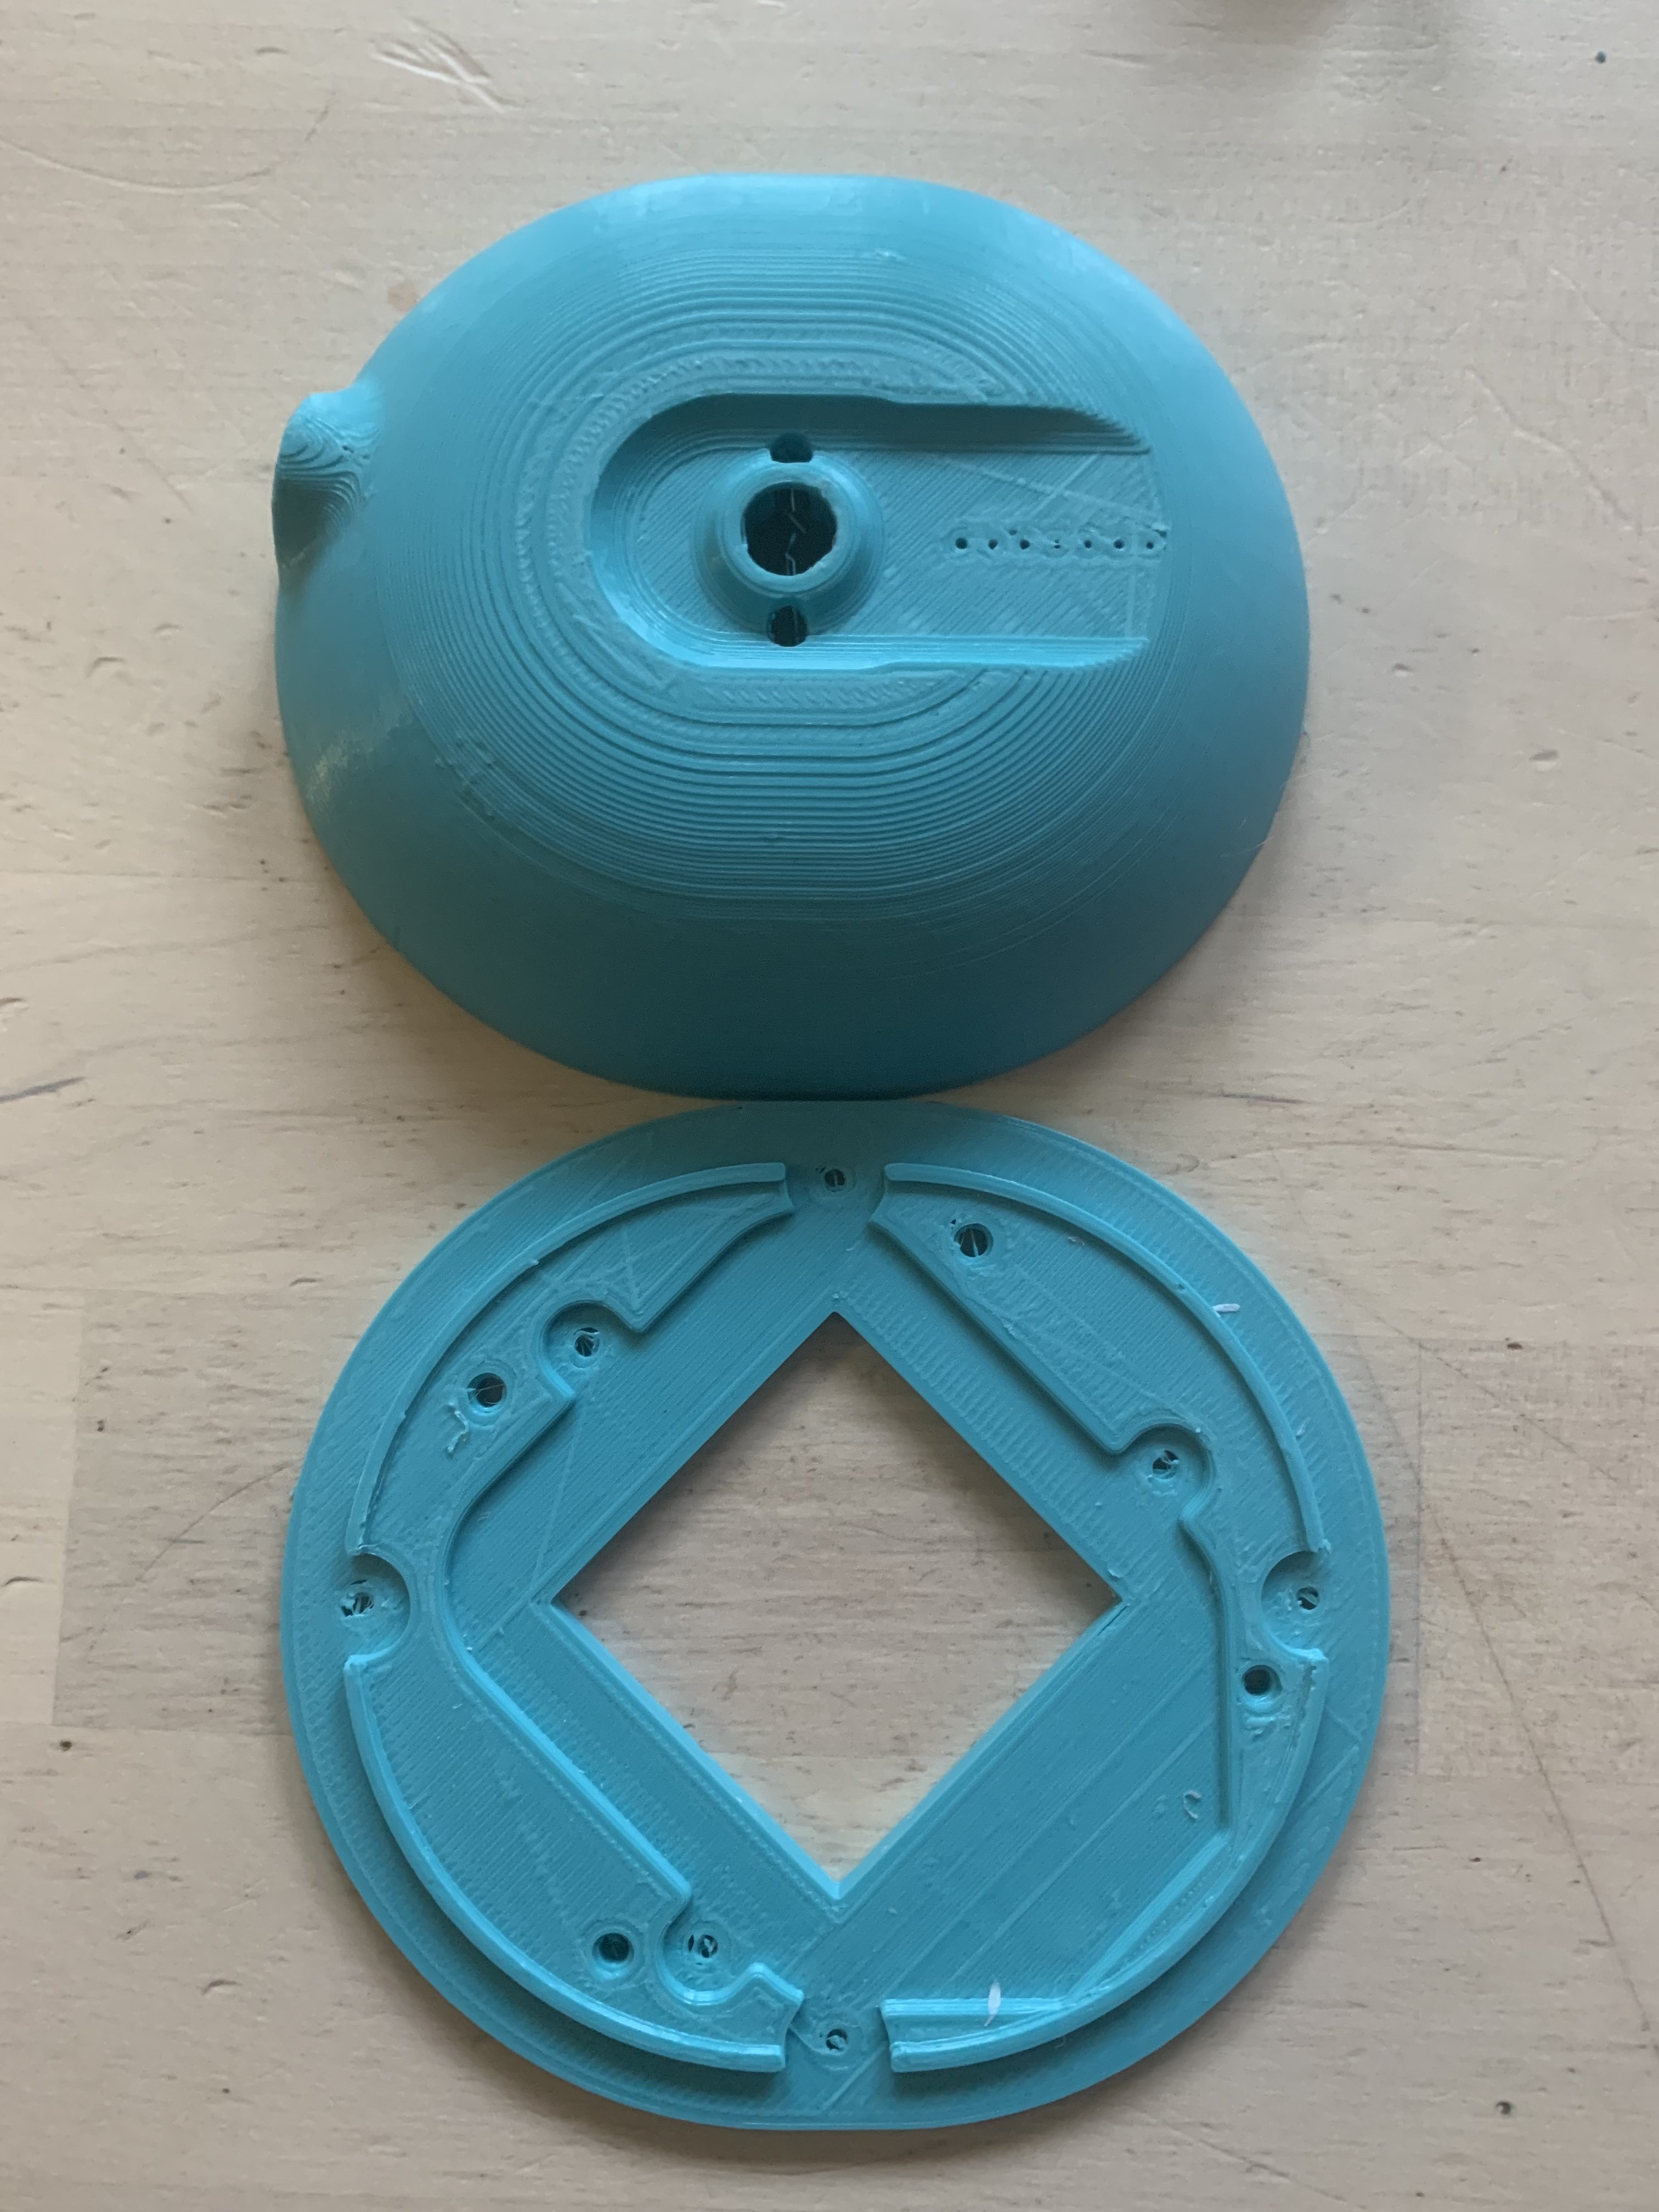
print quality looks fine. You have to remove all of the support structures and sand the rough edges down a bit, specially the prints for the pads. Otherwise they can be damaged.
print quality looks fine. You have to remove all of the support structures and sand the rough edges down a bit, specially the prints for the pads. Otherwise they can be damaged.
@Pars yeah they don't look too bad. fdm 3d prints are never going to look great straight from the printer. Get yourself some primer, some paint, and a range of different grit sandpapers.
The main problem with PLA is it is a nightmare to sand...it takes ages.
My first set were PLA, then for the second set I used PETG which is much more forgiving.
Supports are an absolute nuisance, but a neccessity unfortunately.
The main problem with PLA is it is a nightmare to sand...it takes ages.
My first set were PLA, then for the second set I used PETG which is much more forgiving.
Supports are an absolute nuisance, but a neccessity unfortunately.
Users who are viewing this thread
Total: 5 (members: 0, guests: 5)
