"Open Alpha" T50 3D printed headphone project from MrSpeakers
Mar 8, 2017 at 5:46 AM Post #346 of 979
  Has anyone reused the stock cable with the hirose jacks? 

If its a 4 stranded wire (?), then I dont see any issue with using it, except for how to unbraid it to the Y-Split and make it look nice. I would expect you need to re-sleeve it, and then it might all just be too much trouble compared to getting a new cable. I would expect red to be right and blue to be left, but I would always check by measuring it myself.
 
You could ofcause follow the original principle with wiring only one side of the cups, but that would then require changes to the other cup and you should skip the step where the wire in the headband is removed. I personally think the dual wiring is better, but I guess that might be up to personal taste and/or requirement for balanced use.
 
Mar 9, 2017 at 4:41 AM Post #347 of 979
I haven't cut the wire open yet, I suspect it's a 3 wire job. For the Y in the cable I could either print out a Y tube in ABS maybe in two halves. Or just heatshrink it. Either way I reckon I'll sleeve the original cable with paracord, colour-coded left and right.
 
Mar 9, 2017 at 7:11 AM Post #348 of 979
Sounds resonable to suspect that its a 3 stranded wire. If you dont mind the extra hirose socket, then I guess you could leave the cups as they are and maintain the wire going through the headband. You then put a hirose jack on both sides... It might look a little funny, and I would also be nervous if the small piece of cable can reach down long enough.
 
I dont really see how you can make it work with splitting the cable if it is 3 stranded ?   
 
I guess that some compromise would have to be made if using the stock cable. So in my very personal opinion, I do not really see that its worth the hassle to reuse the cable. 1-3 meters of 4 stranded cable shouldnt cost much, and a jack is only a few dollars too. Only real benefit would be avoiding soldering a jack (potential minijack) which can be a hassle.
 
Mar 9, 2017 at 4:42 PM Post #349 of 979


That moment when you read the first post and it mentions a sealing gasket... Yeah I forgot it...

Which is alright, I have to rewire my cans soon, and I'm going to see if I can emulate the mk3 damping.


Also silly question, Im assuming the "Cable Plugs" and "Cable Jack" AC010 and AC015 are the hirose connectors?
 
Mar 10, 2017 at 10:18 PM Post #351 of 979
  For making a custom cable, is there any real benefit to having a balanced TRRS plug as opposed to a regular TRS plug with the grounds wired together?

The argument is cleaner signal, but remember that your amplifier has to support this before deciding on what termination to go with. Since I'm fickle, I terminate my wires to XLR 4-pin balanced, and use a "converter" whip to convert it back to 1/4" single-ended depending upon what I'm connecting it to. I am planning on making a 4-pin XLR to 2.5mm balanced (TRRS) in the future (I have a DAP that uses the 2.5mm TRRS connector).
 
Mar 13, 2017 at 11:07 PM Post #353 of 979
Prototype version all done.
 
Happy with the results but still needs further tweaking. Mids are a bit recessed and the treble is a bit in-your-face. The next version I'll do will be painted I reckon. Ended up re-using the stock cable and sleeved it with paracord. 


Mar 15, 2017 at 4:12 AM Post #354 of 979
Looks good. The cups look very similar to mine, are yours also PLA? Lots of contrast with the bright green baffle.. I like it, but it is very in your face...
Good job on the cable. Was it 3-stranded or 4? 
 
I would strongly recommend getting Alpha Pads if thats in your budget. I feel they lifted the sound a lot but adding sub bass and a better overall balance. Mine is with a friend at the moment so cant double check, but I seem to recall that they also lowered the highs slightly.
 
Mar 15, 2017 at 10:59 PM Post #355 of 979
Thanks. The cups were printed in ABS on an UP BOX+ and the baffles on an UP Mini. I reckon I'll get some alpha pads for the next build - just wanted to see how it all went together.
 
The stock cable is 3 strand, very thin and coated with plasticy resin protection. If you need to, you can do it. But the next build i'll be wiring it up with proper stuff. 
 
I'm using 3 cotton balls in each cup pulled out the fill the space. This is the first area I'm going to play with when I have a bit of time.
 
Mar 17, 2017 at 2:30 AM Post #356 of 979
  What kind of silicone is everyone using to seal between the connector and the cup when installing the jacks of your choice (2.5mm, SN-8-4(P), whatever you're doing)?

I used Delo Gum 3697 which worked very well. I have no idea where to get it from, though, as it was just something my employer had lying around and did not mind me using a tiny bit of. :)
 
Mar 17, 2017 at 2:37 AM Post #357 of 979
 
The stock cable is 3 strand, very thin and coated with plasticy resin protection. If you need to, you can do it. But the next build i'll be wiring it up with proper stuff. 
 
I'm using 3 cotton balls in each cup pulled out the fill the space. This is the first area I'm going to play with when I have a bit of time.

Ok, so you had to split one strand or add another one I guess? I think I will stick to making new cables, though...
 
While I do not know how large those cotton balls are, I believe I used much less wool, so seems like a solid plan to start tuning that.
 
Mar 17, 2017 at 9:38 PM Post #358 of 979
I just wanted to share a few notes from my tuning experiences so far. (For reference, I’m using Alpha pads and MK3 drivers.)
 
Ear-side Damping:
 
I experimented with a couple of different materials, including the original MK3 foam and some stiff felt about 2.5 mm thick, but I learned that in this area, less is more. I’m currently using a wool felt about 1mm thick: https://www.amazon.com/gp/product/B00XA89GG8
 
At first, I used four layers of this thin felt, but I soon realized this was soaking up all the mids and highs. I removed the stack and tried just one layer stuck down with double-sided tape… WOW, everything just got really exciting! The highs were really detailed and the mids really sounded like planar mids again. I had to open up all the bass vents to balance out the louder mids and highs, but it was thrilling. Unfortunately, it sounded a little too exciting, veering close to sibilance at times.
 
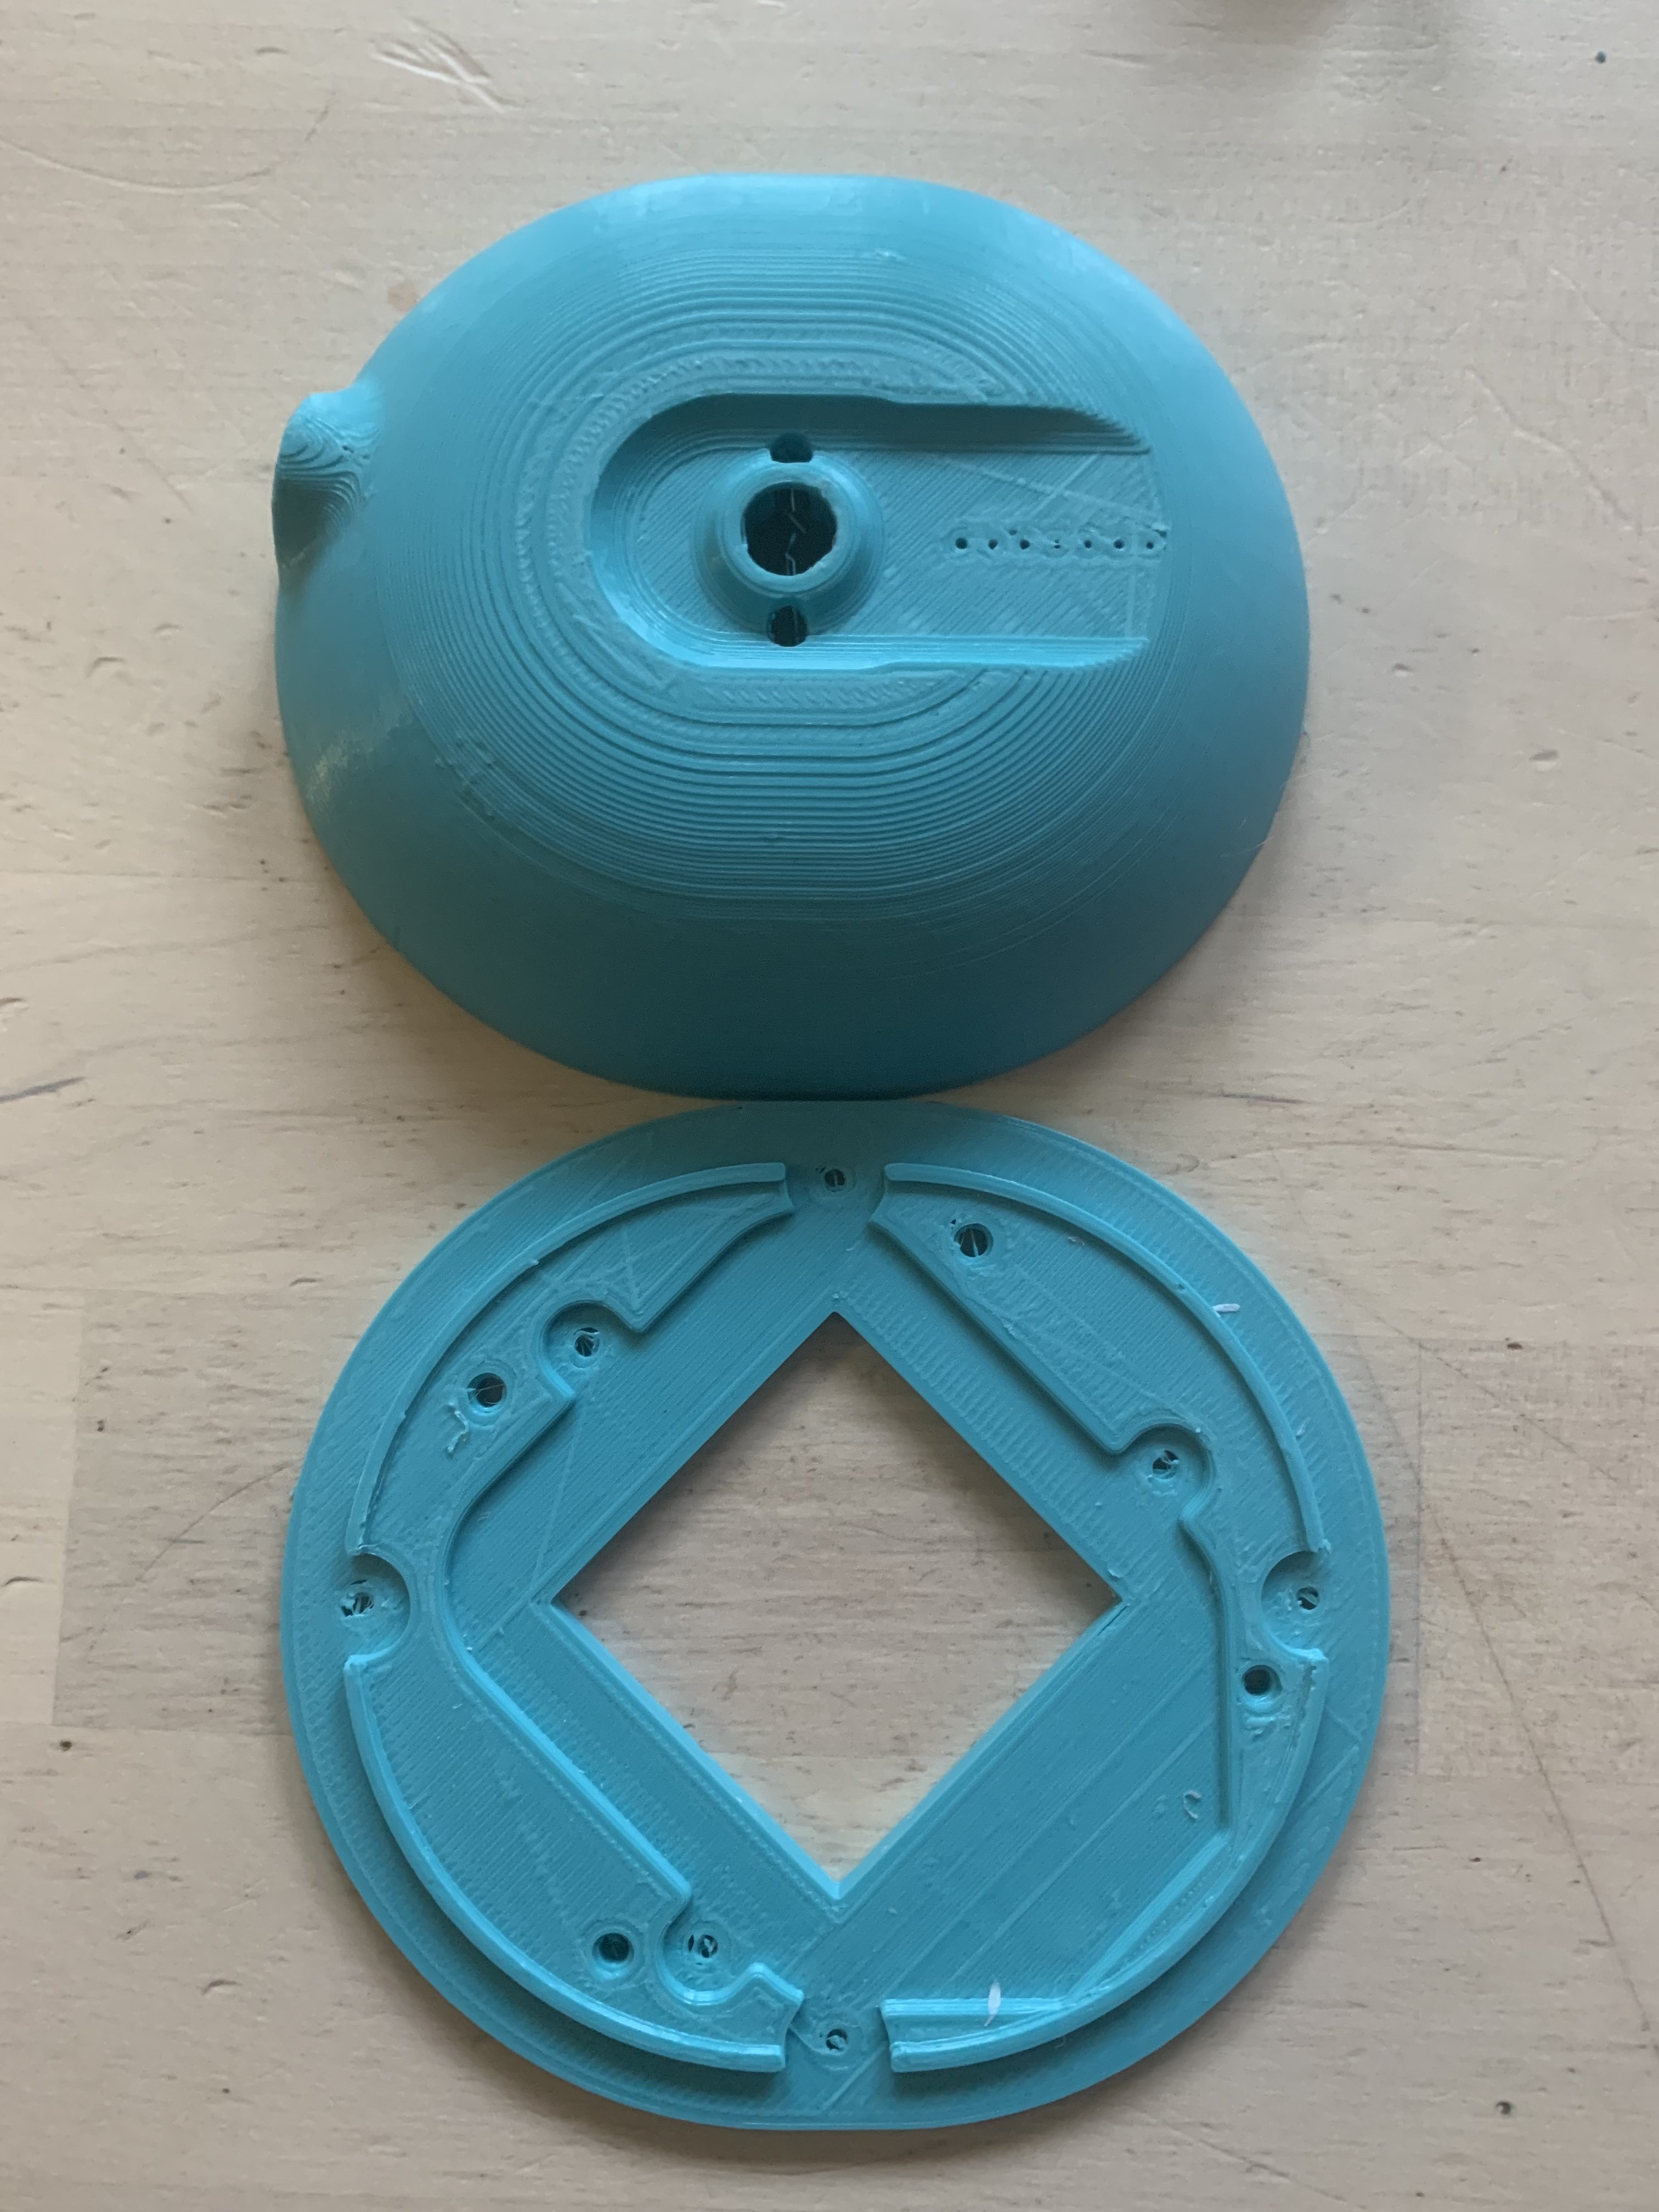
In order to reel it in a little bit, I tried adding some small strips of the felt around the perpendicular walls around the outside edge, and this calmed it down considerably. Covering this wall all the way around made the mids and highs very smooth, but not very exciting. Covering only part of this wall brought the excitement back, but the frequency response just seemed uneven. Finally, I removed everything I had put in, and cut out a new piece of felt for each side with a smaller square cut out of the middle (the square hole being just big enough to uncover of the holes in the driver). This little bit of extra material around the driver seemed to calm down the mids and highs in a more even way, while keeping much of the excitement.
 
Cup Stuffing:
 
I’m using this wool roving: https://www.amazon.com/gp/product/B0099NYOAQ/
 
Originally, I put one layer about 3” square, but I couldn’t get a bass tuning I was satisfied with. Closing the bass vents enough to tame the mid to upper bass would choke off the sub-bass extension. I opened up the cups and added two more squares of the wool roving, and it thoroughly tamed the mid to upper bass hump. I’m sorry I don’t have more specific quantities, but the lesson is simply that moving from very light wool stuffing to a moderate amount of wool stuffing had a significant impact on reducing the mid to upper bass. (I’m still probably using less than the amount shown in the original pictures from MrSpeakers, and I’m just laying it flat in the cup.)
 
Summary of My Current Tune:
 
Ear-side damping is one layer of thin wool felt, with a smaller square cut out of the middle. Cup stuffing is 3 layers of the wool roving. All bass cup vent holes are open. Alpha pads. Unmodified MK3 drivers.
 
This has yielded a nicely balanced sound signature. Very lively mids and highs, good sub-bass extension without bloated upper bass. The mids and highs are more forward than what I’m used to, but the bass never seems lacking (like it did with the PM-3s I tried out). I feel like the minimal ear-side damping and open bass vents has also make them much more efficient.
 
Mar 17, 2017 at 10:53 PM Post #359 of 979
I'm curious as to how many of you actually use testing equipment and try to reproduce your tests as accurately as possible while trying out different things. This is not supposed to be a negative comment by any means, but it just seems strange that so many people who are trying to get better audio quality seemingly just do it by "ear", which is quite flawed. Maybe it's just trying to get what "you" like rather than what it scientifically sounds like.
 
Mar 18, 2017 at 12:20 AM Post #360 of 979
I'm curious as to how many of you actually use testing equipment and try to reproduce your tests as accurately as possible while trying out different things. This is not supposed to be a negative comment by any means, but it just seems strange that so many people who are trying to get better audio quality seemingly just do it by "ear", which is quite flawed. Maybe it's just trying to get what "you" like rather than what it scientifically sounds like.


Isn't the whole point of fun, personal, and moddable what is fun to hear and not necessarily a science experiment though? :)
 

Users who are viewing this thread

Back
Top