"Open Alpha" T50 3D printed headphone project from MrSpeakers
Feb 23, 2017 at 10:27 AM Post #316 of 979
  Use the crimp on a wire stripper if you have one.


Guess I should invest in a different wire stripper (I used to have a nice Klein Tools one that I can't find anymore for both insulated and non-insulated crimping). I have a Hakko one for small gauge wire (interest was in 26AWG to 30AWG) and it doesn't have a crimping tool on it. :frowning2:
 
Feb 23, 2017 at 6:16 PM Post #317 of 979
I have a couple of really basic questions. I have a modded T50RP MKII with ZMF Lambskin pads already, and am very interested in giving this project a try. However, I have never done any kind of 3D printing before. 
 
First, looking at my options, I see PLA, PETG, and ABS. Which would you recommend for best results?
 
Also, I see the options of 200 microns or 100 microns. Is it worth an extra $15-$20 for 100 microns.
 
Feb 23, 2017 at 8:43 PM Post #318 of 979
I have a couple of really basic questions. I have a modded T50RP MKII with ZMF Lambskin pads already, and am very interested in giving this project a try. However, I have never done any kind of 3D printing before. 

First, looking at my options, I see PLA, PETG, and ABS. Which would you recommend for best results?

Also, I see the options of 200 microns or 100 microns. Is it worth an extra $15-$20 for 100 microns.


I can't say for anything else, but I chose ABS. It's tough and easy to reglue if something breaks. PLA can break down over time a bit easier as well.

Mine were printed at 100 microns on a ultmaker 2 I'm sure 200 would be fine tbh to keep costs down
 
Feb 23, 2017 at 9:42 PM Post #319 of 979
I can't say for anything else, but I chose ABS. It's tough and easy to reglue if something breaks. PLA can break down over time a bit easier as well.

Mine were printed at 100 microns on a ultmaker 2 I'm sure 200 would be fine tbh to keep costs down

I definitely agree here with using the ABS. The ABS tends to take more abuse than some of the other plastics and any UV exposure with the PLA can cause a definite brittleness that you would not expect otherwise. With the tolerance its going to be important for the surfaces so I would say that you want to keep that as tight as possible. When they say that the tolerance is 200 microns that is +200 microns to -200 microns. So you are looking at a .4 mm. That does not sound like a lot but it can be the difference between a bumpy surface to a smooth surface. 
 
My opinion if all the parts increase is 20 bucks per part then maybe not worth it, but 20 bucks for all the parts combined is totally worth it. Wouldn't it be terrible if you had to get them reprinted?
 
Feb 23, 2017 at 9:46 PM Post #320 of 979
I must say I added cotton balls in the cups and they sound pretty good, and a rattle that I had in one cup is gone. I think that it was caused by the wire sitting on the driver and jumping when it was sitting on it. Check this site out (linked) they have a number of different tests for the headphones so that you can isolate problems with them. I still however need to check to see if I can find a way to test each ear cup for differences. 
 
http://www.audiocheck.net/soundtests_headphones.php 
 
Feb 24, 2017 at 7:37 PM Post #321 of 979
I finally got mine put together. I couldn't find a blue paint to match that nifty set that PeterJensen made, so I just went with satin black to match the headband hardware. However, I did steal his idea of using a gray baffle plate as an "accent" color!

I used Alpha pads, put a very small amount of wool batting inside, left the MK3 drivers unmodified, and (for now) left all the vent holes open. Once the paint fully cures, I'll do some tuning, but they sound pretty great right out of the gate.

When I get to my computer I'll share some files and tips to solve the problem of breaking the bosses off of the cups.


Feb 24, 2017 at 10:04 PM Post #322 of 979
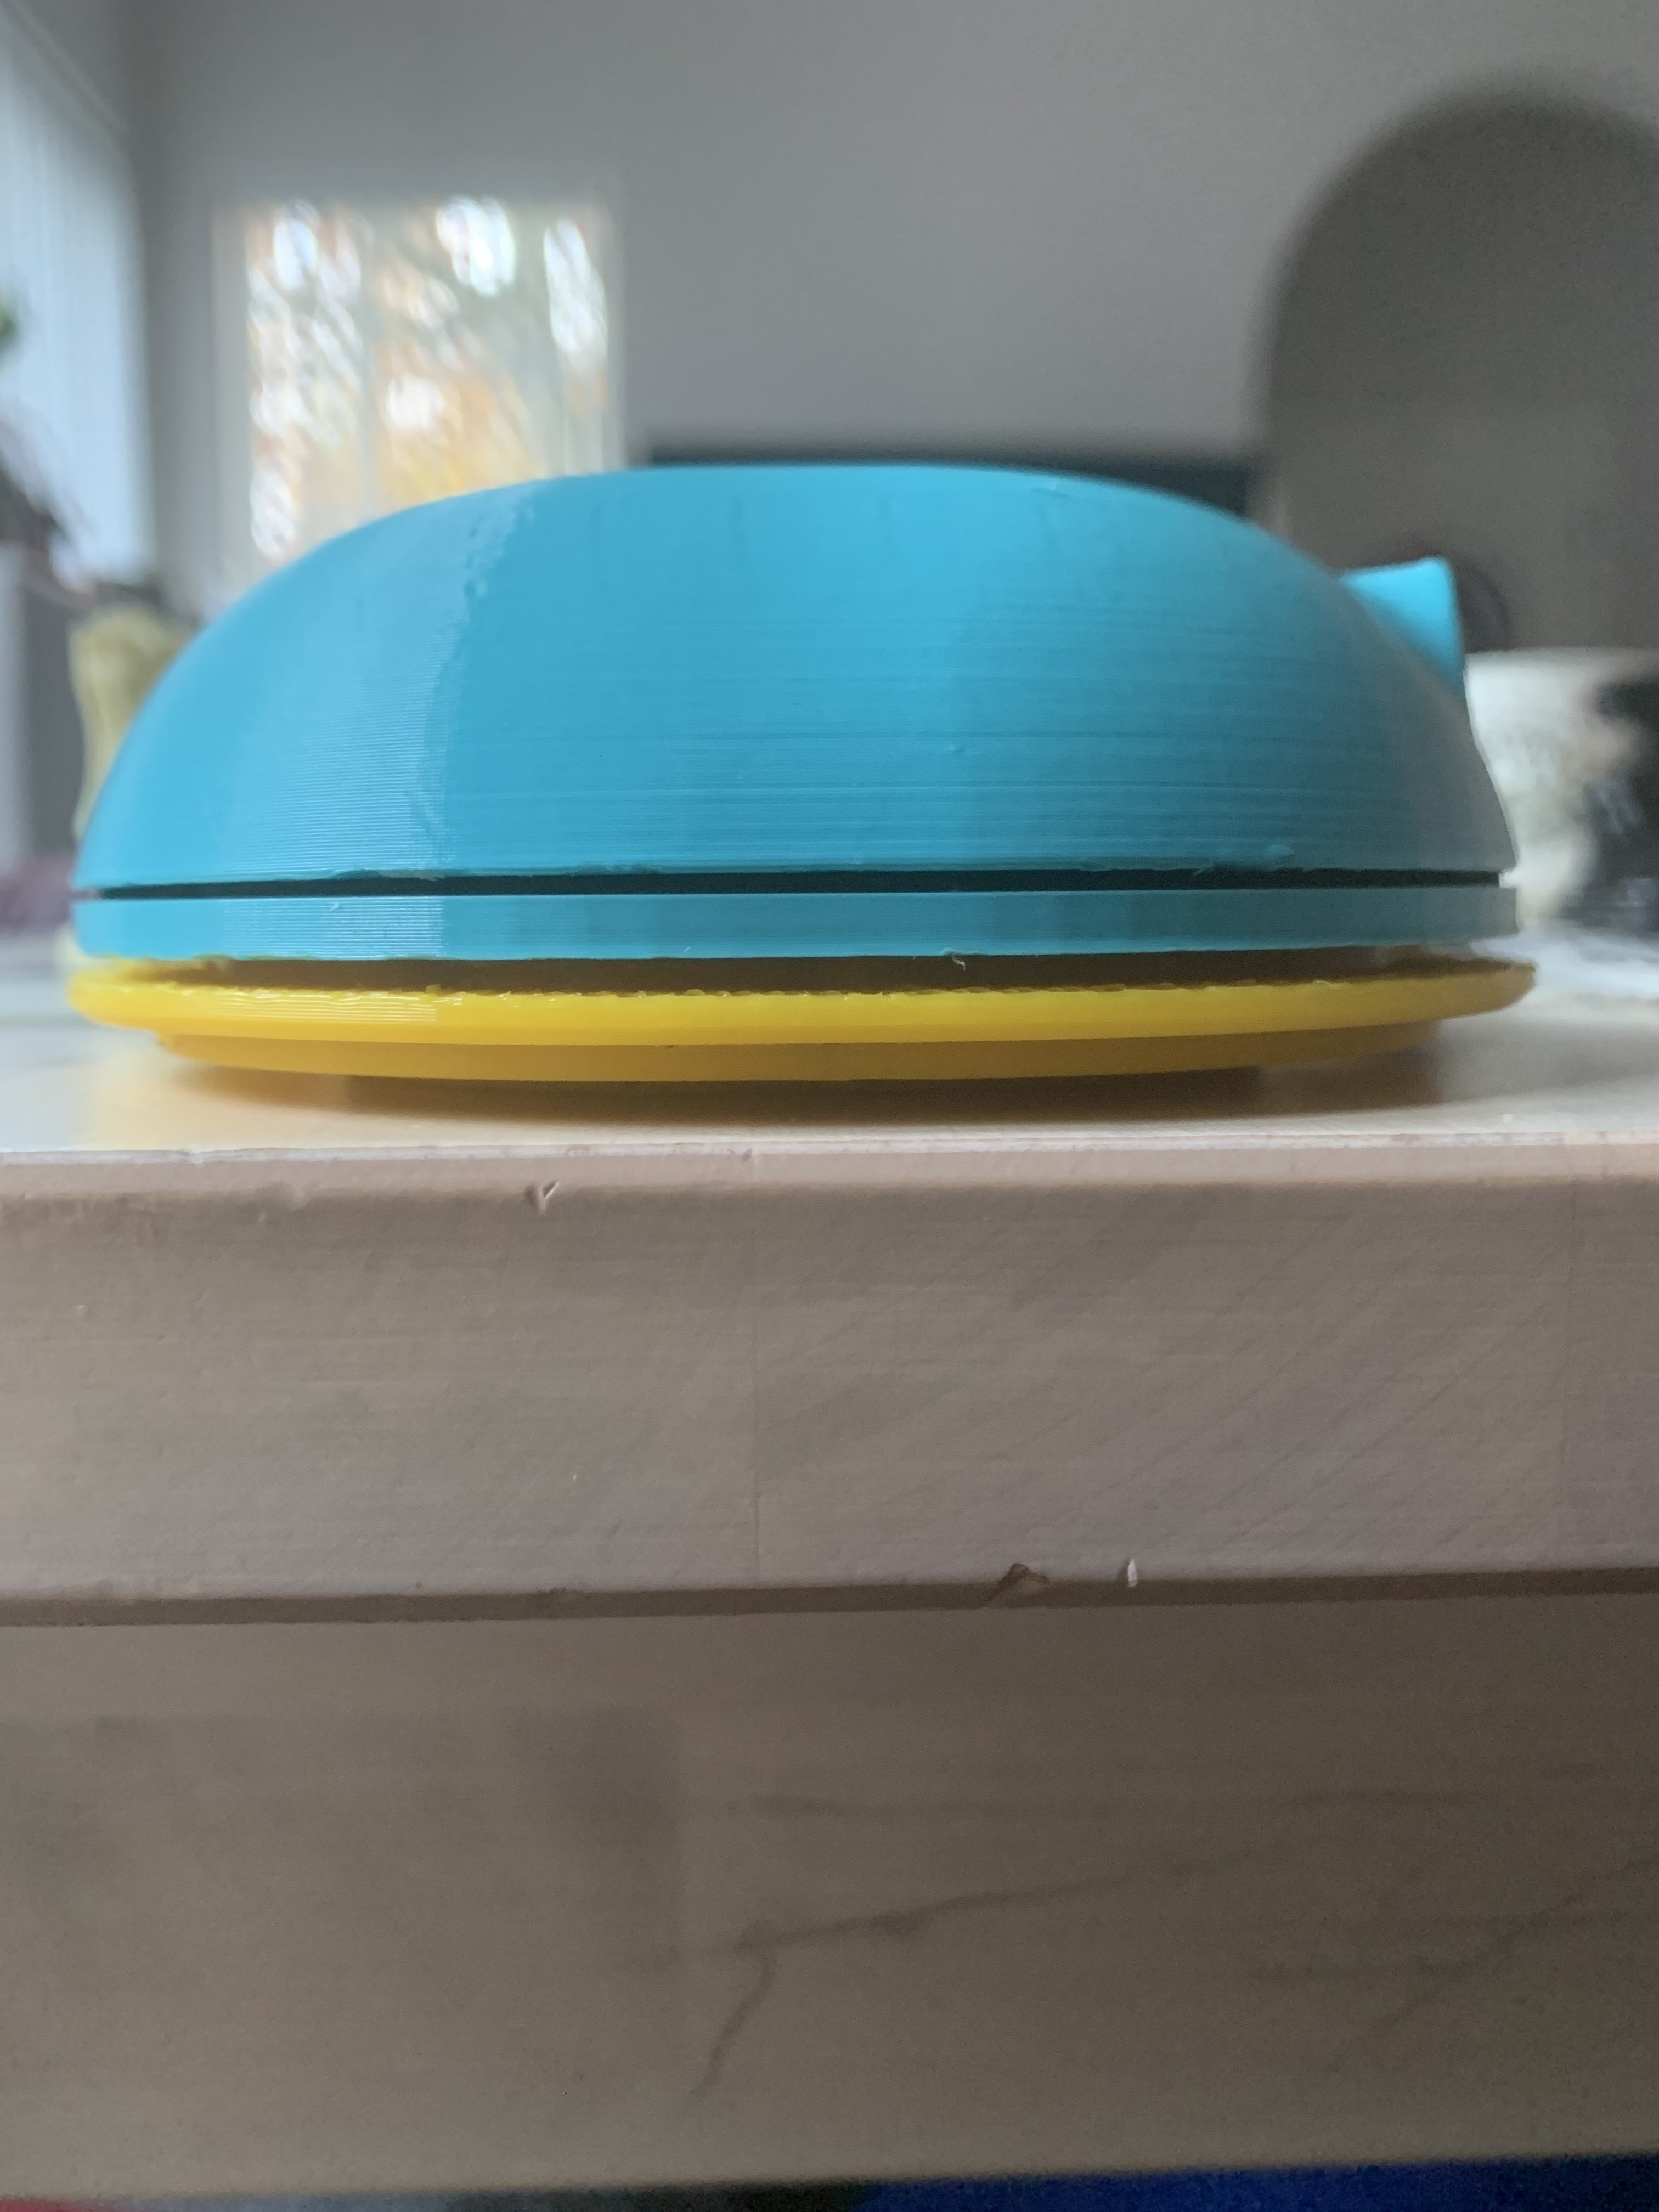
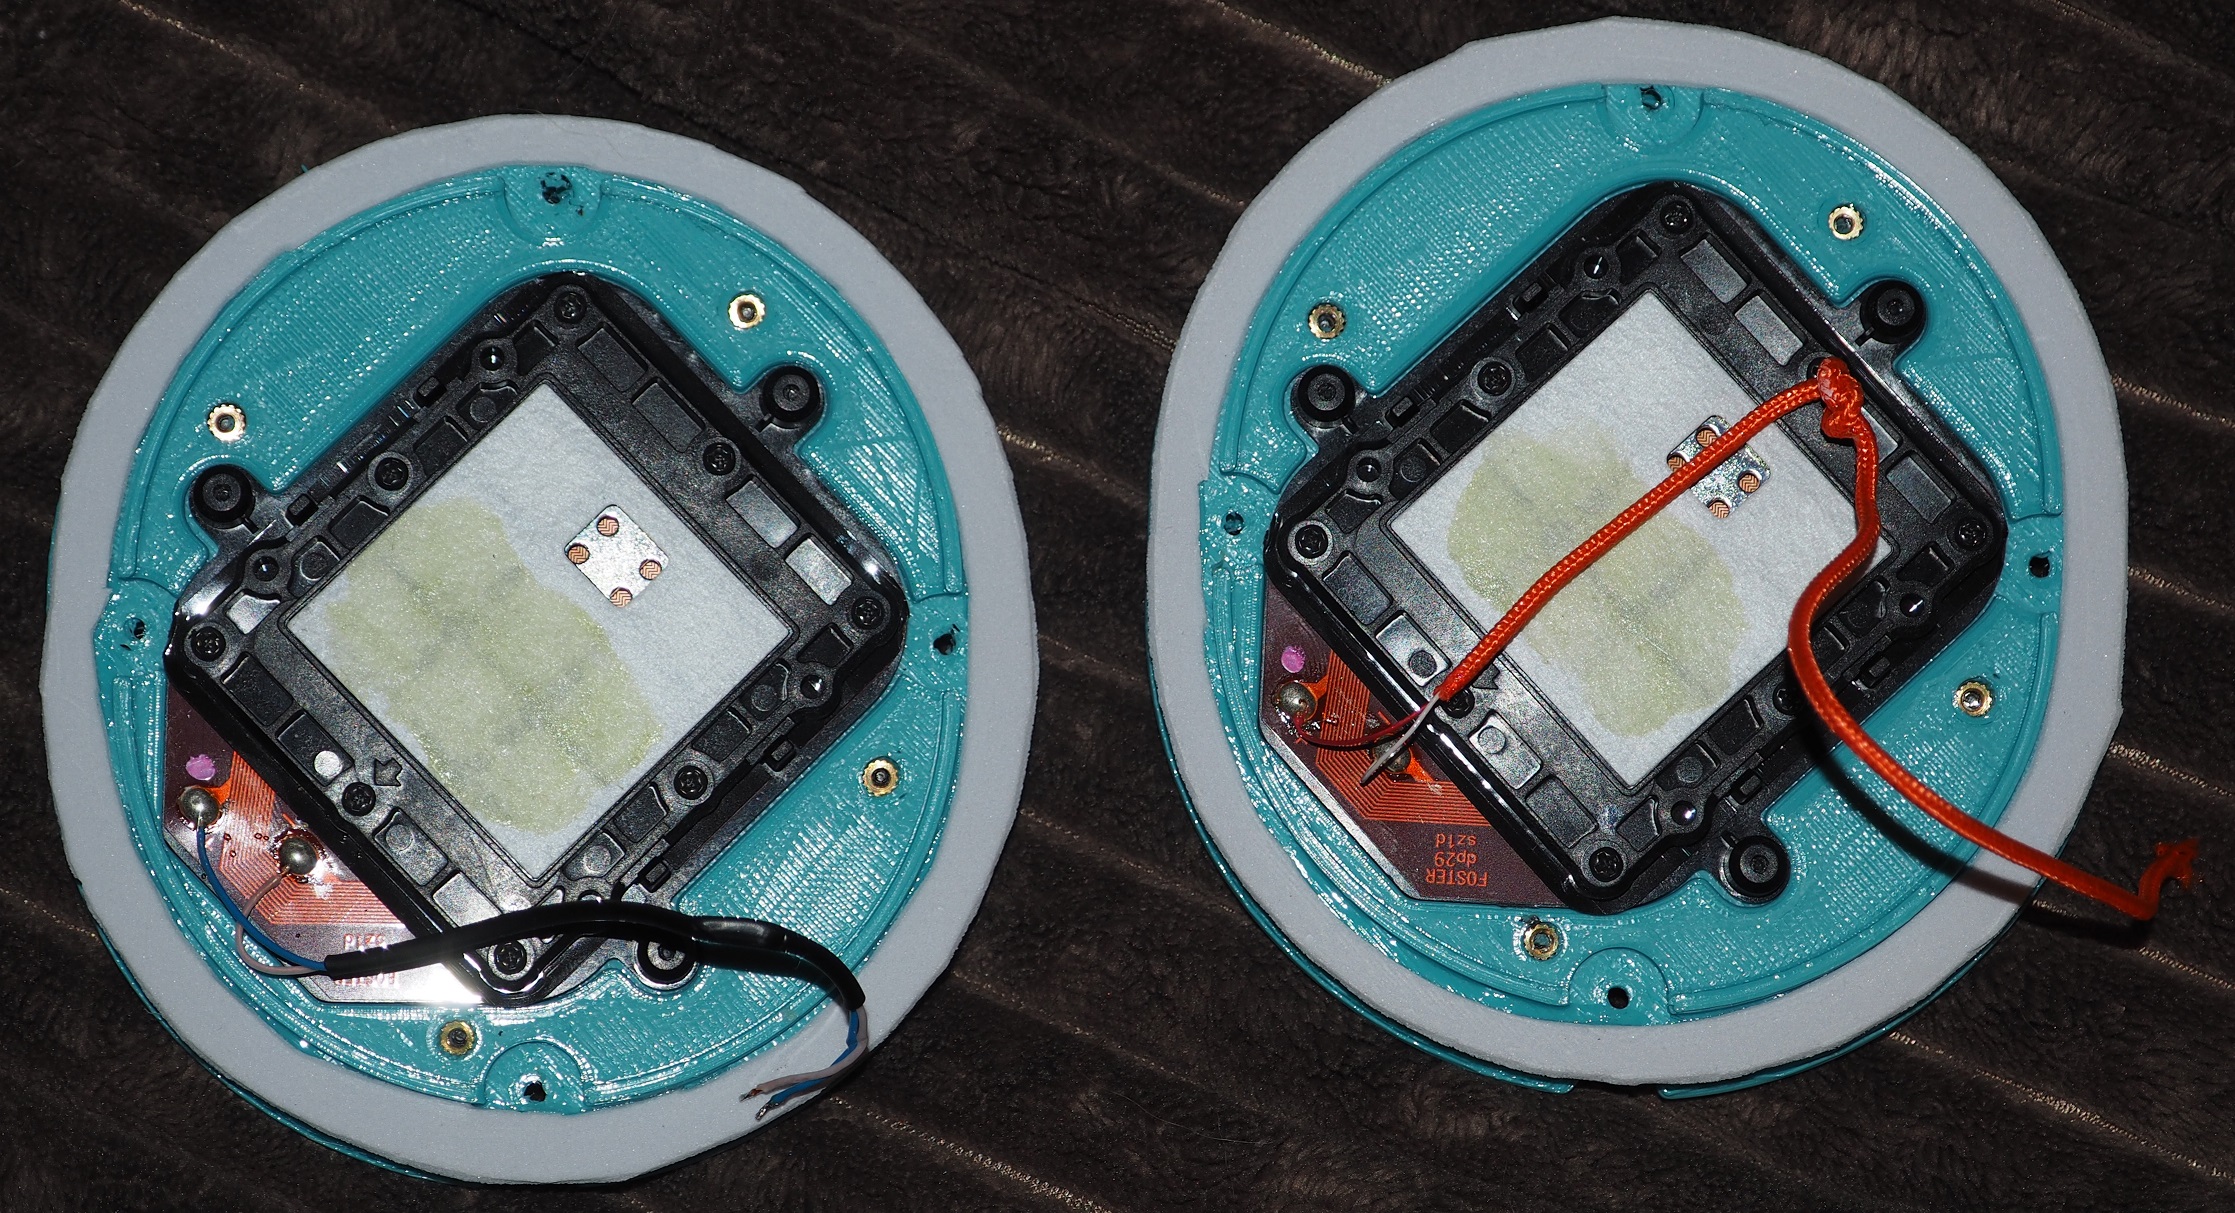
One of the weaknesses of FDM printers (the filament extruding type that most of us use) is that the objects they create are not isotropic; they are not equally strong in all directions. The bonds between the individual extruded filaments are not as strong as the filaments themselves. In the case of our beloved Open Alpha cups, the bosses that the baffle screws thread into are created by essentially layering concentric rings of filament on top of each other (when the cups are printed flat). Since the bond between these layers of rings are weaker than the rings themselves, they are prone to twisting off when the baffle screws are tightened.
 
I generally have pretty good finesse when it comes to fasteners, but after breaking the bosses off two sets of cups, I set out to find a solution. One possibility would be to print the cups vertically, but that creates a whole ‘nother set of headaches in getting a smooth finish on the outside and on the sealing surface. Another solution would be to print the cups using an SLA printer, which creates an isotropic print. Unfortunately, this is significantly more expensive (in my case 5x more).
 
For those looking for a cheap, relatively foolproof way of not having the bosses break off the cups, here is what worked for me:
 
1) I modified the 3D models for the cup to make them significantly stronger (and easier to seal). STL files are linked below.
 
2) I had these files printed in Z-HIPS, a material that has significantly higher tensile strength that ABS or Z-ABS. Z-HIPS is for Zortrax printers, but I’m sure there are other similar materials available for other models. I also had them printed at 100 microns resolution so the fine details around the bosses would be better formed.
 
3) I took better care to make sure the bosses weren’t damaged during finishing. (Acetone doesn’t work on Z-HIPS, but I think on the previous cups I had probably deformed the bosses a little during the acetone treatment.)
 
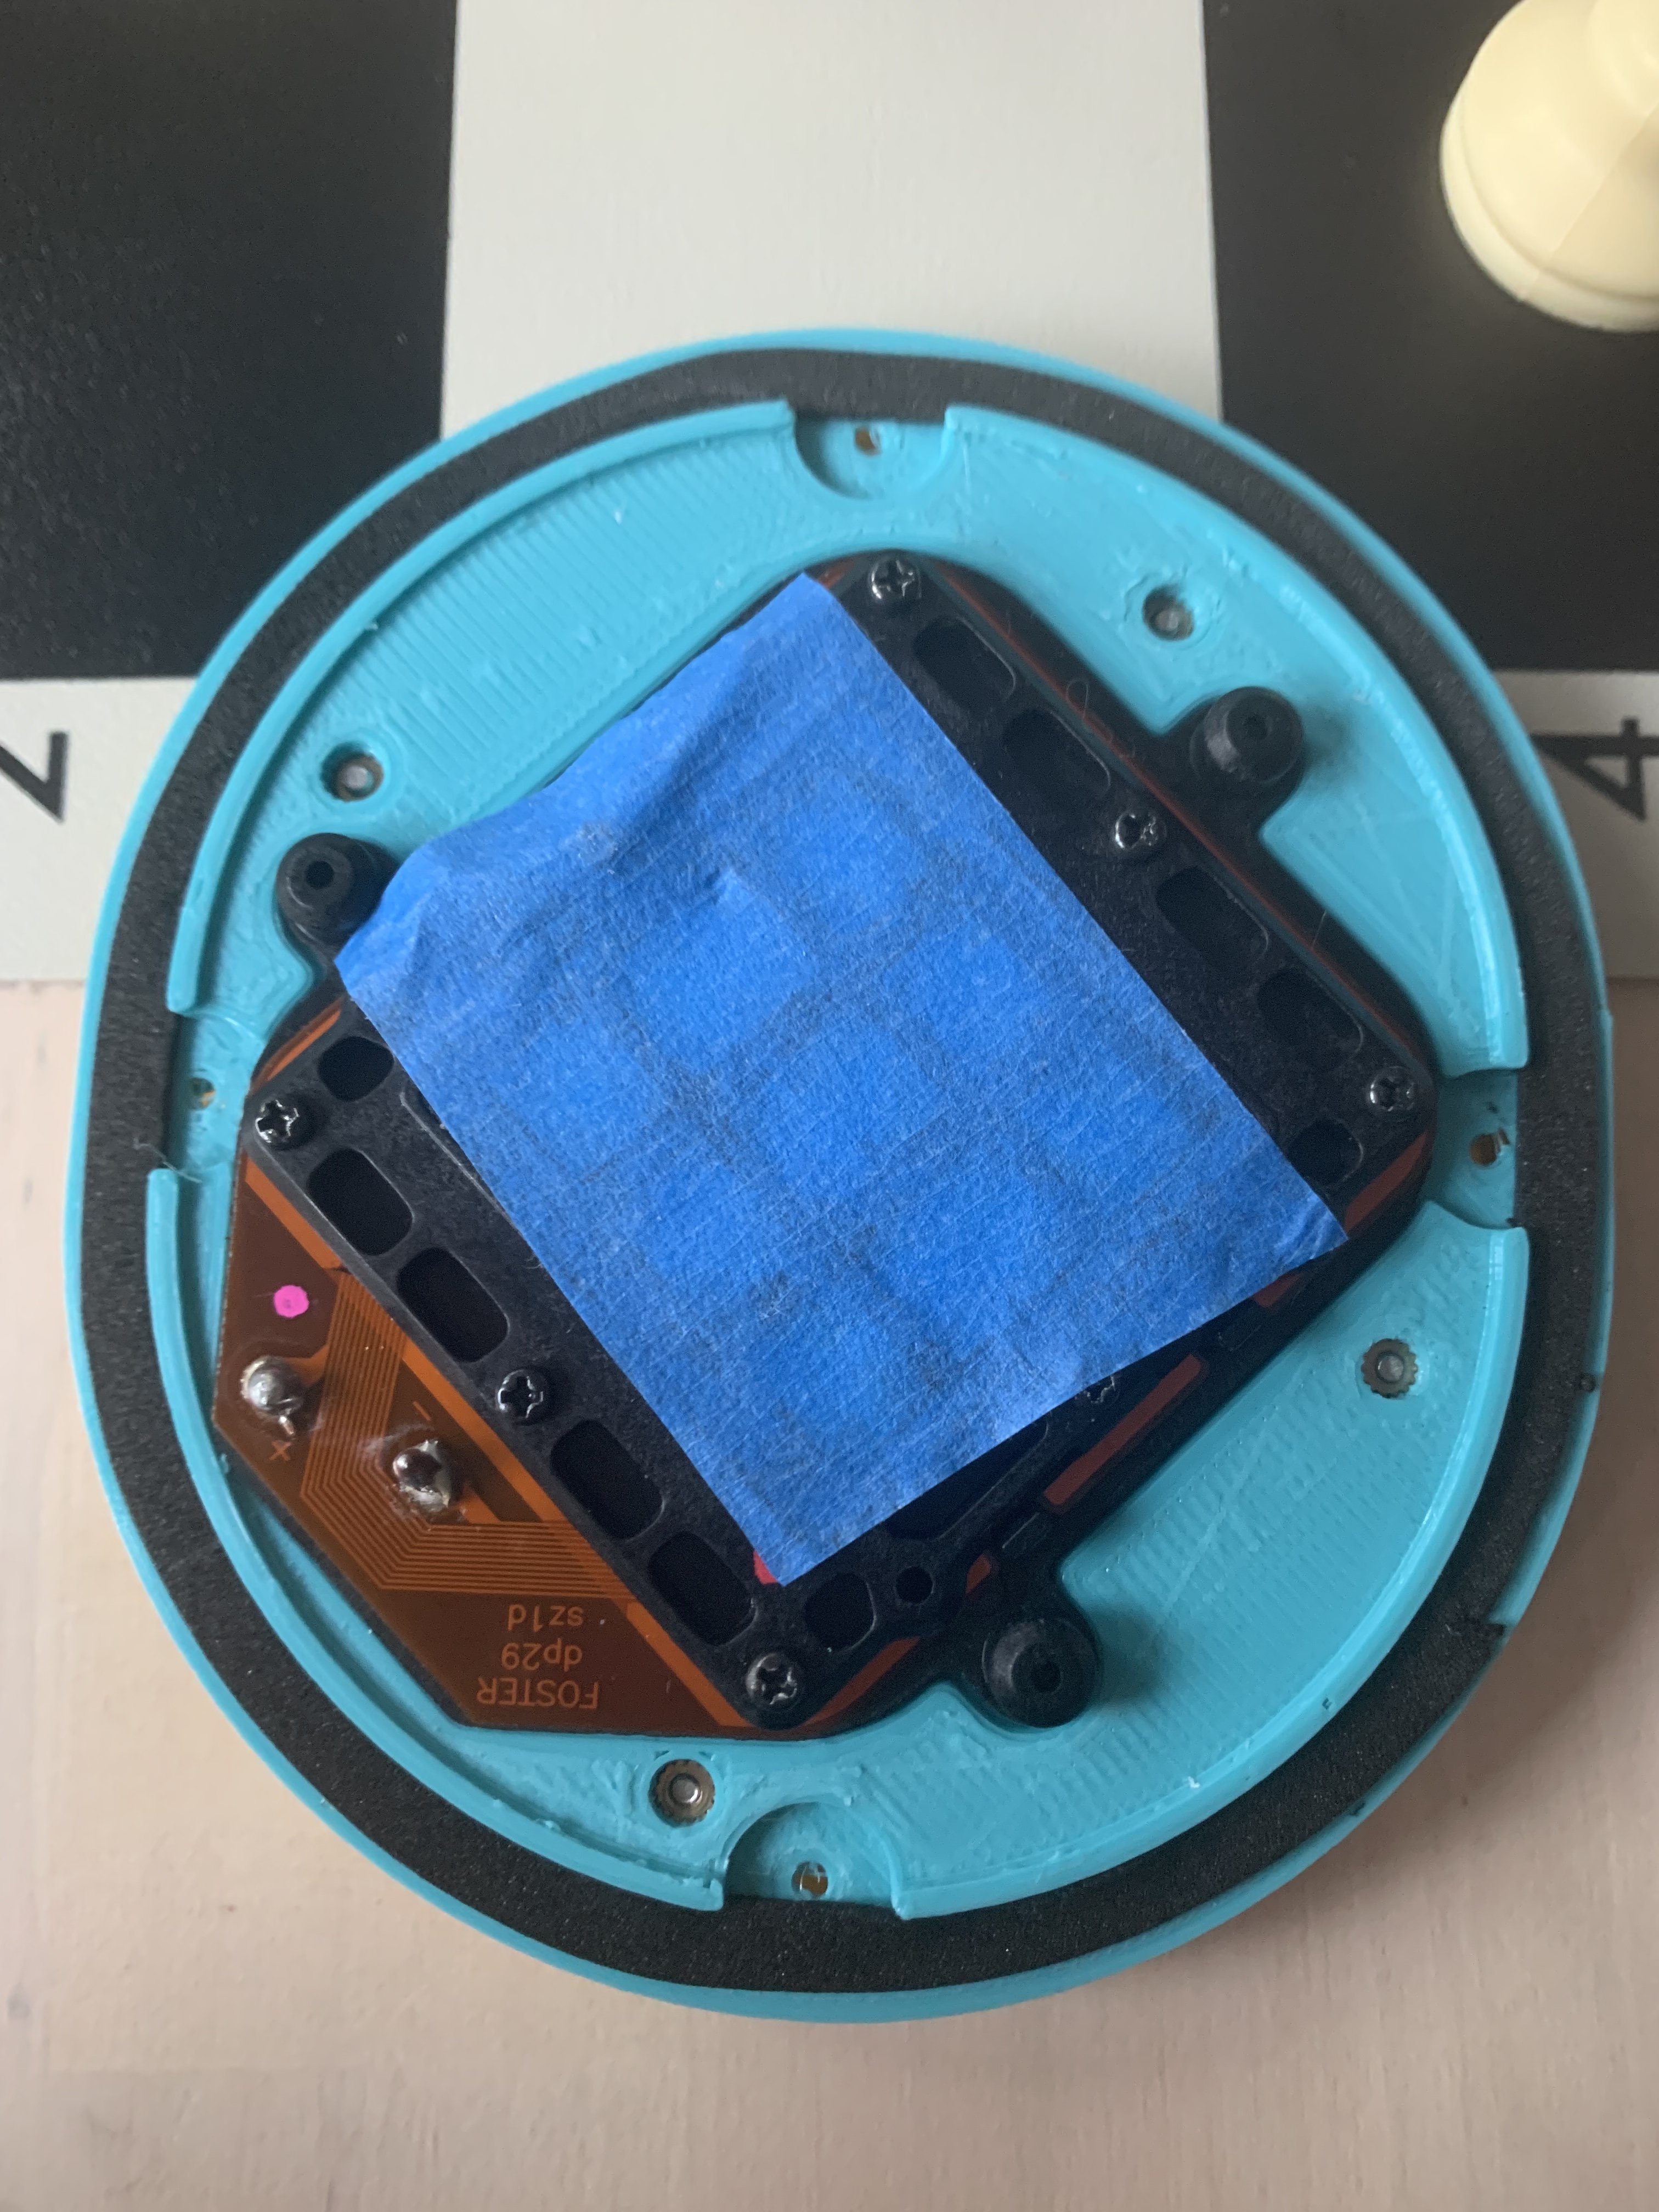
4) I purchased a #54 drill bit (1.4mm) and a pin vise to ream out the screw holes and make sure they were the right size for the Fostex baffle screws to thread into. (The pin vise can also be used with a 1mm bit to ream out the bass vent holes to a perfect, consistent size on both cups.)
 
5) I made sure the acoustic foam lining the cups didn't go so far up the side of the cup that it required additional force to compress it.
 
6) Before assembling the parts, I made sure there were no burrs, debris, or stray filaments on top of the bosses, in the screw holes of the cups, or in the screw holes of the baffle.
 
Maybe all of these measures were not necessary; perhaps if I had been more careful when finishing the parts and preparing them for assembly, they wouldn’t have broken. However, I did not want to suffer the crushing disappointment of having the cups come apart during final assembly again.
 
(Almost) Foolproof Cups
 
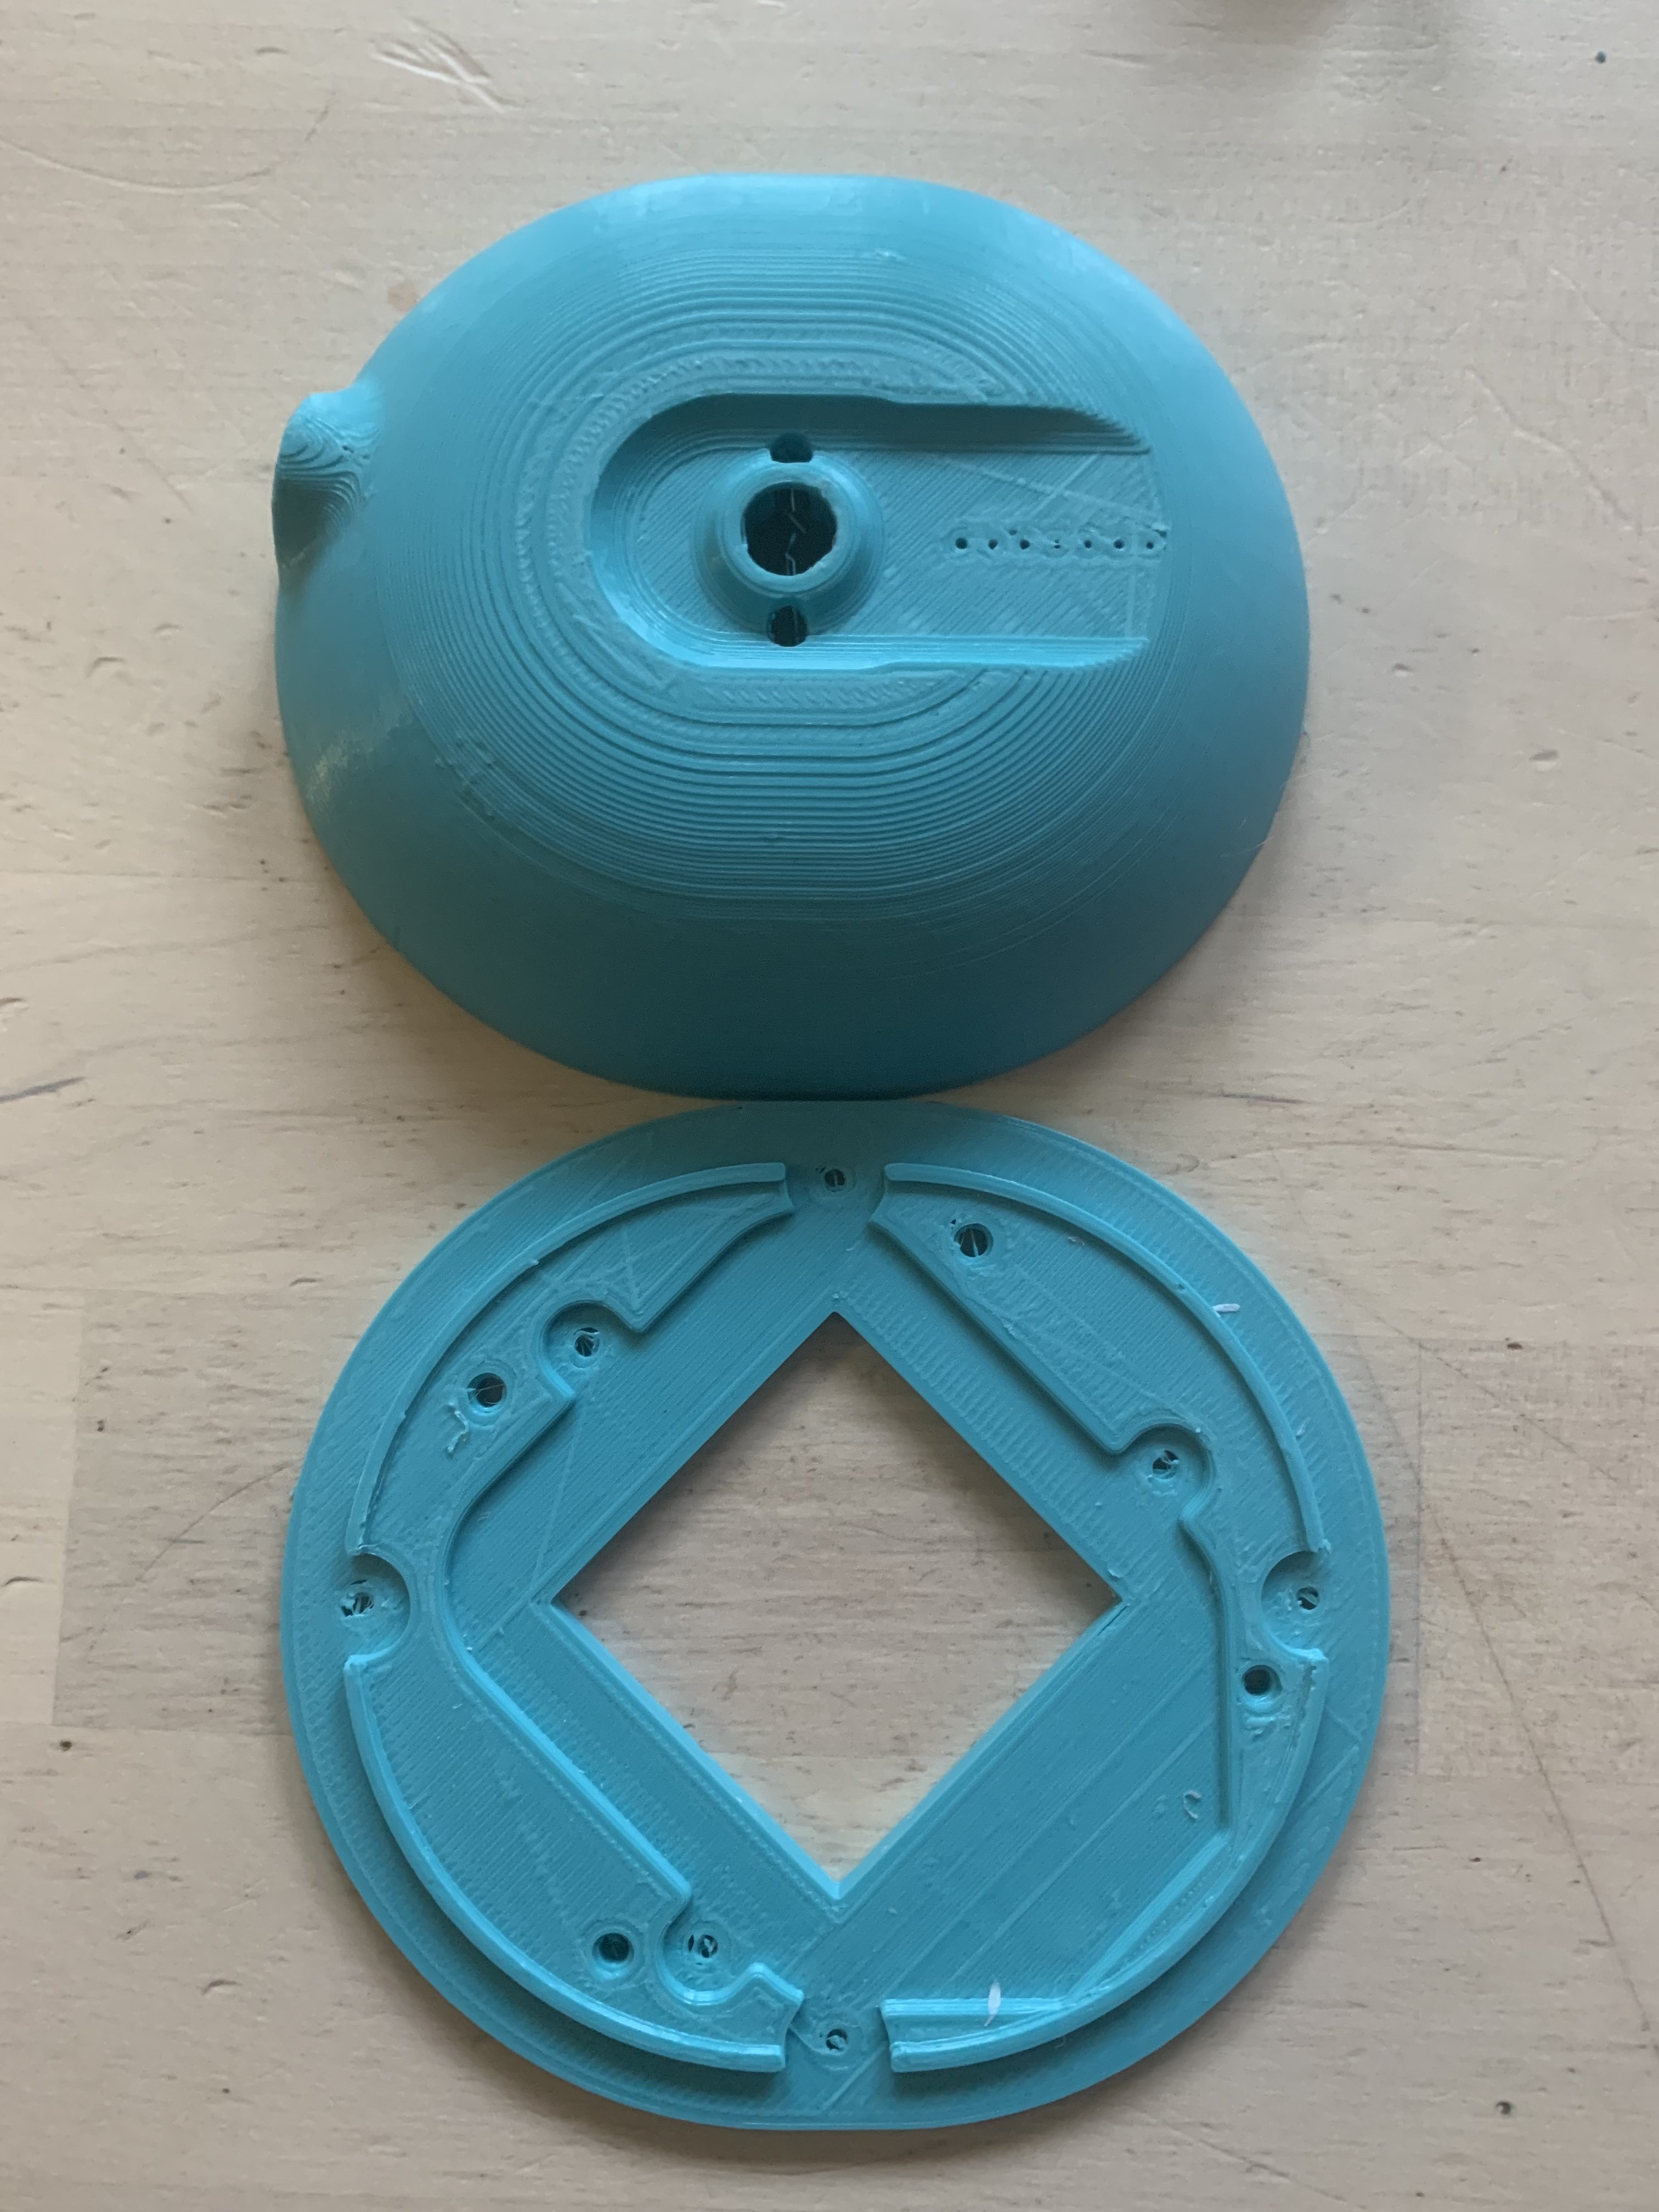
Another thing that scares me about the original design of the cups is how narrow the sealing surface gets around the bosses. No doubt this is perfectly fine for a production headphone that is being put together by an experienced assembler, sealed with silicone, and rarely, if ever, being opened again. However, as MrSpeakers noted in his original instructions, many of us will want to use a thin closed cell gasket to seal between the cups and baffle, allowing for easier disassembly for subsequent internal tuning. For those of us cutting that gasket out by hand, it seemed devilishly difficult to make sure it sealed in those narrow areas around the bosses.
 
For the following STL files, I hope this will make both problems considerably more foolproof. I reinforced the area around the bosses so that 1) the sealing surface is considerably wider, without interfering with the baffle, and 2) the bosses are tied in to the side of the cup, so they cannot twist off so easily. (Detail images of the changes are below.)


The files above are for the original Hirose jack. I also created a set of these modified for the 2.5mm panel mount jacks from Vetco. Check the dimensions before ordering, but I’m pretty sure they would also work for the 3.5mm jacks from Vetco or Parts Express.


I stink at soldering and I hate doing it, so I chose these jacks primarily because the nut goes on the outside of the cup. Once they are soldered to the driver, you can easily disassemble the headphones (even completely remove the cups) without additional soldering. It also gives you a number of different options for pre-made cabling: Anything that works for Oppo PM-1/2, Nighthawks, or HD700s will work with these jacks. There is even a $15 replacement cable for some of the old entry level Senns that works great for a start.
 
(Note that the jack is not recessed, just the nut that holds it on. It’s positioned at the outside edge of the cup so that a narrow or stepped plug is not required.)


More Detail
 
For those who may be thinking that this wider sealing surface and reinforced boss must cause some problem with the baffle, here are some close-ups of the shapes I added (shown in red), along with a transparent cut-away of the baffle. As you can see it does not interfere with the fit of the baffle. (And yes, It would have been better to put fillets in there to make it even stronger, but I just didn’t have time for that. Did I mention that I’m doing this in Tinkercad, a free online modeling tool designed for kids?)


Feb 24, 2017 at 11:44 PM Post #323 of 979

those look great, its really hard to get a shiny finish, i've pretty pretty much given up
the matte looks great, the alpha pad, wool, mk3 driver probably sounds the best
i've tried most combinations, you know how to get better at soldering, practice practice pratice, buy a real fine point
 
i like what you did to the files, i've thought about doing something similar, i'll give them a try over the weekend
another option is PETG it has better layer adhesion but is tricky to print
 
good work
 
are you happy with the sound?
 
Feb 25, 2017 at 6:59 AM Post #324 of 979
My opinion if all the parts increase is 20 bucks per part then maybe not worth it, but 20 bucks for all the parts combined is totally worth it. Wouldn't it be terrible if you had to get them reprinted?


Absolutely agree! In my case, I decided to go with a 150 microns print. Increasing it to 100 microns would have costed me about $50 more in total, while with a 200 microns resolution I would have saved less than $20. In the end, it's a balance between the cost and the benefit of having an initial smoother surface that will make the process of finishing the cups with sand paper easier. But 200 microns is really the minimum resolution to start with.
 
Feb 25, 2017 at 7:15 AM Post #325 of 979
those look great, its really hard to get a shiny finish, i've pretty pretty much given up
the matte looks great, the alpha pad, wool, mk3 driver probably sounds the best
i've tried most combinations, you know how to get better at soldering, practice practice pratice, buy a real fine point

i like what you did to the files, i've thought about doing something similar, i'll give them a try over the weekend
another option is PETG it has better layer adhesion but is tricky to print

good work

are you happy with the sound?


Thanks! The paint fumes were still pretty strong, so I only had about 30 minutes with them yesterday. I feel like there will be some tuning to do, but I'm very pleased so far. No channel imbalance, no buzzing or rattling, no glaring frequency response problems. I first connected them to my Dragonfly Red, and the bass seemed bloated, but when I put them on my Vali 2, most of that cleared up.
 
Feb 25, 2017 at 9:30 AM Post #326 of 979
I finally got mine put together. I couldn't find a blue paint to match that nifty set that @PeterJensen made, so I just went with satin black to match the headband hardware. However, I did steal his idea of using a gray baffle plate as an "accent" color!

I used Alpha pads, put a very small amount of wool batting inside, left the MK3 drivers unmodified, and (for now) left all the vent holes open. Once the paint fully cures, I'll do some tuning, but they sound pretty great right out of the gate.


Great work indeed! You did a very good job with the painting and the matte finish is something to seriously consider, since it looks very pleasing to the eye.
I personally opted for a metallic glossy finish on my Alpha. It's a nice and bizarre coincidence that a very similar dark metallic blue ended up being the color of choice by MrSpeakers for their new Aeon!
normal_smile .gif

Anyway, I really love the look of the matte black on your Alphas! Well done!
 
On a side note, after a few listening sessions, I decided to close two vent holes on the cups (the two holes closes to the pivot joint of the headband). This seemed to return a quite balanced bass response... but we all hear differently and it's very difficult, if not impossible, to completely agree on the settings and mods required to properly tune a headphone.
 
Feb 25, 2017 at 1:23 PM Post #327 of 979
Great work indeed! You did a very good job with the painting and the matte finish is something to seriously consider, since it looks very pleasing to the eye.
I personally opted for a metallic glossy finish on my Alpha. It's a nice and bizarre coincidence that a very similar dark metallic blue ended up being the color of choice by MrSpeakers for their new Aeon!
normal_smile%20.gif

Anyway, I really love the look of the matte black on your Alphas! Well done!

On a side note, after a few listening sessions, I decided to close two vent holes on the cups (the two holes closes to the pivot joint of the headband). This seemed to return a quite balanced bass response... but we all hear differently and it's very difficult, if not impossible, to completely agree on the settings and mods required to properly tune a headphone.


Thanks! I love the way the metallic finish on yours turned out. I briefly considered that, but I figured there was no way I could successfully execute a glossy finish. (I'm painting outside, and the pollen count here in Atlanta is already over 1000!)

Did you ever try the stiff felt on the ear side of the baffle? I'm using four layers of the thin wool felt, but I may try some different options since this is so easy to change out.

Also, was there a reason behind which specific two bass vents you chose to close?
 
Feb 25, 2017 at 1:52 PM Post #328 of 979
Absolutely agree! In my case, I decided to go with a 150 microns print. Increasing it to 100 microns would have costed me about $50 more in total, while with a 200 microns resolution I would have saved less than $20. In the end, it's a balance between the cost and the benefit of having an initial smoother surface that will make the process of finishing the cups with sand paper easier. But 200 microns is really the minimum resolution to start with.


Mine were printed at 100, and I actually love the lines, heh makes for a "brushed aluminum" look... Lol I guess
 
Feb 25, 2017 at 7:04 PM Post #329 of 979
Did you ever try the stiff felt on the ear side of the baffle? I'm using four layers of the thin wool felt, but I may try some different options since this is so easy to change out.

Also, was there a reason behind which specific two bass vents you chose to close?


Stiff felt is definitely on my "to do" list... Unfortunately, at the time I was putting together the Alphas, I could not find the right stiff felt and I decided to carry on with the open cell foam instead. I'm quite sure the using stiff felt on the ear side of the baffle is the way to... I'd like to find some ticker felt, so as to reduce the number of layers to be used. Did you glue together the four layers of felt, or did you just lined them up on top of each other?

As for the vent holes, I've to admit it was quite difficult to perceive the subtle changes between the different possible configurations!
At the starting point, with all vent holes open, the initial impression was of an overly extended bass response, which was characterizing the overall sound signature too much. Therefore, I started fiddling with the vents to tame the bass a little bit, and I t seemed to me that keeping two/three vent holes closed would serve the purpose well, even if just slightly so... beyond that, however, I had a very hard time noticing further differences (if any really!).

So, in the end, the difference between all vent holes open versus two/three closed seemed to be the only one I could really detect and that would help fine-tuning the sound to my liking a little bit more... closing additional vents didn't bring any clear changes that I could really notice. That's why I decided to only close two vents directly from the inside of the cup with some gaffer tape.

I believe that the quantity of damping material, the pads, as well as some small piece of felt applied directly on the drivers (i.e. 'doggie treats') play a much bigger role in fine tuning the sound of the Alphas...
 
Feb 27, 2017 at 11:10 AM Post #330 of 979
Did you glue together the four layers of felt, or did you just lined them up on top of each other?

 
I used just a few drops of glue--enough to keep them stacked together, but hopefully not so much that it impacted the acoustic absorption. It was really difficult to cut four pieces that matched exactly, so it looked a little sloppy once they were stacked together. Actually, the thin wool felt is really difficult to cut in general, it tends to tear when cutting with an x-acto knife, so I had to use scissors to get any kind of clean edge.
 
To make matters worse, once I started taping over vent holes to tune the bass, I found the upper mids and highs to still be lacking compared to what I experienced with the modded MK3. (In the modded MK3, I actually had to tame the highs with 2 layers of toilet paper.)
 
I'm going to start experimenting with some other materials I have laying around: some thin open-cell foam, thick open cell foam, the original OEM foam piece re-cut to match the Alphas, etc. I may try it with fewer layers of the wool felt. Also, someone gave my son one of those "Boogie Board" drawing tablets, and it came in a sleeve made of stiff felt about 3mm thick. I don't think he'll miss the sleeve if I cut it up and make damping material out of it. 
biggrin.gif

 
I'd love to hear what materials (including sources) that others have used for the ear-side lining with good results.
 

Users who are viewing this thread

Back
Top