"Open Alpha" T50 3D printed headphone project from MrSpeakers
Feb 20, 2017 at 1:57 AM Post #301 of 981
Does anyone have some feedback on how they feel the waveguides affect the headphones?  I am pretty curious about them, but have been focusing on my amp ever since I got my bass response sorted.
 
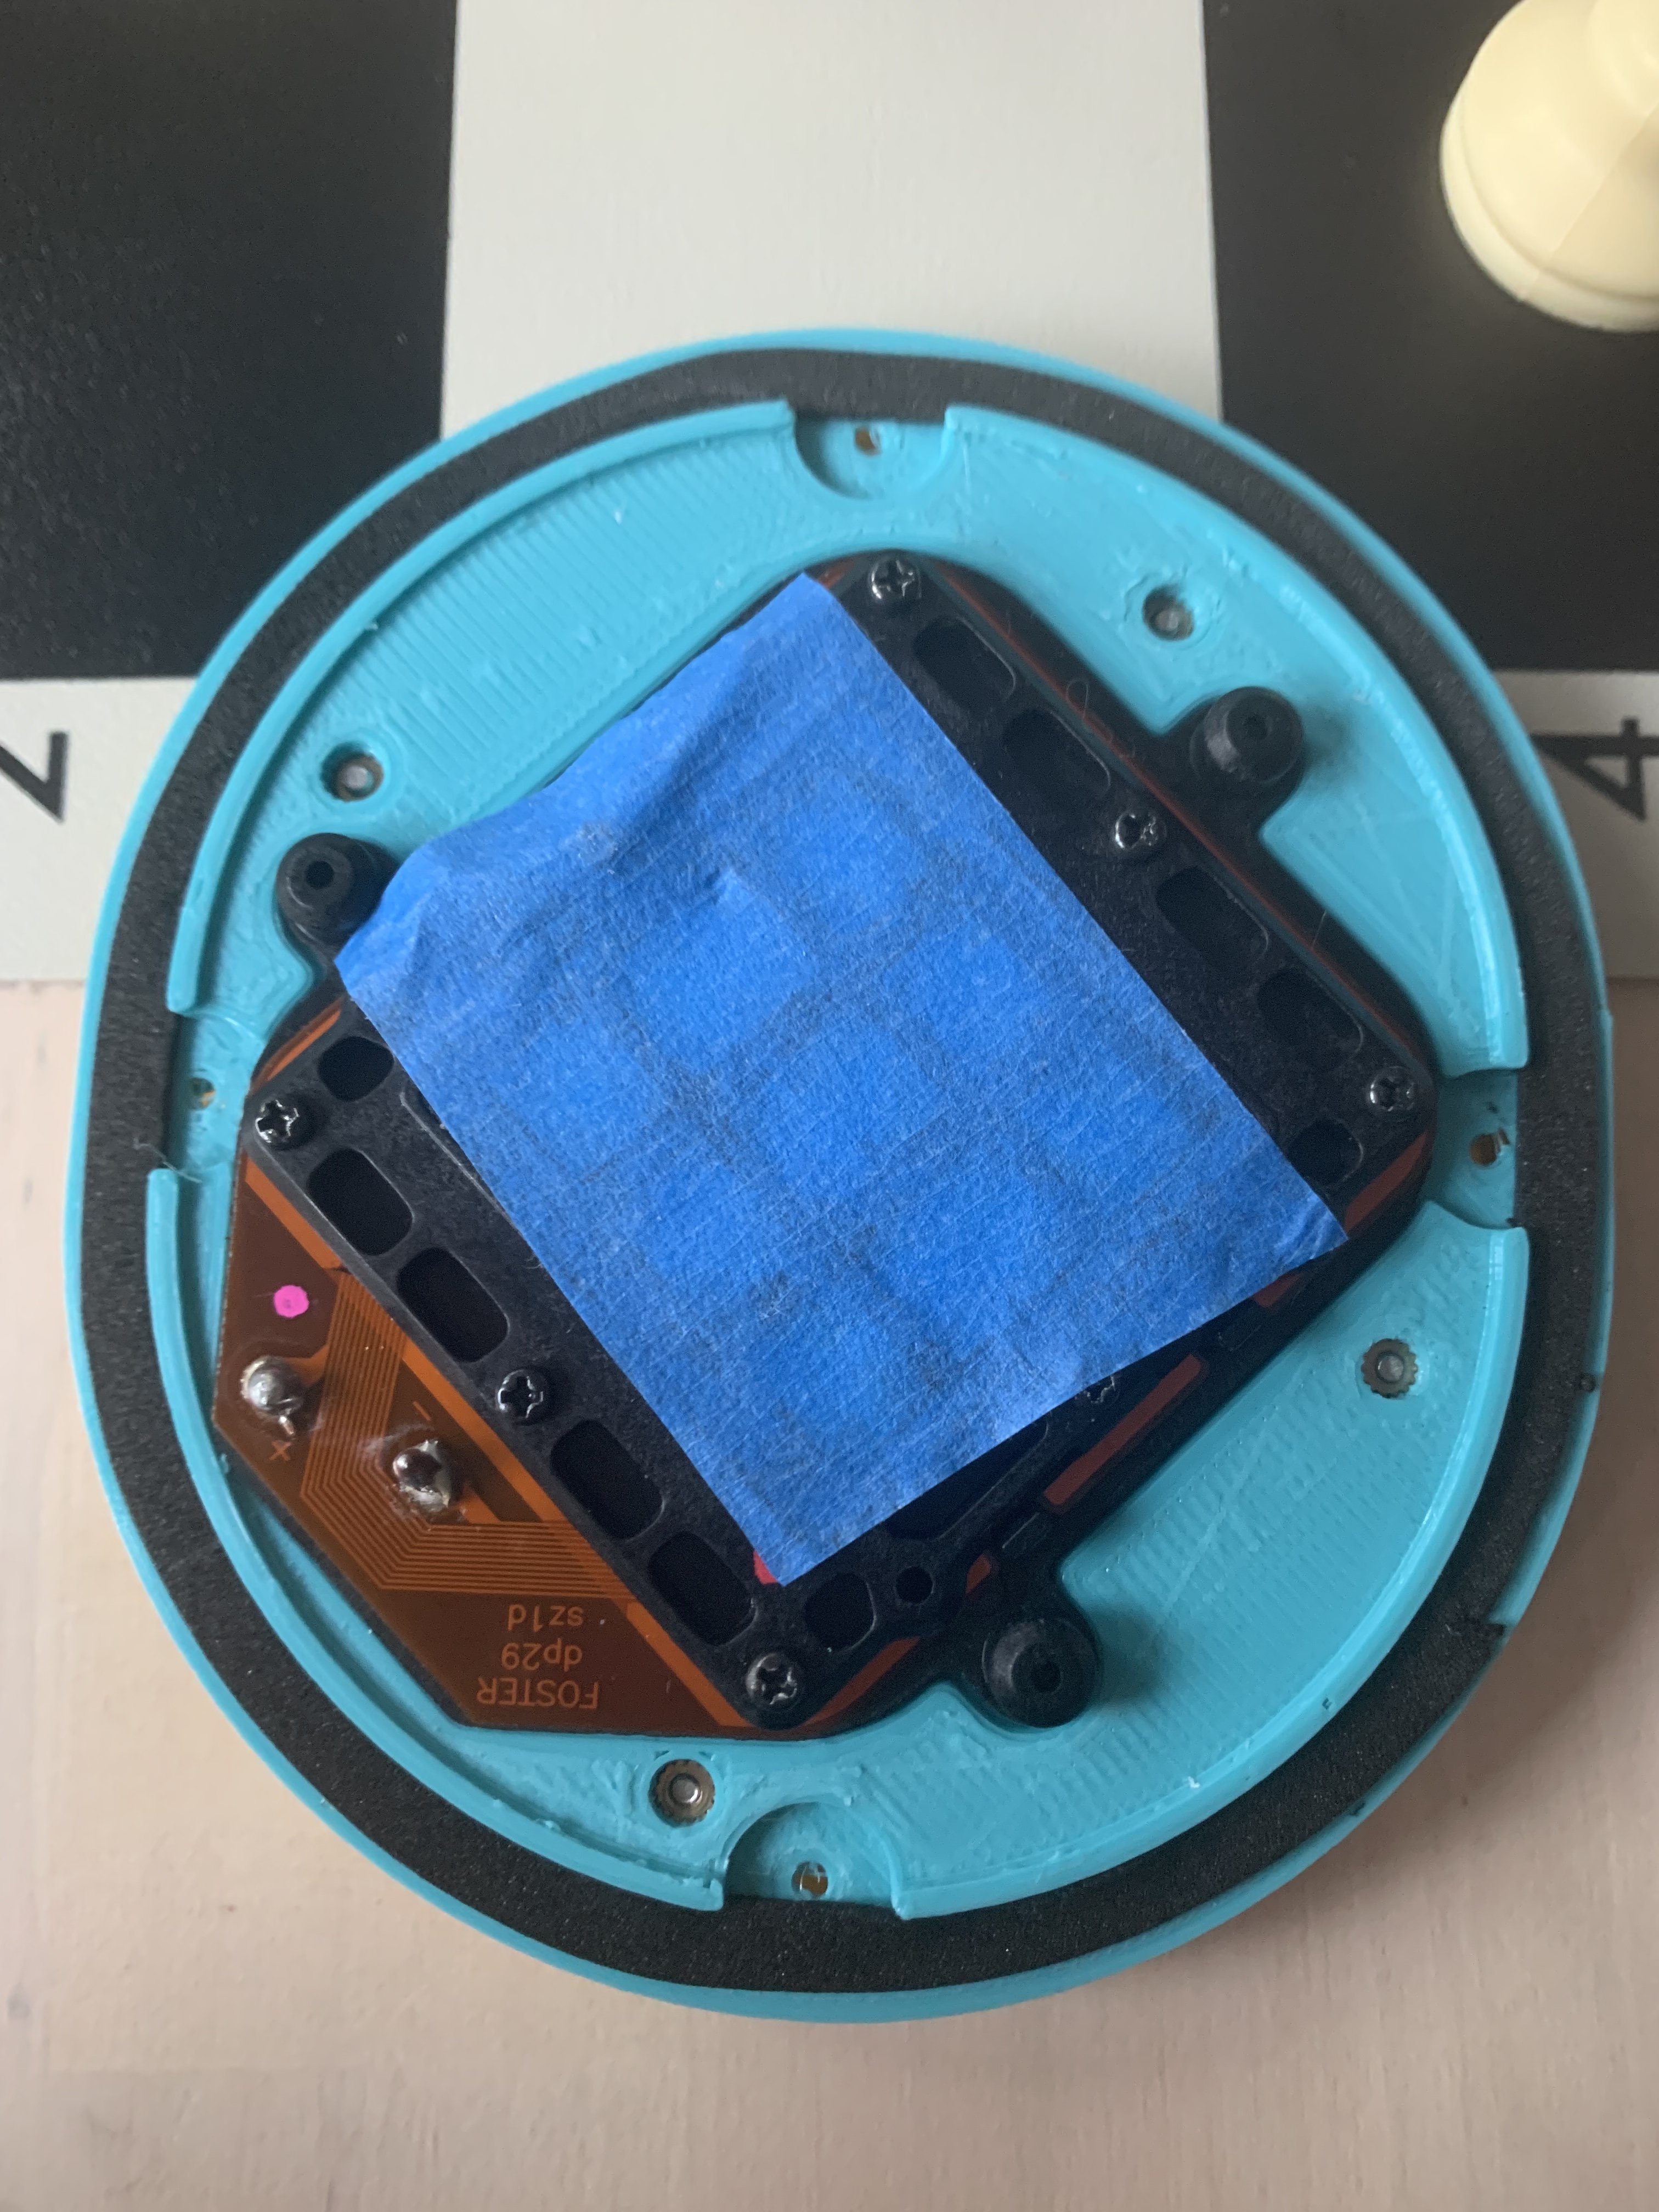
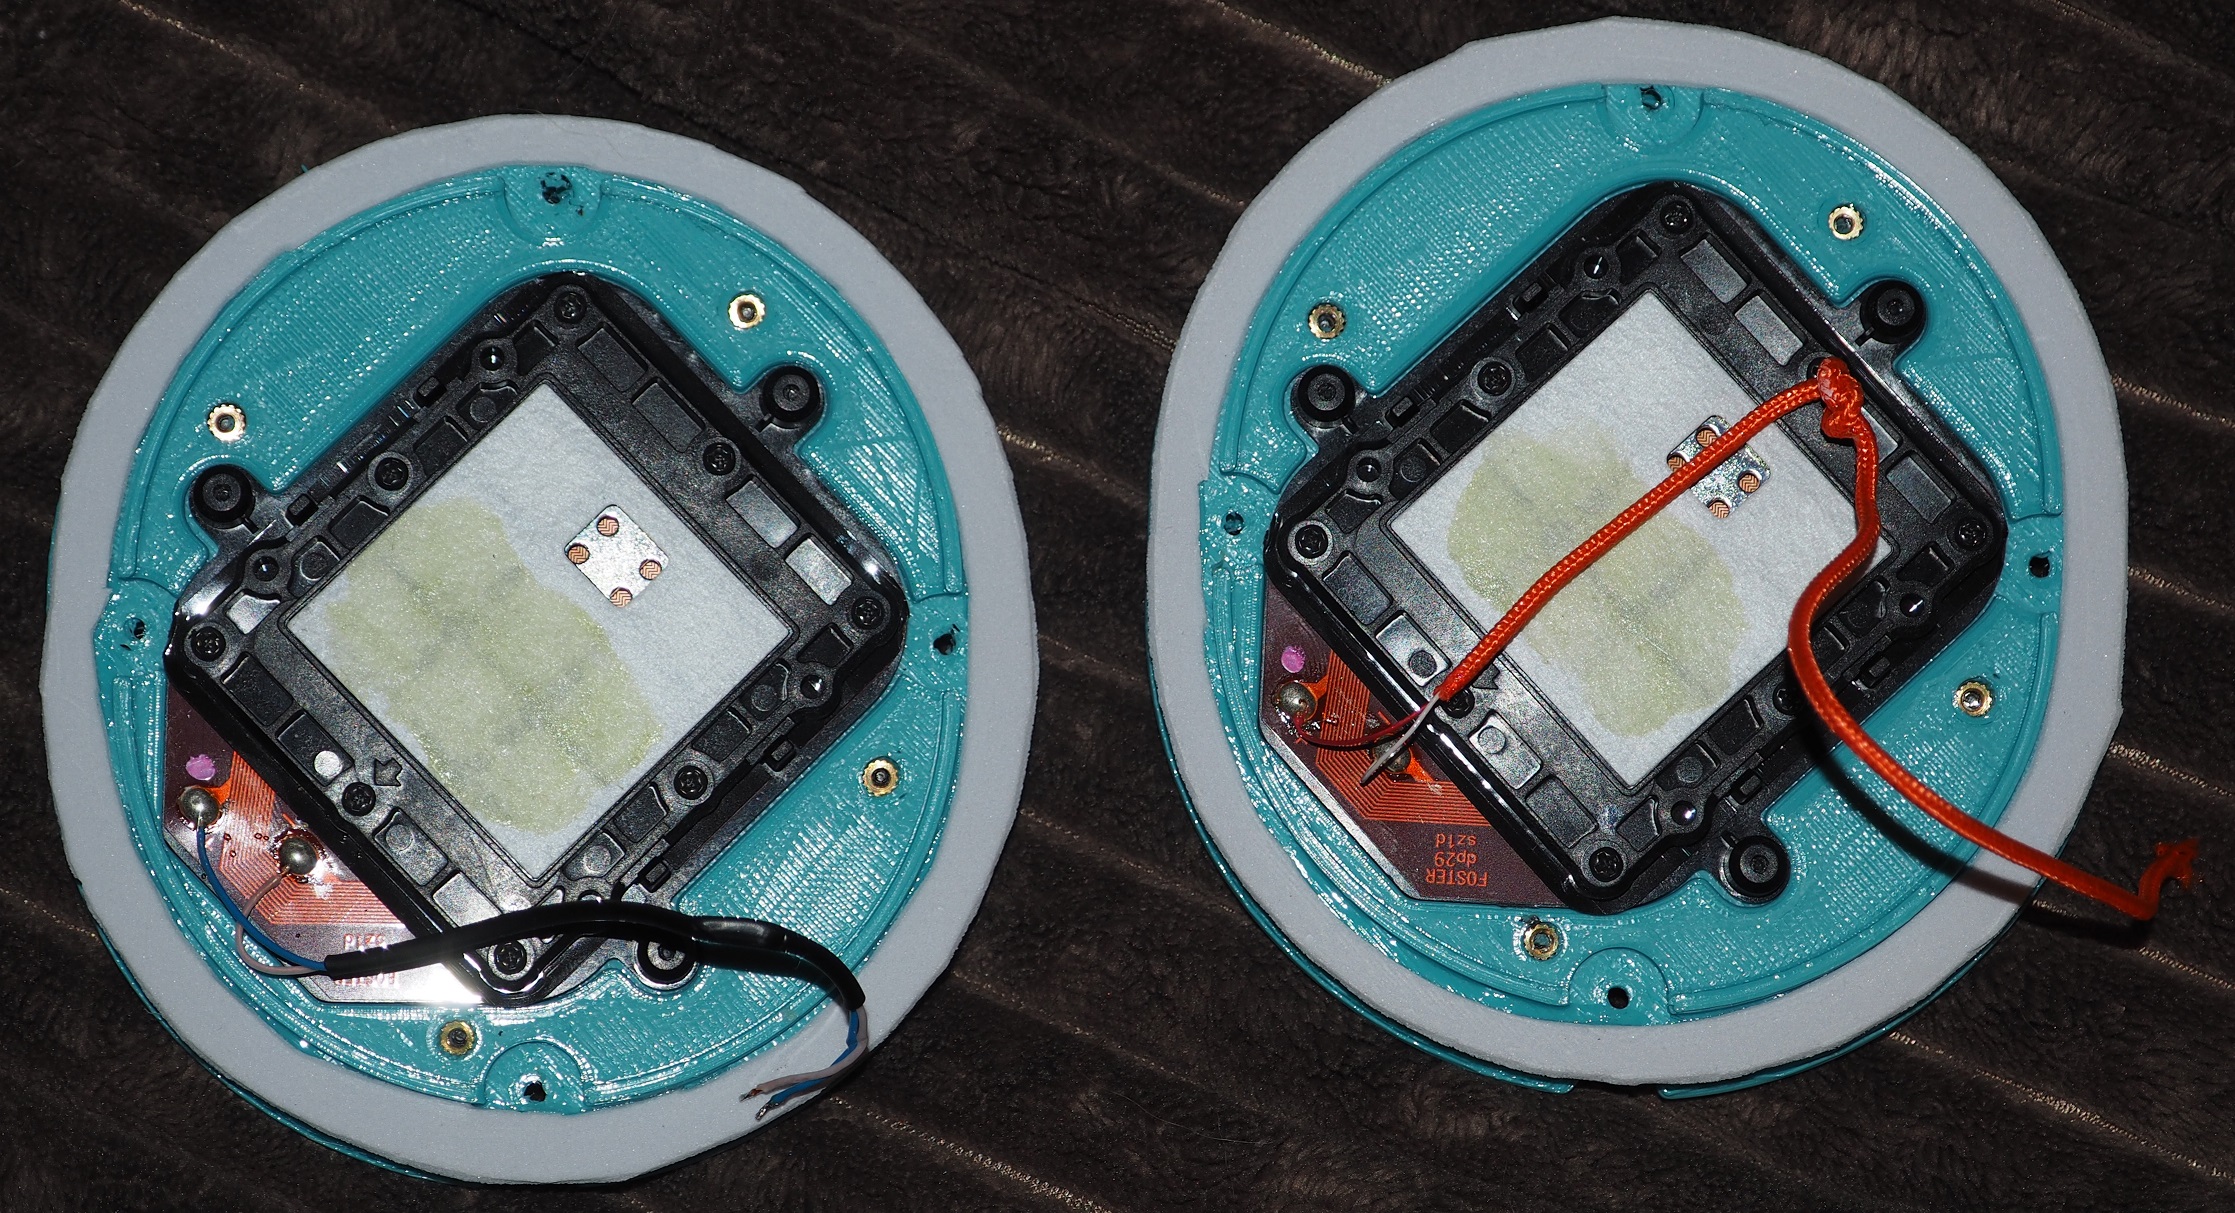
For those complaining a bit about the low end, I have to admit that I found the same issue initially.  I do tend to like a bit more than most, I suppose.  I found that any type of material on the back of the driver (like with typical mods, stiff felt, etc.) didn't work out too well.  I also found that having a nice solid "glue job" of the foam to the inside of the cup was important.  Overall, the volume inside the cup can increase the bass response pretty dramatically with relatively small changes like thickness of damping material and making sure its glued down everywhere.  I tried a lot of different cotton/wool type fills as well, and found that going completely without was worse.  The amount I ended up with was.. maybe about 1 cotton balls worth fluffed furiously.  No scale, so nothing more specific than that.
 
Not necessarily bass related, but I have found that foam attacked to the ear side baffle as well as the interior baffle yields a nice sound. I also bored my ports out to 1mm. I figured if I didn't like it, I could just seal some of them up to compensate, but, I dig the change.
 
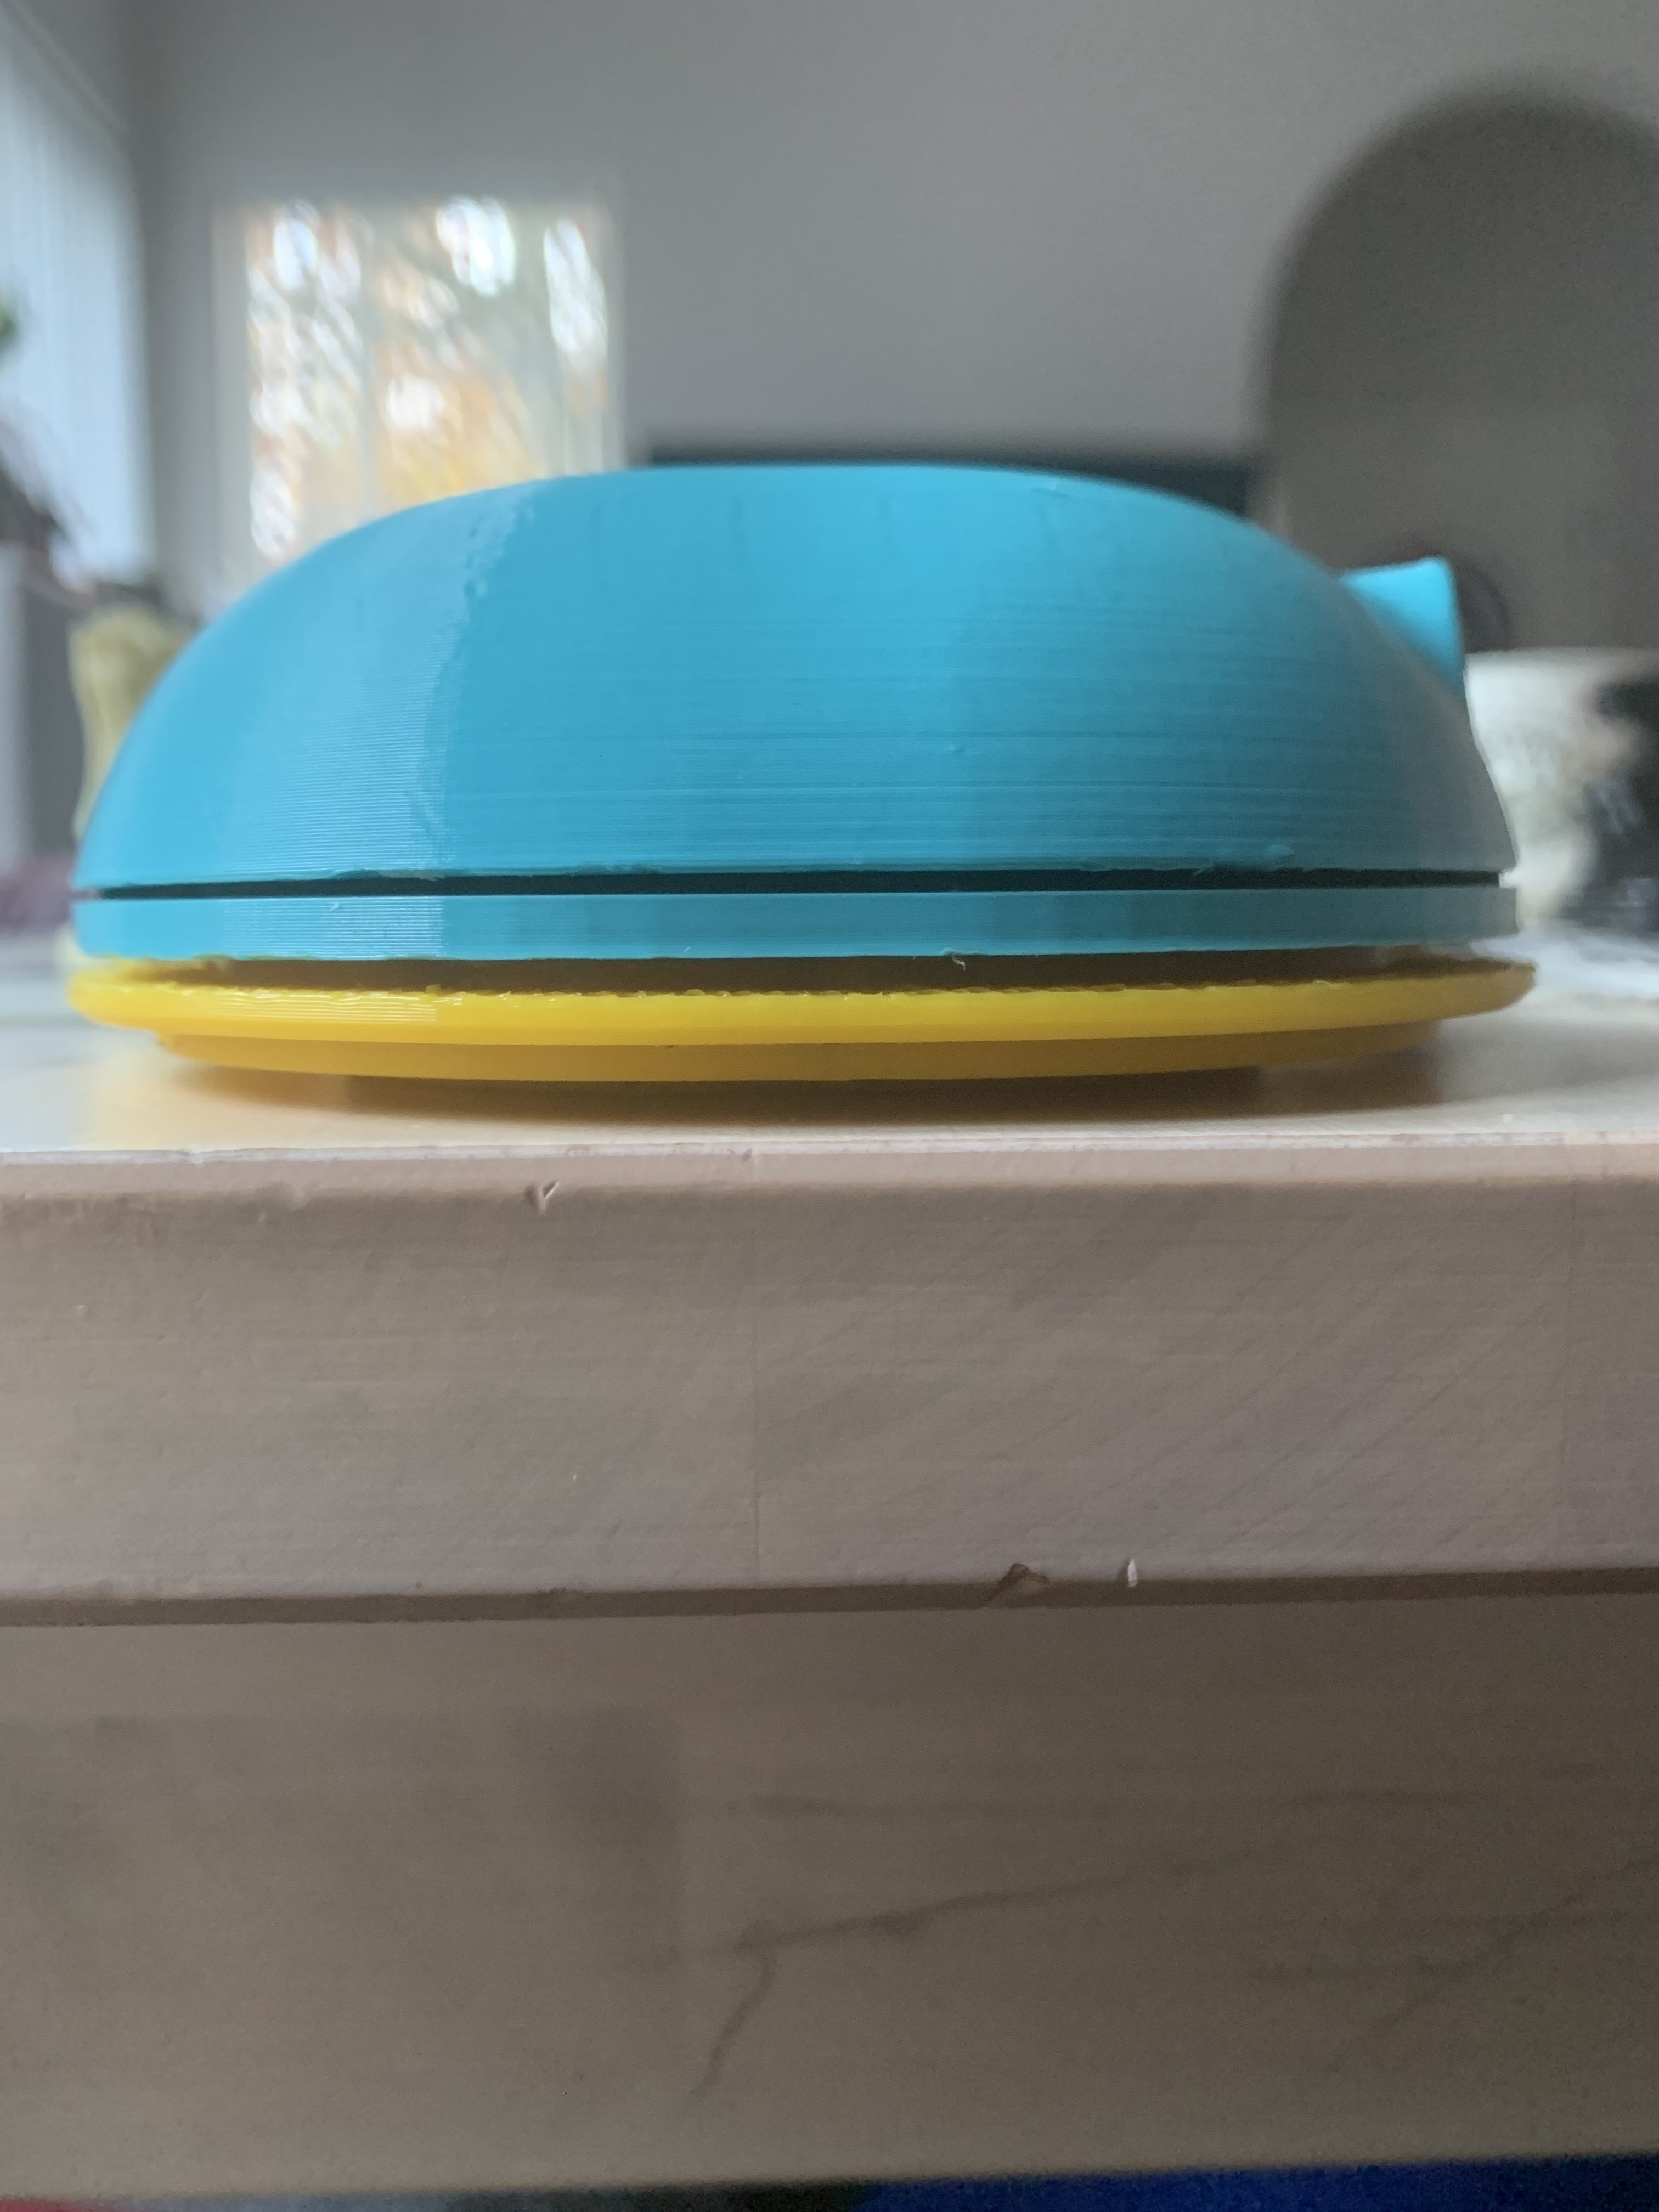
Of course, the obvious stuff like proper seals should also be considered, but if using anything like foam between the baffle and cup, its good to make sure its really quite thin.  If its on the thicker side, it can cause some of the screw posts to snap off under the pressure (even if holding them together, ask me how I know :p).  The material I tried initially compressed down to ~.8mm but still gave some issues.
 
Feb 20, 2017 at 5:18 AM Post #302 of 981
But if the baffle plate was the only difference, that wouldn't carry over to the Open Alphas of course....

True... If you ever get both MK2 and MK3 next to each other, and are willing to experiment, then it could be interesting to remove the material on the back and build them into identical cups and baffles. Then you can listen for differences and try to measure. According to popular belief they should be identical, but I guess any further differences in the drivers should show in such an experiment.
 
Feb 20, 2017 at 8:21 AM Post #303 of 981
... it can cause some of the screw posts to snap off under the pressure (even if holding them together, ask me how I know :p)


I'm currently in a state of depression/rage because last night I twisted off the screw bosses on both sets of cups I had. I think this is partly due to a failure to properly ream out the screw holes, partly due to the soft nature of the z-abs material, and partly due to the "grain" of the filament.

I was so frustrated I stayed up late and created a more fool-proof STL with reinforced bosses, and I'm having them printed with a different material/orientation. I'll share the results once I see how they turn out. Meanwhile I have to borrow my old headphones back from the wife and try to explain why the MK3s are in pieces scattered across my desk. :wink:
 
Feb 20, 2017 at 1:40 PM Post #304 of 981
Does anyone have some feedback on how they feel the waveguides affect the headphones?  I am pretty curious about them, but have been focusing on my amp ever since I got my bass response sorted


So far I think it's only been me and bluemonkeyflyer to have installed the wave guides. Pop over to Incremental Mods and Measurements, he has a full tutorial and his thoughts on how they changed the sound

I've found similar results but combined with the Open Alphas it seems to be amplified, of course I didn't get to compare directly
 
Feb 20, 2017 at 2:13 PM Post #305 of 981
Hey got to the local hardware store and get some JB Weld. Its an epoxy resin that happens to be just perfect for what happened to you. Just fill the hole up with JB weld and then just re-drill them out with a close size. Make sure that the size of the bit is a bit smaller than the post on the screw. 
 
Feb 20, 2017 at 9:12 PM Post #306 of 981
@musicfan145

​I think one of the biggest issues with FDM is weakness along certain planes.  Sometimes it can be downright tricky to try to work around.  Ive been trying to design a Christmas light clip, but the issue is that it has force exerted against it along two perpendicular planes.  Other than printing it at an angle with supports, its a difficult issue to actually solve through design.  There are some great books about the topic, cant remember the one I enjoyed off the top of my head, but if you are interested ill dig it up so you can check it out :)
 
@SeEnCreaTive
 
Yup, I had seen the feedback in that thread. I was hoping that some more people from this thread had experimented with it. My printer is currently down, so cant just print them up to check out for myself :frowning2:
 
Feb 21, 2017 at 1:25 AM Post #307 of 981
@musicfan145


​I think one of the biggest issues with FDM is weakness along certain planes.  Sometimes it can be downright tricky to try to work around.  Ive been trying to design a Christmas light clip, but the issue is that it has force exerted against it along two perpendicular planes.  Other than printing it at an angle with supports, its a difficult issue to actually solve through design.  There are some great books about the topic, cant remember the one I enjoyed off the top of my head, but if you are interested ill dig it up so you can check it out :)

@SeEnCreaTive


Yup, I had seen the feedback in that thread. I was hoping that some more people from this thread had experimented with it. My printer is currently down, so cant just print them up to check out for myself :frowning2:


I'm very excited too :) I hope people modify them, I really don't like the bass I added on, takes a huge amount of sanding to get them back, and you have to make sure all the parts are level :l
 
Feb 21, 2017 at 1:42 AM Post #308 of 981
@musicfan145


​I think one of the biggest issues with FDM is weakness along certain planes.  Sometimes it can be downright tricky to try to work around.  Ive been trying to design a Christmas light clip, but the issue is that it has force exerted against it along two perpendicular planes.  Other than printing it at an angle with supports, its a difficult issue to actually solve through design.  There are some great books about the topic, cant remember the one I enjoyed off the top of my head, but if you are interested ill dig it up so you can check it out :)

@SeEnCreaTive


Yup, I had seen the feedback in that thread. I was hoping that some more people from this thread had experimented with it. My printer is currently down, so cant just print them up to check out for myself :frowning2:


Try and paint the part with some epoxy. It will help a bit with the crack formation.
 
Feb 22, 2017 at 3:38 PM Post #309 of 981
Hey Guys, 

Just giving an update to the project. The Cups came out perfect with a great resolution. I quickly removed the supports from the exterior with some wire snips and started to sand them with some 200 grit sand paper to start then followed with 400 up to 600. After I applied some satin clear acrylic paint (5 coats) to the parts with great results. Im glad I used satin finish because with the gloss it would show any imperfections that were present.
 
I printed the baffle plates in one piece and they really turned out great. They have no warp that I can see. in order to seal the plates better I am going to use some silicone sheet (.5mm thick) and cut to shape to seal any fine holes present. The silicone should give some decent clamp and seal as well as vibration isolation form the baffle plate for the driver. Im going with some 2.5mm 4 pole connectors that mate with my modded Audio Technica ath-ad2000x's so I just have to have one cable for the both of them.
 
I am going to be covering the interior with foam tonight with the stencil provided here and fill with some standard cotton balls. I will report back on the work.

 
Feb 22, 2017 at 3:54 PM Post #310 of 981
Looks really good, and I am glad to hear that the SLA printed parts came out well.
 
I recently got some alpha pads from a fellow Danish audiophile who had switched to other pads on his HE6, and I am very pleased with the sound. They lift the bass to another level and just work perfectly with this headphone. No surprise as it was designed for this pad, but I definitely would recommend everyone doing this build to get the alpha pads!
 
Feb 22, 2017 at 6:51 PM Post #311 of 981
Hey Guys, 


Just giving an update to the project. The Cups came out perfect with a great resolution. I quickly removed the supports from the exterior with some wire snips and started to sand them with some 200 grit sand paper to start then followed with 400 up to 600. After I applied some satin clear acrylic paint (5 coats) to the parts with great results. Im glad I used satin finish because with the gloss it would show any imperfections that were present.


Well done!!! I really like the nice and quite peculiar finish on the cups... they look ethereal! It's a sort of "between the lines" homage to MrSpeakers ... :wink:
 
Feb 22, 2017 at 11:43 PM Post #312 of 981
Ok just semi-finished them. I still need to add some cotton it the cups to get the balance right between the 2 cups. They feel slightly bass heavy right now but I think that with some tuning I can get that down. I am getting a slight rattle in my right earcup and I thin that it is being caused by the wire touching. I am not completely  sure as I have to take them apart tomorrow and add ear side foam, cotton balls instead of cotton squares, and do final balancing. Also noticed that not painting them and leaving them clear adds this weird effect for the foam that does not make contact with the inner cups. You get black spots(adhesive foam sticking) and brighter spots (adhesive foam not making contact but  has a bubble). Maybe a small prick can help. Also not mentioned before is the use of a silicone gasket between the baffle/driver mount/ear cup mount plate to the cups. I think that it really seals it well when it is tightened down. I created the silicone plates by pressing some silicone between to flat plates then throwing it in the oven. 
 
Does anyone recommend any tools to help balance other than just by ear?


Feb 23, 2017 at 1:16 AM Post #313 of 981
  Ok just semi-finished them. I still need to add some cotton it the cups to get the balance right between the 2 cups. They feel slightly bass heavy right now but I think that with some tuning I can get that down. I am getting a slight rattle in my right earcup and I thin that it is being caused by the wire touching. I am not completely  sure as I have to take them apart tomorrow and add ear side foam, cotton balls instead of cotton squares, and do final balancing. Also noticed that not painting them and leaving them clear adds this weird effect for the foam that does not make contact with the inner cups. You get black spots(adhesive foam sticking) and brighter spots (adhesive foam not making contact but  has a bubble). Maybe a small prick can help. Also not mentioned before is the use of a silicone gasket between the baffle/driver mount/ear cup mount plate to the cups. I think that it really seals it well when it is tightened down. I created the silicone plates by pressing some silicone between to flat plates then throwing it in the oven. 
 
Does anyone recommend any tools to help balance other than just by ear?


Robert, that looks amazing!
 
Feb 23, 2017 at 1:17 AM Post #314 of 981
Figured I'd separate this post (I don't know why, but it feels right). Maybe it's more a question for @mrspeakers but for those who are using the Hirose-style connectors--when you're making custom cables, what tool are you using for the crimping? I tried pliers and boy, I have some ugly crimps on my hands. :frowning2:
 

Users who are viewing this thread

Back
Top