My DIY electrostatic headphones
Jan 29, 2016 at 7:10 AM Post #1,982 of 4,059
WHAT GLUE do you use to glue mylar to the stator as my glue is evo stik cement and its like syrup!!! when you try and run your finger over the stator to evenly spread the glue.... it goes all lumpy the glue i mean !!!
confused.gif
 any ideas? what do you use for glue ??
cheers!!
 
Jan 29, 2016 at 10:02 AM Post #1,983 of 4,059
Come on!  I've answered this glue question to you already.  I use contact cement for gluing the diaphragm,  That's the only type of glue that works well for me.  It's yellow colour with bad smell.  We also call it rubber glue around here.
 
Wachara C.
 
Jan 30, 2016 at 4:34 AM Post #1,990 of 4,059
Quote:
  I'm really itching to try to make a pair of really small, in ear, type of electrostatic earphones - similar to Stax SR002.  Does anyone have any experience on how they sound?
 
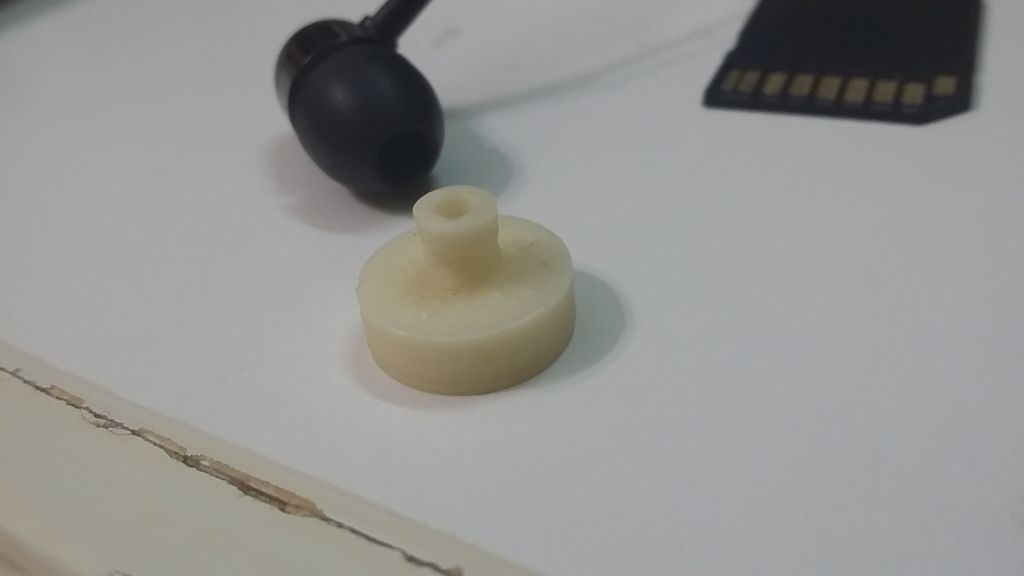
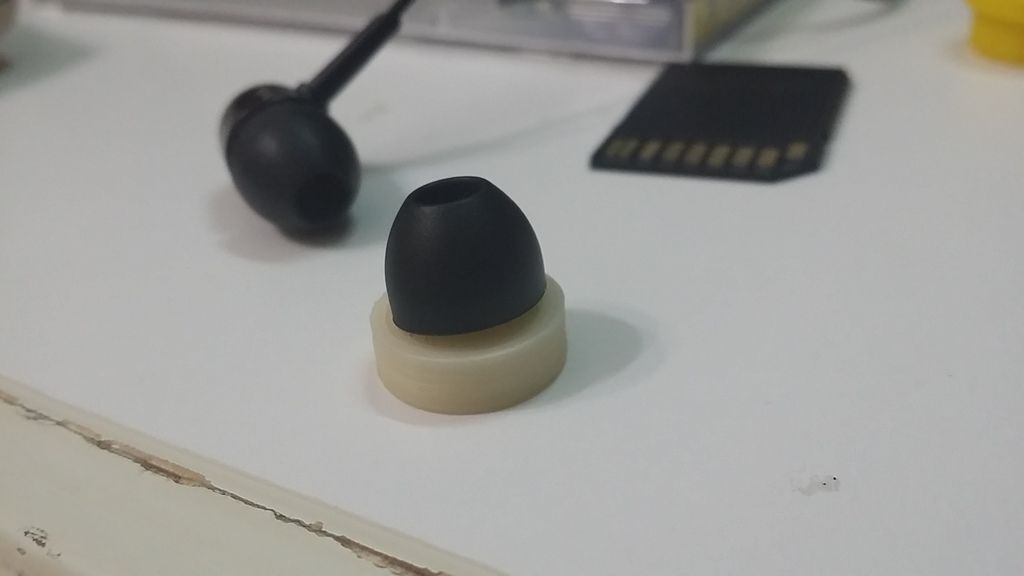
I can use my 3d printer to print the housing.  I'm thinking of 0.75 mm holes on the stators and 0.5 mm spacers.  I would like to use the amps I have which all have bias voltage of 580V.
 
It would be fun to try something different.  What do you guys think?  
 
Wachara C.


Hi  Wachara,
 
i am new in this thread. I like that you are sharing all your information. I appreciate this.
When i finish my actual project i will join you and try to build my own headphones.
 
You are asking about the SR-002. I have a pair of them and as i got a broken cable
i opened them. If you need some details may be pictures or meassuring please ask.
I may also reopen it if you need details.
 
I am with Mr Gilmore that they are very nice, but they need perfect seal which is very hard to find.
I tried like this:
 
- I used Moldex earplugs. These i cutted in halfes. Using the bigger end. Made a whole with a singe hole puncher and manteled them to the headphones.
- You can sgueeze them and quickly insert in your ears so that the expanding foam will rnake the seal.
- i combined this with an elastic headband of a headlight/torch, which gives a certain pressure to the headphones.
- you should look that the headband is not covering the backside holes of the headphones, as this changes the sound again.

I always wanted to make otoplasties, but i didn´t do it till now.
So i am happy following what you may develope.
 
If i can help you please PN or reply here.
 
geemo
 
Jan 30, 2016 at 4:51 AM Post #1,991 of 4,059
Hi geemo,

It would be a great help if you could share with me some photos and measurements of the driver. What I really like to kmow is the spacer thickness and the diameter of the active diaphragm.

Thanks for your help.

I just went out to buy a 0.5 mm endmill. Boy, it is so mall and fragile. I'm not sure if my CNC can handle it. We'll see.

Wachara C.
 
Jan 30, 2016 at 4:57 AM Post #1,992 of 4,059
Hi Wachara,
 
i think the issue about re-designing the Sr-002 will be:
 
1.) The shape of the outlet:
 
Why did Stax people use an oval ? May be for maximum surface. So it will be the question
what to develope - an better oval or a round which fits in the ear.
 
2.) The way from the membrane to the outlet.
 
A change in geometry may change the sound.
 
geemo
 
Jan 30, 2016 at 5:29 AM Post #1,993 of 4,059
Hi geemo,

It would be a great help if you could share with me some photos and measurements of the driver. What I really like to kmow is the spacer thickness and the diameter of the active diaphragm.

Thanks for your help.

I just went out to buy a 0.5 mm endmill. Boy, it is so mall and fragile. I'm not sure if my CNC can handle it. We'll see.

Wachara C.


Hi Wachara,
 
here are some information i have still in mind:
 
- The spacers where little white washers about 2-3 mm (Outer diameter -inner diameter) The thickness is hard to remember but i guess
0,5 mm may be less.
- The membrane was held by a brass coloured washer.
- The stators: You could not see holes in there. It had a sort of white surface in the middle.
 
Al the stuff was not screwed or glued - it was just hold together by the housing, which was 2 parts. When you strip off the shell
where the cable comes out you can see 3 clamps. They look like static crocodile mouths. You cannot push or pull the clamps for release.
You just pull the jack backwards. Then you have the single speaker. You can open the housing like opening a remote control. Its not very
tough. Then there is the stack of the slices/ disks.
 
To reassemble it you must see that everything is in the right place. The stators and the membrane have these metal tongues / latches,
which are sitting in a socket which is part of the housing shells. When you clip the housing shells together again you need to see
that everything is in the right place. But it works - i tried 2-3 times.
 
After that the cable-jack will be pushed on the open 3 latches. Finally you push the cable shell over the cable outlet / socket/plug. This will
also avoid that the two main housing shelves are opening unintended.
 
geemo
 

Users who are viewing this thread

Back
Top