mod: Monoporice 8323
Oct 2, 2012 at 9:26 PM Post #61 of 208
I guess more sub-bass is what I'm after, and smoother treble. But then I'm asking a lot for cheap cans I already like quite a lot.

I'll grab some of the tape soon and apply to the vents and the holes surrounding the driver, as pictured. See how I like that to begin with.
 
Oct 16, 2012 at 10:00 PM Post #62 of 208
I designed a 3-5khz freq fix circuit for 8323. Just installed today, testing for a couple hours now, and it's a HUGE improvement. It brings the recessed upper midrange and lower highs more into focus and balances the sound. Effect can be tuned/tweaked by changing one resistor. An effect of the mod is also a boost above 11khz, which is lacking on this can anyway. It makes the headphone seem fairly airy for a closed headphone and doesn't seem to add fatigue. The sound is WAY more balanced now and reminds me sort-of like AD900 but with bass impact and extension, less detail and a slightly more closed soundstage. I like the AD900 comfort more, but like the freqmod 8323 sound FAR more =)

Bass-heads probably need not apply. But bass extension and feel is still there, it just isn't the priority. Effect can be tuned though.

The mod works by reducing bass, starting to slope around 1khz to make the affected 3-5khz region more prominent, and notches the 8-9k peak (the Frys parts I used don't do this well though; low-z inductor would work way better). Makes the headphone WAY more listenable.

If you feel the 8323 is too bass-heavy and / or lacks upper mid and high freq detail, you'd like this mod. It's about $10 in parts from Fry's and will perform much better and probably be cheaper if parts are ordered online. One can make an inline box or do as I did and solder the parts to the drivers.

I haven't measured and done graphs yet...need to set up the equipment for that. They are audibly better and match my expectations from simulation and application of simulation response to electronic EQ.

Anyone interested?
 
Oct 16, 2012 at 11:23 PM Post #63 of 208
While I applaud the DIY spirit, is all that really necessary for a $25 headphone?  Factoring in the time and money required, you're now into the next tier of budget headphones with more balanced sound signatures. 
 
Oct 17, 2012 at 1:34 AM Post #64 of 208
Wrote the whole post and the browser crashed as I hovered over Submit. Really. I should know better than to not use a text editor...

So here's the short version: The 8323 is cheap. I have various cans in the "next tier", and the tier above that, and above that... dozens and dozens of pairs. Many headphones have model defects, usually more annoying ones like comfort or creaky plastics or weird resonances and ringing, and these even happen in $200+ headphones. The 8323 is all-around pretty good except for that 3k dip, and after it is fixed, it sounds _way_ better.

Why not mod a more accessible headphone? Why not make a good workplace or closed portable can sound better?

Besides, the parts were $9 at Frys and it took about 20-30min to solder. Would probably cost about that for the better parts online. Other mods cost more. People even mod the Superlux HD 681 similarly. Why not do it with this can?

There is a defect in the first version of the mod, in that 6k is still too bright. Made a v2 of the mod that changes the freqs around and fixes the 6-8k piercing but I will have to order parts for this version (already made a BOM for Mouser). I'll get them and try the mod, and if it works out and people are interested then I'll post both versions (the first version is 80% there and is easier).
 
Oct 17, 2012 at 9:23 PM Post #65 of 208
I would be interested in hearing more about it.
 
Oct 27, 2012 at 1:08 PM Post #66 of 208
Installed and tested the latest version of the mod...sounds so good. 3-5k is as fixed as it can be I think and the 6k and 8k peaks are gone. Will publish schematics, simulation graphs, and parts lists once a couple of other testers come forward and give their thoughts.
 
Nov 19, 2012 at 1:39 PM Post #68 of 208
is there any way you could make a video of this process as well.. i'd really like to mod a pair but im not the most mechanically inclined person around..
 
so having a video reference is a godsend.
 
Nov 19, 2012 at 3:59 PM Post #69 of 208
Sorry, I don't have another set nor a video camera. The process is really quite straight forward though. The pictures should be sufficient to guide you through.
 
Nov 30, 2012 at 9:51 AM Post #70 of 208
Hi there.  First post!  I bought a pair of these a month or two ago, and I also love the potential and the disconnecting cord, but the comfort is way off (I got the top pad many people recommend) and I especially did not like the flabby bass and empty high end.  Here is how I addressed it so far:
 
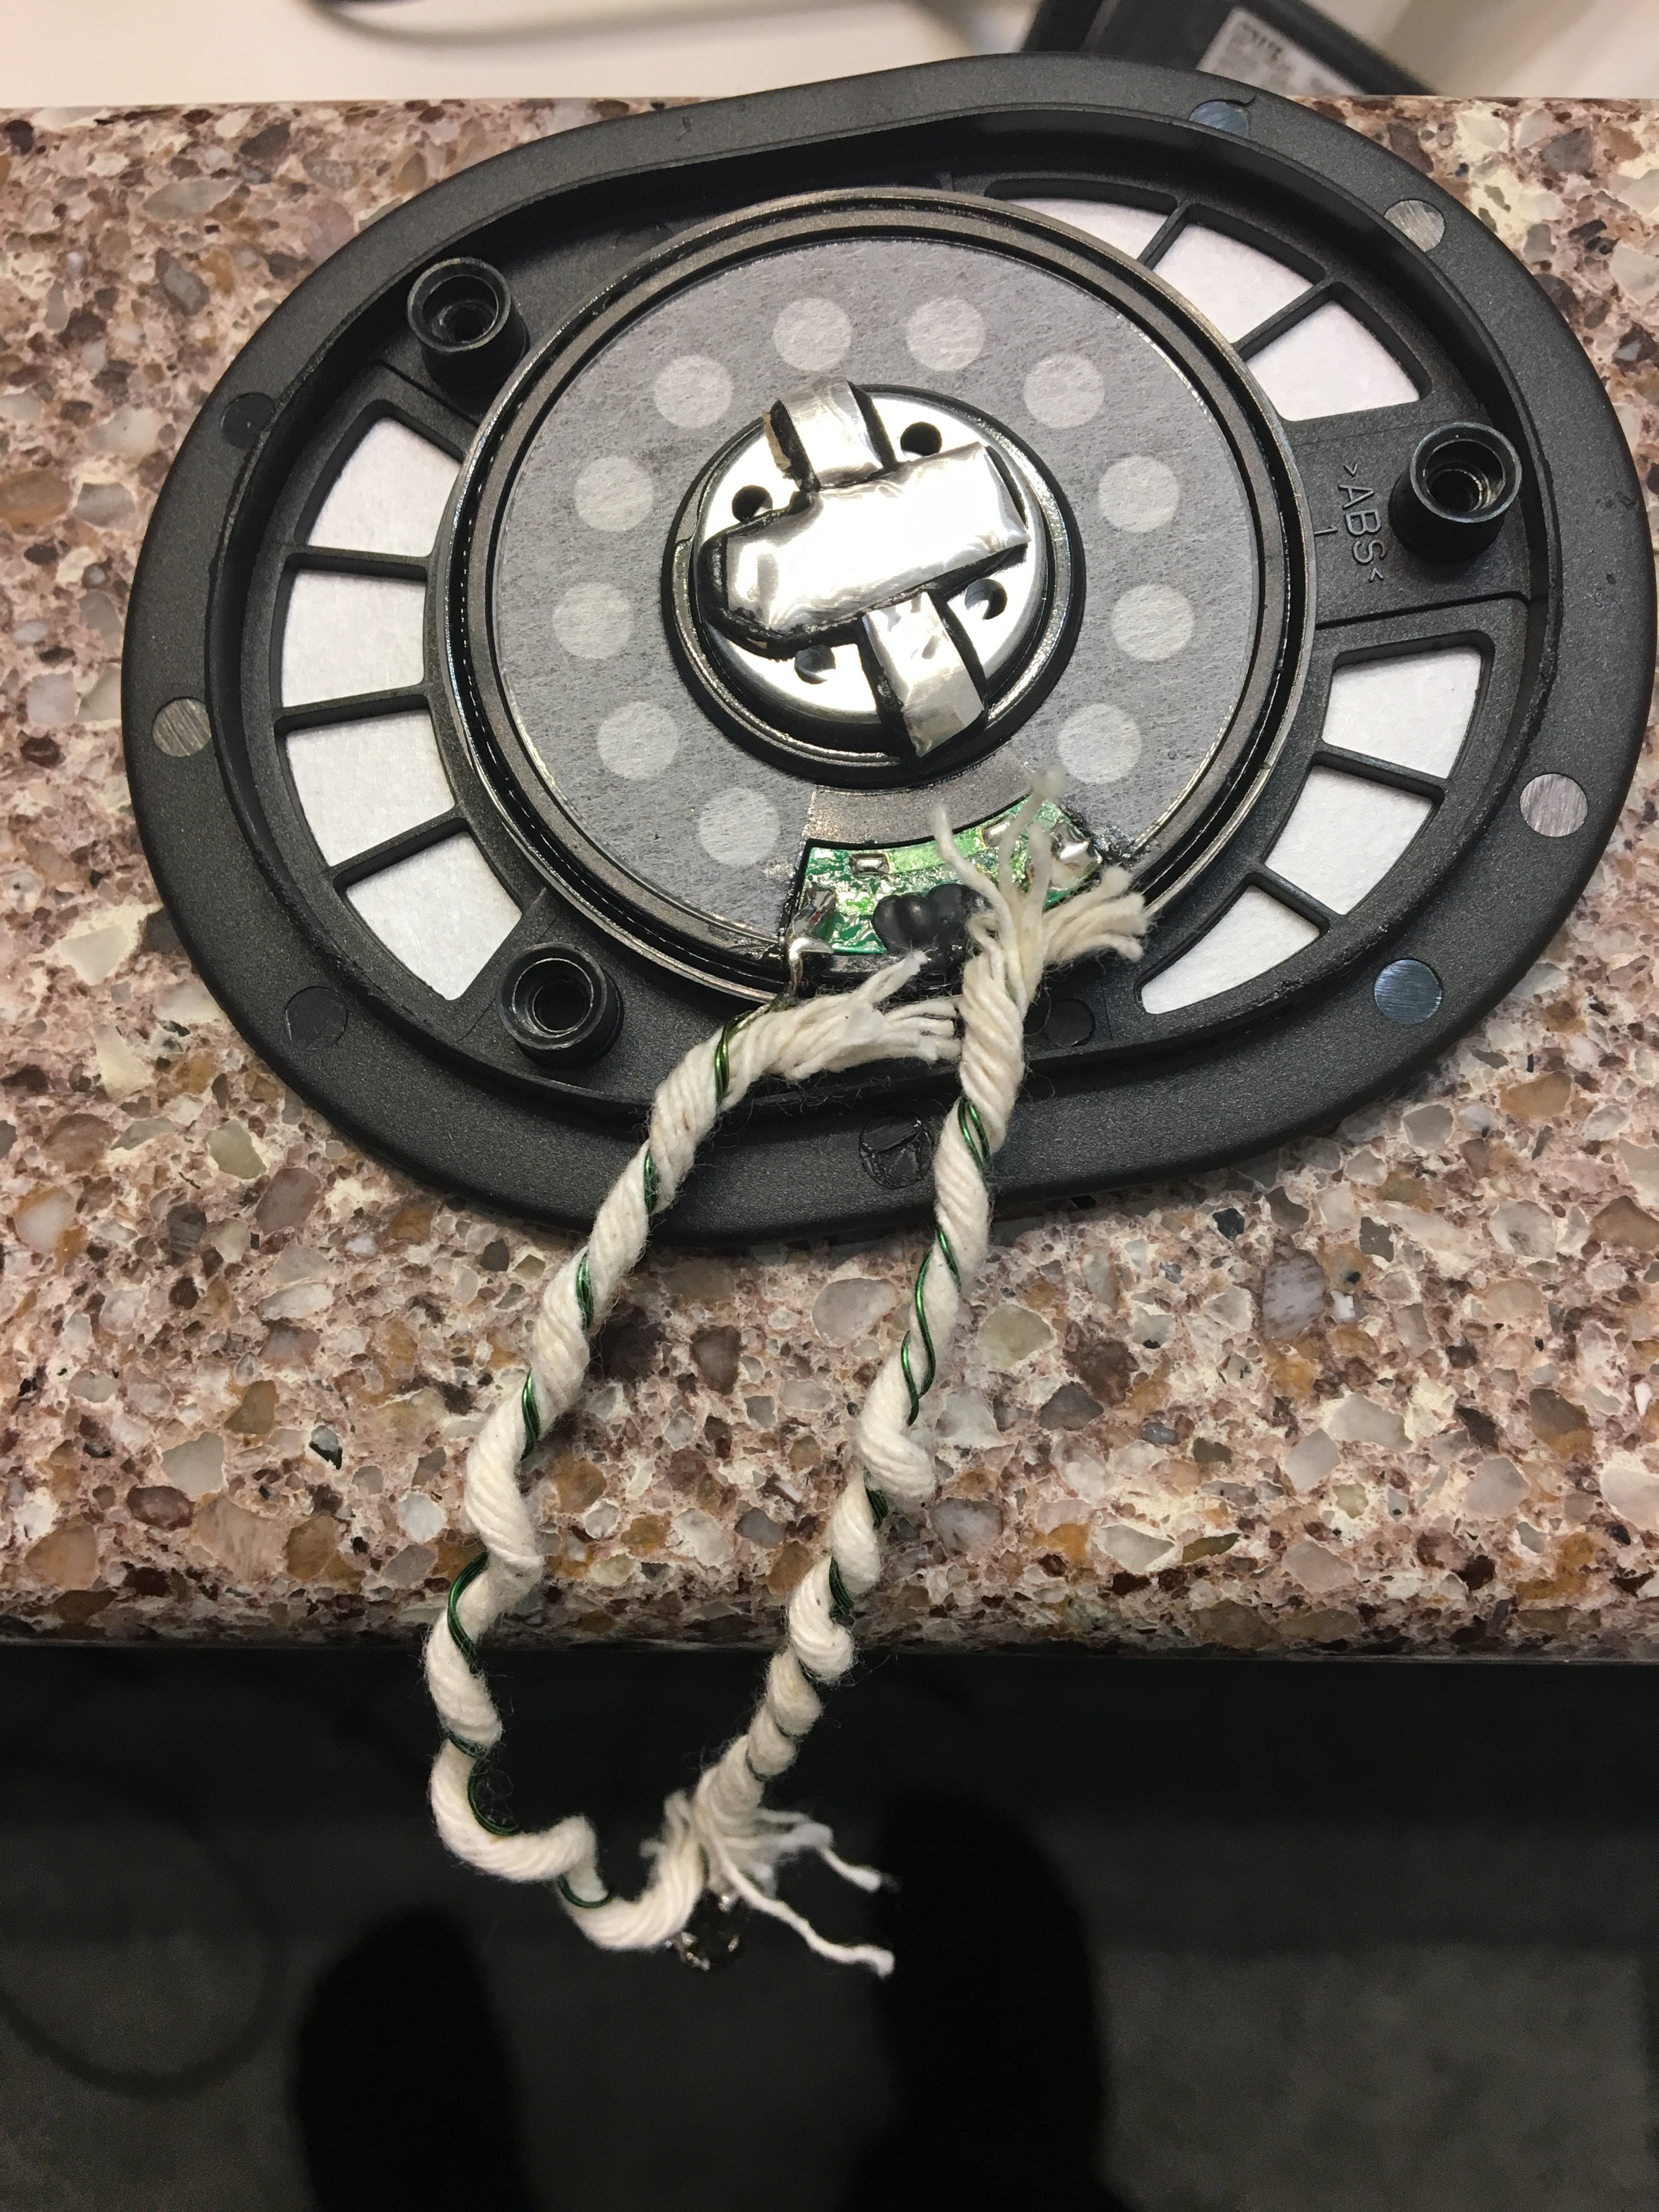
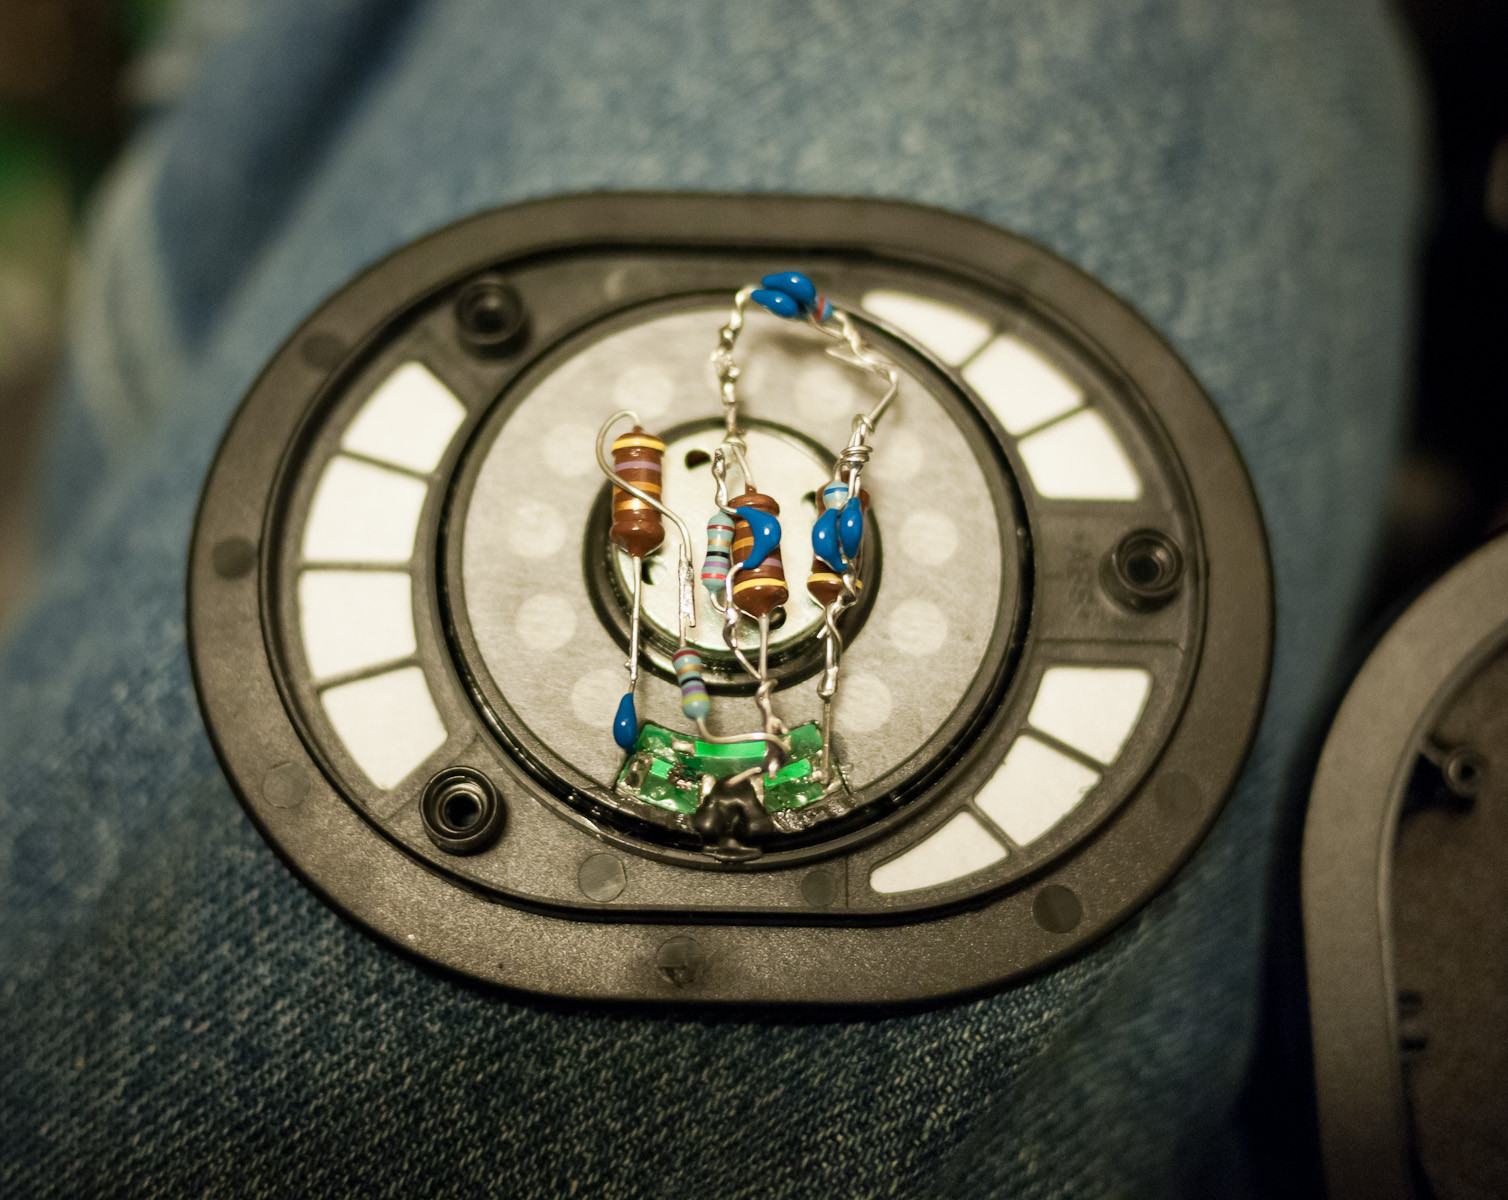
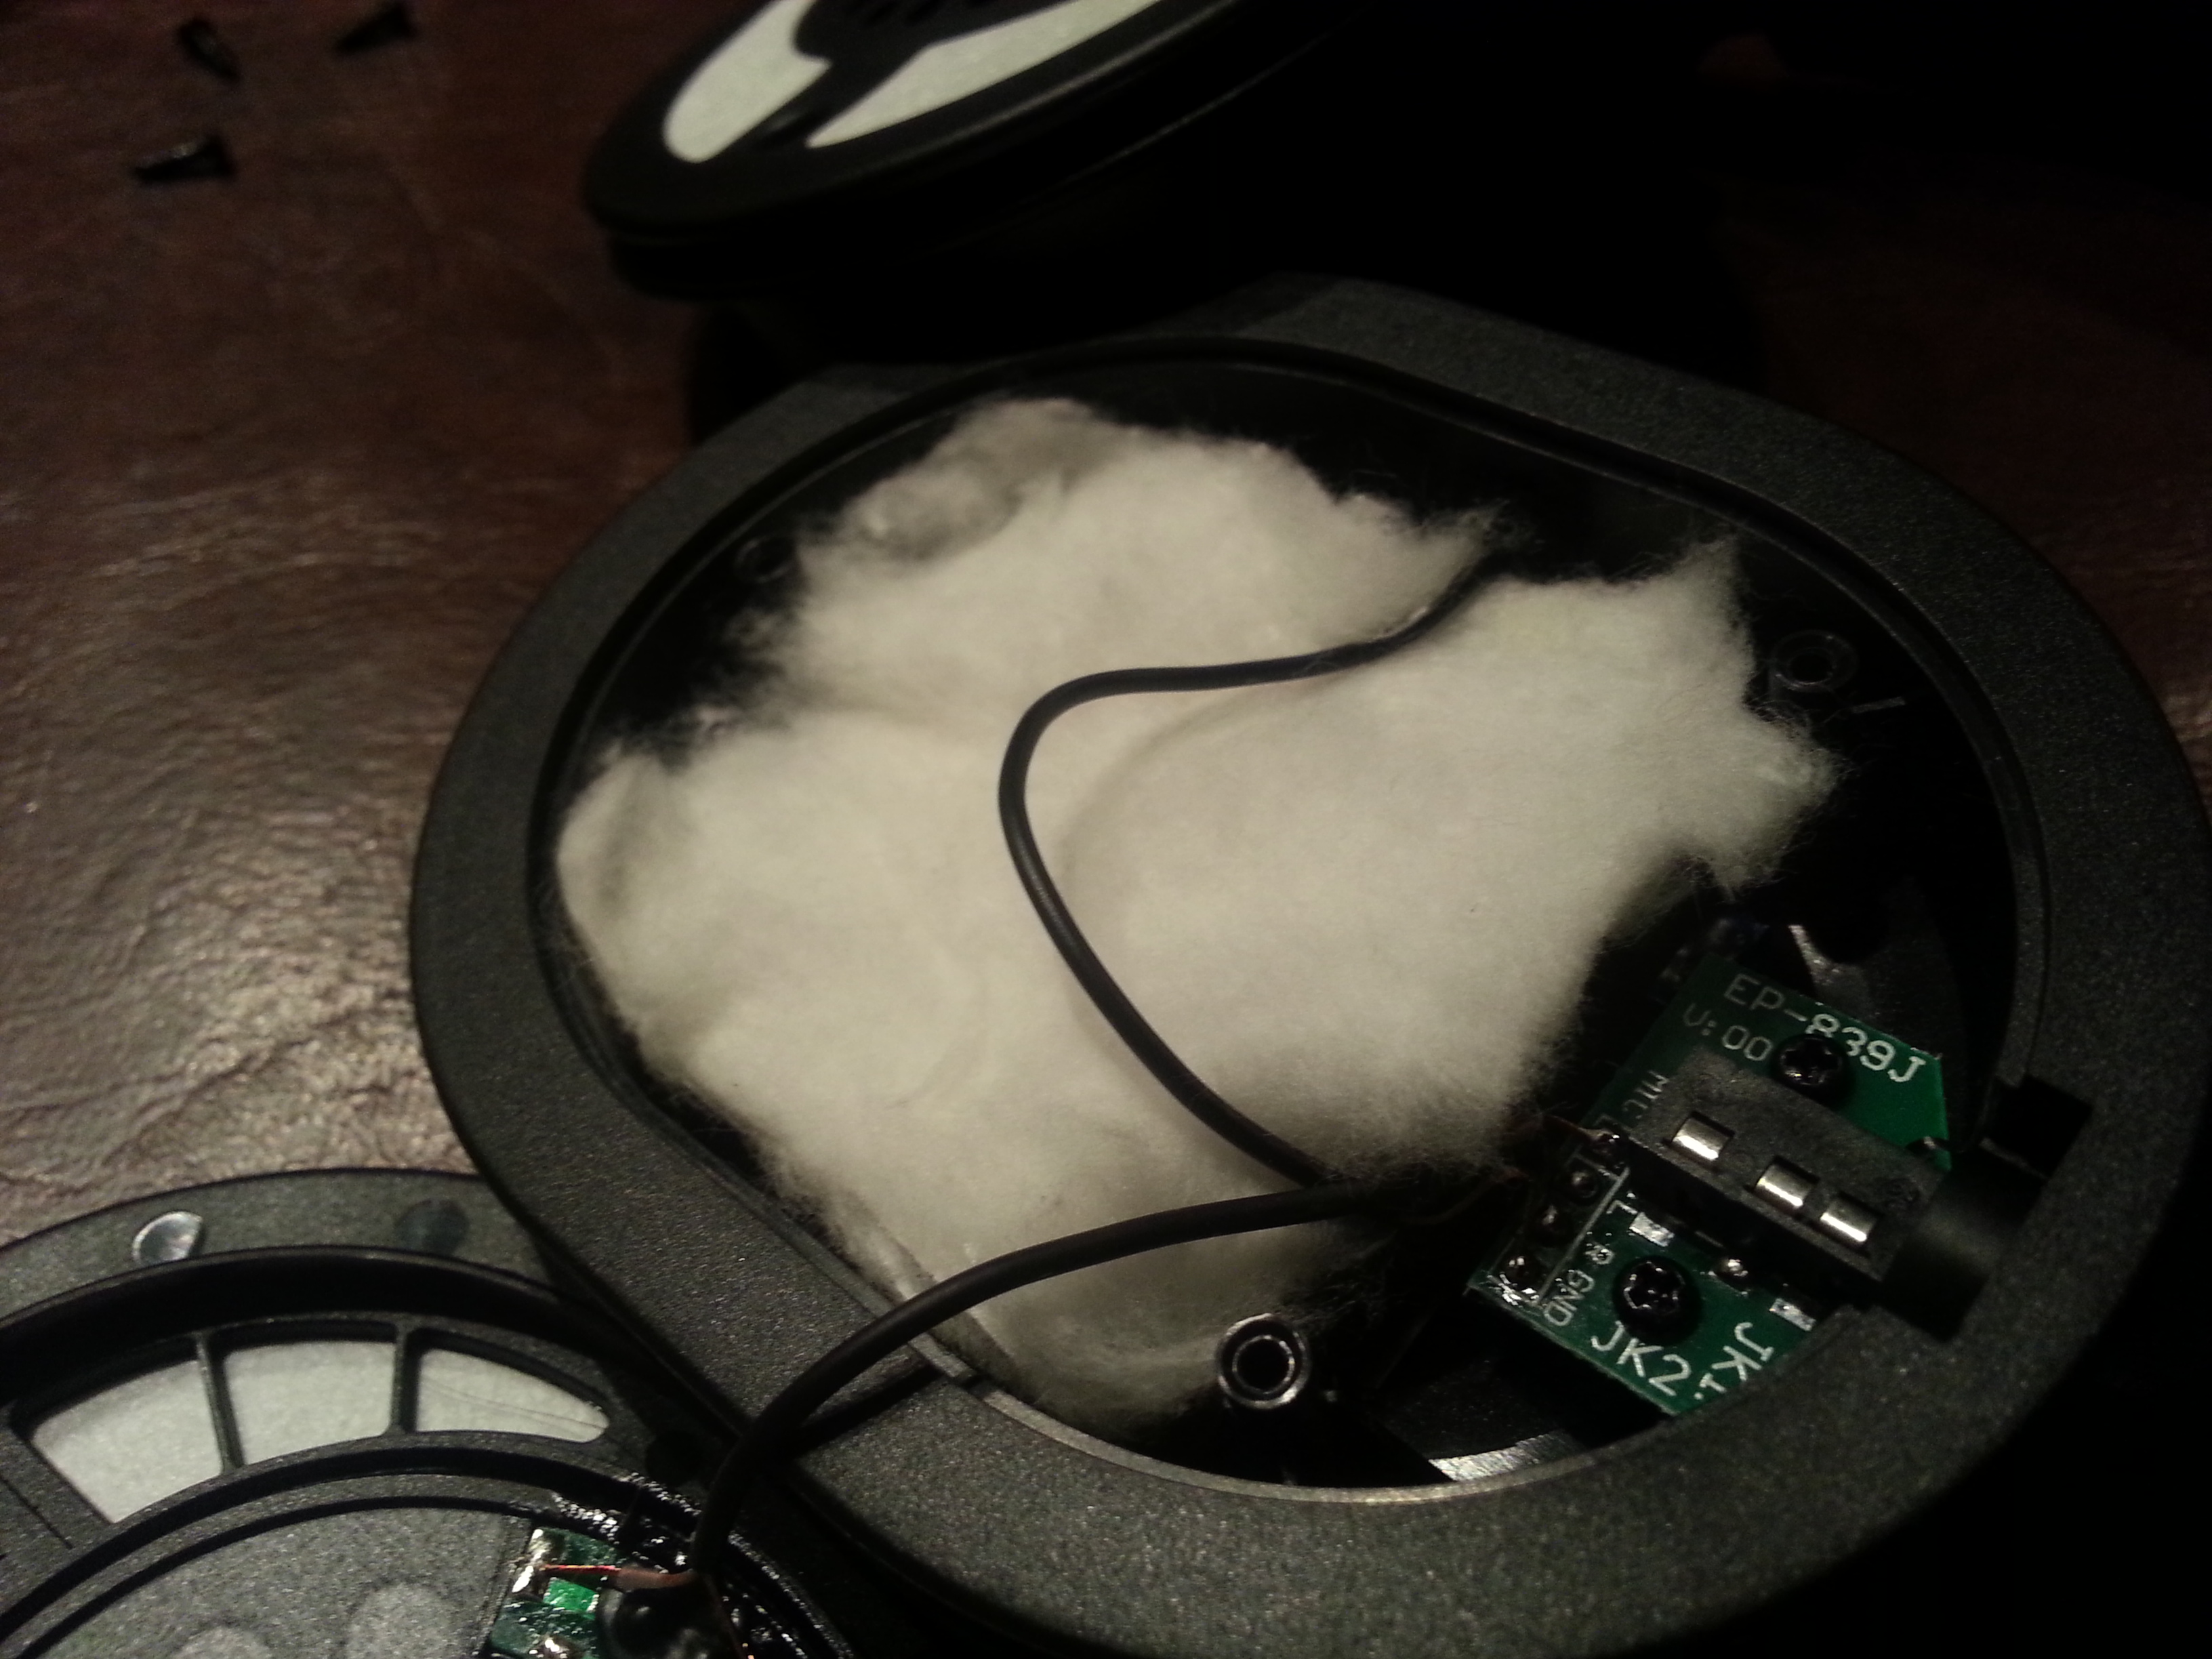
1) I put a fair amount of fiberglass (insulation type) behind the driver.  I read that fiberglass is one of the best damping materials.  Armaegis, can you please explain to me the reasons that you used each different material?  I found the fiberglass to help a lot, but I am genuinely curious of the pros/cons of the different materials.  I'm fairly new at this, and the one time I needed to add fiberglass to a larger speaker it helped a lot, so I figured doing this in a similar way would also be a good place to start.  I have some on hand, so it makes it easy.  (Not literally, I wear gloves!)
2) I also tried taping up some of the driver holes per the recommendations.  I'm not sure how much difference this really made.  Fiberglass was a much larger difference, but I left it since I haven't opened it again recently.
3) I still felt that the highs needed help, so I *gulp* poked some holes in the pad near the center of the driver.  This really seemed to help bring the high end out a lot more, which is what I am looking for.
 
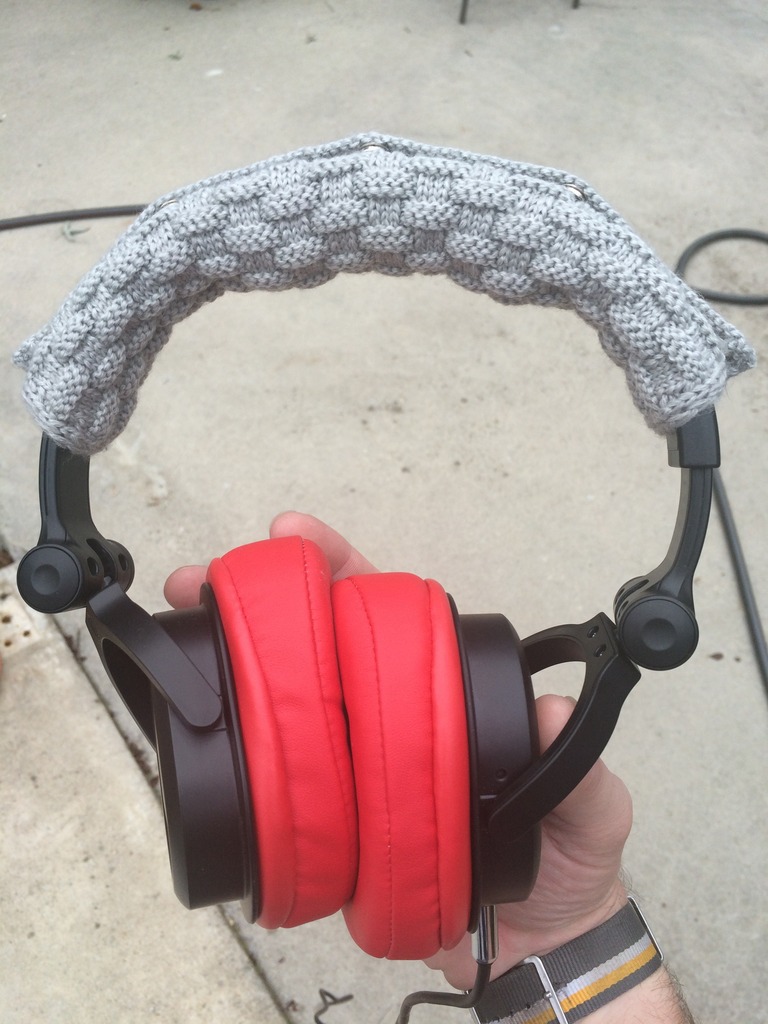
All in all it's not a bad headphone, but I am certainly hoping for more improvements with other mods.  I tried the 'sock mod' for earpad comfort, and I think I will likely try a thinner material like nylon next.  I wanted to try the cheaper alternatives before coughing up the cash for velour pads.
 
Thanks, and I look forward to your feedback!
 
IBJamon
 
Dec 1, 2012 at 3:45 AM Post #71 of 208
>>can you please explain to me the reasons that you used each different material?
 
Because that's what I had on hand. I've done brief listening tests with only a handful of materials and have settled on a few favourites. Namely, felt in front of the drivers and velour + cotton behind. The stuff behind the driver is mostly resonance control/absorption. You want to absorb as much as possible while still letting the driver breathe a little. In front the felt helps attenuate the spikes in the highs, which I am particularly sensitive to. This might be too much for some people though; different materials will yield different results. 
 
>>I also tried taping up some of the driver holes per the recommendations.  I'm not sure how much difference this really made.  F
 
Yeah that one I wasn't too sure what the effect would be. Previous modding experience showed that to reduce bass amount and improve clarity a bit. 
 
>>I still felt that the highs needed help, so I *gulp* poked some holes in the pad near the center of the driver.  This really seemed to help bring the high end out a lot more, which is what I am looking for.
 
Allowing more direct air flow in front does increase the highs. Any materials in front effectively act like filters. 
 
Dec 1, 2012 at 3:29 PM Post #72 of 208
None of the material mods will fix the 3-5k issue with the highs. Still having some people test my passive circuit which does fix it.

I recently got some SRH-440 and would have to say after my circuit mod that they're pretty close, with the Monoprice having better bass quality (440 has some weird one-note boom?), a little less refined treble but overall better SQ than the 440. Comfort goes to the 440 though. Not bad at all for the price.
 
Dec 7, 2012 at 12:24 AM Post #74 of 208
My Monos came yesterday so I just completed a couple quick mods to see what the results would be. I put a layer of FatMat on the rear of the cups, then cover it with silverstone acoustic foam. After that I added a tiny bit of cotton on top. I also put a tiny piece of FatMat on the back of the driver magnet as that seemed like the cool thing to do. I'll post my pics soon.
 
I need to do some tweeks to tune my phones a bit, but here are my impressions on what my particular mods did:
Bass has increased. I was not expecting this, in fact I was hoping to tighten it up and lose a bit. Sub-bass has improved a bit though which is nice, but there is still notice roll off if the bass gets too low. I will probably use more foam and more cotton to try and kill the bass a bit more.
 
Mids are recessed a bit more now. Vocals feel a little distant, but that could be a result of the inflated bass.
 
Anyways, this was fun and I'm hoping to fully customize these just because they are so cheap and bare bones.
 

Users who are viewing this thread

Back
Top