Ok then, time for an update.
I got some decent sandpaper and incrementally went up the grit to see what the wood would look like, i think i stopped at 300 ish and it was pretty smooth...

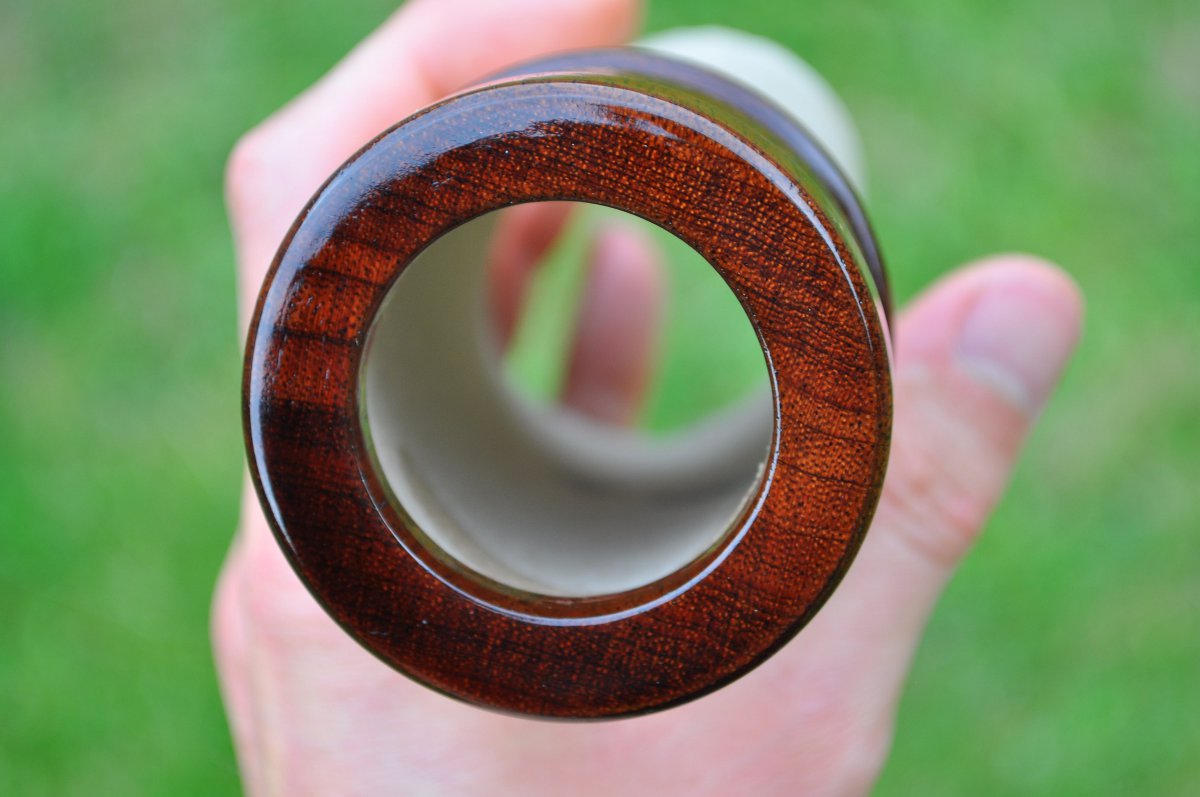
I think i was a little premature in doing so, but more on that in a bit. As you can see i started to lathe out the innards of the outside end, but it was taking forever so i went out and got a 32mm wood drill and made a bigger hole, but don't seem to have a photo of that, so just imagine a big hole in the end there.
For the other end, and as it needs to create a flat lip on the inside (where the mesh will eventually be stuck) i have a 43mm forstner drill bit, which is designed to make flat bottomed holes.

This allowed me to mount the cup on the lathe chuck directly, something that with hindsight i should have done in the first place, but i didn't have the forstner but until this week.

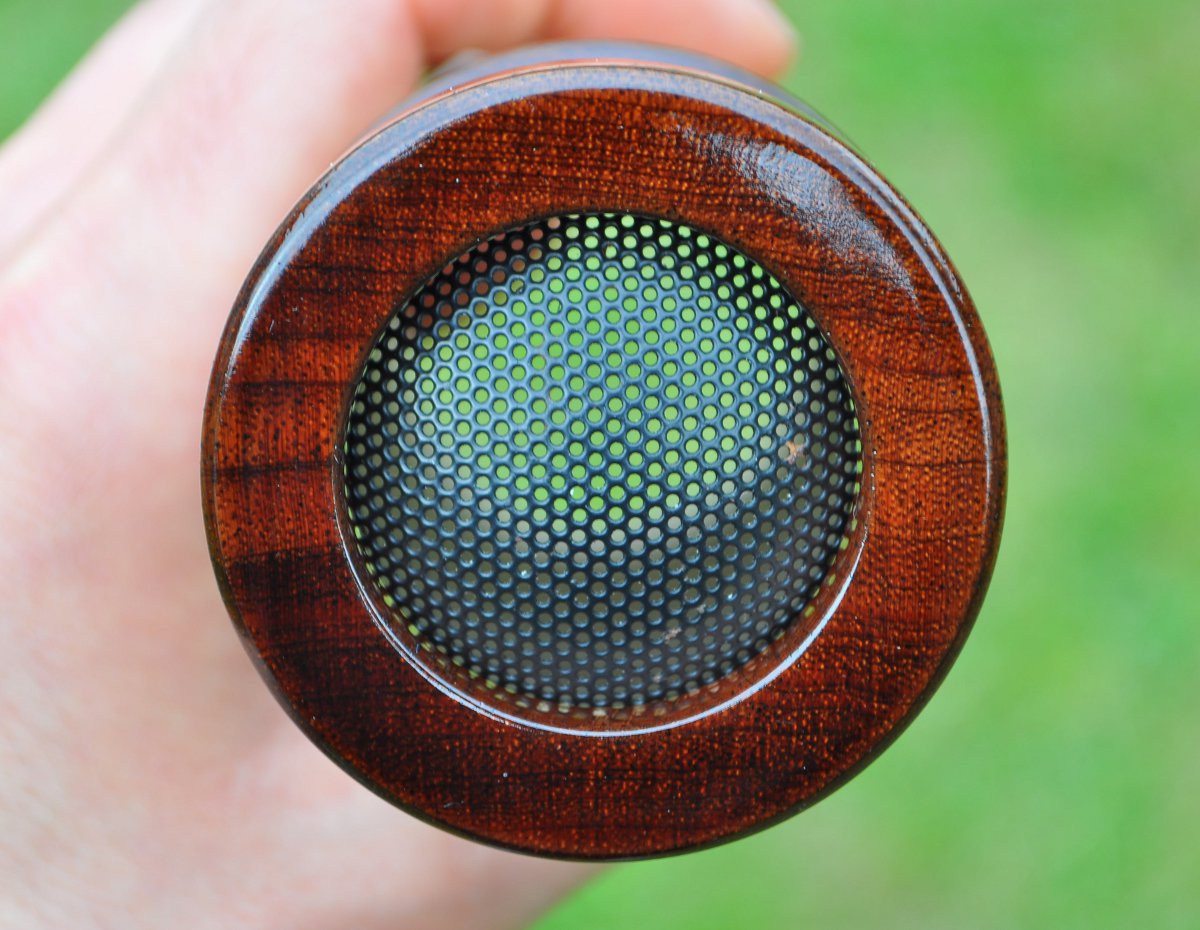
And mounted from the other end, working on the part of the cup that will hold the driver in place. It needs to have a ridge as the driver is stepped slightly (see pic earlier in the thread).

Once i had the dimensions right on the inside of both ends i hollowed out the centre with the drill bit first then the forstner, as it kept trying to spin out of the clamp. I had quite a job getting them held firm in the drill press, as i didn't want to crush the more or less finished outer surface, but still needed a good grip to stop them from spinning (which happened a few times). Next time i do this (har har) i'll hollow out the centre first, then i can mount direct on the lathe in the same place every time, plus i can grip onto unfinished wood so it shoudn't move so much. One of the problems i had today was getting it mounted in perfect alignment on the lathe, as i've used various methods throughout the build, and it has cost some accuracy (one cup is a bit off centre). If i drilled out first i would have had a better base line to work from. One other problem is that i think the wood warped slightly when i hollowed it out, either from pressure or heat or both, so the perfectly round driver ends are now oval to the point that the drivers don't fit so easily. There's a saying that's along the lines of, 'experience is something you gain after you needed it most', and this build has proven the point to me on several occasions.
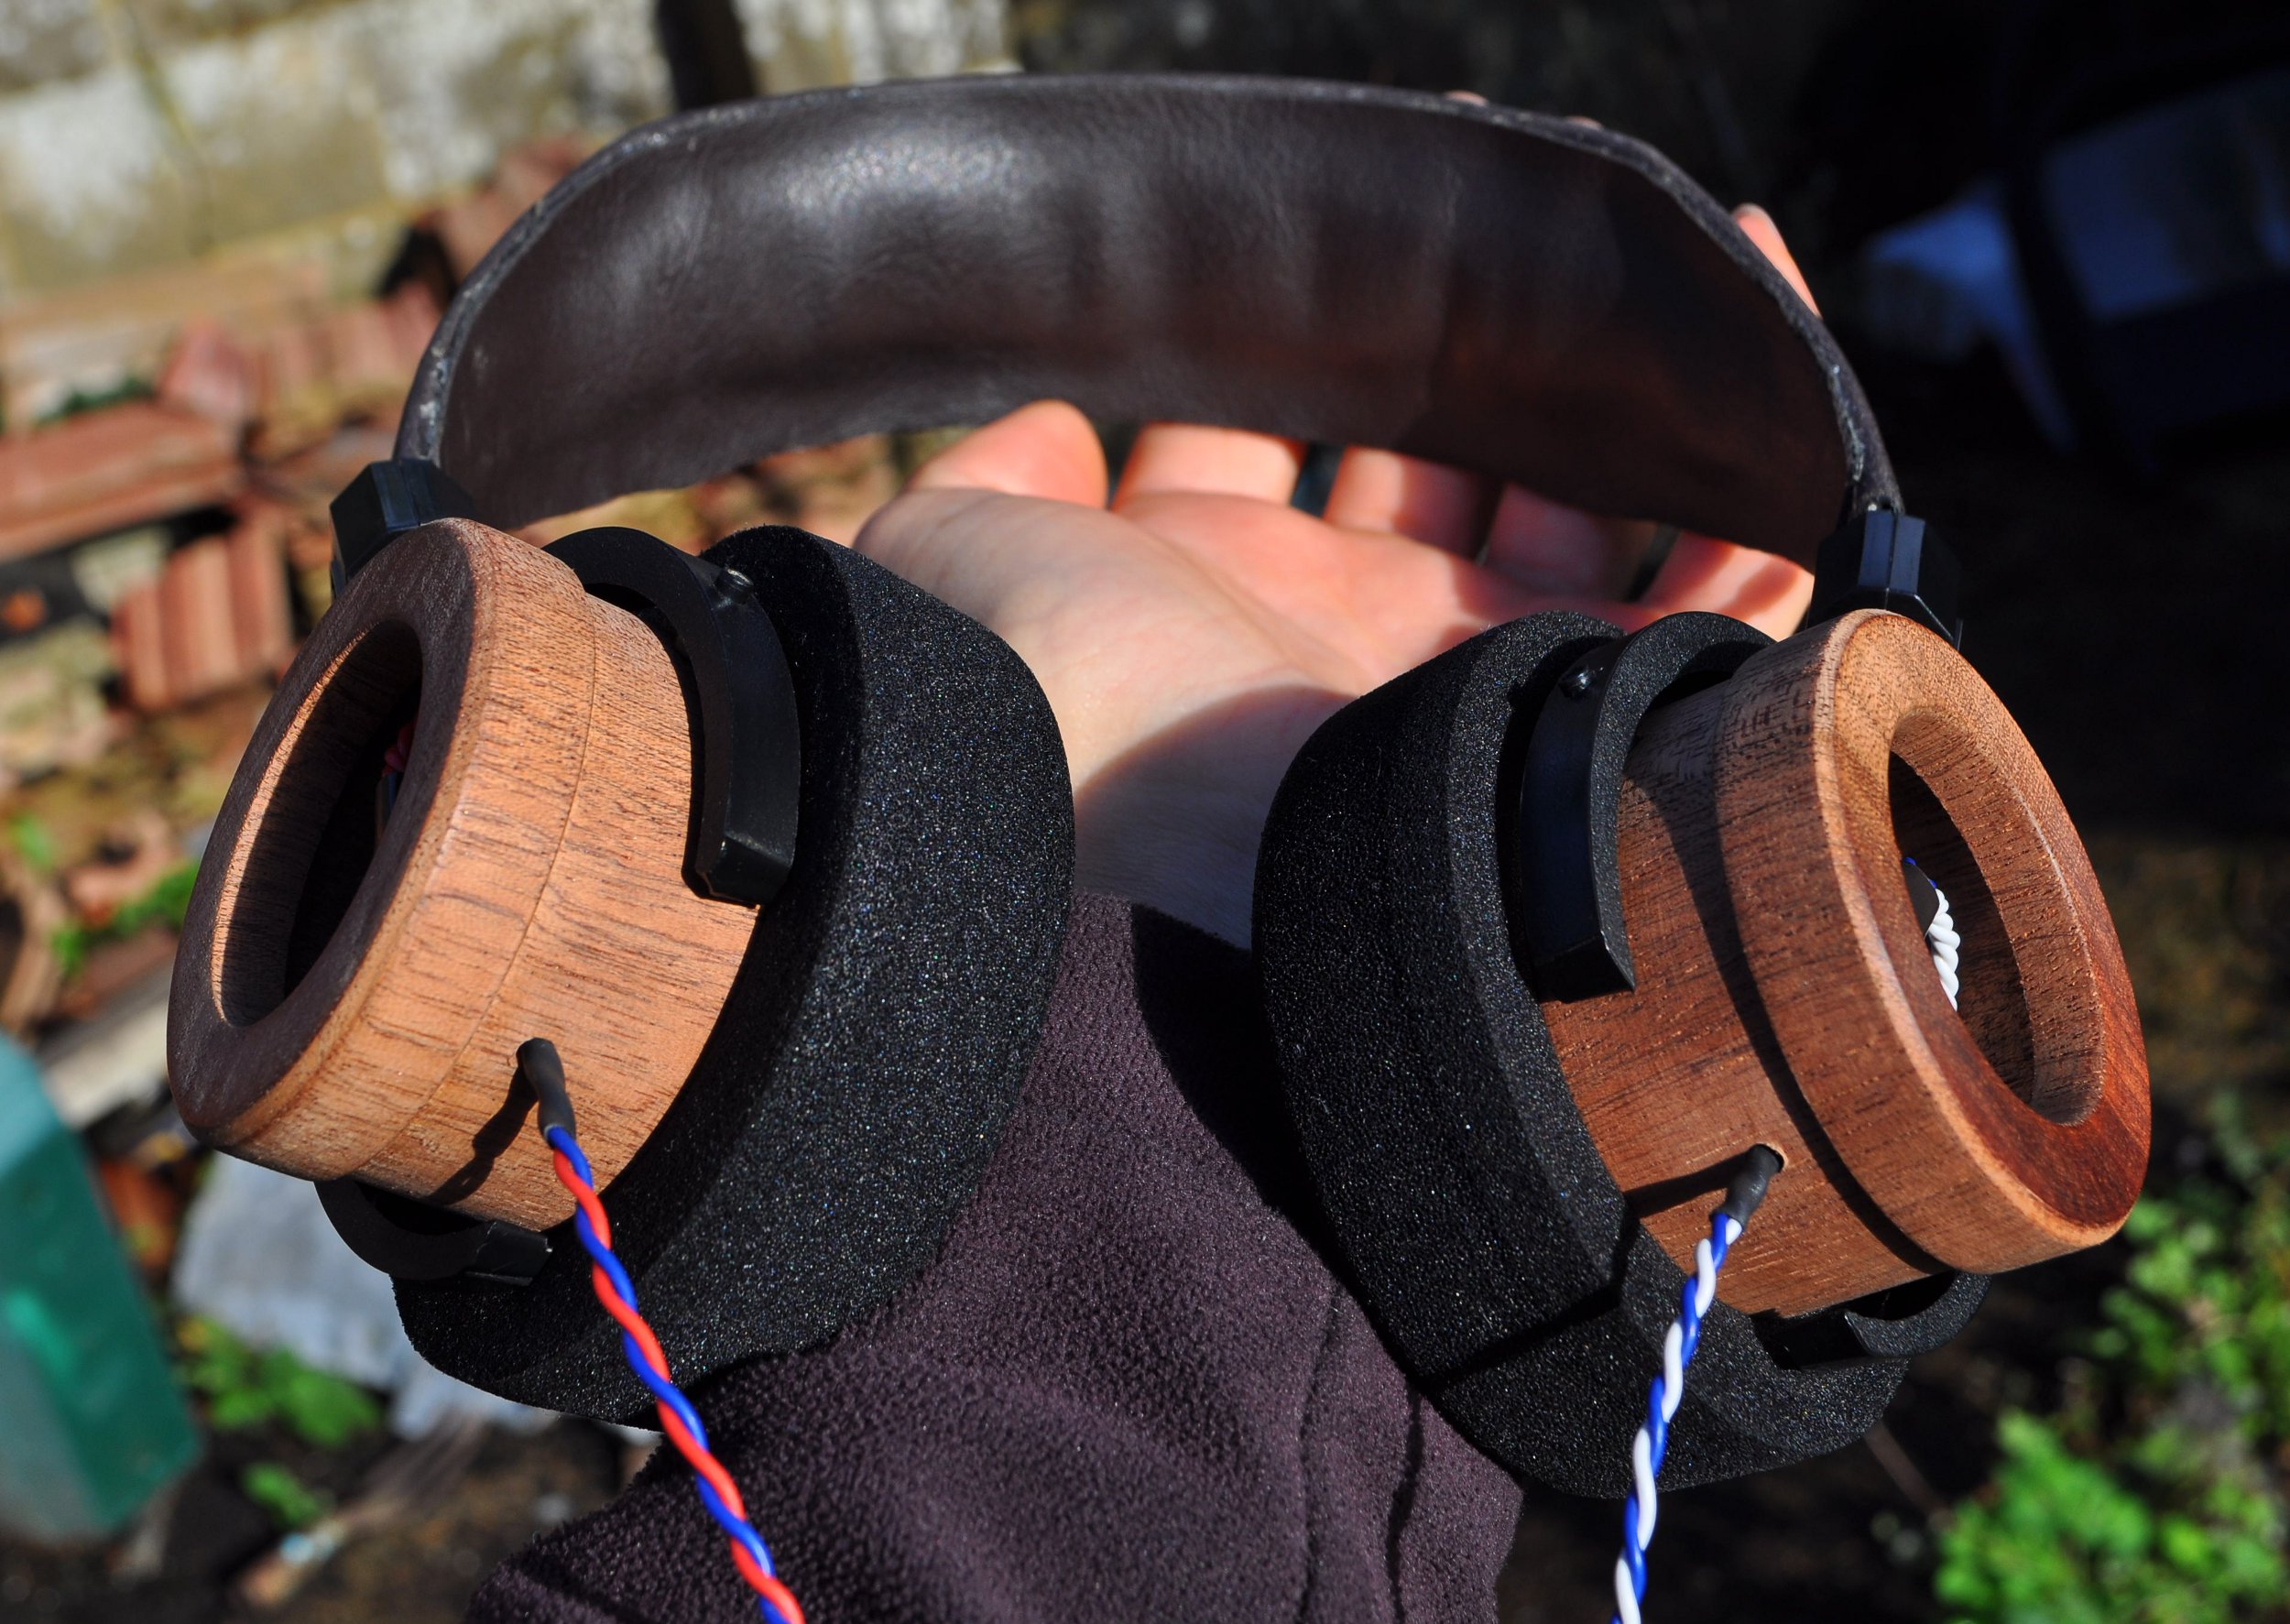
Anyway, i digress, here are the two cups...


Test fitting the driver (well, the test fit was before i hollowed out the inside and it was perfect, this was a bit of a struggle since the opening is now a bit oval) ...


If i'm perfectly honest with myself i'm not totally happy with how these have come out, they're slightly different sizes, and one is not as well centred as the other, and with the experience of making these two i know i can do better so i might start over. I'll probably drill out mounting holes in these so i can fit them into a headband and wire up the drivers so i can have a listen, but i have a feeling that they might become the working prototypes for a (hopefully) much better built pair.


 I might still have to get a wood lathe, as I've been having trouble re-mounting in the chuck squarely. I finally managed to drill out part of this inside of one cup with a forstner drill bit, which has allowed me to mount using the inside of the chuck, and remove the central bolt. Work is a bit slow tomorrow so i might be able to crack on.