


WayTooCrazy
Headphoneus Supremus
I recently entered the Headphone gaming scene and have been told to grab the Audio-Technica AD700 headphones by many, many people in many, many threads. So, I acquired a pair. I liked the way they sounded, they lacked a little bass (the thump, bass is there), and the highs were a little over done. In gaming though, those are probably it's best features. Used a Zalman clip on mic and some Techflex PET to keep them together, I gamed for about a week with them like this... and decided, to Mod. So, here we go.
First, I cut the headphone cable and modified that with a Neutrik 3.5mm plug. The side benefit of this (I get a 10' 3.5mm patch cable for free):

Then, when my KVConnection 4 Pole adapters came in, I swapped the bodies from the stock ones, to Silver Neutrik bodies:

Then came the actual cable I was going to use. I chose to go with the Mogami W2893. I stripped the rubber jacket and EMI shield off and fed that into a Nylon sleeve and added the 4 pole Neutrik Hybrid plugs on either end:

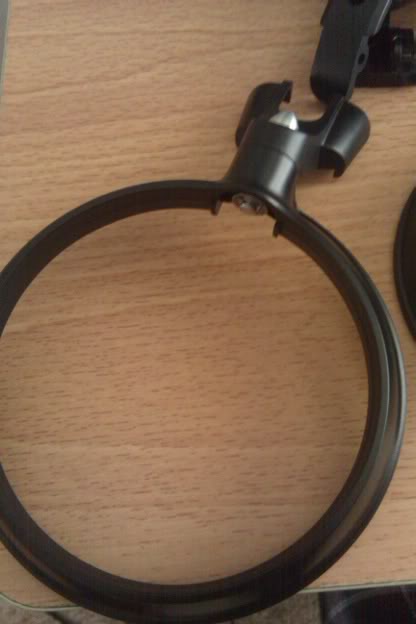
Now, it was time to disassemble the headphones and see what I was working with:


After getting everything all apart, I scuffed them up with Automotive 400 grit sandpaper, and sprayed them with Flat Black spray paint that adheres to plastic:


All sides were sprayed. I gave the outside of the headphones 5 light coats of black, and the insides only received 4 coats of black. When all was done, they received 4 coats of Matte Clear Coat (again, plastic compatible spray paint) on the outside and 3 coats of Matte Clear for the inside.
While that was drying, I took the headband wires, and use Mogami W2893 and fed them through (probably one of the hardest things of the build, as the wires kept catching on the rubber sheathing).

Next item on the list was to tackle the upgraded headphone connector and Mic connector. I drilled out the stock opening and then close to that, I drilled another hold for the Microphone connector.


When I couldn't properly seat the microphone connector flush, I decided to use some Epoxy Putty and build up a platform for both connectors:


After filing, sanding, painting the newly remodeled left cup, I test fitted the plugs again...

First, I cut the headphone cable and modified that with a Neutrik 3.5mm plug. The side benefit of this (I get a 10' 3.5mm patch cable for free):

Then, when my KVConnection 4 Pole adapters came in, I swapped the bodies from the stock ones, to Silver Neutrik bodies:

Then came the actual cable I was going to use. I chose to go with the Mogami W2893. I stripped the rubber jacket and EMI shield off and fed that into a Nylon sleeve and added the 4 pole Neutrik Hybrid plugs on either end:

Now, it was time to disassemble the headphones and see what I was working with:


After getting everything all apart, I scuffed them up with Automotive 400 grit sandpaper, and sprayed them with Flat Black spray paint that adheres to plastic:


All sides were sprayed. I gave the outside of the headphones 5 light coats of black, and the insides only received 4 coats of black. When all was done, they received 4 coats of Matte Clear Coat (again, plastic compatible spray paint) on the outside and 3 coats of Matte Clear for the inside.
While that was drying, I took the headband wires, and use Mogami W2893 and fed them through (probably one of the hardest things of the build, as the wires kept catching on the rubber sheathing).

Next item on the list was to tackle the upgraded headphone connector and Mic connector. I drilled out the stock opening and then close to that, I drilled another hold for the Microphone connector.


When I couldn't properly seat the microphone connector flush, I decided to use some Epoxy Putty and build up a platform for both connectors:


After filing, sanding, painting the newly remodeled left cup, I test fitted the plugs again...

Last edited:


