Bottlehead Amplifier Discussion / Comparison Thread: Crack, SEX & Mainline
Jun 28, 2015 at 6:37 AM Post #1,246 of 2,108
Just about finished assembling the sex, then soldering time. I've been taking progress pics.

Went with a kiwame populated elma attenuator, some koa speer metal films to experiment with resistors and have some kiwame carbon films on the way along with two vishay bulk foils for the c4s board per PJ's recco. Also ordered two 20uf 400vdc Soviet mbgo-1 pio caps that should be here next month and I'll try those in the power supply.

Expect pics within a few days!
 
Jun 29, 2015 at 5:11 AM Post #1,247 of 2,108
Question for everyone who built the Crack with the Speedball upgrade:
The Crack and the Speedball manuals come separately and it's not mentioned in the Crack manual which step exactly the Speedball should be installed at the Crack manual. It only mentioned after the Crack is assembled completely.
Does anyone know in which page should I start building the Speeball into the Crack? I don't want to start desolder components.
 
Jun 29, 2015 at 5:26 AM Post #1,248 of 2,108
You should absolutely build it stock first - if you run into any issues with your build removing the Speedball to troubleshoot is unavoidable.
 
The only thing I would do is place the standoffs around the nine-pin socket to ensure that your wires are routed appropriately. Just note that you will then route your wires with the standoffs in place, but remove them for soldering as they get in the way.
 
Jun 29, 2015 at 8:17 AM Post #1,249 of 2,108
I'm going to second Grausch.
 
Build it stock.  The speedball kit simply replaces two sets of plate load resistors.  Should you ever have to troubleshoot the build after the speedball is in, you can revert it back to a stock kit very quickly.  Pulling out the plate load resistors is a matter of cutting them out and then heating up the same solder points and pulling out the remaining wire while hot. Maybe using a solder sucker or braid to clean up the excess if necessary.
 
As for de-soldering - you should get a handle on that. :) I use a solder sucker and never really worked out getting braid to work well for me.  But, removing components is like building. Like using an eraser is part of writing. Using the backspace is part of typing....etc.
 
Jun 29, 2015 at 3:44 PM Post #1,251 of 2,108
  Yes, never thought of it that way. I can run into issues after I add the Speedball and then I won't have any choice to remove it.
I guess that appreciating the difference with the upgrade is also important.
 
Thanks!

 
Totally agree with the above.  You want to be able to get the stock build working first and then worry about the speedball.  The only caveat is that when you fasten the hardware to your chassis, you might go ahead and pull out the nylon standoffs that the speedball boards will ultimate sit on and screw them on to the four existing screws that come with the stock kit.  Then, when you wire up your input tube socket, these will already be in place and you can wire around them/won't have to try and potentially reposition the wires to make room for the standoffs after the fact.  
 
I was careless when I went to install my standoffs and ended up breaking a lead on one of the a-socket led's that was a pain in the rear to deal with.  Easily avoidable though if you are careful.
 
Also, the stock amp really does sound very good.  Far better than a Woo 3 for example in my opinion.  Nice to get to hear it stock for a few days at least and then drop in the speedball the following weekend.  
 
Jun 30, 2015 at 5:55 AM Post #1,252 of 2,108
  Yes, never thought of it that way. I can run into issues after I add the Speedball and then I won't have any choice to remove it.
I guess that appreciating the difference with the upgrade is also important.
 
Thanks!

You will notice that both skeptic and I advised mounting the Speedball standoffs during the Crack build. With my initial build, I blocked the screw closest to the terminal strip which made getting the standoff really difficult and would have placed some stress on one or two solder joints.
 
With my rebuild, I installed the standoffs once I started working in the nine-pin socket area and I believe it allowed me to achieve better routing for the eventual Speedball install. 
 
Just be aware that it gets crowded if you decided to solder with them installed. I would just unscrew them whenever I needed to solder and then replace them afterwards. Worked like a charm.
 
Jun 30, 2015 at 8:09 PM Post #1,253 of 2,108
Well, I upgraded the Caps in my Mainline to the Mundorf EVO SilverGold Oil.  I tried breaking them in on speaker taps, but I don't have a low enough resistor with a high enough wattage on hand. So the itch got the best of me and I'm just going to break them in right on the rig. My initial impressions are great!
 
More detail out of everything. Impact and snap/crackle/pop are jumping out. Easy on the ear even though they are completely raw.  Without burn-in and as they stand they are too intimate and I'm hoping that opens up with time. Actually, I'm betting on it. I think they are already lending more performance upgrade to the Mainline than the Electro-harmonix 6C45Pi I grabbed I grabbed from Woo Audio. I don't know, maybe its the pairing. But it so far, its awesome.
 
I got them from http://www.partsconnexion.com while their yearly 20% discount on everything sale was on util June 30th. So if you go this route it will set you back a couple hundred bux. As much as I wanted to, I just couldn't justify the Supreme SilverGold Oil at $277ea. Redonkulous!  But I think the EVO definitely have bang for your buck and I'm really going to enjoy listening to them flower over the next few hundred hours.
 
I think the biggest attribute the Mundorf EVO SGO brough to the table on top of detail is the musical quality to the total impression.  I thought the Daytons were really good and anything I dropped into replace them would be a marginal upgrade at most.  A non-audiophile would probably not get this change at all... but I think its money well spent. Not that the Daytons are a bad cap at all, but they're just missing that extra oomph.
 
beerchug.gif

 
Jun 30, 2015 at 8:53 PM Post #1,254 of 2,108
Nice to hear, the Mundorf EVOs are good too. I might be building a Mainline for a fellow Aussie soon (it's taken a year or so of persuasion, but I think I finally got him across the line
wink.gif
) so I'll keep them in mind for him - thanks, Skeptic.
 
Great advice above about building the Crack in stock form, but with standoffs. I didn't do that on my first build, but definitely did the second time around - makes it SO much easier.
 
Jul 1, 2015 at 2:23 PM Post #1,255 of 2,108
A day away from receiving my S.E.X 2.0 iron upgrade, and some Mundorf Supreme 2.2uf parafeed and 0.1uf coupling caps are waiting patiently in the box. Will be a happy weekend of burn-and-play :)
 
Jul 3, 2015 at 11:11 AM Post #1,256 of 2,108
Just received the Iron Upgrade for my BH S.E.X amp. Wow - very substantial transformers and plate chokes - heavy iron indeed. Have 2x Mundorf Supreme 2.2uf parafeed caps and 2x Mundorf Supreme 0.1uf coupling caps sitting in a box, the unit itself upside-down and stripped of the old caps, and a serious itch to solder!
 
Unfortunately I must cut the grass, weed the garden and install some ballisters on the stairs of the new deck before I get to play. Curse you female logic!! On a happier note it's a long weekend for me, and the sooner I get these puppies installed the sooner they can cook in lol.
 
Jul 4, 2015 at 12:22 PM Post #1,258 of 2,108
  Possibly too late now, it takes nearly no time to solder in the components and it would be better to break-in while you work around the house. 

 
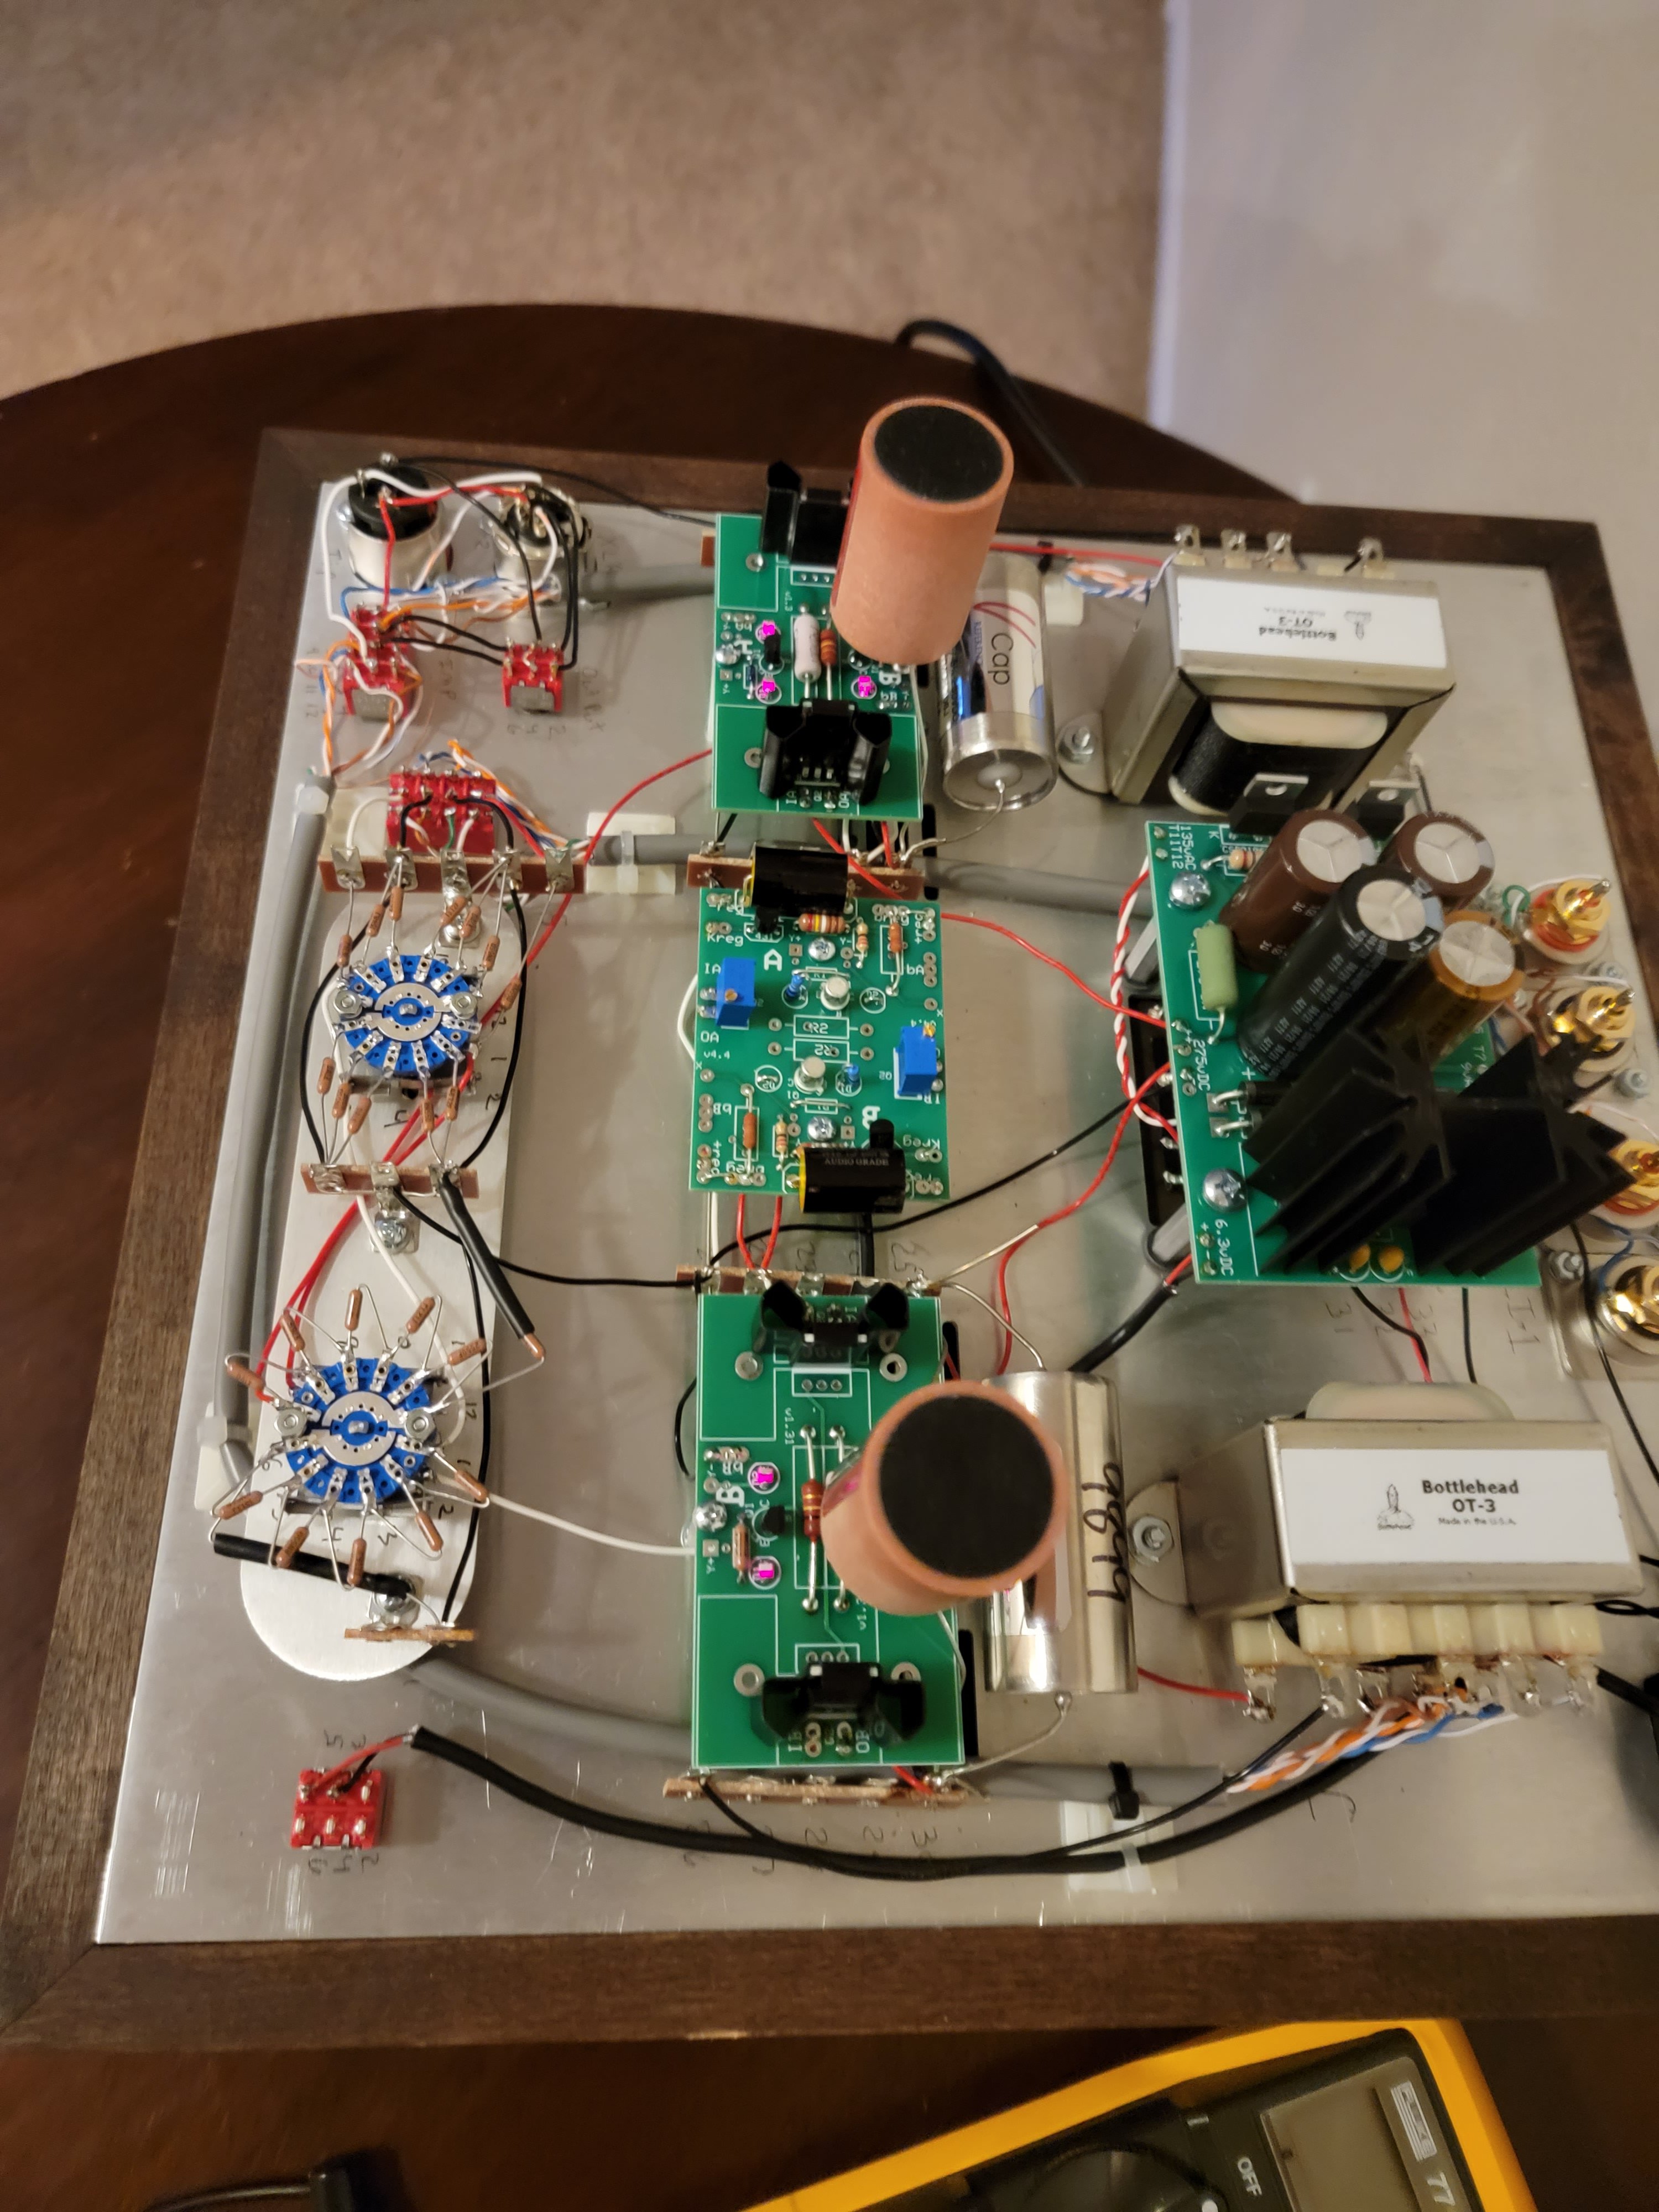
On a happy note, my BH S.E.X brain surgery was a success! At least after two hours of troubleshooting lol. Never solder at 02:00am in a tight rats-nest with poor lighting and several beverages! At least no light-show to accompany the fanfare.
 
Early impressions are very good. I previously characterized the S.E,X (2.0) as very airy and spacious with a decent soundstage and great detail - surprisingly so for tubes. Where it lacked was some bass punch.
 
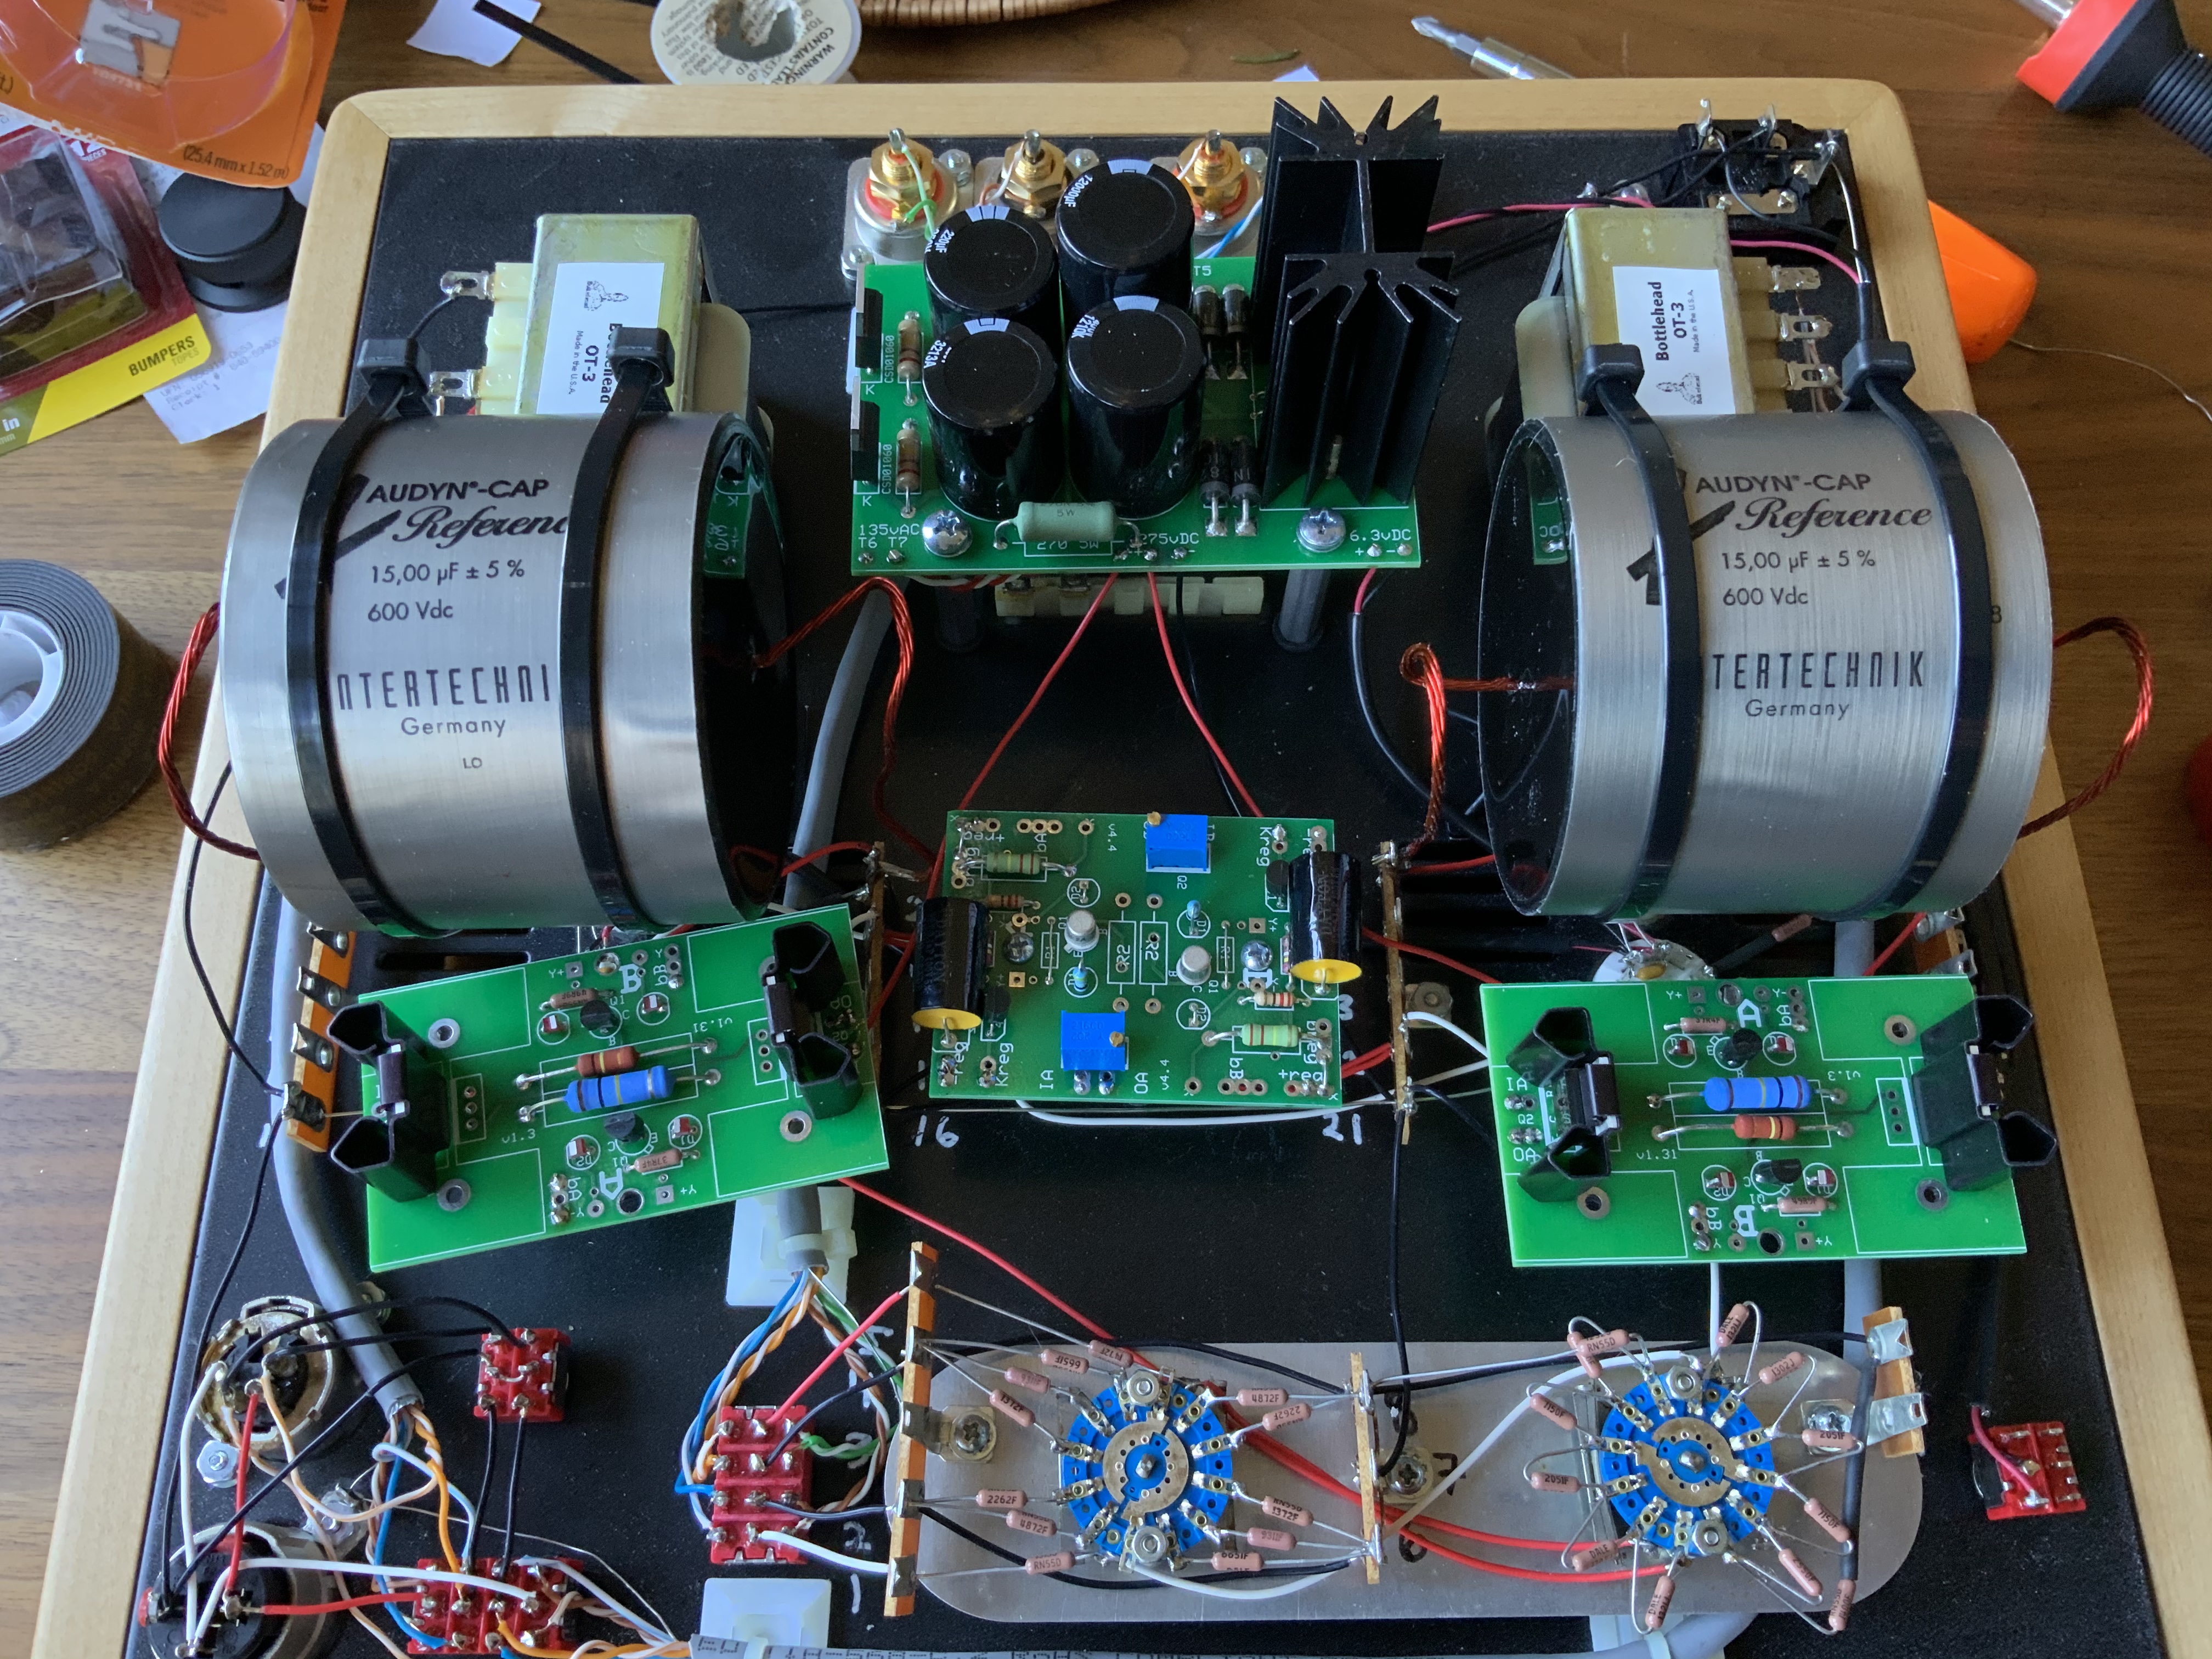
The old girl now has 2.1 iron and plate chokes installed to bring it up to current standard. I changed out the coupling and parafeed capacitors for some Mundorf Supremes. Both of these upgrades are expected to need a fairly long settling period, and I'm in the first two hours or so. I also removed the 120ohm jack resistors for a little more current / less attenuation on power-hungry cans.
 
According to Doc, the upgraded iron is supposed to improve bass linearity by an octave or so and increase the overall dynamics. I can clearly hear that - both bass extension and definition are better, and the amp seems a little more SS-sounding in terms of not rounding edges. There's a hint of harshness surrounding some of the transients which I trust will smooth out.
 
The Mundorfs are said to be "highly detailed yet musical".
 
Through the 650's right now the detail-retrieval is way up over what it was already - with more dynamics and punch without killing the 650 sound. The soundstage is a little more closed-in than it was - likely as the bass warmed up a bit. The whole thing got more Crack-like but with better detail than what I get from even more lively tubes like the Cifte 12AU7/5998 combo I enjoy so much. I may have to experiment with the output resistance a little as the gain is very high so volume-control within reasonable ranges is more restricted, with the benefit of more overall current / voltage swing. The objective there was getting more power and punch out to my LCD2.2c's and HE-400's - ditching the resistors did that in spades without noticeably increasing the noise-floor.
 
Hoping the rougher edges smooth out a bit - almost a certainty with these particular mods - gotta let them cook. All-in-all a success from the get-go. It's like a more refined Crack. Detail, great power and punch, and a dead-black background even using the 32ohm taps and no output attenuators. Win!
 
Jul 5, 2015 at 8:30 AM Post #1,260 of 2,108
Hi Loquah - yep, just a general harshness to faster transients and brighter highs. And spot on - within 4hrs most of that had fallen right off. Now have about 14hrs on the mods and there's hardly a trace of them. Very encouraging, as I could spot the good differences immediately. Honestly - continued improvements from here would be a bonus but already the increase in bass quantity/extension and the improved dynamics are very welcome.
 
I wouldn't have put S.E.X and "authoritative" in the same sentence before. Now that's my first impression. The music is much more punchy, livelier and more "fun". The loss might be in soundstage and "air" but it was a good trade for the benefits. Can't wait for the final result!
 
Please note this is a S.E.X 2.0, so comparisons to 2.1 aren't really valid except for the cap upgrade. You 2.1 owners already have this iron :wink:
 

Users who are viewing this thread

Back
Top