the Pimeta-V2 thread
Nov 3, 2010 at 2:24 PM Post #211 of 651
Here are better pics:
 
http://dl.dropbox.com/u/7337908/IMG_6844.JPG
 
http://dl.dropbox.com/u/7337908/IMG_6845.JPG
 
It burned the led when there was only one, in LED1
 
In scratchpad I have diode bridge and LM317T configured to 24V. The wall wart outputs 26VAC.
 
I added 0.1uF caps to BUFG pins because all the buffers ran hot at one point. I need to measure the current draw...
 
I will get back to it...
 
There can be scratches.
 
I need to get some clean isopropyl alcohol soon.
 
 
Quote:
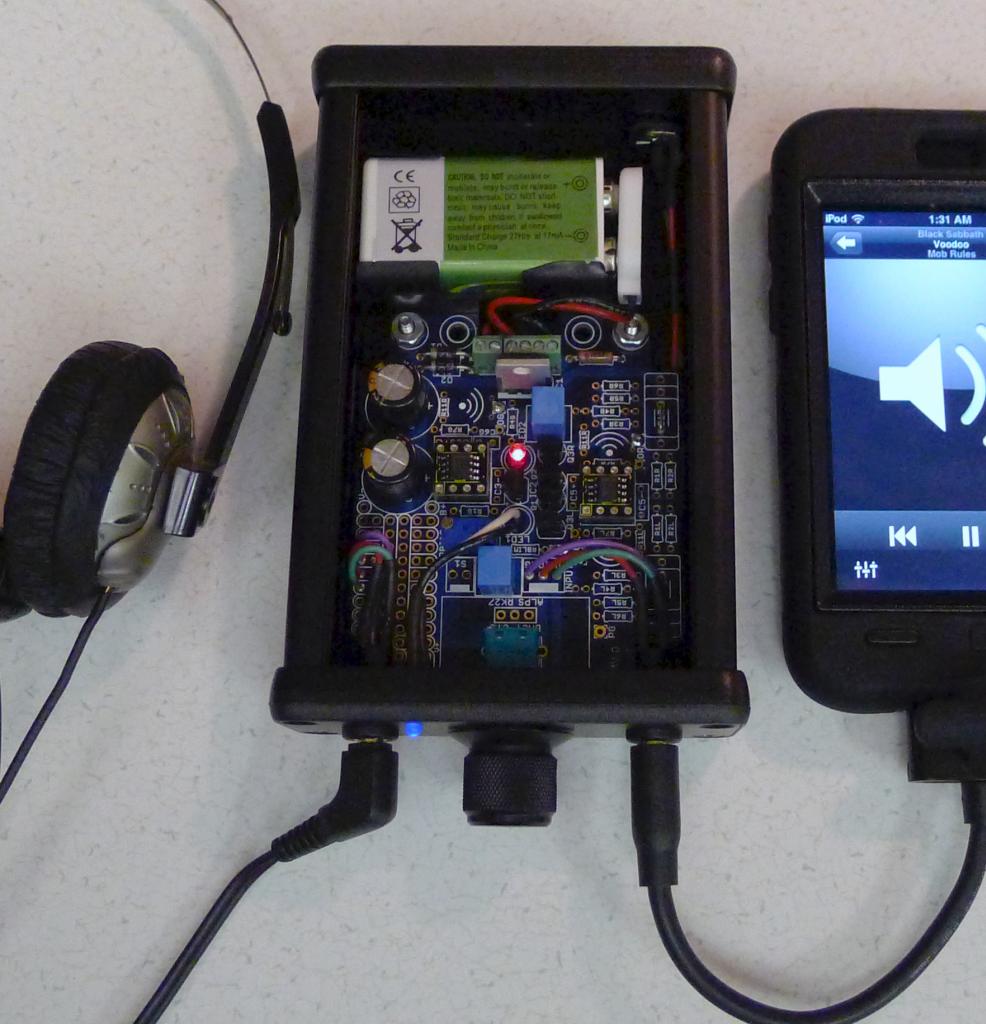
May we see a top-side pic showing D1 and D2?


Clearly so.  As messy as it's left your board, I wonder if you wouldn't have been better off not cleaning it at all as use that stuff.  Instead of flux around the solder points, you have junk evenly spread over the board now.
 
I think you have little choice but to make another cleaning pass at it.  Try to find something purer: tape head cleaner, high-purity isopropyl from a drug store, etc.  
 
Heet gas additives are high-purity alcohol (yellow bottle = methanol, red = isopropyl), but I don't know how the 1% of "proprietary additive" affects its suitability as a PCB cleaner.
 
I also see the potential for several shorts:
 
  1. BATT wires, extra exposed length and solder splatter on the blue one
  2. several places around BUFG
  3. extra unclipped lead lengths and unshielded jumpers in the scratchpad area
 
Is that a scratch or wire strand near forward LED?

 
Nov 3, 2010 at 8:18 PM Post #212 of 651
The diode bridge...your wall supply is AC output?
 
If so, try an isolated DC power supply.  If it works, there's something wrong with your rectification or you're connecting something to the amp's power input incorrectly.  (Grounding, etc.)
 
Nov 3, 2010 at 8:45 PM Post #214 of 651
I chose that 24VAC supply because it allows me to get higher voltage supply rails. I have lower voltage DC supplys, like 17 VDC in no load. They could be regulated to 13-14VDC. Do you think that is enough voltage?
 
Nov 3, 2010 at 11:36 PM Post #215 of 651
It sounds like there's something wrong with your AC-DC circuit in the scratchpad area, then, or in the way it's connected to the PIMETA proper.
 
As for your unregulated DC supply question, yes, that should be enough for most purposes.
 
Nov 6, 2010 at 1:03 AM Post #216 of 651
I had 11.6v on the V+ and V- of both opamp sockets prior to installing any opamps or buffers.  Once I install the opamps and buffers I check and the rail voltage was like 19 on the V+ and 1.9 on the V- of both opamps. The buffers were hot too.  I went back and cleaned up my soldering around the buffers and cleaned the flux off and now the voltages are normal again but BufL is hot still.  I've googled this problem but couldn't find more info so I'm looking for advice what to do now.  
 
Nov 6, 2010 at 5:04 AM Post #217 of 651
There are lots of things that could be wrong.
 
What supply type are you using?  Model numbers and part values, where applicable, please.
 
Have you gone through the troubleshooting guide?
 
Post pics.
 
Nov 6, 2010 at 6:04 AM Post #218 of 651
There is an external power supply (an acopian 24v linear regulated) being fed into the pimeta.  The battery pack has not been constructed yet (planning to use 10-14 2500mah AA nimh depending how they fit in the case).  I was going to do that when it came time to case it.  C1 is jumpered.  It's using 3x 680uf 50v nichicon HE series for c2.  There is a lm317 to-220 package with rccs of 5ohms 1/2watt to charge the 2500mah nimh at 250ma.  Opamps are biased at 1ma atm  (3000 ohms).  rblim is 301ohm and rbias is 10k or something large.  Gain is set at 3.  That's about the extend of the customizations.  Everything else is following the docs I think.  I've look over the board pretty well and can't see any shorts.  I'm afraid that the 19v I measured earlier toasted my buffers.  I had r11 unpopulated.  I tried to see if populating them would help but it had no effect.  BufL still gets too hot to keep my finger on it and I shut it off immediately.


Nov 6, 2010 at 6:53 AM Post #219 of 651
Whoops I see the mistake! BufL is reversed...lol.  I guess was paying more attention to putting on the right amount of thermal paste than the direction.  Now to try desoldering it and see if it's salvageable
 
Nov 26, 2010 at 10:43 PM Post #220 of 651
I FINALLY built mine and I am very happy with the results!

In case you are wondering, yes it is a laptop li-ion cell battery. giving me 12 volts of endless power!!!
 
This is the semi-final boxed project:

Excuse my crappy cell pics.
 
Nov 27, 2010 at 7:33 AM Post #221 of 651
Cool!
 
How do you charge the battery after modding it like that?  I guess the charge controller is inside the battery pack, so it doesn't have to be in the computer to charge?
 
Nov 27, 2010 at 9:19 AM Post #222 of 651
The battery pack usually only contains a protection circuit that shuts down the battery if
the voltage is too high or too low. The charging circuit is usually in the laptop.
You can charge a Li + batteries with a constant current then constant voltage profile.
Charging rate can be 1/C with charge termination at .1/C. The main thing is to never
exceed 4.1 or 4.2 volts per cell depending on the exact chemistry.
 
Quote:
Cool!
 
How do you charge the battery after modding it like that?  I guess the charge controller is inside the battery pack, so it doesn't have to be in the computer to charge?


Nov 27, 2010 at 4:27 PM Post #224 of 651
Darn double posts...
 
Quote:
I do not want to risk overcharging so I just plug it into the laptop every week or so charge and it is good. Any suggestions on a trickle charger?

 
Nov 27, 2010 at 4:36 PM Post #225 of 651
"Trickle charging" a Li + is not a good idea.
What you are doing now is a better idea.
Building a dedicated Li+ charger would be the best idea.
The Texas Instruments BQ2000 series is a good place to start.
Maxim also makes some good chips.
I use two, three and four series cells for my amps.
I'm just using an adjustable constant current, constant voltage
charger I made based on a LM317 but my next project is
a dedicated charger.
 
We will now return you to the original thread topic...
 

Users who are viewing this thread

Back
Top