Rockbox Xduoo X3
Mar 30, 2017 at 12:29 AM Post #1,546 of 2,617
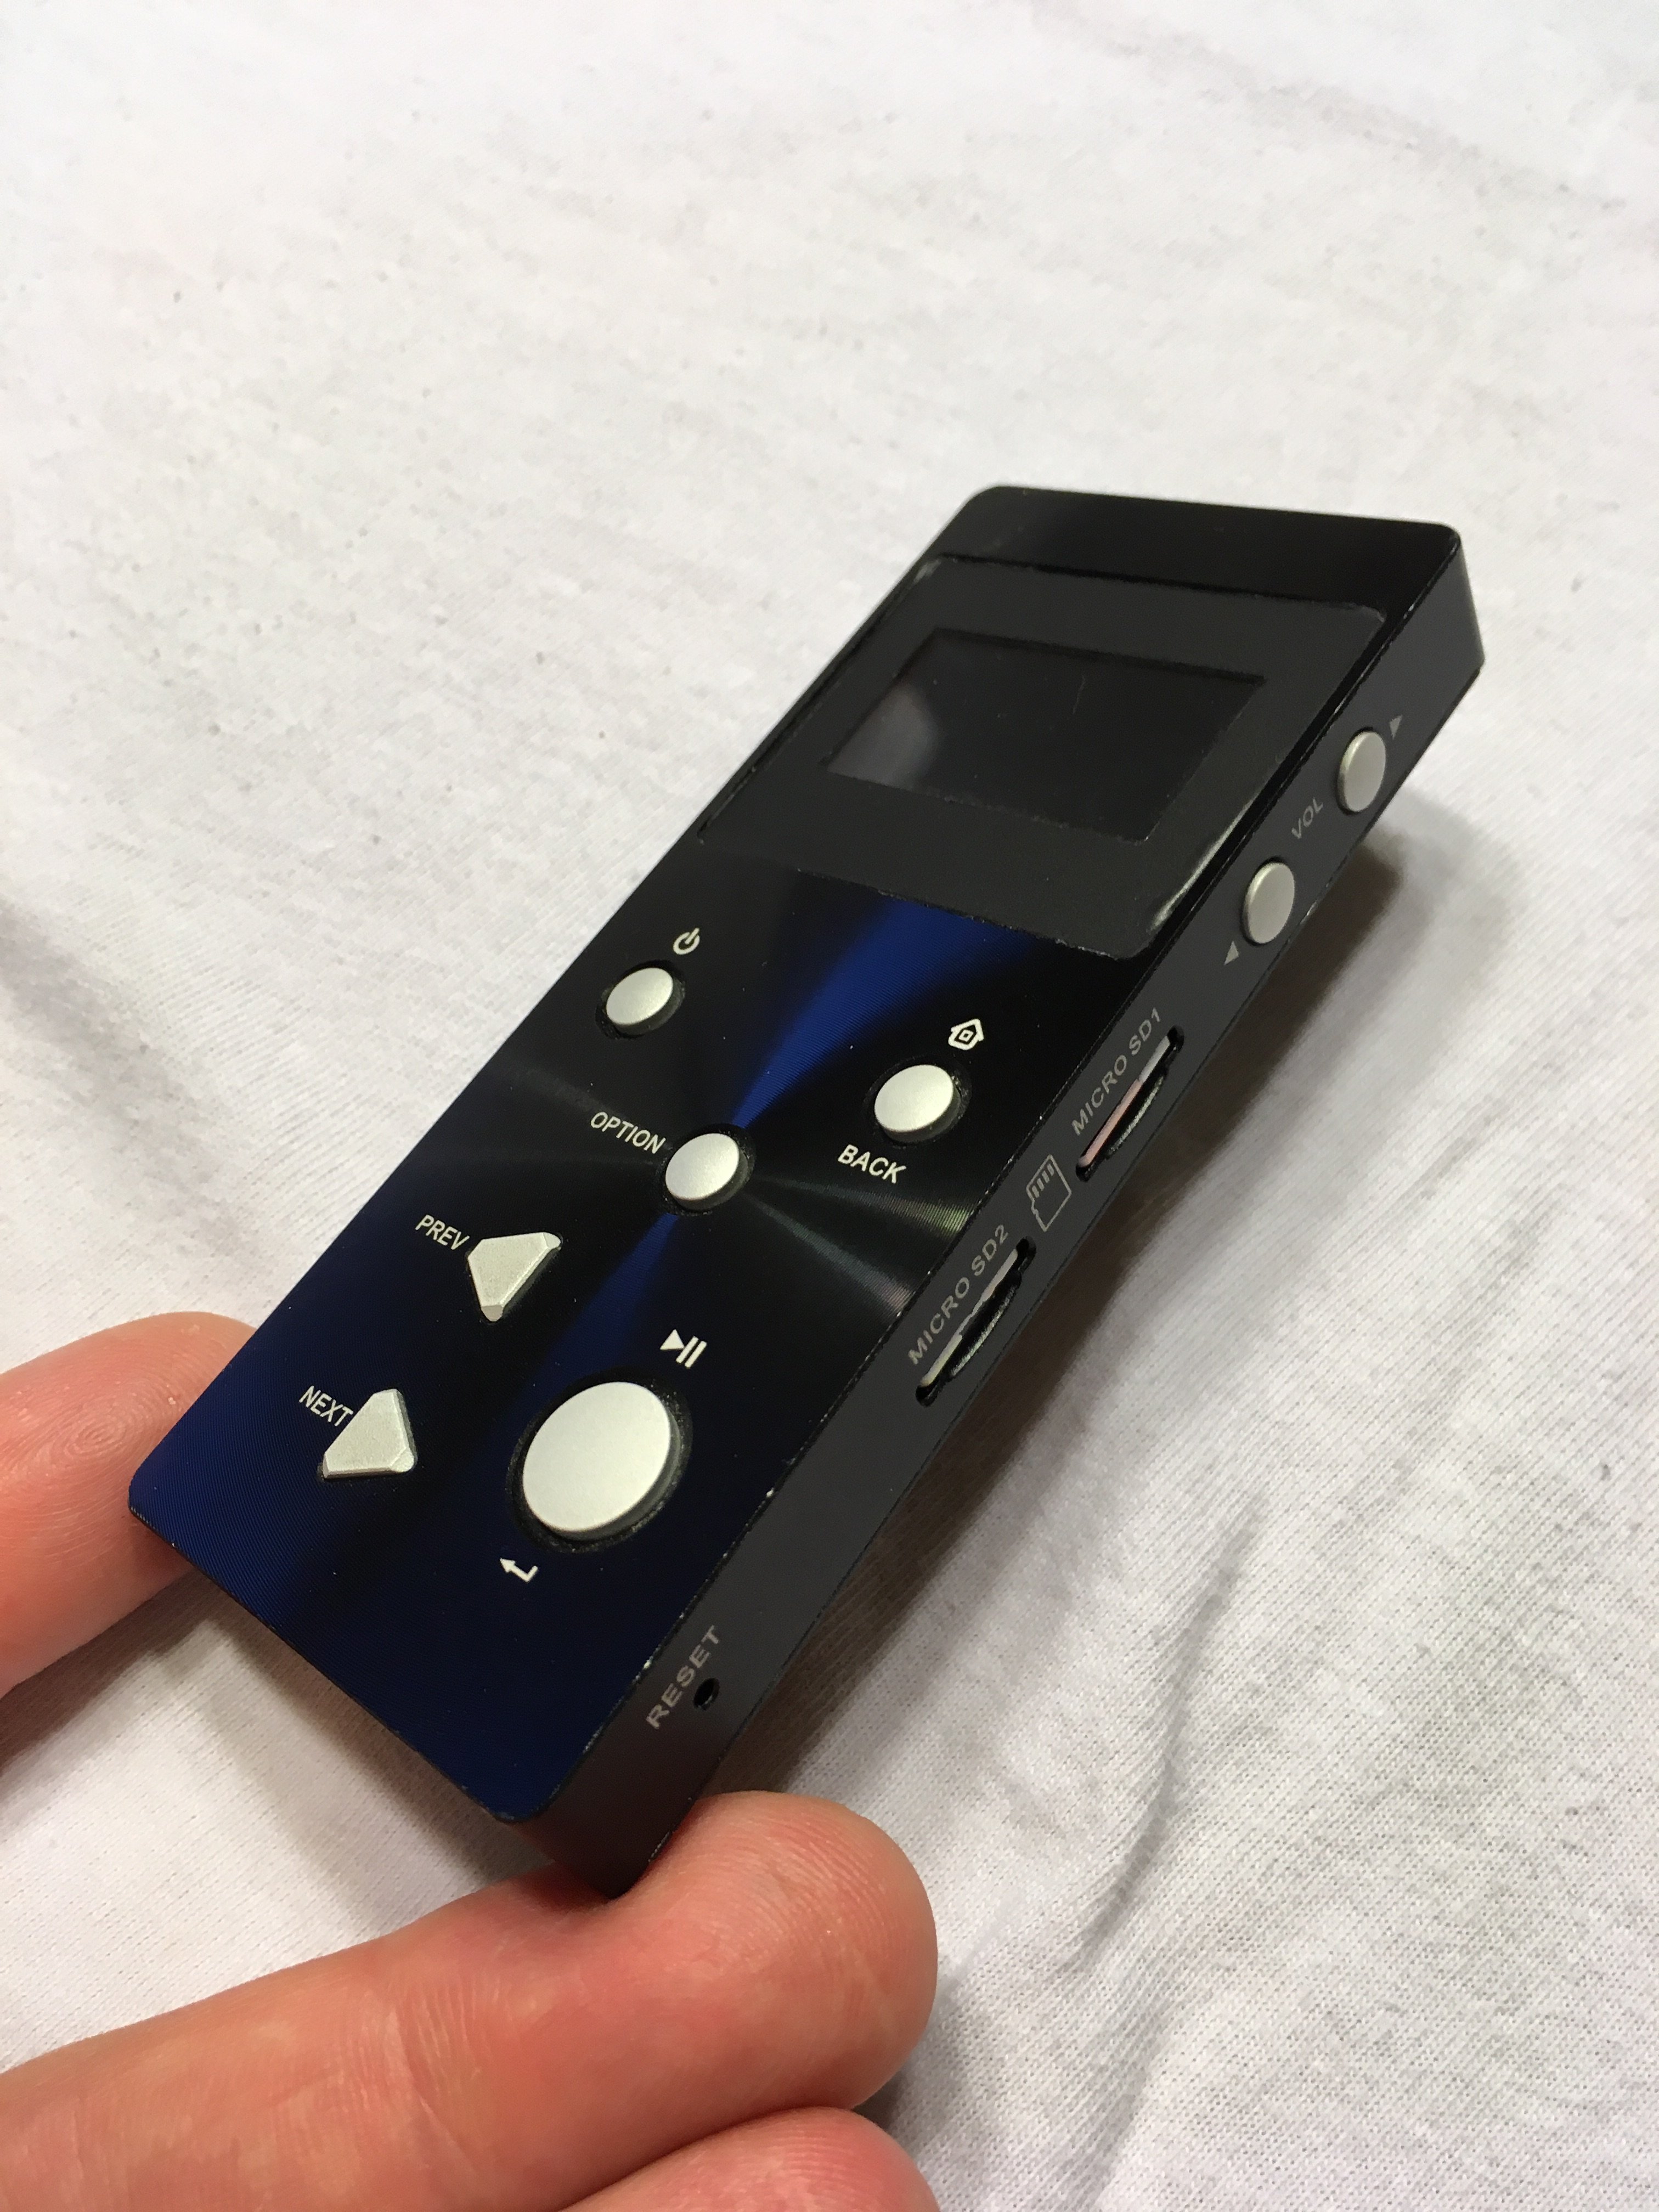
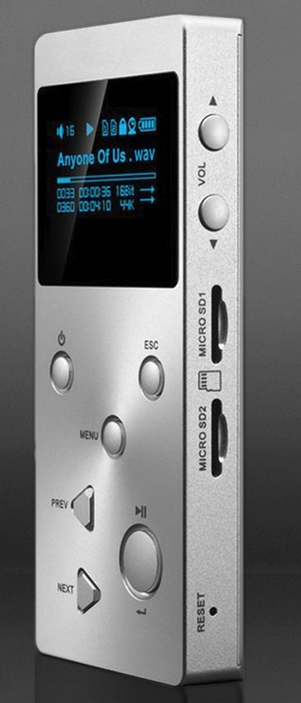
The clear screen mod looks like a huge visibility improvement! Nice work, Slater! Killer step-by-step guide, too. Does the screen cover you used sit flush with the body, even with the black vinyl mask? I think I will try this, probably razor blade style to avoid the extra hassle and potential hazards of opening the case. No more squinting in the car!

Glenn, I hope you are able to fix your volume buttons. But if not, you know you can still set the volume via the front arrow keys in Rockbox, right? Just go to Settings -> Sound Settings -> Volume. Good luck.

 
Thanks!
 
It's about 0.5mm thinner than the stock screen (so it sits recessed just a hair). So you can barely feel the tiny edge (of aluminum) all around the new clear screen if you rub your fingers on it just the right way. It's not sharp, and doesn't catch/snag on anything though, so it's no big deal.
 
I would rather have it 0.5mm below than 0.5mm above. If it was above, the screen would be much more likely to get scratched up.
 
Mar 30, 2017 at 12:52 AM Post #1,547 of 2,617
Yeah I used the Nintendo one. It's as you said, a fraction thinner than the original. Can't believe the difference it's made though. Can finally use it outdoors.

Thanks for the tip about setting volume from settings too :)
 
Mar 30, 2017 at 12:58 AM Post #1,548 of 2,617
OK, here's really clear closeups of the buttons, both from the side and top view (click for larger view):

[COLOR=FF4400]
[/COLOR]


As you can see in the 1st photo, the external volume buttons are simply (2) aluminum pieces, joined together with a strip of very thin adhesive-backed plastic (to hold the buttons together).

As you can from the 2nd photo, the internal SMT micro buttons simply touch the surface of the adhesive-backed plastic strip. No springs, no spacer pads, no rubber bumpers.

It could just be that your board is in there slightly crooked, and it's jamming up the volume buttons.

Does your lock switch work OK? What about all of the buttons on front?

The very 1st time I ever took the X3 apart (to work on my DIY case), it took me 3 tries to get it all back together. One time the buttons on the front (play, home, etc) were jammed up. Then the front buttons were OK but I had problems getting the volume and lock buttons to line up properly.

I would recommend opening it back up and checking it out again. I will almost bet that something is barely out of alignment, and it's causing it to jam up. Pay particular attention to the lock and volume buttons, as that is the most likely culprit.


Thanks for the pic.

See...on mine, the parts in your pic that look like little grey squares between the black round buttons and the silver square in the pub. ..aren't there.

Are they attached to the switch component or to the buttons? If they're attached to the switch then I've def broken them :p
 
Mar 30, 2017 at 1:28 AM Post #1,550 of 2,617
Mar 30, 2017 at 9:16 AM Post #1,552 of 2,617

GlennTidbury, I can share your pain.
 
A few weeks ago I got my Xduoo immerged in water and in the process of disassembling/reassembling it to dry it, I happen to break the volume up button. As the buttons were similars in shape and function, I quickly noticed the missing grey part on volume up button.
 
Very easily broken, one pay much atention to these buttons when disassembling/reassembling. Really.
 
I am very interested in the push button switch, I'll order one and test my soldering proficiencies. But I had to find a workaround to change the volume on my device without using the physicall buttons. Here comes Rockbox wonderful plasticity.
 
I made a shortcut file ('shortcuts.txt' in .rockbox directory) , containing the following shortcut :
 
[shortcut]
type: setting
data: volume
name: Volume
 
Then, in my config.cfg file I have the following line (among others)
 
root menu order: shortcuts, wps, files, settings, system_menu,
 
So, when I summon the menu, the first item is a link to the shortcuts, in which I have this very shortcuts allowing me to change the volume, using the 'prev'/'next' buttons.
 
I also tried to find a way to reassign physical buttons to vol up/vol down in Rockbox code, but it's far over my proficiencies. I order push button switches...
 
Hope the shortcut trick will help a bit.
 
Regards,
Thezac
 
Mar 30, 2017 at 10:04 AM Post #1,553 of 2,617
Thanks. Ordered some switches
smily_headphones1.gif


Will let you know how the repair goes when they arrive
smily_headphones1.gif

This would be a fairly easy job if you have the right equipment, not so much if you don't. I have a desoldering/soldering station that would make short work of it. Where are you located?
 
Mar 30, 2017 at 10:32 AM Post #1,554 of 2,617
I'm in Wycombe in the UK. I've got equipment already for soldering though, ta. As I said, I've taken things to bits and repaired things before, but these switches seem very fragile. I didn't even realise I'd broken them until I went to press the volume buttons.

I think the eBay list I used is sending them from Hong Kong so it'll be a couple of weeks before I receive them. Should be easy enough to replace though.
 
Mar 30, 2017 at 10:48 AM Post #1,555 of 2,617
I'm in Wycombe in the UK. I've got equipment already for soldering though, ta. As I said, I've taken things to bits and repaired things before, but these switches seem very fragile. I didn't even realise I'd broken them until I went to press the volume buttons.

I think the eBay list I used is sending them from Hong Kong so it'll be a couple of weeks before I receive them. Should be easy enough to replace though.

OK, do you have hot air desoldering? I have a soldering station that has that and a temperature controlled soldering iron. The technique I would use is:
1: secure the board to a flat surface with tape
2: make a 'mask' with heavy cardboard with cutouts that expose only the switches and their four soldering pads.
3: holding the switch with a tweezer, heat the soldering pads with an appropriate size hot air nozzle and the switch should lift easily.
4: carefully place the new switches on the pads and tack them in place with the hot air.
5: once they are tacked on you can remove the mask and solder each pad permanently with the soldering iron using a fine tip.
 
In short, the most difficult part will be removing the old switches, the hot air desoldering nozzle makes that easy. It's risky to do it with just a soldering iron since the switch won't lift off the pads until all four are desoldered and mechanically trying to lift each switch board contact risks lifting the circuit board pads.
 
Mar 30, 2017 at 11:20 AM Post #1,556 of 2,617
Please assist!! The other day, i updated to the latest rockbox version, 20172403 (i believe).  Replaced the .rockbox folder with the new version of .rockbox  Inserted card into slot1 of Xduoo and during bootup, screen gets stuck on "Commiitiing to database 1/9".  After checking for errors and fixed mp3s using MP3VAL and resetting several times and the farthest it gets to is "Commiitiing to database 4/9" before freezing.  After, reading another post do i have to delete NVRAM.BIN?  Is there anything I should try?
 
Mar 30, 2017 at 12:33 PM Post #1,557 of 2,617
Please assist!! The other day, i updated to the latest rockbox version, 20172403 (i believe).  Replaced the .rockbox folder with the new version of .rockbox  Inserted card into slot1 of Xduoo and during bootup, screen gets stuck on "Commiitiing to database 1/9".  After checking for errors and fixed mp3s using MP3VAL and resetting several times and the farthest it gets to is "Commiitiing to database 4/9" before freezing.  After, reading another post do i have to delete NVRAM.BIN?  Is there anything I should try?
Same thing here.
 
Mar 30, 2017 at 7:30 PM Post #1,558 of 2,617
   
It's about 0.5mm thinner than the stock screen (so it sits recessed just a hair). So you can barely feel the tiny edge (of aluminum) all around the new clear screen if you rub your fingers on it just the right way. It's not sharp, and doesn't catch/snag on anything though, so it's no big deal.
 
I would rather have it 0.5mm below than 0.5mm above. If it was above, the screen would be much more likely to get scratched up.

 
Recessed a tiny bit seems perfect...it will actually protect the screen somewhat.  I'm going to try it.  My wife scratched my X3's stock screen with keys in her purse, so I have nothing to lose!  Do you think this vinyl would work well?I seriously think you solved the #1 ergonomic issue that many have had with this player.  

BTW, I see you have a Pocket Class A amp.  I just posted about my X3/PCA stack here...you should weigh in on the pairing too!
 
Mar 30, 2017 at 8:18 PM Post #1,559 of 2,617
Yeah, that vinyl looks like it would work just fine.
 
6 sq-ft is an awful lot. You only need a 2"x1.5" square. You'll have enough leftover to do 500 X3s LOL.
 
Any sign shop or automobile graphics place will give you a scrap this size for free.
 
And yes, I do technically have the class A amp. I just haven't fully assembled it yet! I'll be sure to weigh in as soon as I get around to finishing up the soldering.
 
Mar 30, 2017 at 8:28 PM Post #1,560 of 2,617
  OK, do you have hot air desoldering? I have a soldering station that has that and a temperature controlled soldering iron. The technique I would use is:
1: secure the board to a flat surface with tape
2: make a 'mask' with heavy cardboard with cutouts that expose only the switches and their four soldering pads.
3: holding the switch with a tweezer, heat the soldering pads with an appropriate size hot air nozzle and the switch should lift easily.
4: carefully place the new switches on the pads and tack them in place with the hot air.
5: once they are tacked on you can remove the mask and solder each pad permanently with the soldering iron using a fine tip.
 
In short, the most difficult part will be removing the old switches, the hot air desoldering nozzle makes that easy. It's risky to do it with just a soldering iron since the switch won't lift off the pads until all four are desoldered and mechanically trying to lift each switch board contact risks lifting the circuit board pads.

 
If have doesn't have a hot-air station, plain ol' desoldering wick will work fine for this job.
 
I forgot to point out last night that there are some MICROSCOPIC SMT resistors very close to the buttons (especially the volume DOWN button). I would be VERY careful that those do not get disturbed or damaged in any way.
 
You can see in this photo:


Users who are viewing this thread

Back
Top