ericj
Headphoneus Supremus
- Joined
- Aug 2, 2005
- Posts
- 8,270
- Likes
- 170
I searched and searched, and i found no posts here or elsewhere on the intertubes regarding the proper repair or cosmetic recabling of hard-wired etys. I found a few people saying that it was too difficult, that the wires were impossibly small, that it just can't be done.
I'm hear to tell you, that's a load of bullflop.
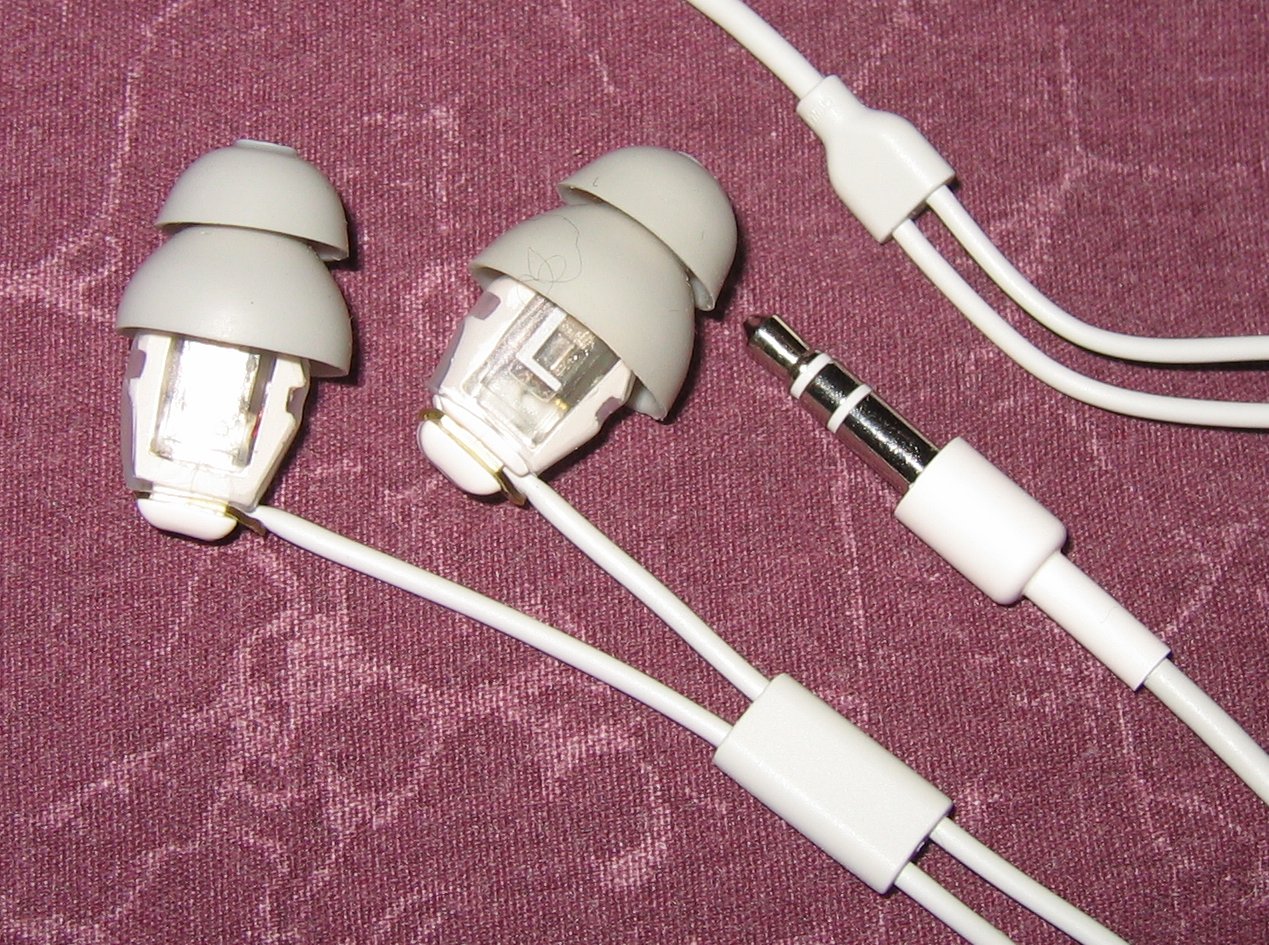
I bought my ER-6i off that auction site for $5.99 shipped - used and with damaged wire on the right side. Complete with half a dozen gray tri-flanges and a never-used pair of foamies, four filters and a (totally unnecessary with ER-6i) filter replacement tool. And pouch.
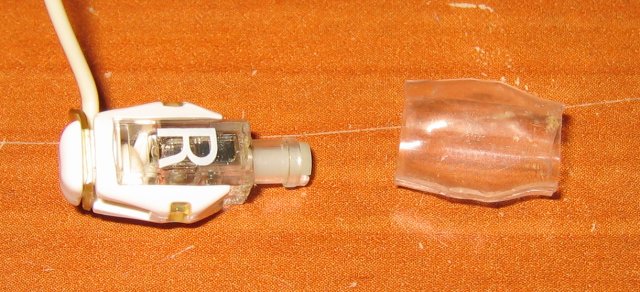
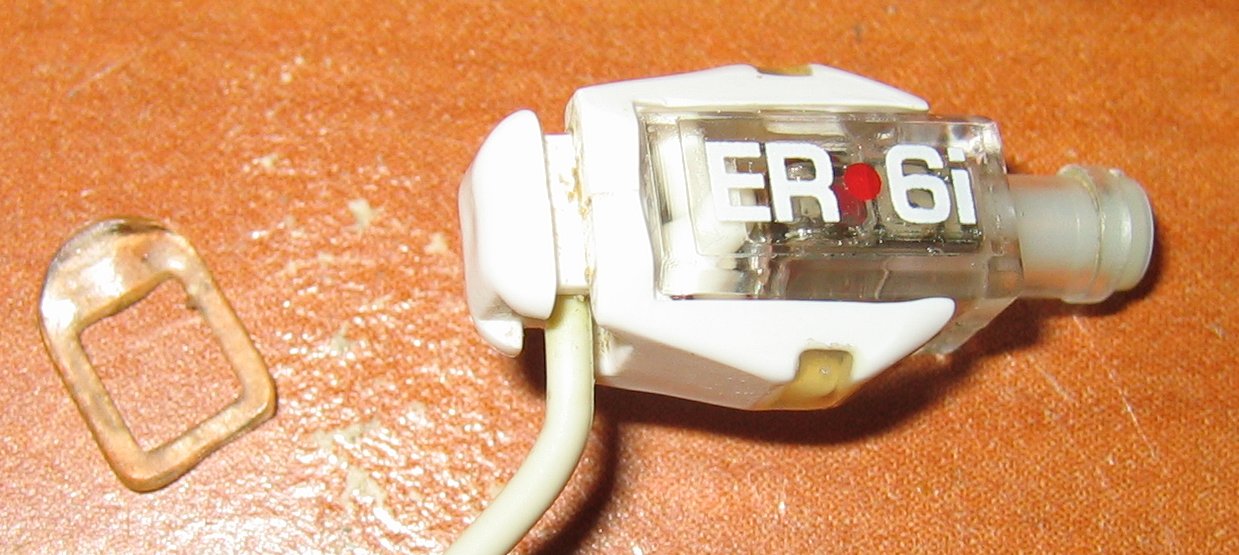
The ER-6i is held together with heat-shrink tubing. The rubber band / flap on the back is just really poor strain relief.
There's a bit of glue top and bottom that holds the white piece over the clear piece, but it's no big deal to break free.
The repair took me about 30 minutes, including time to take pictures, change batteries in camera, and kinda/sorta watch Sexy Beast.
Anyway, lets start. Most pics are clickable for a bigger version.
Pretty easy to cut of the heatshrink.
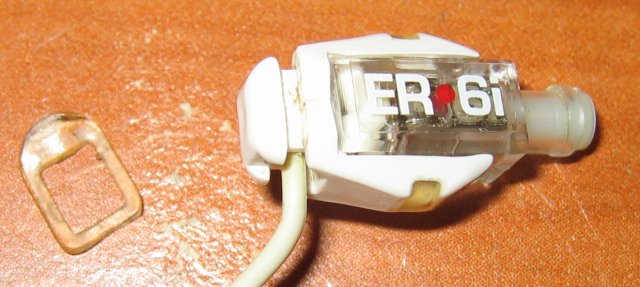
Strain-relief tag pulls off easy too
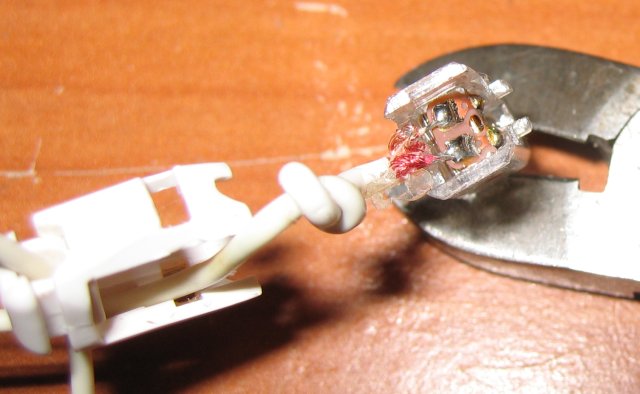
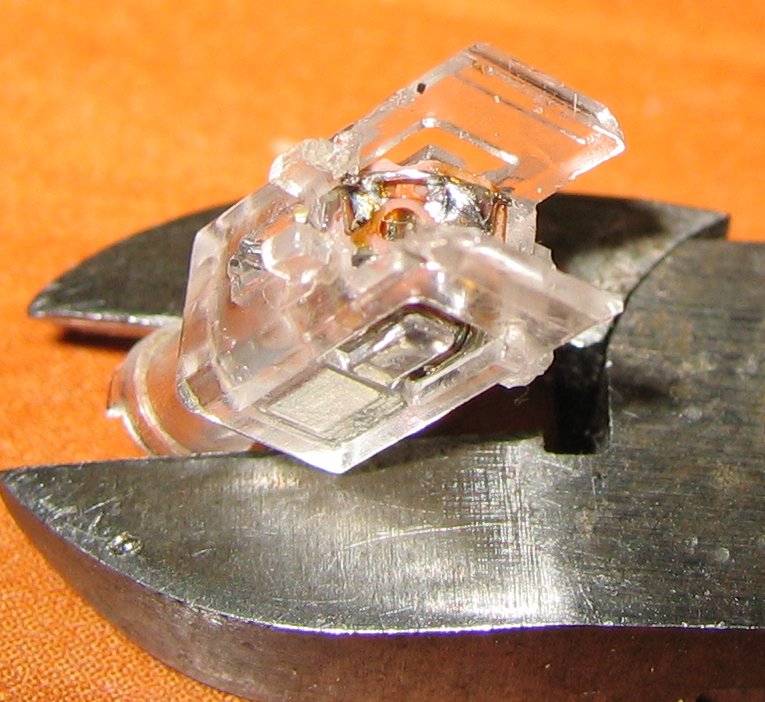
Had to use the x-acto blade to dig out the glue blob on the bottom, which provides some strain relief for the wire. There are tabs top and bottom of the clear piece that snap into slots on the inside of the white piece.
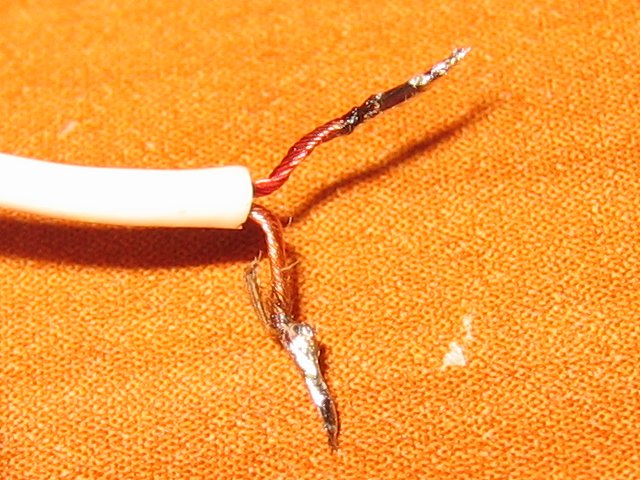
Here we can see that the Etymotic cable is utterly mundane as earphone wires go. Pretty standard reinforced enamel-coated strands soldered to a flexible pcb. Granny knot for strain relief.
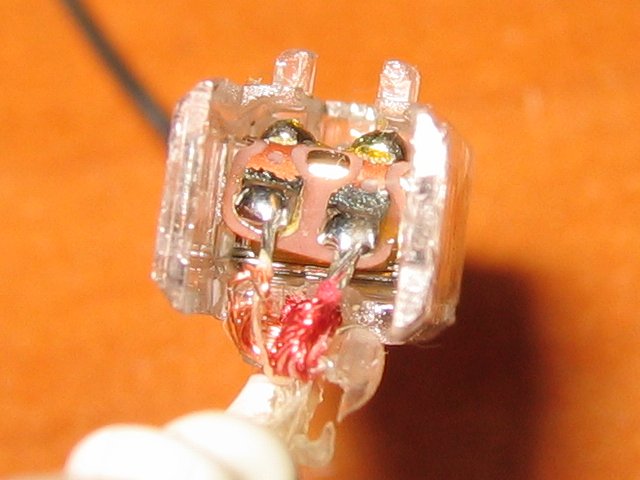
Standard tinning method for enameled wire. Flux liberally, apply blob of hot solder, wait patiently, clean up. Helps to tin about 1/4" of wire and then trim off the excess.
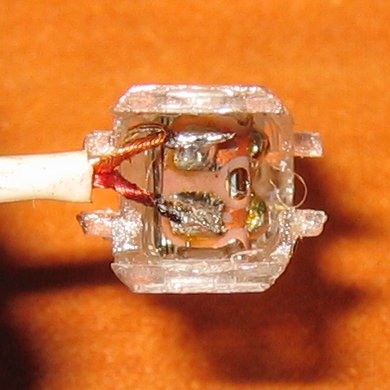
Now, here's the fiddly part. I used my 600f tapered tip in the weller to desolder the original wires, because it's a tight space, and then had to switch to the 700f conical to tin the end of the wire, and then had to switch badk to the 600f tapered to solder down the new ends.
Having a pair of pliers helps. This is the 1st time this year I've had to change tips hot, btw, and you folks who use variable temperature irons are chumps. Continuous temperature wellers are where the careful control is at.
Before:
After:
Frankly i think i did a better job here than Etymotic did.
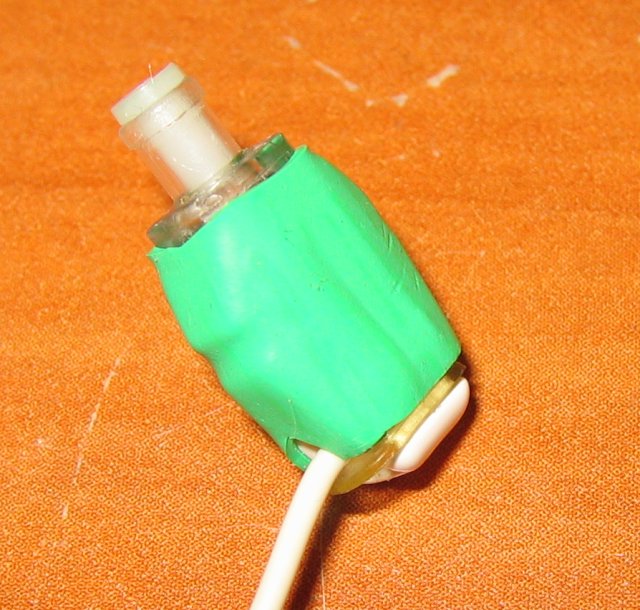
It turns out that my color choices for this size of heat shrink were yellow and green. I'm running low on heatshrink and have a bunch coming in some time this week. I'll re-do this in clear when it gets here.
Works perfectly!
I'm hear to tell you, that's a load of bullflop.
I bought my ER-6i off that auction site for $5.99 shipped - used and with damaged wire on the right side. Complete with half a dozen gray tri-flanges and a never-used pair of foamies, four filters and a (totally unnecessary with ER-6i) filter replacement tool. And pouch.
The ER-6i is held together with heat-shrink tubing. The rubber band / flap on the back is just really poor strain relief.
There's a bit of glue top and bottom that holds the white piece over the clear piece, but it's no big deal to break free.
The repair took me about 30 minutes, including time to take pictures, change batteries in camera, and kinda/sorta watch Sexy Beast.
Anyway, lets start. Most pics are clickable for a bigger version.

Pretty easy to cut of the heatshrink.
Strain-relief tag pulls off easy too

Had to use the x-acto blade to dig out the glue blob on the bottom, which provides some strain relief for the wire. There are tabs top and bottom of the clear piece that snap into slots on the inside of the white piece.
Here we can see that the Etymotic cable is utterly mundane as earphone wires go. Pretty standard reinforced enamel-coated strands soldered to a flexible pcb. Granny knot for strain relief.
Standard tinning method for enameled wire. Flux liberally, apply blob of hot solder, wait patiently, clean up. Helps to tin about 1/4" of wire and then trim off the excess.
Now, here's the fiddly part. I used my 600f tapered tip in the weller to desolder the original wires, because it's a tight space, and then had to switch to the 700f conical to tin the end of the wire, and then had to switch badk to the 600f tapered to solder down the new ends.
Having a pair of pliers helps. This is the 1st time this year I've had to change tips hot, btw, and you folks who use variable temperature irons are chumps. Continuous temperature wellers are where the careful control is at.
Before:
After:
Frankly i think i did a better job here than Etymotic did.
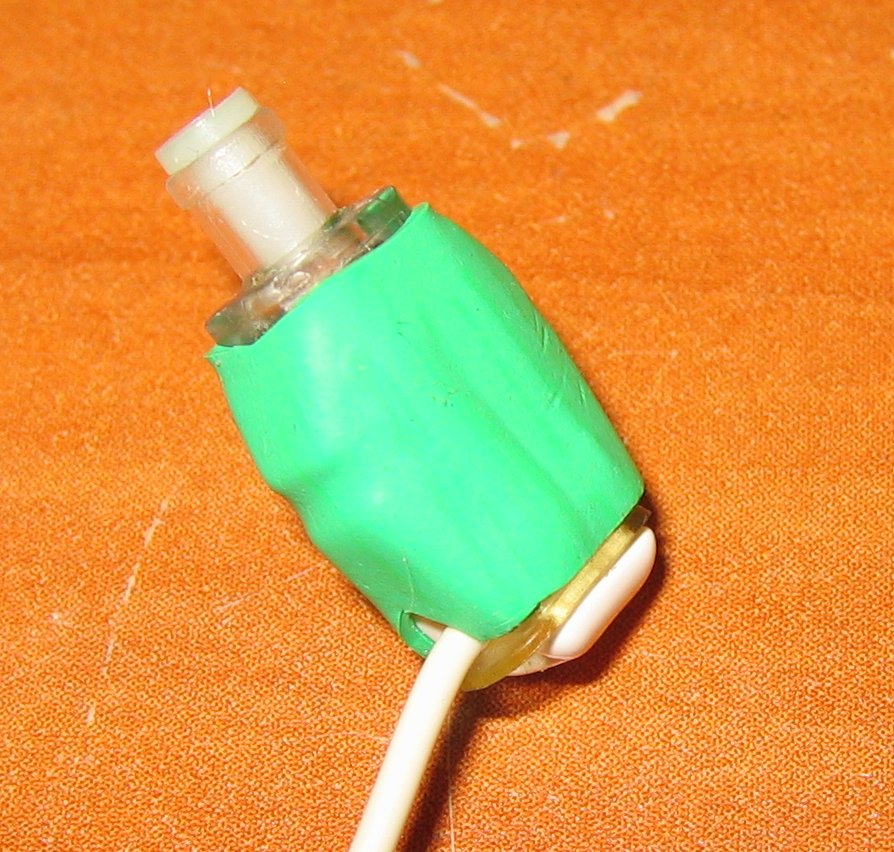
It turns out that my color choices for this size of heat shrink were yellow and green. I'm running low on heatshrink and have a bunch coming in some time this week. I'll re-do this in clear when it gets here.
Works perfectly!