


BotByte
Headphoneus Supremus
- Joined
- Dec 14, 2010
- Posts
- 2,309
- Likes
- 178
Disclaimer: (My excuse)
This was a request from a few dozen people who wanted me to explain the method of how I made my own earpads for full-sized headphones. Because I feel this is a DIY project but best if posted in the Fullsized forum, I decided to post here as a full-sized thread. Administrators and Moderators, please feel that I’m doing this for the better of our community and wish not to break the boundary lines of the separated forums. I know there is a DIY forum, but I don't want to clutter in a tutorial in there. Here it would much more appreciated.
So you might ask if custom made pads will be better?
Wait, this is a question? Of course handmade pads are better!First of all you can customize them to fit for you, out of your favorite materials and for what you want. If you don’t like your Senn pads, make new ones.
Second, they do improve the sound quality by allowing by using higher grade materials. Wait, headphones companies add cheap items to their headphones? Well, yes, haven’t you seen Senn? No, seriously, they forget in terms. Think, you spend $500 on that can and they come with velour or pleather pads. What’s with that? Give me some lamb skin or at least a durable pleather.
So as I start here is what I’m working off of:
Fostex T50RP – because they need new pads. The original are horrible and the can is fun and easy to mod.
The plan: Pleather pads that are soft and large enough to envelope my ears and not allow any part of my ear to touch the pad of the can. Soft enough to isolate and hard enough to support.
The directions here will be on basic knowledge of hand sewing. The people who have their own sewing machine, be prepared for alterations and no hand holding. If you have a sewing machine, you should know how to use it.
For simple sewing techniques, consult this Cute British Asian:
We will be using the Overhand or Oversewing Stitch. The Running stich will not be able to hold anything here. The other stich is too much work but can be used.
Now, put on a marathon and clear your day. You have work to do. For me and with my skills and knowledge, it took me about 10 hours total. But I took my time and did and very good job. Just sit down and do a procedure every once and a while for a week until everything is done.
Materials:
Pleather or Velour ½ yard for good measure. Go to a Fabric store, they sell in 4 feet long rolls I do believe. Order half a yard of that roll. Mine was $4.50 for mixed pleather.
Standard cheap thread with choice of color. This is softer and better to touch your skin.
Super strong or heavy duty thread with choice of color. This is to not touch your skin. You can do without, but the final result will be weaker.
Needles, Leather needles are best for Pleather, normal for Velour. Get the leather needles for pleather, you will thank me for this!
Foam or other filler material. I used a custom material I will explain later.
My Pleather. Right side is the back, left with sheen is front
Tools:
Scissors, extremely sharp.
Exacto or sharp knife. With something to cut on.
Shapes for cutting around. I used a blank CD, a cup coaster and a lid.
Ruler
Clamps. If you’re doing your cutting on a desk with the knife. Pictures and explanations later.
For starters:
- Measure old pads for dimensions. Add 1/8-1/4 inch more material in design. After this, you can find items to make your cuts exact to the shapes. Don’t free hand this, it will turn out very bad. You need to obtain the original shape to hold the pads to the headphones while altering them and also adding material to the ends so you can sew.
- Figure out the design you wish, see mine for my best design. Mine is out of two circles, the insides of which are the same diameter but the outside is different. The strips are as long as I could make them and thick enough for what I wanted to space my ear away from the driver.
- Cut shapes out. I used my second desk drawer that I can sacrifice and this allowed me to accurately cut my designs. You can also you a kitchen cutting board. Make sure you watch the knife and your hands. And remember, add more material then you need. You can always remove more, but it’s harder to add more material.
- I used the Cd as the outside ring, I used the coaster as the outside ring for the back rings, and the can lid as both the insides of the rings to make the entire tunnel to the headphone the same size. You can make the rings the same size, but I wanted a larger pad then the can will give me. The Strips are about 1 and ¾ inch thick and the longest I could make them. The retaining straps will be a guess but I said about an inch thick.
Next:
- Turn shapes inside out accordingly. My method involves leaving a smooth line of thread on the outside. With practice, it will blend into the material without a problem.
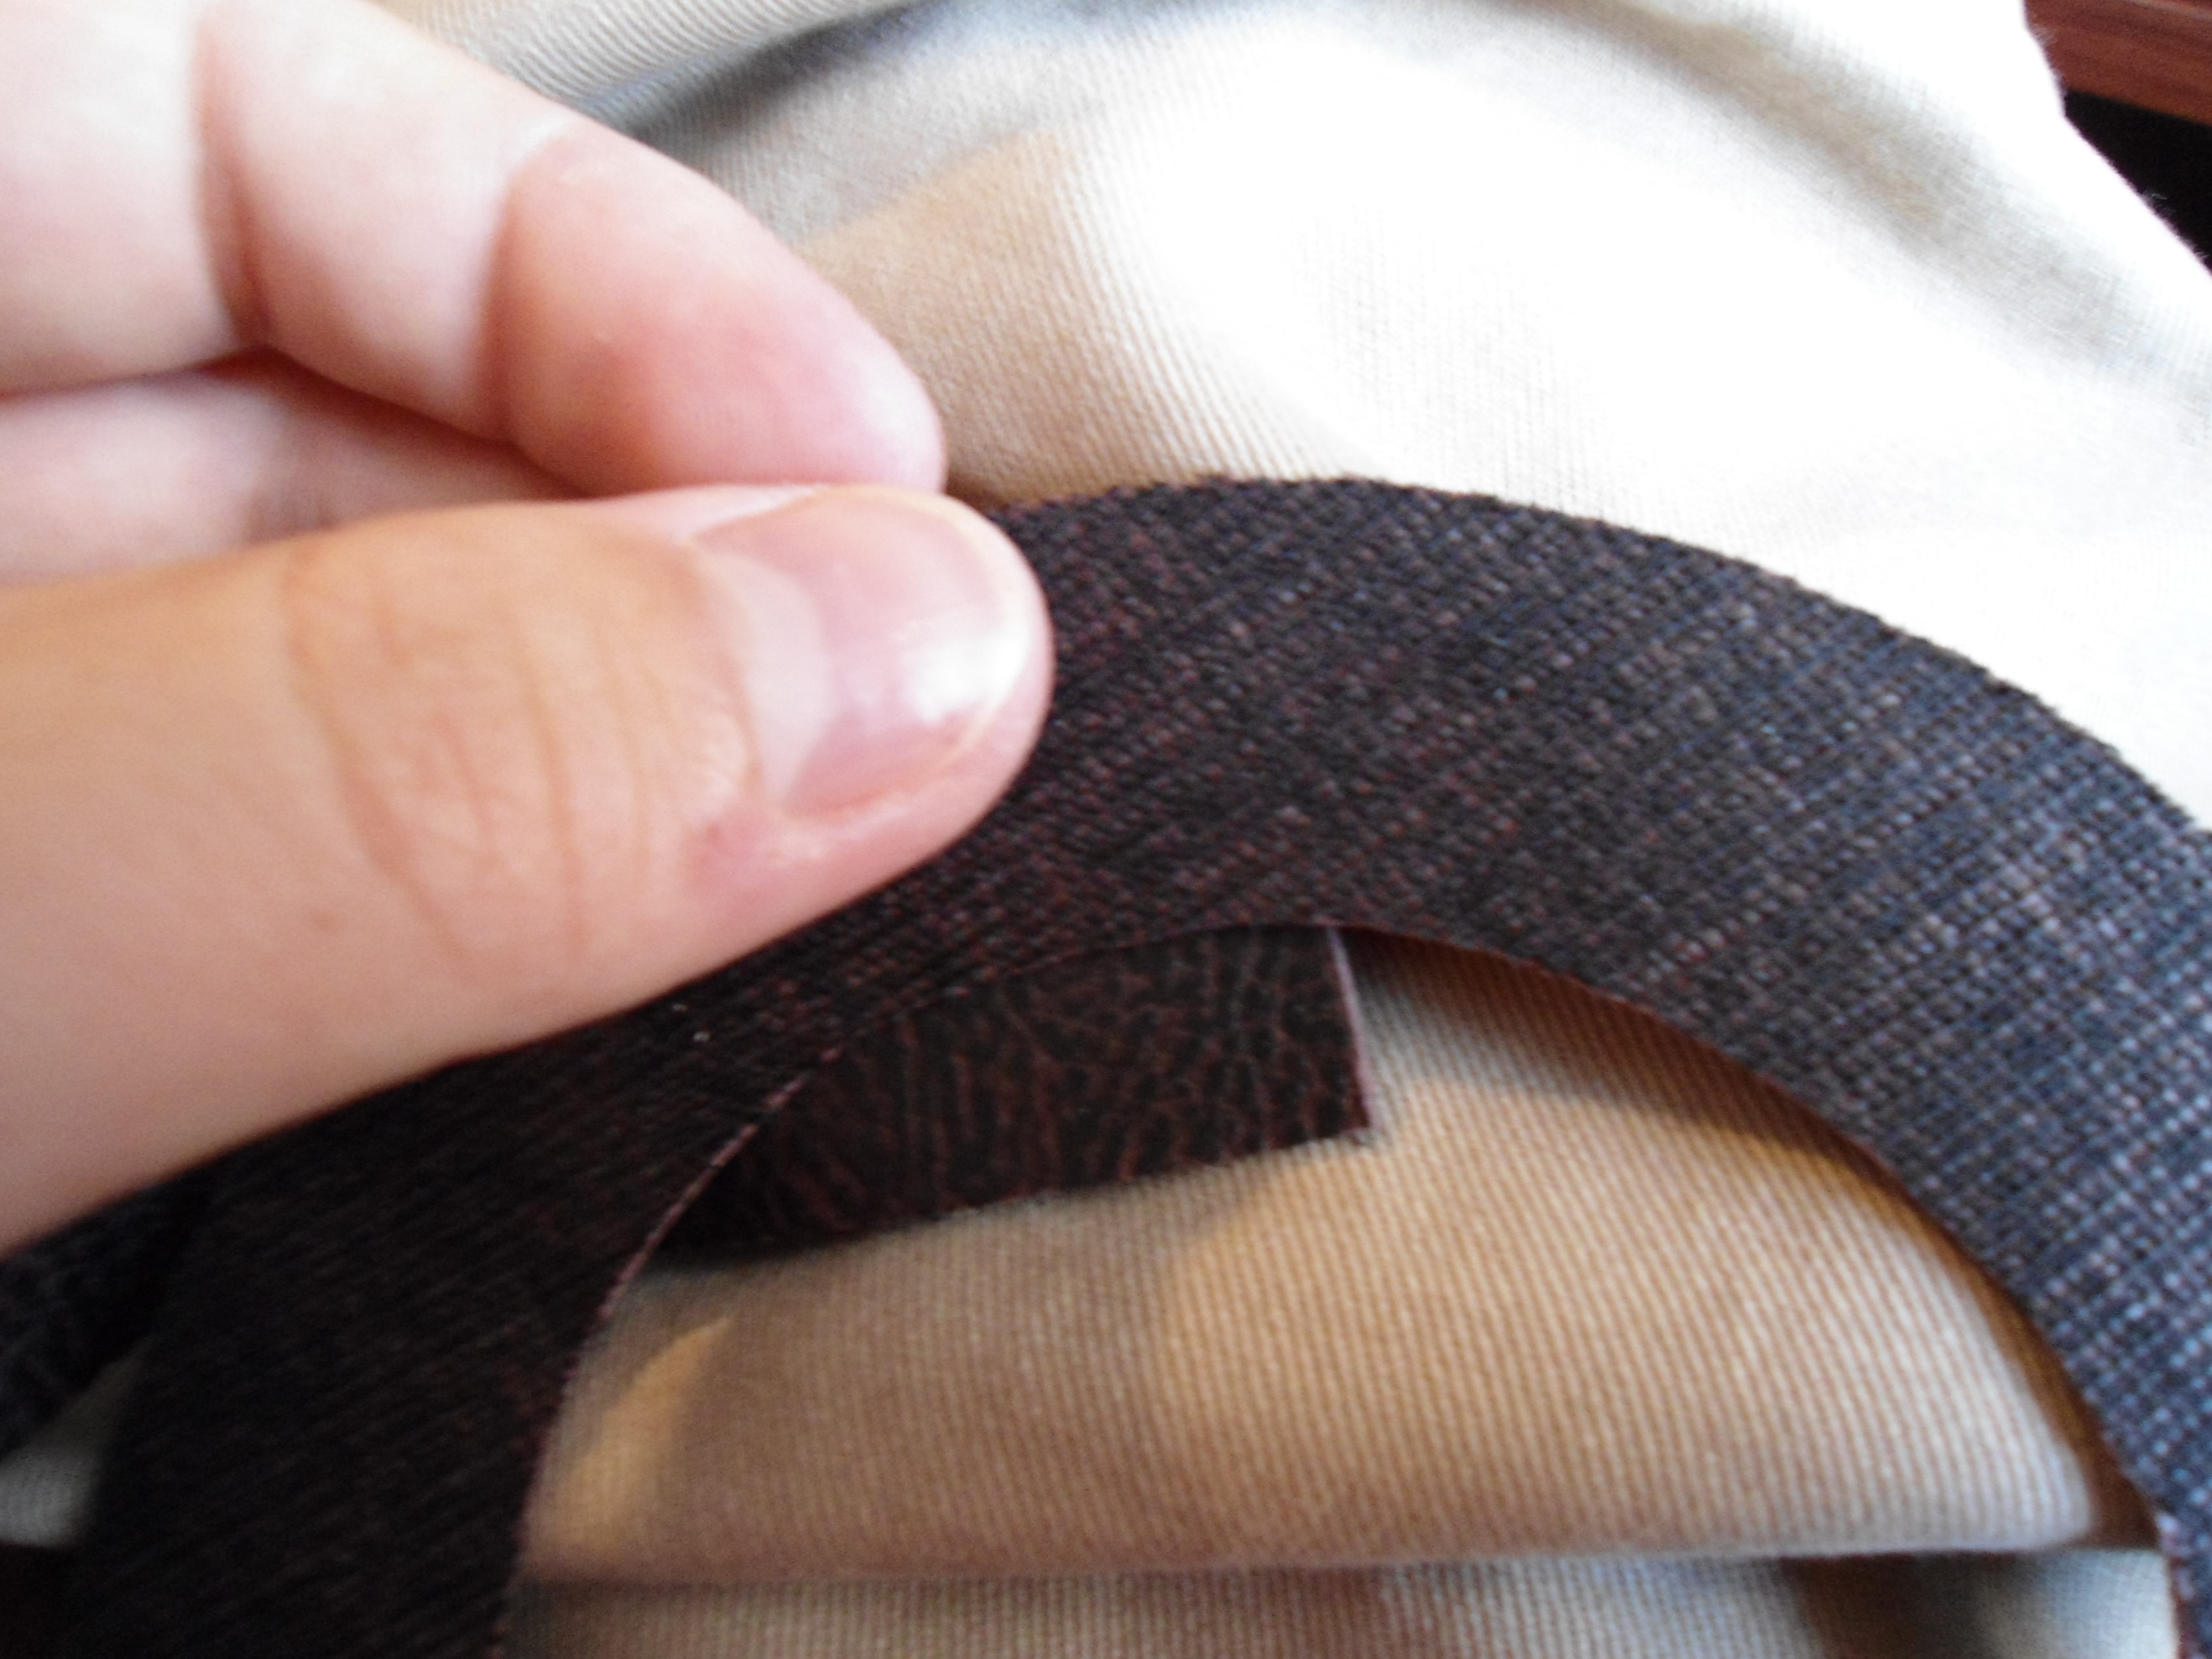
- Sew, staring in the inside of the pads. Using Outside ring and outside strip (the ones to touch your head and the side). Loop thread 1/16 inch from the top. Make sure not to space too closely, 1/16 is good, 1/32 is better from side to side. Take the two materials that the inside of which will be able to turn outward and see the reverse of the stitch. Start from you towards the material, through, up and towards you. Tighten gently, repeat 1/32 inch to the right. Repeat 1000 or so times. When the material meets again, cut to length and fold the flaps over. Making sure it’s inside out to the pad, sew the line. Repeat on step 4.
Cut where you need to and stitch the same way to put the flap together. Always cut more then you need, you can always cut more off.
- Assemble sides with the top first. The outside that will contact skin or might, will be the cheaper thread and a very tight stich. This adds strength and comfort. Larger stitched will tear and you will feel it even more.
On left finished, on right the two sides sewn on. Notice the bend on the bottom go inward into the inner section.
- After the sides are sewed, it should look like an inside out earpad with the stitches facing out, fill the insides with filler material. Make sure it’s just packed enough. If you stuff it, it will be hard. A small amount of filler will make them softer and more conforming. I waited because my material is this: this is a soft blanket that I cut into small strips and I could stuff them into the last hole and fill it out from the last stitch to keep it all inside. It’s best to do this, foam is too unstable and won’t match your design correctly. Loose cotton will do what I did but better.
- Sew on backing on the inside. Turn the material inside out to insure that when done, the interior of the pad will be smooth here.
- Then sew the last of the loop, but when you do, do not turn anything inside out. It won’t work. Just sew the edge thickly and with some wide stiches to save time. Don’t worry, this will be worked on, it’s mostly to hold. I stuffed my pad before the end of this point. It helped with the loose stuffing, foam cannot do this. Do not over stuff. The more surface area on you head, the less stuffing you will need. Too much and it doesn’t isolate and it’s too hard on your head. Overstuffing can also warp the shape of your pads. I used the stronger thread for this step.
Bottom or pad is actually the side that will touch you.
- Sew over a flap on retaining strip reversely so that you can turn it out and see the material continue. This has to be time taken and use the strong thread with the tight stitch. This can rip out easily with pressure, so be slow and show some quality. Turn the flap inside out and sew on the same thread in step 6. Make sure to leave some material and sew the overlapping strips together. Do not meet them like in earlier steps. This adds strength.
- Sew on the outside of the retaining strap. Sew the top, you won’t need to fold it over, just a ¼ inch stitch and sew around evenly. Give a pull every inch to tighten and even pull the material to tighten the thread. When done, do not tie off and cut, leave it for next step. This should be like the other stiches, but you missed horribly and you should be able to make a perfect circle with the thread regardless of the material. This will be tightened like a shoelace, so it has to be done right and smoothly. Any holes have to be skipped.
- Add pad to headphone cup, tape helps to hold, and tighten retaining thread from step 8 until it’s tight to the cup but not tight enough you can’t slip it off. This will take a bit to do correctly. Tighten, try to take off, then on. You should barely get it on. Then take the pad off, and tighten ¼ inch. Then you can tie off and cut the thread. Be prepared to remove and make a new retaining strip until you’ve done it correctly. Not enough material will give bad hold, too much will give too much, unless you never want to remove them.
I worked out my SH!$& camera!
- Repeat for second cup.
Finished Product:
Now I did this with the T50Rp and the same idea could be used with Grado and many other headphones. If your headphones need to clip in the pads, try to custom design yours so that they can fit to the headphones. Like Senn have clip in pads and I would have to tape in my pads If I would make them.

