My Custom M Audio AV 40 Speaker Stands
Jun 29, 2010 at 12:05 AM Post #16 of 30
Did some sanding after dying.  Water based stains and dyes tend to raise the wood fibers so its no longer smooth.  Some surface sanding is required but not too much.
 
It lost a bit of its color after sanding.  Most of the color lost was in the wood fibers on the surface.
The lower half of this piece was sanded:


I used one of these.  Its amazing as it doesn't leave scratches at all. Its like steel wool wrapped around a 3M scotch-bright pad.  Just takes off enough to smooth the surface:


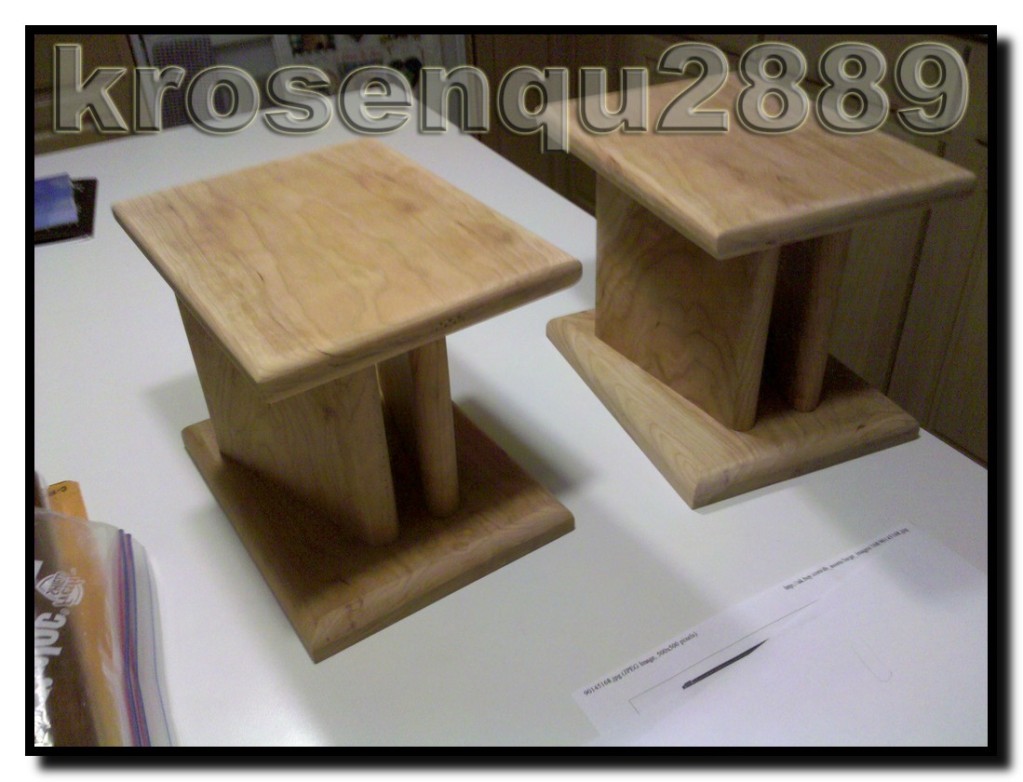
And here is the first half of the clear coat drying.  The other side gets coated tomorrow and then I'm done!  Wahoo!
 
As you can see, the piece on the top left of the area is my origonal test piece.  On it are Minwax Cherry, red mahogany, Cherry Wood, and redwood fence stain.  None of which are red!  And they all look the same!


Jun 30, 2010 at 2:13 AM Post #17 of 30
I am attempting to build some of these!  I could not find any 2" thick wood anywhere.  I'm using two boards of 1"x8"x6' for everything.  Pine, since it's cheap and buying nice oak or whatnot for $5-8/foot would put me in pretty deep, especially on a first attempt.
 
Now, if I could only find some 2"x8" boards of nicer wood.
 
Jul 1, 2010 at 1:17 PM Post #18 of 30


Quote:
I am attempting to build some of these!  I could not find any 2" thick wood anywhere.  I'm using two boards of 1"x8"x6' for everything.  Pine, since it's cheap and buying nice oak or whatnot for $5-8/foot would put me in pretty deep, especially on a first attempt.
 
Now, if I could only find some 2"x8" boards of nicer wood.

Awesome!  Be sure to post up a tread of your progress :)
 
Pine will work just fine.  You wont get as nice of a grain look but frankly, it won't really matter.  Maybe get some black wood dye or wood paint to match your speakers?  Pine looks really nice with solid primary colors.
 
Jul 1, 2010 at 3:52 PM Post #19 of 30
I'm going to try 3 coats of maple stain, then poly.  I'd rather keep them a wood color since a lot of my furniture, including my desk is wood or wood laminated stuff.  Have to love ikea furniture!
 
I've actually finished gluing all of the pieces and building them.  I'm going to go stain them right now actually.
 
Jul 1, 2010 at 11:51 PM Post #20 of 30

 
Quote:
I'm going to try 3 coats of maple stain, then poly.  I'd rather keep them a wood color since a lot of my furniture, including my desk is wood or wood laminated stuff.  Have to love ikea furniture!
 
I've actually finished gluing all of the pieces and building them.  I'm going to go stain them right now actually.


Sweet. just remember that with stain, 1 coat is generally enough.  Once the wood sucks up the stain, that's pretty much it.  The only thing you may do is sand and reapply for darker color.  Its the polyurethane that you want to do multiple coats of.  Apply, sand. apply, sand, apply sand.  This way it fills in all of the gaps and dips, leaving a perfectly smooth and wet looking surface.  I'm already on my... IDK, 4th coat of poly?  I keep screwing up and putting too much on so it drips and makes a mess.  I finally learned to JUST get it barely wet with poly.  Small amounts so it doesn't drip.
 
Jul 2, 2010 at 3:14 AM Post #21 of 30
I did a test piece of the pine with some minwax maple and found it way too faint.  Luckily my dad had some other stain in the same maple color and they came out great after 1 coat [perfect color].  However I hate how end-grain always holds the color better than the other sides.  Tomorrow is atleast two coats of poly.  1 in the early AM and then one late at night.  Repeat and they should be done by Monday. 
 
Now...where's that computer monitor to complete the setup...hmm.
 
Jul 2, 2010 at 11:48 AM Post #22 of 30
Yeah, I figured out the end grain bit a little late.  After I cut all my pieces, my dad (who is the woodworker) told me that the end grain should never be visible if possible.  Side grain is ok but I should always try to hide the end grain because it has a different color and pattern than the rest of the wood.  O well.  Its a learning process.
 
Oh yeah, just make sure the poly is completely dry all the way through.  I'm now waiting 24 hrs between applying and sanding because I messed up the first coat.  12 hrs after applying, the poly was still tacky so it gummed up the sandpaper and rolled off the wood like the permanent adhesive from a peeled up sticker.  Wont do that again :frowning2:
 
Jul 2, 2010 at 5:09 PM Post #23 of 30
Apparently all my dad has is oil based poly.  Going to wait until tomorrow to go out and buy latex poly.  Damn. 
 
Next time I may do a solid color.  Maybe an all black paint job then poly for a nice glossy black finish.  Definitely cheap wood though since you won't be able to see it under the black paint!
 
I wish I could get that nice glossy black veneer look.
 
Jul 2, 2010 at 6:39 PM Post #24 of 30

 
Quote:
Apparently all my dad has is oil based poly.  Going to wait until tomorrow to go out and buy latex poly.  Damn. 
 
Next time I may do a solid color.  Maybe an all black paint job then poly for a nice glossy black finish.  Definitely cheap wood though since you won't be able to see it under the black paint!
 
I wish I could get that nice glossy black veneer look.


Any reason you really want to use a water base instead of oil poly? I don't have the best techniques myself but I have better luck getting a smooth finish with oil base. It lays flatter since it kind of levels out as it dries. Also seems to be easier to recoat later if you ever get a bad scratch on a piece that you need to fix
 
Jul 2, 2010 at 8:33 PM Post #25 of 30


Quote:
 

Any reason you really want to use a water base instead of oil poly? I don't have the best techniques myself but I have better luck getting a smooth finish with oil base. It lays flatter since it kind of levels out as it dries. Also seems to be easier to recoat later if you ever get a bad scratch on a piece that you need to fix


I've always just used water based poly, I guess.  Maybe I'll try it out.
 
 
Jul 9, 2010 at 2:02 PM Post #26 of 30
I finished the stands last week.  I've just been lazy about taking the finished pictures.
 
I'll get pictures up soon.  They didn't turn out the way I would have liked.   The measurements aren't perfect and there are several scratches and nicks from screwdriver slips.  Grr... O well.  Maybe I'll sell these and with the profits buy new wood to start again.  Now that I know what I'm doing its going to be a bit easier.
 
Any luck on your stands CCBASS?
 
Jul 11, 2010 at 8:03 PM Post #27 of 30


Quote:
I finished the stands last week.  I've just been lazy about taking the finished pictures.
 
I'll get pictures up soon.  They didn't turn out the way I would have liked.   The measurements aren't perfect and there are several scratches and nicks from screwdriver slips.  Grr... O well.  Maybe I'll sell these and with the profits buy new wood to start again.  Now that I know what I'm doing its going to be a bit easier.
 
Any luck on your stands CCBASS?


They came out really great.  I still haven't poly'ed them, but that hasn't stopped me from using them.  One is a bit wobbly, however with a heavy monitor on top, no issue.  I added 4 vinyl feet to the bottom to help them from sliding and vibrating the desk.  Pictures up soon.  I'm very pleased for a first attempt.  Next time I'm just going to use red oak, and just poly, no stain. 
 
I'm actually going to chisel out a small part in the wider part of base where the v is widest, and add an iPod dock! 
 
Feb 21, 2011 at 5:37 PM Post #29 of 30
I just found these. I think they are perfect for the AV40. They are 8" high. The picture is a little decieving because it would seem that the top plate is too small for the AV40. So, M-audio dimensions 6" width x 7.25" depth.  Wood Technology top dimensions 8.5 width x 8.5 depth.  So I think that this would be perfect!
 
You can find it online for $49. Comes in 2 different colors. Cant wait to get mine!


Wood Technology FGH-8


Users who are viewing this thread

Back
Top