


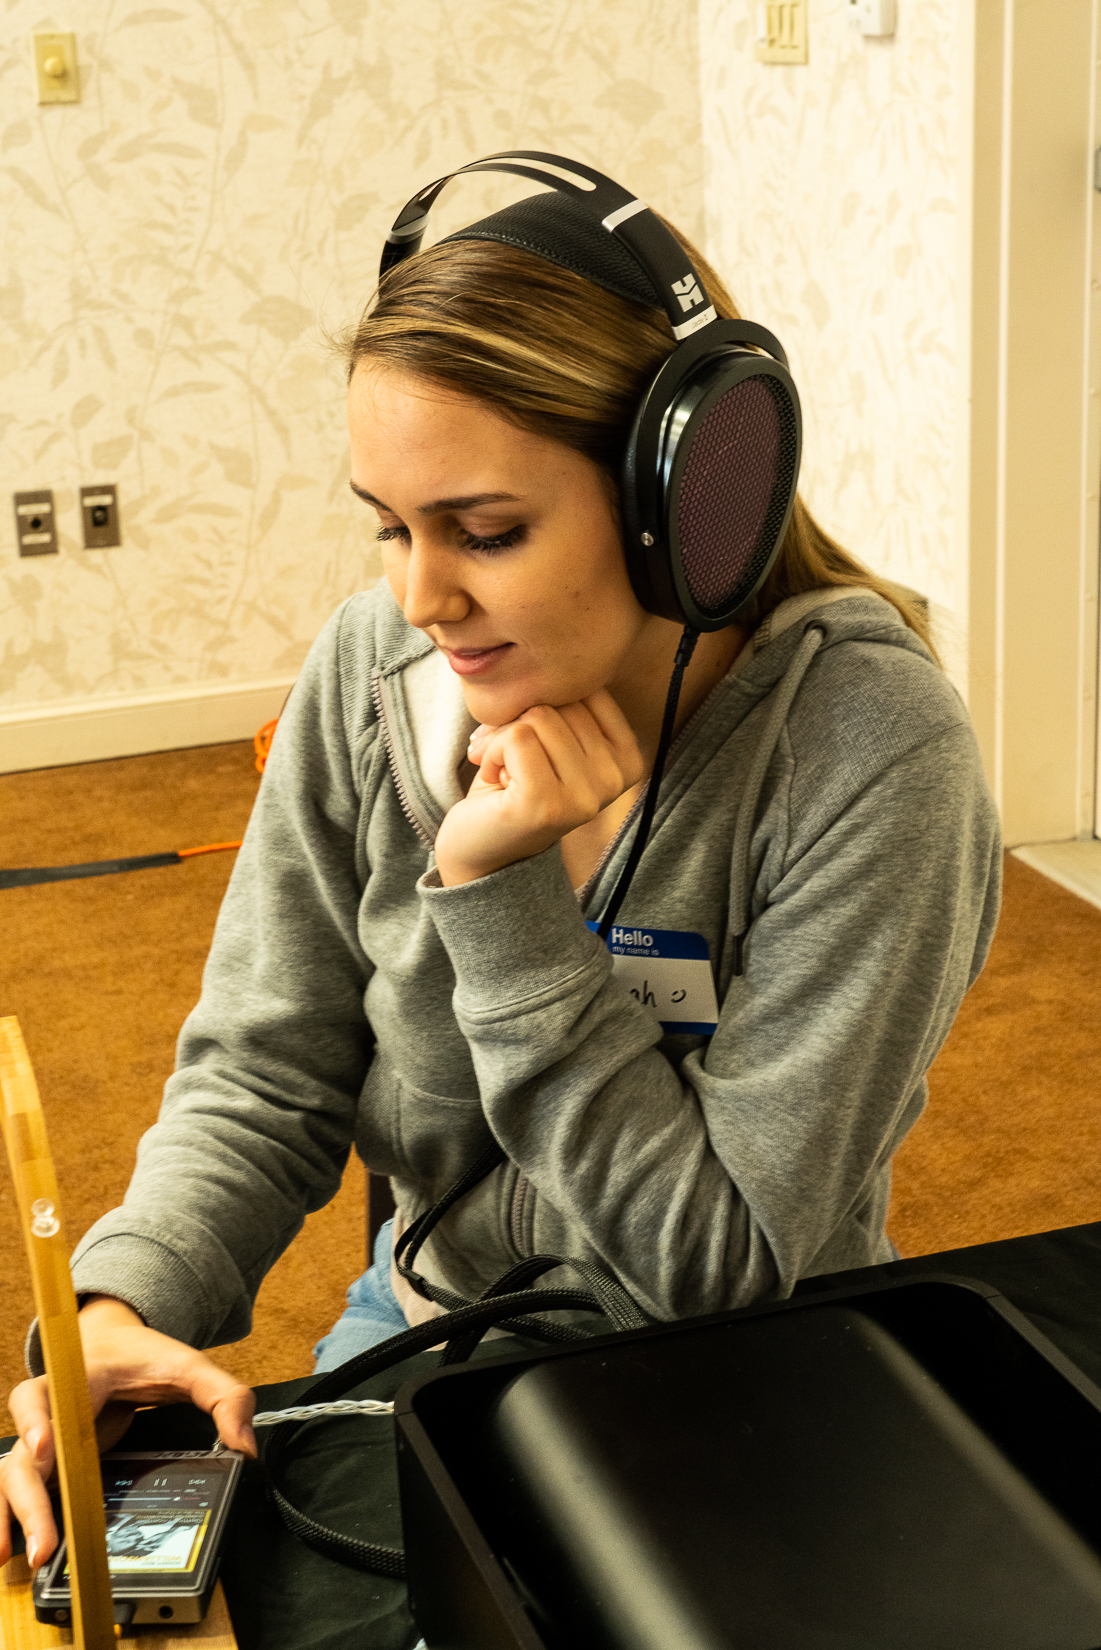

Anyone heard the Jades against the Stax L700 and the 009?
You are using an out of date browser. It may not display this or other websites correctly.
You should upgrade or use an alternative browser.
You should upgrade or use an alternative browser.
Jade II Discussion
- Thread starter oneguy
- Start date
-
- Tags
- hifiman jade ii jade ii
I have, versus 009.
and preferred Jade with the KG GG, and 009 with an old T1. but both cans were very close, just a matter of personal taste. that's why I kept them both
never heard carefully the L700, so will not comment on these
and preferred Jade with the KG GG, and 009 with an old T1. but both cans were very close, just a matter of personal taste. that's why I kept them both
never heard carefully the L700, so will not comment on these
Hello, today my Jade II B-Stock arrived. First thing i noticed when i plugged it in my Audiovalve Solaris as well as the Jade II Amp was a buzzing sound in the right side. This buzzing sound wasn't constant in volume but rather got louder and less loud from time to time. After plugging the headphone a few times between the two amps the buzzing sound changed to the left side. When moving or sitting in a distinct way the buzzing stopped from time to time. Now after it's plugged in for around 5 minutes the buzzing seem to have stopped except for a very low noisefloor on the right side. Anyone knows what this is? Maybe the headphone isn't charged fully?
Last edited:
Now it's back. Think my unit is faulty.


Hello, today my Jade II B-Stock arrived. First thing i noticed when i plugged it in my Audiovalve Solaris as well as the Jade II Amp was a buzzing sound in the right side. This buzzing sound wasn't constant in volume but rather got louder and less loud from time to time. After plugging the headphone a few times between the two amps the buzzing sound changed to the left side. When moving or sitting in a distinct way the buzzing stopped from time to time. Now after it's plugged in for around 5 minutes the buzzing seem to have stopped except for a very low noisefloor on the right side. Anyone knows what this is? Maybe the headphone isn't charged fully?
should not have buzzing sound. they're clean and pretty equal on both cups. no distortion. maybe you need to return it.
billqs
500+ Head-Fier
- Joined
- Jul 19, 2016
- Posts
- 526
- Likes
- 299
Yeah, not normal behavior.
Thanks, will return them. Bass distortion on very loud volume is also not normal?
billqs
500+ Head-Fier
- Joined
- Jul 19, 2016
- Posts
- 526
- Likes
- 299
I haven't owned them in awhile, but mine were always clear as a bell. That's the stat advantage. That being said, these aren't the phones I would use for bass heavy tunes. I'd grab a planar or dynamic phone for those.
What i don't understand, doesn't this product come from an asian market? How is the average asian woman supposed to fit this headphone on her head? I never used any headphone on the tightest settings until hifiman products came in my house. This almost falls from my head. Always thought asian people are smaller on average than European/North American but they must have monstrous heads if those headphones are made for their average headsize.
definitely not normal if it's happening with both amplifier. defective cans.
BoyNamedSue
100+ Head-Fier
- Joined
- Sep 7, 2010
- Posts
- 497
- Likes
- 453
Edit: Disclaimer, this mod is NOT reversible as attempts to remove the blutak will strip away the dust cover, which I learned the hard way. I am keeping my post though to document my trial and error process.
All impressions based on QA660 > AGD NFB7/M7 > AGD M8 Preamp > KGGG.
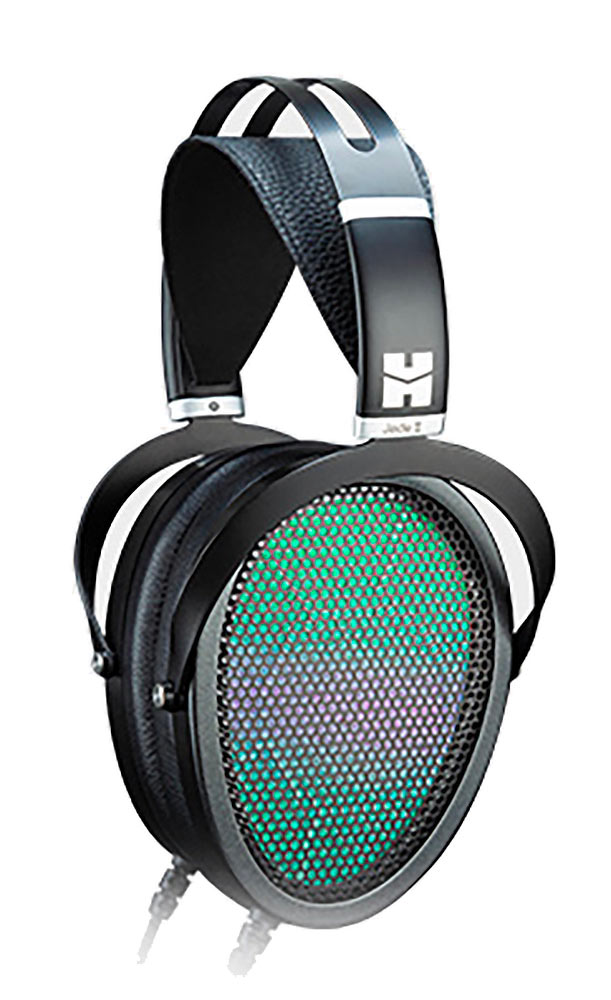
I picked up a used pair of Jade 2's (thanks SoundEQ!) based on the legendary status of the OG Jade as well as the halo effect of the Shangri-la senior system, which I preferred over the HE-1 when I was lucky to AB them for a good hour during a speaker event where these systems were not getting much attention. The reps were nice to let me pick my own music and go back and forth between the two systems.
My first impression of the Jade 2's was uneven. I just couldn't get a handle on their sound. I put together my system for versatility (warm v. bright, analytical v. euphonic, SS v. tubes, low v. high power) in order to neutralize or color my headphones based on my preference and mood. However, the Jade 2's sounded thin and bright on all configurations.
Based on the music, the sound ranged from unlistenable to the best I've heard of that particular track. Unlistenable as in tinny like those old thin-wired plastic computer speakers, and best I've heard as in the most transparent and resolving of any headphone in my collection, even beating out the Stax 009's.
While the Jade 2's certainly has its strengths with regard to transparency, resolution, separation, speed, effortlessness, PRAT, and extended non-fatiguing highs, but only on certain music,specifically simple recordings such as one singer with an acoustic guitar. However they seemed to fall apart with more complex recordings, and possessed the following short-comings:
With disappointment, I felt compelled to make a choice between selling them off, or resigning myself to narrowly using them for simple vocal acoustic music. While mulling over this decision, I realized a few things that made me consider modding them:
all the strengths mentioned above (see edits) and I observed following improvements:
Edit: My impression of them being thin or lean may be due to me using the Z1R's as my primary headphone prior to the Jade 2's, which tends to have a thick and warm sound signature. After using the Jade 2's almost daily now, they no longer sound lean but just right. Not sure how much of this is brain burn-in.
IMO, I think the modsmade a significant improvement Edit: made some improvements but some trade-offs depending on preference, and brought the Jade 2's up the level of my 009's, and actually do a better job in terms of transparency and speed.
This is pure speculation, but I wonder if Hifiman put world-class drivers in the Jade 2's but purposely crippled them with poor design to differentiate them from their more expensive electrostatic offerings. Secondly, given the spartan build-quality and packaging, as well as the DIY nature of the original Jade, I believe the Jade 2's beg for modifications to reach their true potential.
p.s. One downside is that the green/purple dust cover is no longer visible. haha.
Edit: I modified my initial impressions of the Jade 2's before and after the mods after spending more time with them and realizing some of my initial impressions may have been due more to extraneous variables and expectation bias, and less due to the Jade 2's themselves.
All impressions based on QA660 > AGD NFB7/M7 > AGD M8 Preamp > KGGG.
I picked up a used pair of Jade 2's (thanks SoundEQ!) based on the legendary status of the OG Jade as well as the halo effect of the Shangri-la senior system, which I preferred over the HE-1 when I was lucky to AB them for a good hour during a speaker event where these systems were not getting much attention. The reps were nice to let me pick my own music and go back and forth between the two systems.
My first impression of the Jade 2's was uneven. I just couldn't get a handle on their sound. I put together my system for versatility (warm v. bright, analytical v. euphonic, SS v. tubes, low v. high power) in order to neutralize or color my headphones based on my preference and mood. However, the Jade 2's sounded thin and bright on all configurations.
Based on the music, the sound ranged from unlistenable to the best I've heard of that particular track. Unlistenable as in tinny like those old thin-wired plastic computer speakers, and best I've heard as in the most transparent and resolving of any headphone in my collection, even beating out the Stax 009's.
While the Jade 2's certainly has its strengths with regard to transparency, resolution, separation, speed, effortlessness, PRAT, and extended non-fatiguing highs, but only on certain music,
- Hollow center stage. Sound is more solid left and right.
- Soundstage is huge, but lacks depth, as if the sound elements are on the same z-axis.
- Absence of sub-bass. Furthermore, there is some bass impact but it is somewhat one-note.
- At high volume, appears to lose some transparency.
Sounds tinny with some recordings.Edit: Realized tinniness was due to the Jade 2's revealing flaws in my system while it was warming up.- Forward upper mid-range made some music sound shouty.
- An overall lack of weight or density to the music, which makes them less engaging and unrealistic.
With disappointment, I felt compelled to make a choice between selling them off, or resigning myself to narrowly using them for simple vocal acoustic music. While mulling over this decision, I realized a few things that made me consider modding them:
- My intuition told me that the tinny sound I was hearing was not from the drivers but the plasticky build quality of its housing. IMO, hifiman has a track record of poor reflection control, the prime example being the HE-6's which improves significantly with mods.
- In his tear down of the Jade 2's, Spritzer mentioned that the bass tightened with him plugging up holes in the baffle.
- I remember Jerg adding shelf-lining to the outer grill of the HE1000's to solidify the center stage.
- From my experience taming the sub-bass of the OG Abyss, replacing the outer diffuser considerably lowered the sub-bass, which made me think the reverse could be true.
- Created my own diffuser by putting together two layers of shelf-lining so that there were no gaps. I placed the diffuser inside the protruding part of the outer grill.
- Plugged all the holes and gaps (there is a lot!) on both the inner and outer baffle with putty (e.g., bluetak). There was 10+ gaps to fill on each side. This made the coupling between the driver and housing more rigid.
No more tinny sound!Edit: Tinny sound returned after the mods but observed a pattern that it only occurs during initial part of my listening sessions, and goes away after my system warms up. My conclusion is that the very transparent nature of the Jade 2's is revealing of any flaws in recordings and systems.- Jerg was right, the center stage became more solid and soundstage became more coherent with the diffusers added to better control the back wave.
- Stock was already fast, and the mods made them even faster with zero blurring of the notes. The modded Jade 2's are now the fastest headphone in my collection, which adds an excitement and fun to the music.
- High volume no longer loses transparency.
- Increase in bass impact. Bass no longer sounds one note. I can now better hear the natural low pitch and tactility of instruments. Edit: Although mods improved bass quality, low frequency naturalness, resolution, and tactility still seem to fall short of my Z1R's when doing A/B comparisons.
No loss in transparency and resolution. I was surprised by this finding as I was expecting some trade-off.Edit: After more time with mods, it seems like there is a slight loss in transparency but they are still very transparent, on 009 level.- There appears to be a very slight increase in sub-bass but this may be expectation bias.
- Edit: The soundstage seems less open than before, but more coherent. Before, the soundstage was so open and spread out left and right but it is a bit more coherent now with better layering.
Edit: My impression of them being thin or lean may be due to me using the Z1R's as my primary headphone prior to the Jade 2's, which tends to have a thick and warm sound signature. After using the Jade 2's almost daily now, they no longer sound lean but just right. Not sure how much of this is brain burn-in.
IMO, I think the mods
This is pure speculation, but I wonder if Hifiman put world-class drivers in the Jade 2's but purposely crippled them with poor design to differentiate them from their more expensive electrostatic offerings. Secondly, given the spartan build-quality and packaging, as well as the DIY nature of the original Jade, I believe the Jade 2's beg for modifications to reach their true potential.
p.s. One downside is that the green/purple dust cover is no longer visible. haha.
Edit: I modified my initial impressions of the Jade 2's before and after the mods after spending more time with them and realizing some of my initial impressions may have been due more to extraneous variables and expectation bias, and less due to the Jade 2's themselves.
Last edited:
BoyNamedSue
100+ Head-Fier
- Joined
- Sep 7, 2010
- Posts
- 497
- Likes
- 453
Edit: Disclaimer, this mod is NOT reversible as attempts to remove the blutak will strip away the dust cover, which I learned the hard way. I am keeping my post though to document my trial and error process.
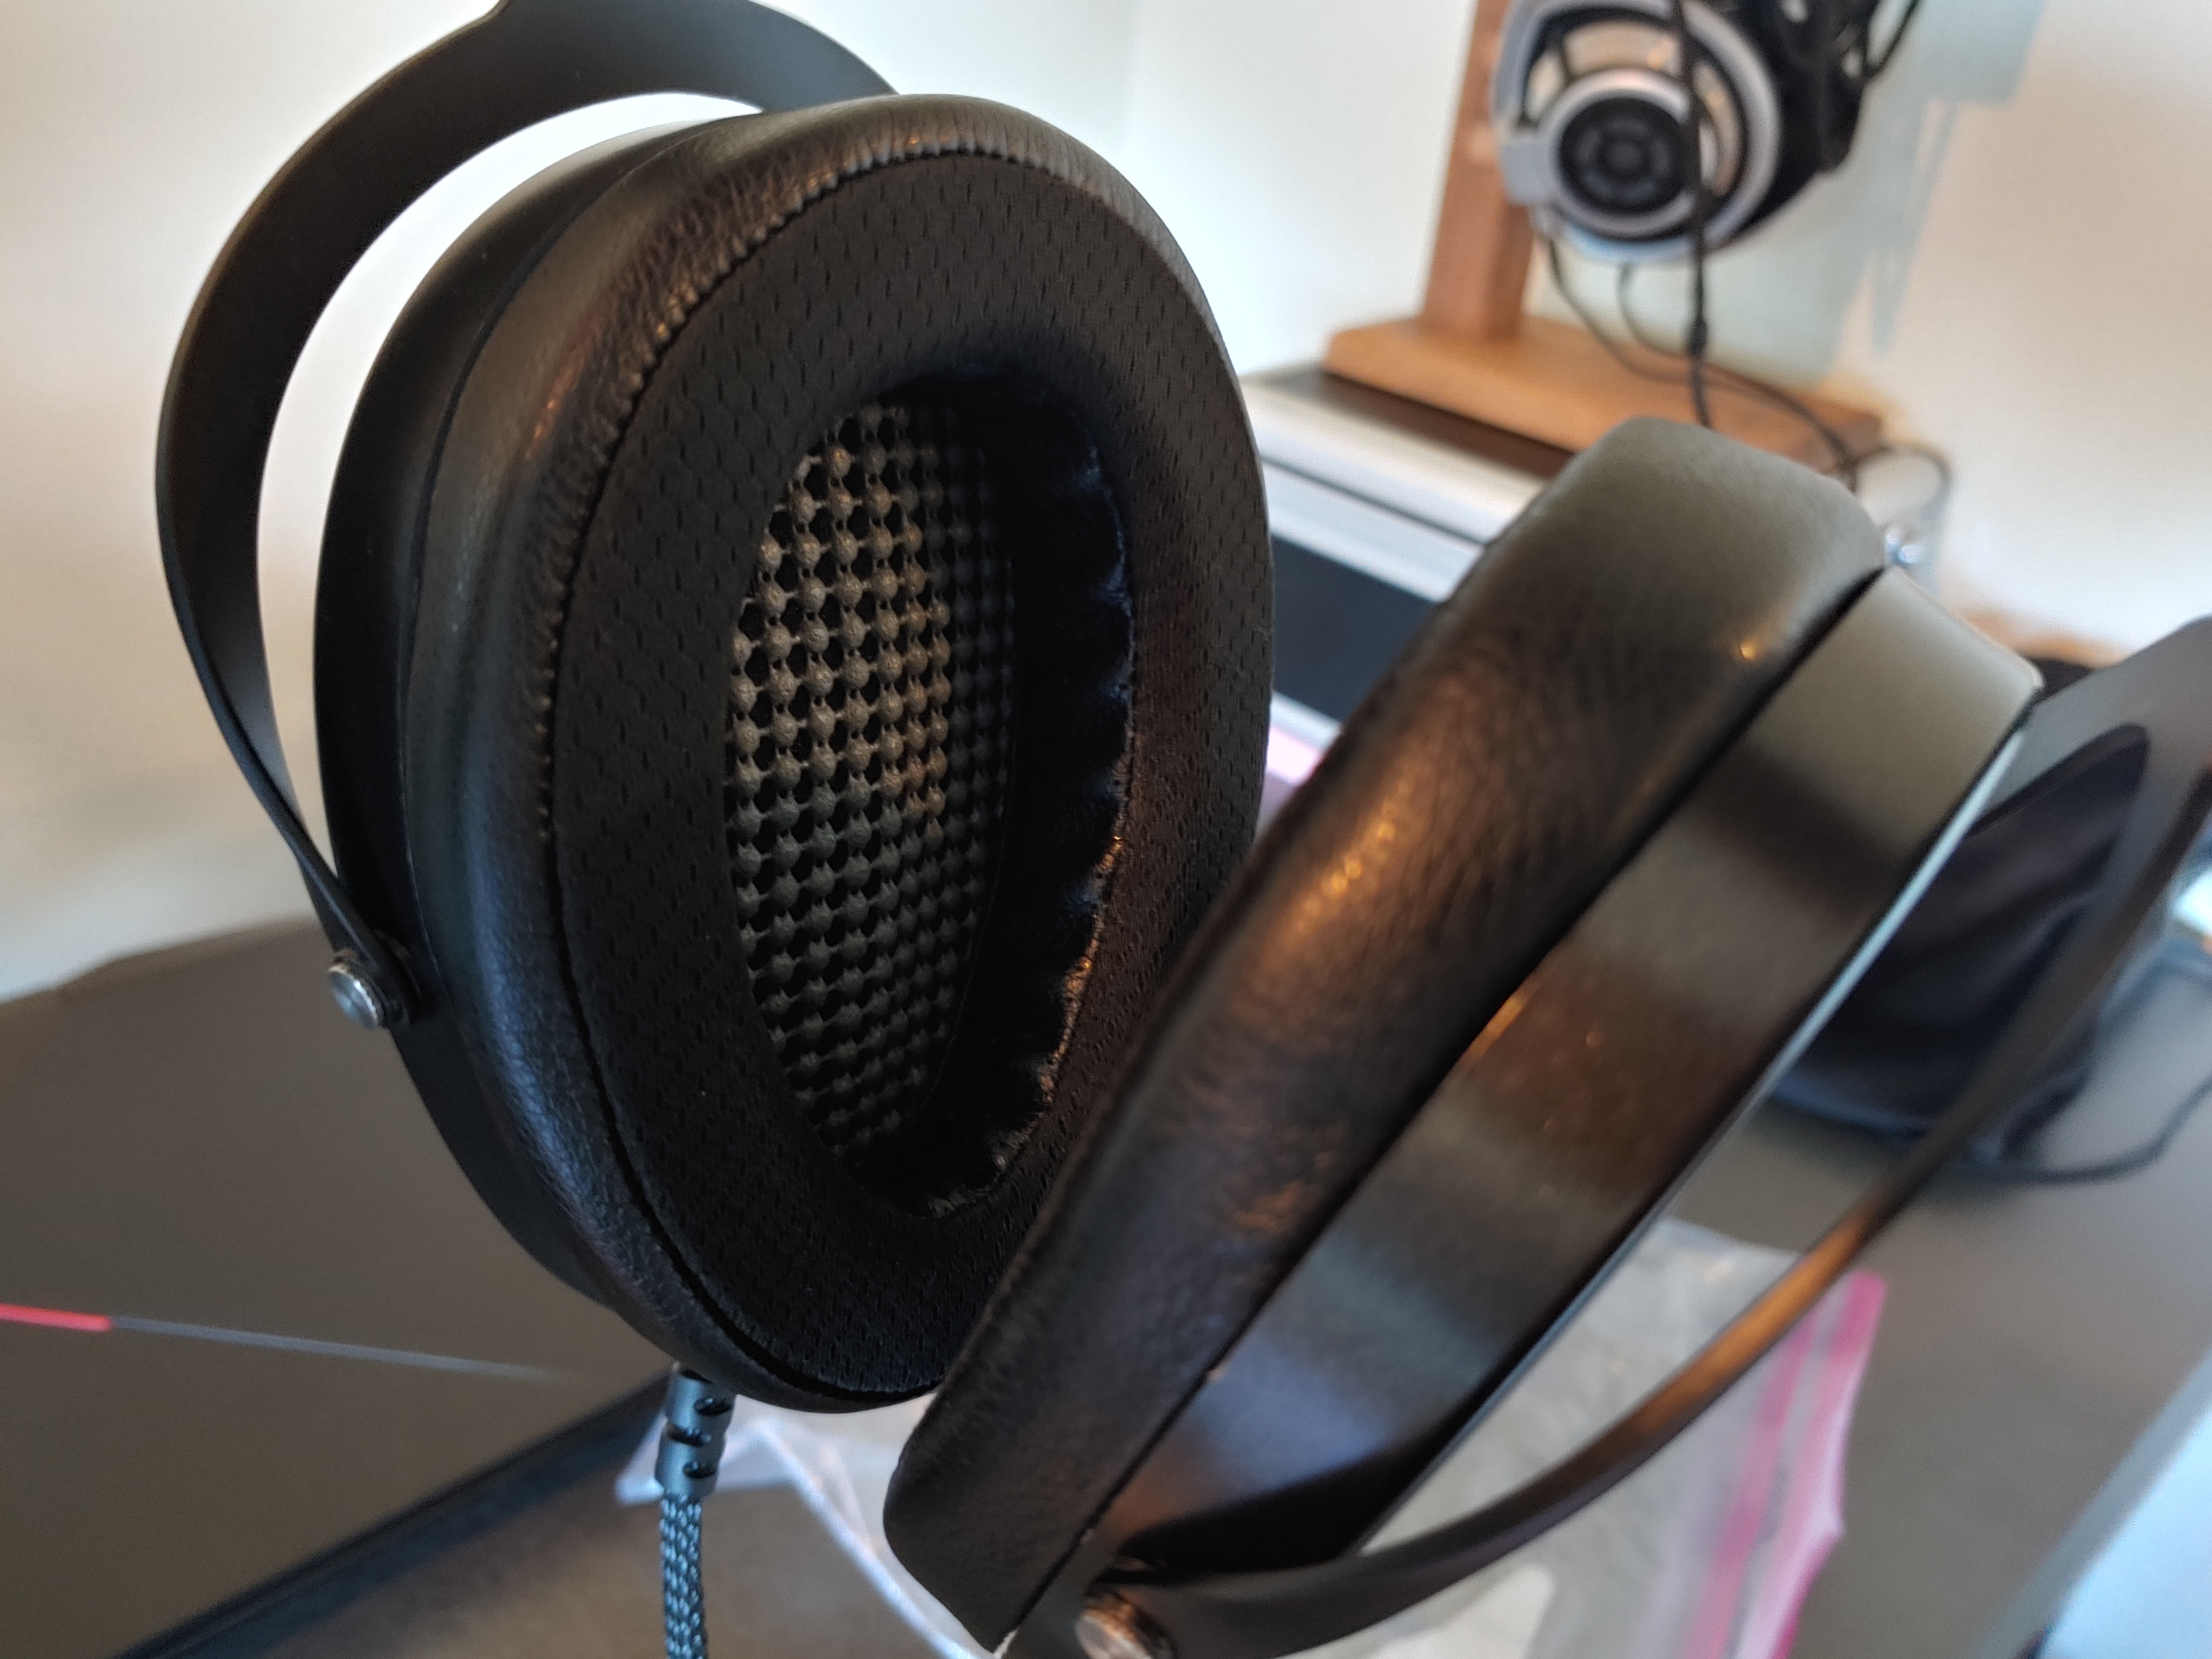
Here is a step-by-step of the mods. Please note I am an amateur and not technically savvy, so I probably won't be able to help much if others need help. The mods are merely parrotting what other's have done with other Hifiman headphones. Members like Jerg or Ohgourami may be better resources. Obviously, I take no responsibility if mods damage your pair. Please be very careful when handling the drivers. I wore plastic gloves whenever I handled the drivers as I heard somewhere the oil from our hands can have a degrading effect. Unfortunately, I didn't take any pictures while doing the mods.
1. Remove earpads using a credit card into the gaps. Once a section is open, its easy to use your finger to pry out the rest of ear pad.
2. Unscrew screws from inner baffle (not sure if this is correct term). Be careful not to strip screws. Pry out the inner baffle by sticking small screw driver into vacant screw holes all around until baffle starts coming out.
3. Carefully pull out driver and place to side, like with Spritzer did in the HC thread. Be care of the wires! I didn't remove the cups from the frame assembly so it was a bit challenging to avoid the other side from touching the driver. There is a dust cover but it looks flimsy, so I slid the drivers into a ziplock plastic bag for extra protection while I was doing the mods.
4. Remove the outer baffle.
5. Remove the outer grill and cut out two layers of shelf-lining shaped according to the inner protruding oval area of the outer grill. Position the two layers so that there are no gaps, the look should look like those diffusers used in room treatments. I purchased the smallest size shelf lining from homegoods ($3). Place diffuser into outer grill. I used non-adhesive shelf-lining but they should still stick to the frame. Put back diffuser/grill to headphone frame. I choose grey color shelf-lining but this is where can customize the color.
6. Put back the outer grill, and start filling the gaps/holes with putty. I used museum putty I had on hand, but bluetak should also work. There were three main areas that I filled, the left and right where the screw inlets are, and the bottom gap where the cables are.
7. Carefully return the driver into housing.
8. Before returning the inner baffle, apply the putty to the driver facing side of the inner baffle. There are tabs that affix itself to the driver. Place putty on the other side of the tabs, as well as all other gaps/holes. Return the inner baffle, and remove any excess putty that leaks out from the cracks.
9. Screw in screws.
10. Put back ear pads. I just stuck them together, putting some finger pressure from side of earpad downward until I started click sounds.
11. Enjoy!
Last edited:
Here is a step-by-step of the mods. Please note I am an amateur and not technically savvy, so I probably won't be able to help much if others need help. The mods are merely parrotting what other's have done with other Hifiman headphones. Members like Jerg or Ohgourami may be better resources. Obviously, I take no responsibility if mods damage your pair. Please be very careful when handling the drivers. I wore plastic gloves whenever I handled the drivers as I heard somewhere the oil from our hands can have a degrading effect. Unfortunately, I didn't take any pictures while doing the mods.
1. Remove earpads using a credit card into the gaps. Once a section is open, its easy to use your finger to pry out the rest of ear pad.
2. Unscrew screws from inner baffle (not sure if this is correct term). Be careful not to strip screws. Pry out the inner baffle by sticking small screw driver into vacant screw holes all around until baffle starts coming out.
3. Carefully pull out driver and place to side, like with Spritzer did in the HC thread. Be care of the wires! I didn't remove the cups from the frame assembly so it was a bit challenging to avoid the other side from touching the driver. There is a dust cover but it looks flimsy, so I slid the drivers into a ziplock plastic bag for extra protection while I was doing the mods.
4. Remove the outer baffle.
5. Remove the outer grill and cut out two layers of shelf-lining shaped according to the inner protruding oval area of the outer grill. Position the two layers so that there are no gaps, the look should look like those diffusers used in room treatments. I purchased the smallest size shelf lining from homegoods ($3). Place diffuser into outer grill. I used non-adhesive shelf-lining but they should still stick to the frame. Put back diffuser/grill to headphone frame. I choose grey color shelf-lining but this is where can customize the color.
6. Put back the outer grill, and start filling the gaps/holes with putty. I used museum putty I had on hand, but bluetak should also work. There were three main areas that I filled, the left and right where the screw inlets are, and the bottom gap where the cables are.
7. Carefully return the driver into housing.
8. Before returning the inner baffle, apply the putty to the driver facing side of the inner baffle. There are tabs that affix itself to the driver. Place putty on the other side of the tabs, as well as all other gaps/holes. Return the inner baffle, and remove any excess putty that leaks out from the cracks.
9. Screw in screws.
10. Put back ear pads. I just stuck them together, putting some finger pressure from side of earpad downward until I started click sounds.
11. Enjoy!
this is interesting. would u be able the.pre and post mod photos so.we can see the mods. thanks
BoyNamedSue
100+ Head-Fier
- Joined
- Sep 7, 2010
- Posts
- 497
- Likes
- 453
Here are some pics. Unfortunately, I didn't take pictures while I was doing the mod so don't have any internals. Sorry! I'm reluctant to open them up as everything got sandwiched together and taking them apart would probably require me to re-apply the mod. The best I can do is reference Spritzer's pic of the "inner baffle" where I applied putty to areas with red circles. There were still some small gaps around the screw holes and the thin border around the driver, but I decided not to do those given the extra time/effort, and didn't want to impede the screws going in. I also applied putty to the gaps between the grill and the "outer baffle" but I couldn't find a pic of that one. However, you can see a little of the bluetak in my external pic.


BoyNamedSue
100+ Head-Fier
- Joined
- Sep 7, 2010
- Posts
- 497
- Likes
- 453
This is Spritzer's quote from HC: " Also there was a small port on the cable entry which I plugged. There are also holes next to the swivel axis so I plugged those too. A small improvement to the bass or it was due to the cable... not sure. Need to do more testing." It looks like he didn't fill up as many holes as I did but he also observed an improvement in bass.
Users who are viewing this thread
Total: 2 (members: 0, guests: 2)
