DIY Earbuds
Jun 26, 2020 at 10:19 AM Post #1,921 of 4,718
Thanks @Slater, will definitely use that on other works but is Aspilet gonna work? Not really sure tho, I might buy some actual aspirin next time.

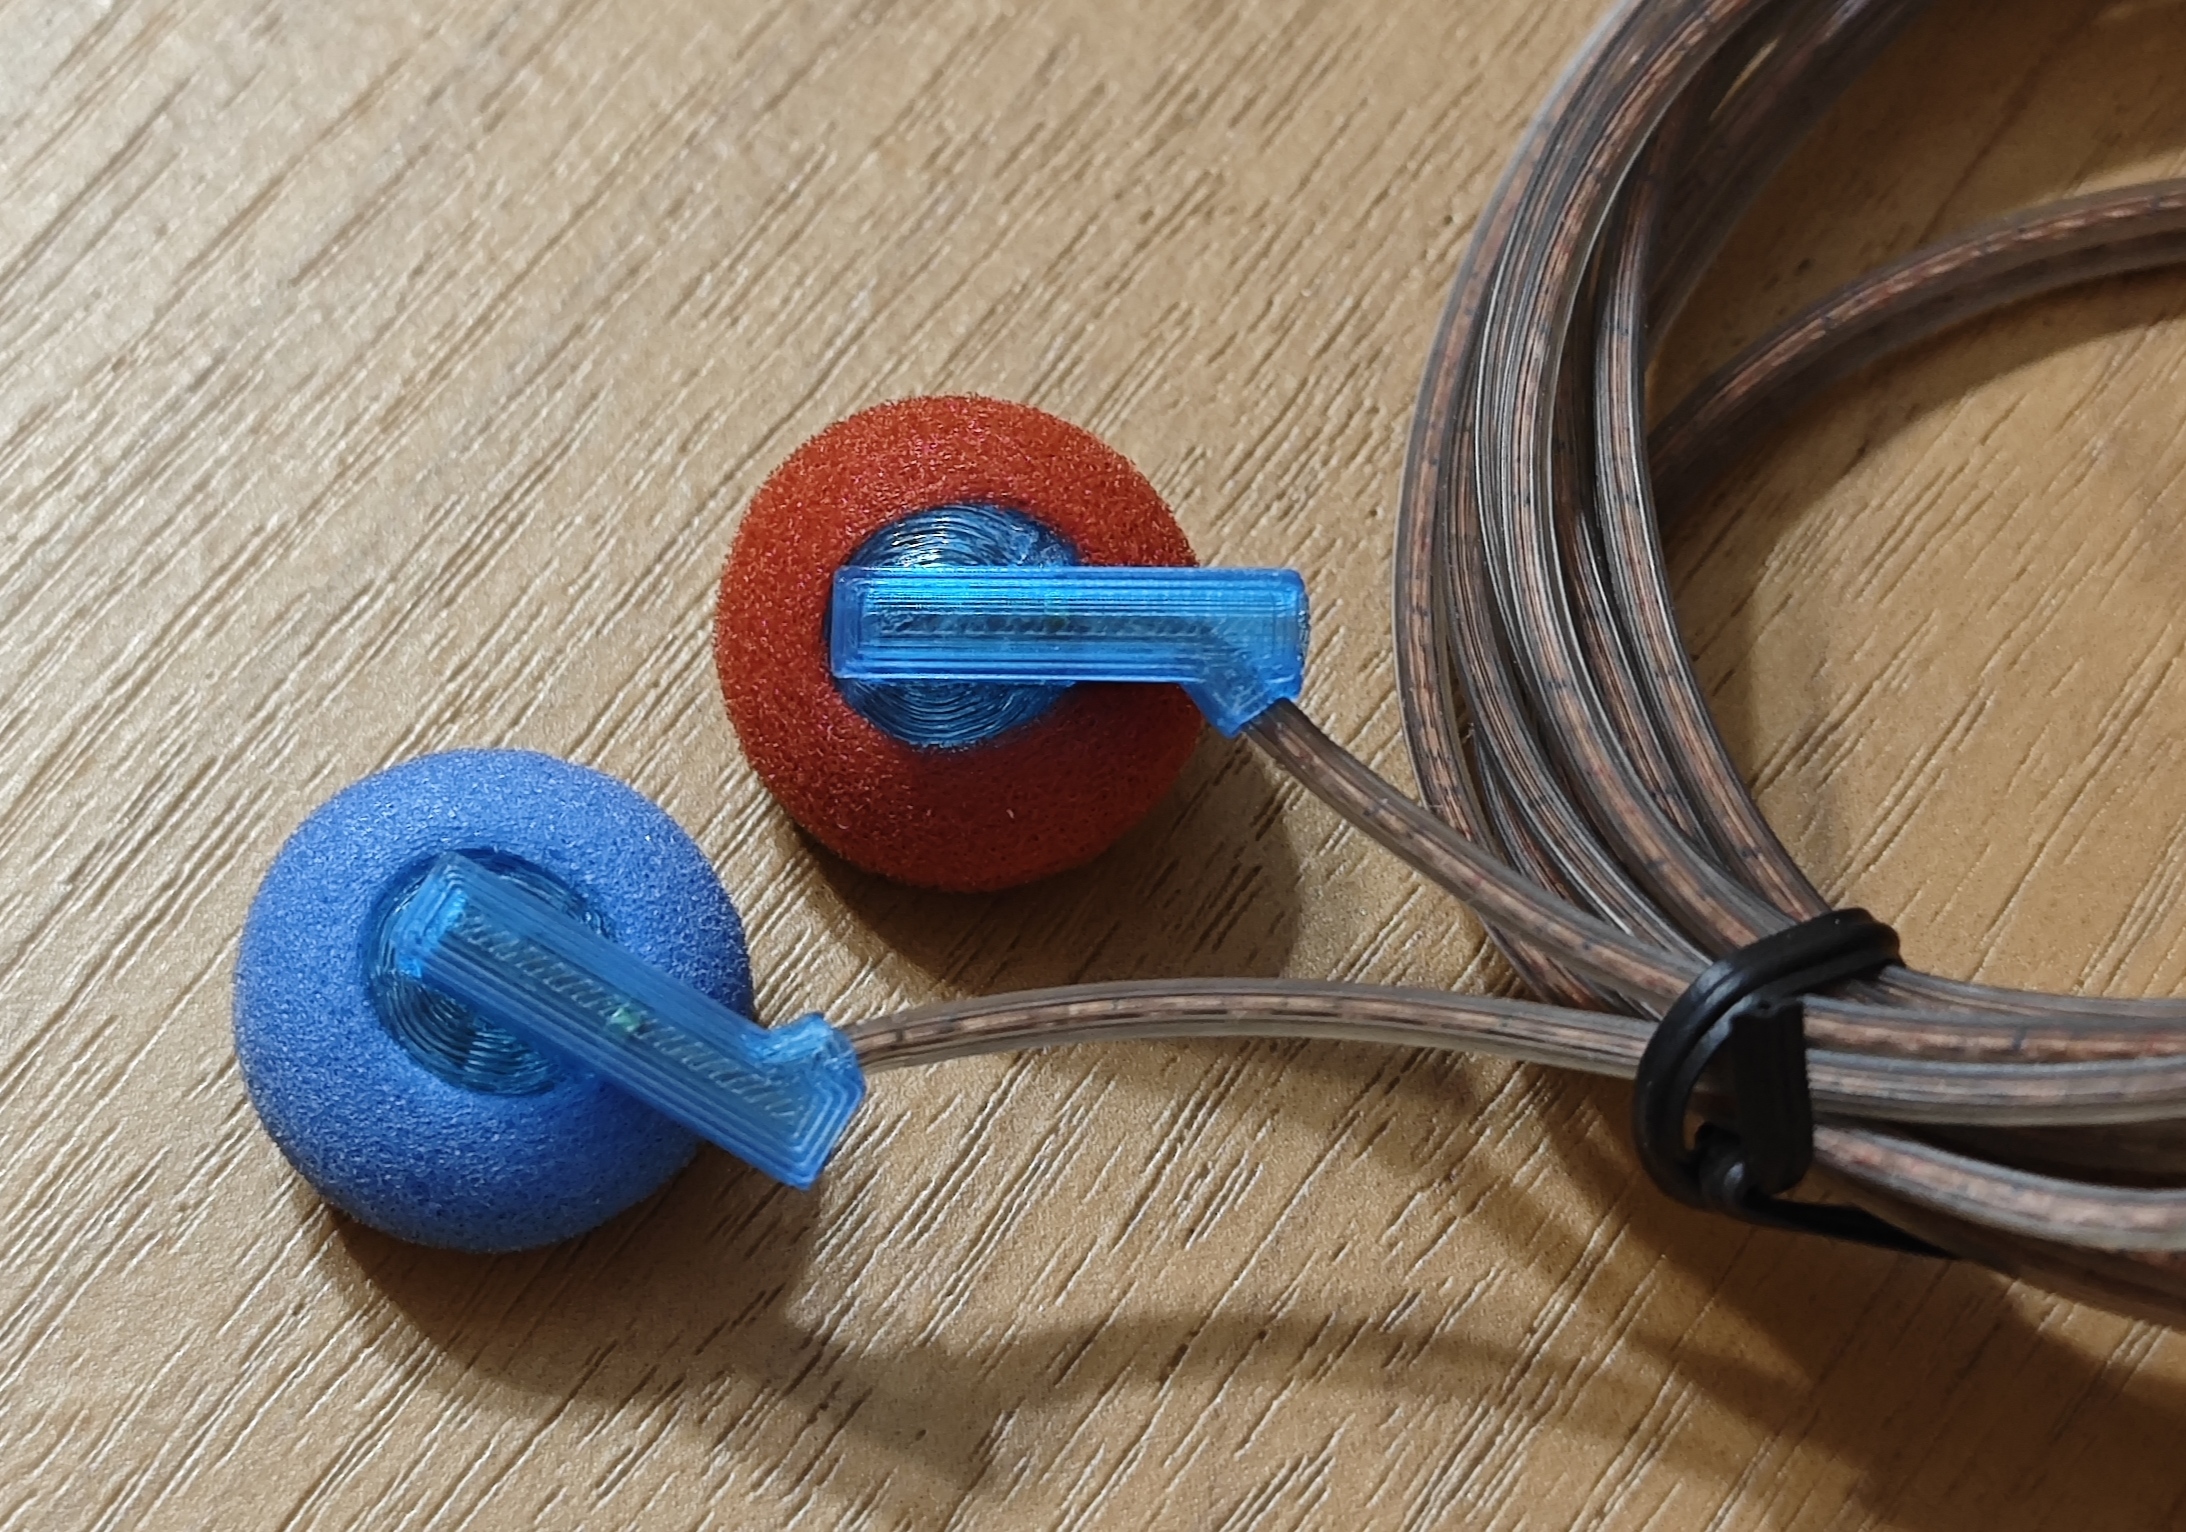
@jayeyeanne btw I found out how the wiring for the kz mic cable actually works:
So basically, the ones with the red core with the wrapped copper wire was actually for the drivers only (red core for pos, copper for gnd), I think KZ was still attaching the blue core wires that seemingly only hooks up on mic controls just for aesthetic and consistency reasons, as if their cables wasn't ugly enough lol, it managed to piss me off just figuring out and somehow just by prying open the mic controls I found out about it. Could've done that earlier and now my split length is short thanks to various wire stripping lol.
IMG_20200626_172753.jpg
IMG_20200626_172739.jpg
 
Last edited:
Jun 26, 2020 at 12:26 PM Post #1,922 of 4,718
Thanks @Slater, will definitely use that on other works but is Aspilet gonna work? Not really sure tho, I might buy some actual aspirin next time.

It’s gotta be plain, regular old school aspirin. I buy the cheapest, most generic stuff possible. It’s not even a dollar for a big bottle. I only use it for soldering.
 
Jun 26, 2020 at 9:24 PM Post #1,923 of 4,718
In relation to enamel wire soldering with aspirin; I found the 75 comments at the back this 2016 hackaday article quite interesting/amusing.

Iron Tips: Soldering Headphones And Enamel Wire

I might try some of the ideas. Btw, I use the lighter method but it's messy.
 
Last edited:
Jun 26, 2020 at 11:11 PM Post #1,924 of 4,718
In relation to enamel wire soldering with aspirin; I found the 75 comments at the back this 2016 hackaday article quite interesting/amusing.

Iron Tips: Soldering Headphones And Enamel Wire

I might try some of the ideas. Btw, I use the lighter method but it's messy.

I never really had luck with a lighter. Always left behind too much oxidation. I saw that comment about the alcohol dip to remove the oxidation; perhaps I’ll give that a try next time and see if it’s worthwhile.

The aspirin method definitely causes some noxious fumes. I remember the first time I ever tried it, I unknowingly got a big whiff of the fumes and about passed out lol. It works awesome though.

The easiest way by far is to use a solder pot, but unless I work in a factory tinning enameled wire all day, I’m not going to mess with waiting on a solder pot.
 
Last edited:
Jun 27, 2020 at 12:52 AM Post #1,925 of 4,718
I never really had luck with a lighter. Always left behind too much oxidation. I saw that comment about the alcohol dip to remove the oxidation; perhaps I’ll give that a try next time and see if it’s worthwhile.
The aspirin method definitely causes some noxious fumes. I remember the first time I ever tried it, I unknowingly got a big whiff of the fumes and about passed out lol. It works awesome though.
The easiest way by far is to use a solder pot, but unless I work in a factory tinning enameled wire all day, I’m not going to mess with waiting on a solder pot.
None of the stuff related to soldering is truly safe anyway. From solder burns to singed hair (fingers, eyebrow). Nothing a tube of Savlon didn't fix. And have a fan blowing, ALWAYS! I very nearly bought a solder pot once just for melting wire enamel - but thought that was going too far! :)

For the lighter method that I do: Have a deft hand, and do it under very bright lights to see the goop melting and exposing the copper - and stop immediately. And don't singe your eyebrow!!!. I use pre-injection medical alcohol swab to clean it up. But it is always messy, and I'm never happy with whatever solder joint I make with it. Will try the asprin method next time I do another earphone wire.
 
Jun 27, 2020 at 1:05 AM Post #1,926 of 4,718
This is what I do.

Clamp the wire in a soldering heat sink with only 3-4mm sticking out.
I put a little flux on the end of the wire.
Get a ball of solder on the tip of the iron.
Then dip 1-2mm of the wire in the solder.

It melts, cleans and tins the ends. Plus it keeps the wire flexible near the ends, if you don't use a heat sink 5-8mm of the coating hardens and becomes way less flexible.
 
Jun 27, 2020 at 11:41 AM Post #1,927 of 4,718
Here's a DIY I did for another member by request. He had a couple pairs of NTT Docomo's he wanted MMCX converted.

Initial fit, not enough thread engagement for me to feel comfortable.
IMG_20200623_213443.jpg
IMG_20200623_213523.jpg

Took some more off the ends but only to the level of the end of the port/vent, to keep tuning changes minimal to none.
IMG_20200623_232417.jpg

Made wiring to length and tinned per my prior post :). Soldered connectors and drivers.
IMG_20200624_003410.jpg

Finished. Black housings are missing vent foam, so you can see the backside of the driver and the wires through the vents. It's to be transferred from another set by the owner when they arrive.

IMG_20200624_010241.jpg
 
Jun 27, 2020 at 1:41 PM Post #1,928 of 4,718
Here's a DIY I did for another member by request. He had a couple pairs of NTT Docomo's he wanted MMCX converted.

Initial fit, not enough thread engagement for me to feel comfortable.


Took some more off the ends but only to the level of the end of the port/vent, to keep tuning changes minimal to none.


Made wiring to length and tinned per my prior post :). Soldered connectors and drivers.


Finished. Black housings are missing vent foam, so you can see the backside of the driver and the wires through the vents. It's to be transferred from another set by the owner when they arrive.


Thanks, @assassin10000.

I can only solder the driver, but everyone in the DIY Earbuds thread here, nice to meet you all.

NTT Docomo earbuds are the best earbuds for me. And I wanted to re-cable them and try more, so I asked him to convert two sets of NTT Docomo earbuds to be MMCXed.
I heard from him that he finished this work only in 5 hours!

They haven't arrived to me yet, but the pics look perfect.
I'm going to switch to various cables and enjoy them.
 
Last edited:
Jun 28, 2020 at 2:56 AM Post #1,929 of 4,718
I'll probably try those 150ohms then :) The photos are somewhat confusing on that listing at cklewis, I suppose this is the same and the pics here show how it looks in real life, isn't it? https://www.aliexpress.com/item/32979616405.html
Hi robar, did you end up buying this 150 Ohm driver? Please tell me what you think, especially compared to (our) favorite 19-21 32 Ohm driver. Thank you.
 
Last edited:
Jun 28, 2020 at 4:44 AM Post #1,930 of 4,718
I've been making my own cables for a while and took a punt on some cheap earbuds during the most recent AE sale. Picked up some pre-wired MMCX sockets too.

Here are my first efforts:

IMG_20200628_090339.jpg


The Vidos were first as a practice run as I don't mind the sound but the MX shells are a little too bulky for my ears. With a balanced SPC, the sound is a lot brighter but has a good soundstage. I'll try double foams and/or a balanced copper cable later on.

The B40s are a better fit in my ears and again sound a lot clearer with a balanced SPC cable. I didn't want to bore out the port too much as I wanted to keep the side markings. I should have sanded off the bottom but didn't feel like it. The MMCX sockets I bought were relatively long but narrow.

Rather than wait for new PK shells to be delivered I've ordered some Nokia HS23 to mod (I understand they might be PK type shells?) and also a pair of Nokia WH108 which are bell-type and might suit me. Still waiting for some RY4S (probably redundant for me due to the MX shell) and Edifier H180s.

***PICTURE WARNING*** Could anyone help with telling me how big the driver is in this very old pair of Sony earbuds? I do not have a model number. I reckon it is 16mm but I do not have a very accurate tape measure. I'd like to transplant them into a PK shell if possible. Sorry about the state of them, they have been in a box for at least 15 years. They work fine but now I'm in a modding mood.....

IMG_20200628_090617.jpg
 
Jun 28, 2020 at 7:57 AM Post #1,931 of 4,718
Hi robar, thanks very much for your inspiration as well. You brought a fine point of 'aligning' the levels at 1kHz. It does make them easier to compare. Sorry I mistype it 'normalizing' on the first graph, this is the same one from the previous post, just aligned at 1kHz. I modified the mounting a little bit to allow hands-free measurement, and came with the the second graph. In real life, subjectively, the full foam does not sound as dark as the graph would suggest. I'm trying to standardize my method now: (1) have a SPL 50dB scale, (2) align 1kHz at 50dB, I think they make it much nicer to see and easier to interpret.
Hi Friends, especially @robar and @GREQ -
I think I've successfully gotten rid of the excessive hump around 2-4kHz on my previous posts. I still use the V7 as the baseline, and note that I include my measurement from two months ago, which is fairly consistent with the new measurement, so that's a good thing. I took three measurements for each earbuds and show the averages only.

Traceless is from NiceHCK: https://bit.ly/3g2Ruf9
Clear Blue is my own creation: https://willyboy.home.blog/2020/06/27/clear-blue-diy-earbuds/

Any comment and input are welcome. Thanks!
Sabia V7, Traceless, Clear Blue - Full Foam.jpg
 
Last edited:
Jun 28, 2020 at 8:19 AM Post #1,932 of 4,718
Hi Friends, especially @robar and @GREQ -
I think I've successfully gotten rid of the excessive hump around 2-4kHz on my previous posts. I still use the V7 as the baseline, and note that I include my measurement from two months ago, which is fairly consistent with the new measurement, so that's a good thing. I took three measurements for each earbuds and show the averages only.

Traceless is from NiceHCK: https://bit.ly/3g2Ruf9
Clear Blue is my own creation: https://willyboy.home.blog/2020/06/27/clear-blue-diy-earbuds/

Any comment and input are welcome. Thanks!
Sabia V7, Traceless, Clear Blue - Full Foam.jpg
That's looking great now!
 
Jun 28, 2020 at 9:53 AM Post #1,933 of 4,718
...

***PICTURE WARNING*** Could anyone help with telling me how big the driver is in this very old pair of Sony earbuds? I do not have a model number. I reckon it is 16mm but I do not have a very accurate tape measure. I'd like to transplant them into a PK shell if possible. Sorry about the state of them, they have been in a box for at least 15 years. They work fine but now I'm in a modding mood.....

IMG_20200628_090617.jpg

About the very old pair of Sony earbuds.
First of all, I think that the model number is written small on the branch part of the cable or the plug part.
If you can find the model number and find it on the site below, or a similar model number, the size of the diaphragm is also listed.
http://20cheaddatebase.web.fc2.com/SONY/sonyindex.html
 
Jun 28, 2020 at 11:35 AM Post #1,934 of 4,718
About the very old pair of Sony earbuds.
First of all, I think that the model number is written small on the branch part of the cable or the plug part.
If you can find the model number and find it on the site below, or a similar model number, the size of the diaphragm is also listed.
http://20cheaddatebase.web.fc2.com/SONY/sonyindex.html
Thank you very much sir/ madam! I put on my loupes and there it was, on the splitter - MDR-ED21.

The closest on the website database is an MDR-ED238 with a 16mm driver.

Next question - are there any shells that would accommodate this driver?
 
Jun 28, 2020 at 1:07 PM Post #1,935 of 4,718
Thank you very much sir/ madam! I put on my loupes and there it was, on the splitter - MDR-ED21.

The closest on the website database is an MDR-ED238 with a 16mm driver.

Next question - are there any shells that would accommodate this driver?

I confirmed that there is "16 mm driver units" in the product description on amazon.com below.
https://www.amazon.com/Sony-MDR-ED21LP-Fontopia-In-The-Ear-Headphones/dp/B000094Q77

Next, regarding the shell for the 16mm driver, I found only the set with the driver as shown below.
https://www.aliexpress.com/i/33027019235.html
It is unknown if it is possible to negotiate with the store owner.

Or maybe anyone else on this thread knows!
 

Users who are viewing this thread

Back
Top