Casework: Share Your DIY Enclosures
Jun 30, 2009 at 7:29 AM Post #286 of 400
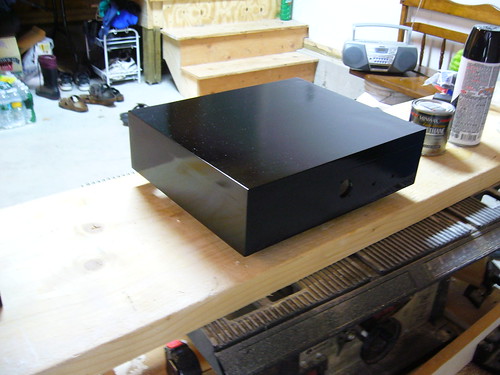
gychang, kuroguy and rshuck are correct, key is to sand the surface well then apply several light coats of sandable primer from the automotive dept., let dry completely then sand some more with finer grit. Remove all dust completely before spraying with few light coats of paint.

Note that all canned spray paint lose their sheen after a while, so top coat the finish with poly/varathane as your final step. It also protects the surface from dings and scratches.
 
Jul 4, 2009 at 5:22 PM Post #287 of 400
3687813450_ded136544b.jpg


First real woodworking and I think its coming out ok. Gloss black paint on poplar. This is after the first coat of polyurethane. Naturally, it got dusty...
 
Jul 5, 2009 at 8:45 AM Post #288 of 400
Lookin good emooze, thanks fo sharing. Any learnings from the case build? If dust is a problem, have you tried using those 'quick-dry' poly spray so that dust do not have a chance to settle? Also once fully dry, you should try buffing and smooth the surface then lay some more light coats.

BTW, what is the case going to house?
 
Jul 6, 2009 at 1:36 AM Post #289 of 400
I'm learning i need some better saws and clamps to make better joins for corners. The dust was an issue because for the first time in a month it was hot in my area and I had the garage doors open... Fixed it with a quick sanding and relocation. I've been lightly sanding every 2 light coats. Gonna let it cure for a week or more too before any final polishing.

My M3 and Sigma 11 are going inside.
 
Jul 6, 2009 at 12:27 PM Post #292 of 400
zkool,
How did you cut that hole for the panel meters? It looks perfect, even at the corners. Cutting inside rectangles is at best, difficult for me.
 
Jul 6, 2009 at 1:42 PM Post #293 of 400
my CK2III/preamp/y-1 DAC. the second pic is with the matching Gainclone.

brushed aluminum flanked with tung-oiled cherry.

i wish i had a better camera. the cherry turned out quite nice. i use a liberal first coat, sand with 320, wipe with paint thinner to remove the dust, 3 more coats of tung-oil, then a final sand of 0000 steel wool.

 
Jul 6, 2009 at 3:17 PM Post #294 of 400
fishski, that is a fantastic looking case. I really like the switches. Would you mind posting a pic or two of the amp wit the cover off? I want to see how you put the aluminum part of the case together as I am thinking of doing something similar soon.
 
Jul 6, 2009 at 3:59 PM Post #295 of 400
hey fishski, you already know how I feel about your polished aluminum work -- another great build. I don't think I've seen it yet but when do you plan to unveil the Bijou? I'm sure it'll look as amazing as your previous work with the tubes hangin out from the top.

Btw, Happy Birthday!

Quote:

Originally Posted by kuroguy /img/forum/go_quote.gif
zkool, How did you cut that hole for the panel meters? It looks perfect, even at the corners. Cutting inside rectangles is at best, difficult for me.


Actually it wasn't as hard as I thought it would be. I used the router to cut the square followed by a heavy gauge exacto knife/blade to take the corners of. Final touch was to file smooth the edges -- it wasn't overly difficult but I did take my time doing it. Also perhaps I'm using MDF and not a hard wood that's why it wasn't as hard (?).

A scroll saw would've been the better option but sadly I don't own one.

mattcalf, lol!
tongue.gif
 
Jul 6, 2009 at 4:45 PM Post #296 of 400
Quote:

Originally Posted by tintin47 /img/forum/go_quote.gif
fishski, that is a fantastic looking case. I really like the switches. Would you mind posting a pic or two of the amp wit the cover off? I want to see how you put the aluminum part of the case together as I am thinking of doing something similar soon.


thanks.

scroll down to my post. also, check out the pic of the CK2III output transistors on the heatsink - you should be able to see the epoxied bolts on the inside of the wood sides:
http://www.head-fi.org/forums/f6/pos.../index353.html

next time i would use these instead of sinking and epoxying a bolt:#10-24 Steel Threaded Inserts, Steel, Threaded Inserts, Fasteners - McFeely's

and here's a naked shot of the Gainclone with a better view of the brackets:
http://www.head-fi.org/forums/f6/pos...ml#post5714033

measuring and cutting the brackets is time consuming, but allows me a little slop to secure everyting butts to nuts.
 
Jul 6, 2009 at 4:56 PM Post #297 of 400
zkool448;5823441 said:
hey fishski, you already know how I feel about your polished aluminum work -- another great build. I don't think I've seen it yet but when do you plan to unveil the Bijou? I'm sure it'll look as amazing as your previous work with the tubes hangin out from the top.

Btw, Happy Birthday!
QUOTE]

thanks.

nah, the Bijou is in a pre-fab Par-Metal chassis. i'm going with my orginal plan from last Oct whan i first started the Bijou and before i started DIYing enclosures - i'm getting a FPE face-plate like the rest of the FPE glamour guys/girls
wink.gif
. i'll grab my purse and leave now...

i'm cooking up something nice for my B22 chassis though. i just need to figure out the wood i want to use and get my router table up and running.

great thread guys
 
Jul 6, 2009 at 5:16 PM Post #298 of 400
Quote:

Originally Posted by zkool448 /img/forum/go_quote.gif
A scroll saw would've been the better option but sadly I don't own one.


I have one and find it terribly difficult to get perfectly straight lines, even with a fence on the scroll saw.

I've used a table saw before, but the length of the side of the rectangle needs to be near or greater than the diameter of the blade. Works ok with my mini table saw, but I'm usually working blind.

Do you use that nice router table to cut rectangles or do you make a template?
 
Jul 7, 2009 at 12:41 AM Post #299 of 400
Thanks. That is beautiful work.
 
Jul 7, 2009 at 1:24 AM Post #300 of 400
Quote:

Originally Posted by zkool448 /img/forum/go_quote.gif
hey fishski, you already know how I feel about your polished aluminum work -- another great build. I don't think I've seen it yet but when do you plan to unveil the Bijou? I'm sure it'll look as amazing as your previous work with the tubes hangin out from the top.

Btw, Happy Birthday!


Actually it wasn't as hard as I thought it would be. I used the router to cut the square followed by a heavy gauge exacto knife/blade to take the corners of. Final touch was to file smooth the edges -- it wasn't overly difficult but I did take my time doing it. Also perhaps I'm using MDF and not a hard wood that's why it wasn't as hard (?).

A scroll saw would've been the better option but sadly I don't own one.

mattcalf, lol!
tongue.gif


Man, that is some nice work!

Do you find MDF difficult to work with? I found it cuts easy, but, also chips easy if you are not careful. Any advice?

How are you going to finish it? (if you don't mind me asking)

Thanks

jk
 

Users who are viewing this thread

Back
Top