Thanks bala!
SOMiC EFi-82MT Detachable Cable Mod or A Quick and Dirty Hack... ")
This is not a very good instructional mod as it is posted by request after the conversion has been done.
There are no pictures for the later sections as the mod was already done and parts were removed.
If you have not taken the 82MT's apart before, they are a bit of a pain because of the spring mechanism's in the cups and arms. I have removed the spring from the cups and arms trying to lessen the creaking plastic noise which is my only problem with these wonderful headphones.
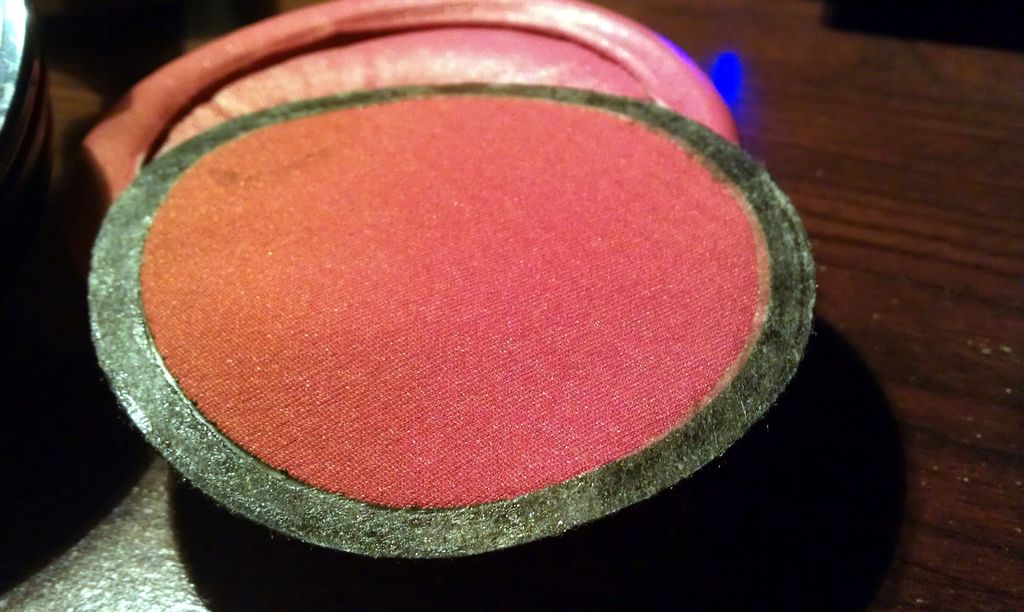
The ear pads just pull off very easily, put a finger in under the inside of the ear pad and pull up slowly. The red & black cloth filter is attached to the base with a double sided tape ring that goes all the way around, put a fingernail under one edge and carefully peel it away from the base.

 The screws on these headphones will strip very easily, so go easy with the torque when putting them back.
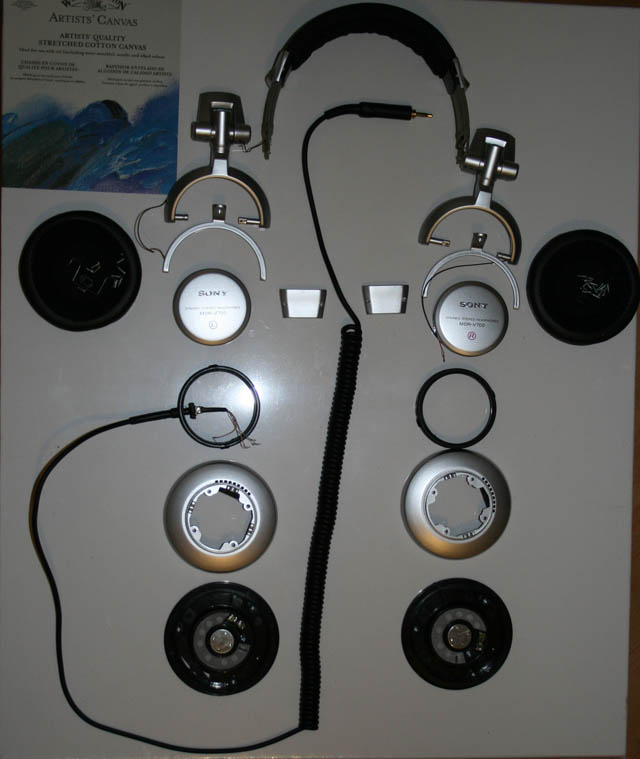
Once the filter is off remove the three Phillips screws holding the driver base to the cup.

Carefully lift off the base and lay it face down on your work area. Now is a good time to take a picture of the driver and the inside of the cup paying close attention to how the spring and white spacer is oriented (missing from my picture).

Unsolder the wires from the driver and set it aside, noting which wires went to each solder pad.
You will only need to unsolder the two outside pads as the two inner pads attach to the voice coil wires and you do not want to disturb them.
Remove the 4 visible screws holding the cup halves together.

Lift off the front cup half and remove the spring wire noting it's orientation and how it is installed. Separate the back part of the cup half and slide off the white spring cam from the fork pivot arm. Now you should basically have a fork with just the ring left.
The little wire that comes through the fork is going to the right side and needs to be disconnected from the headphone wire. Pull off the little piece of shrink tube from the pair of copper ground wires and unsolder these as well.
Cut the headphone wire on the outside of the ring below the rubber strain relief tube. Remove the tube and piece of wire from the ring.
What I did was remove the ring from the fork by pulling the arm with the wire running through it till it clears the ring. You will have to fish the wire through the hole as well and it can be a little tight getting the pivot out. Make sure you note the way the ring faces on the arm as it will go back together both ways.
Slide the ring away from the wire pivot carefully and slide if off the long spring pivot arm.
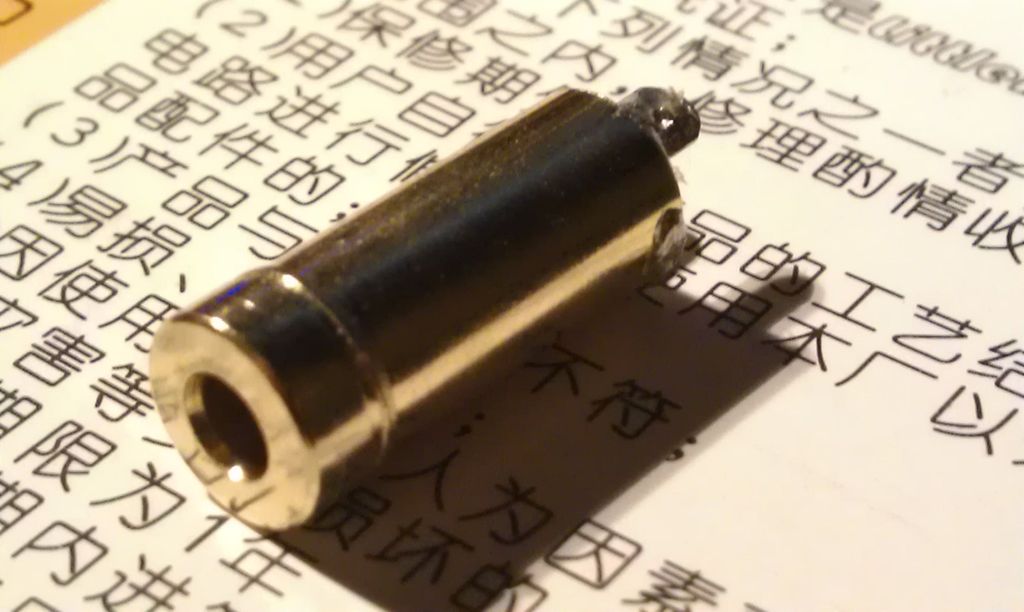
What I used was a re-purposed headphone extension cable jack, I just cut and peeled away the surrounding plastic and unsolder the wires. If you have a bought TRS jack you will have to check the size of the hole it needs vs the plastic wire tube on the ring. If threaded part of your jack fits through the hole all you need to do then is cut off the ring tube flush with the ring.
My TRS jack was larger than the ring tube so I used a drill from the other side by hand and expanded the headphone wire hole then trimmed off the remaining tube bits. The jack I use slides in from the outside till the shoulder is flush then you epoxy it in place.

JB Weld Kwik is the epoxy I use, you get 1 minute of mixing and 5 minutes or working time before it starts to harden.
The back part of the cup will require some plastic removed where you have installed your jack, you can just trim out the existing hole with a sharp knife, file, saw or whatever you use for plastic work.
Once the cup back and ring will go together nicely, it's time to put the ring back on the fork arm.
The front half of the cup has two of its screw hole's with a large flat area right next to the hole, these tabs are what hold the pivot spring in place, so you have to note this orientation.
It will also have three half round tang piece's, make sure you break off the one that worked as a lock for the old cable strain relief. This half round tang can be broken very easily off by grabbing it with pliers and bending towards the middle.
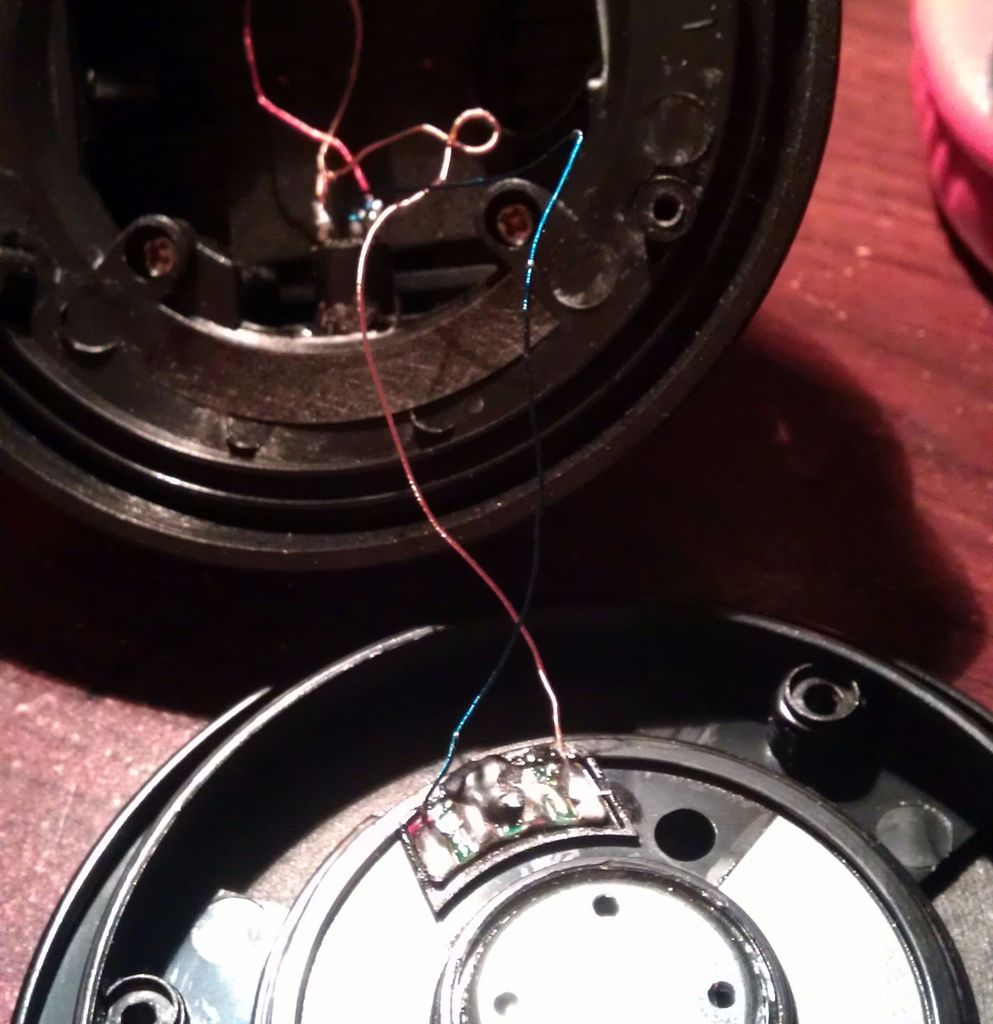
I pulled out 6 inches of the headphone cable wires from the cut off piece, I used the copper and blue ones.
These wires are enamel coated so you will have to scrape the enamel off carefully or get a big blob of solder on your iron and drag the end of the wire back and forth through the solder, this will melt off the enamel and tin the end.
Since my jack is repurposed it required an ohm meter to tell you which wires go where.
Once you have that figured out it's time to join the copper wire coming from the other cup to on end of the copper wire you salvaged, solder both of these end's to the ground on the TRS jack.
The red wire coming from the other cup will solder to the "Ring" connector on the TRS jack and the blue wire you salvaged will connect to the "Tip" connector.
Now it's time to put the spring cam and wire back together on the pivot arm and cup back.
With those in place fish your new copper / blue wires through the center of the front cup half and crew it back together making sure it is properly oriented. Solder the copper wire to the ground on your driver and the blue goes to the side with the red mark on it.
Now would be a good time to check the new jack by hooking up your replacement cable and playing some music.
If there is a problem then most likely a bad solder connection or not properly tinned wires as they are enameled.
Tuck all the wires back inside the cup and put the driver onto the cup noting the little up down arrow over one of the screw holes, this is the screw hole that goes next to the fork swivel at the top of the cup. These holes in the driver base are recessed on the back so the posts you put the screws in will line up. Basically with it properly in place you can't rotate the driver base left or right on the cup. If you can the it's not lined up with the posts.
Center the filter cloth on the cup in the same orientation as the other filter and press it down all round the edges.
Tuck an edge of the ear pad into the slot in the cup and work it back into place with a little pulling and rotating.
You now have a removable cable mod on your SOMiC EFi-MT82's...
And without knowing the skill level of future readers I tried to cover as many bases as I could, sorry if it got a little long in the tooth...