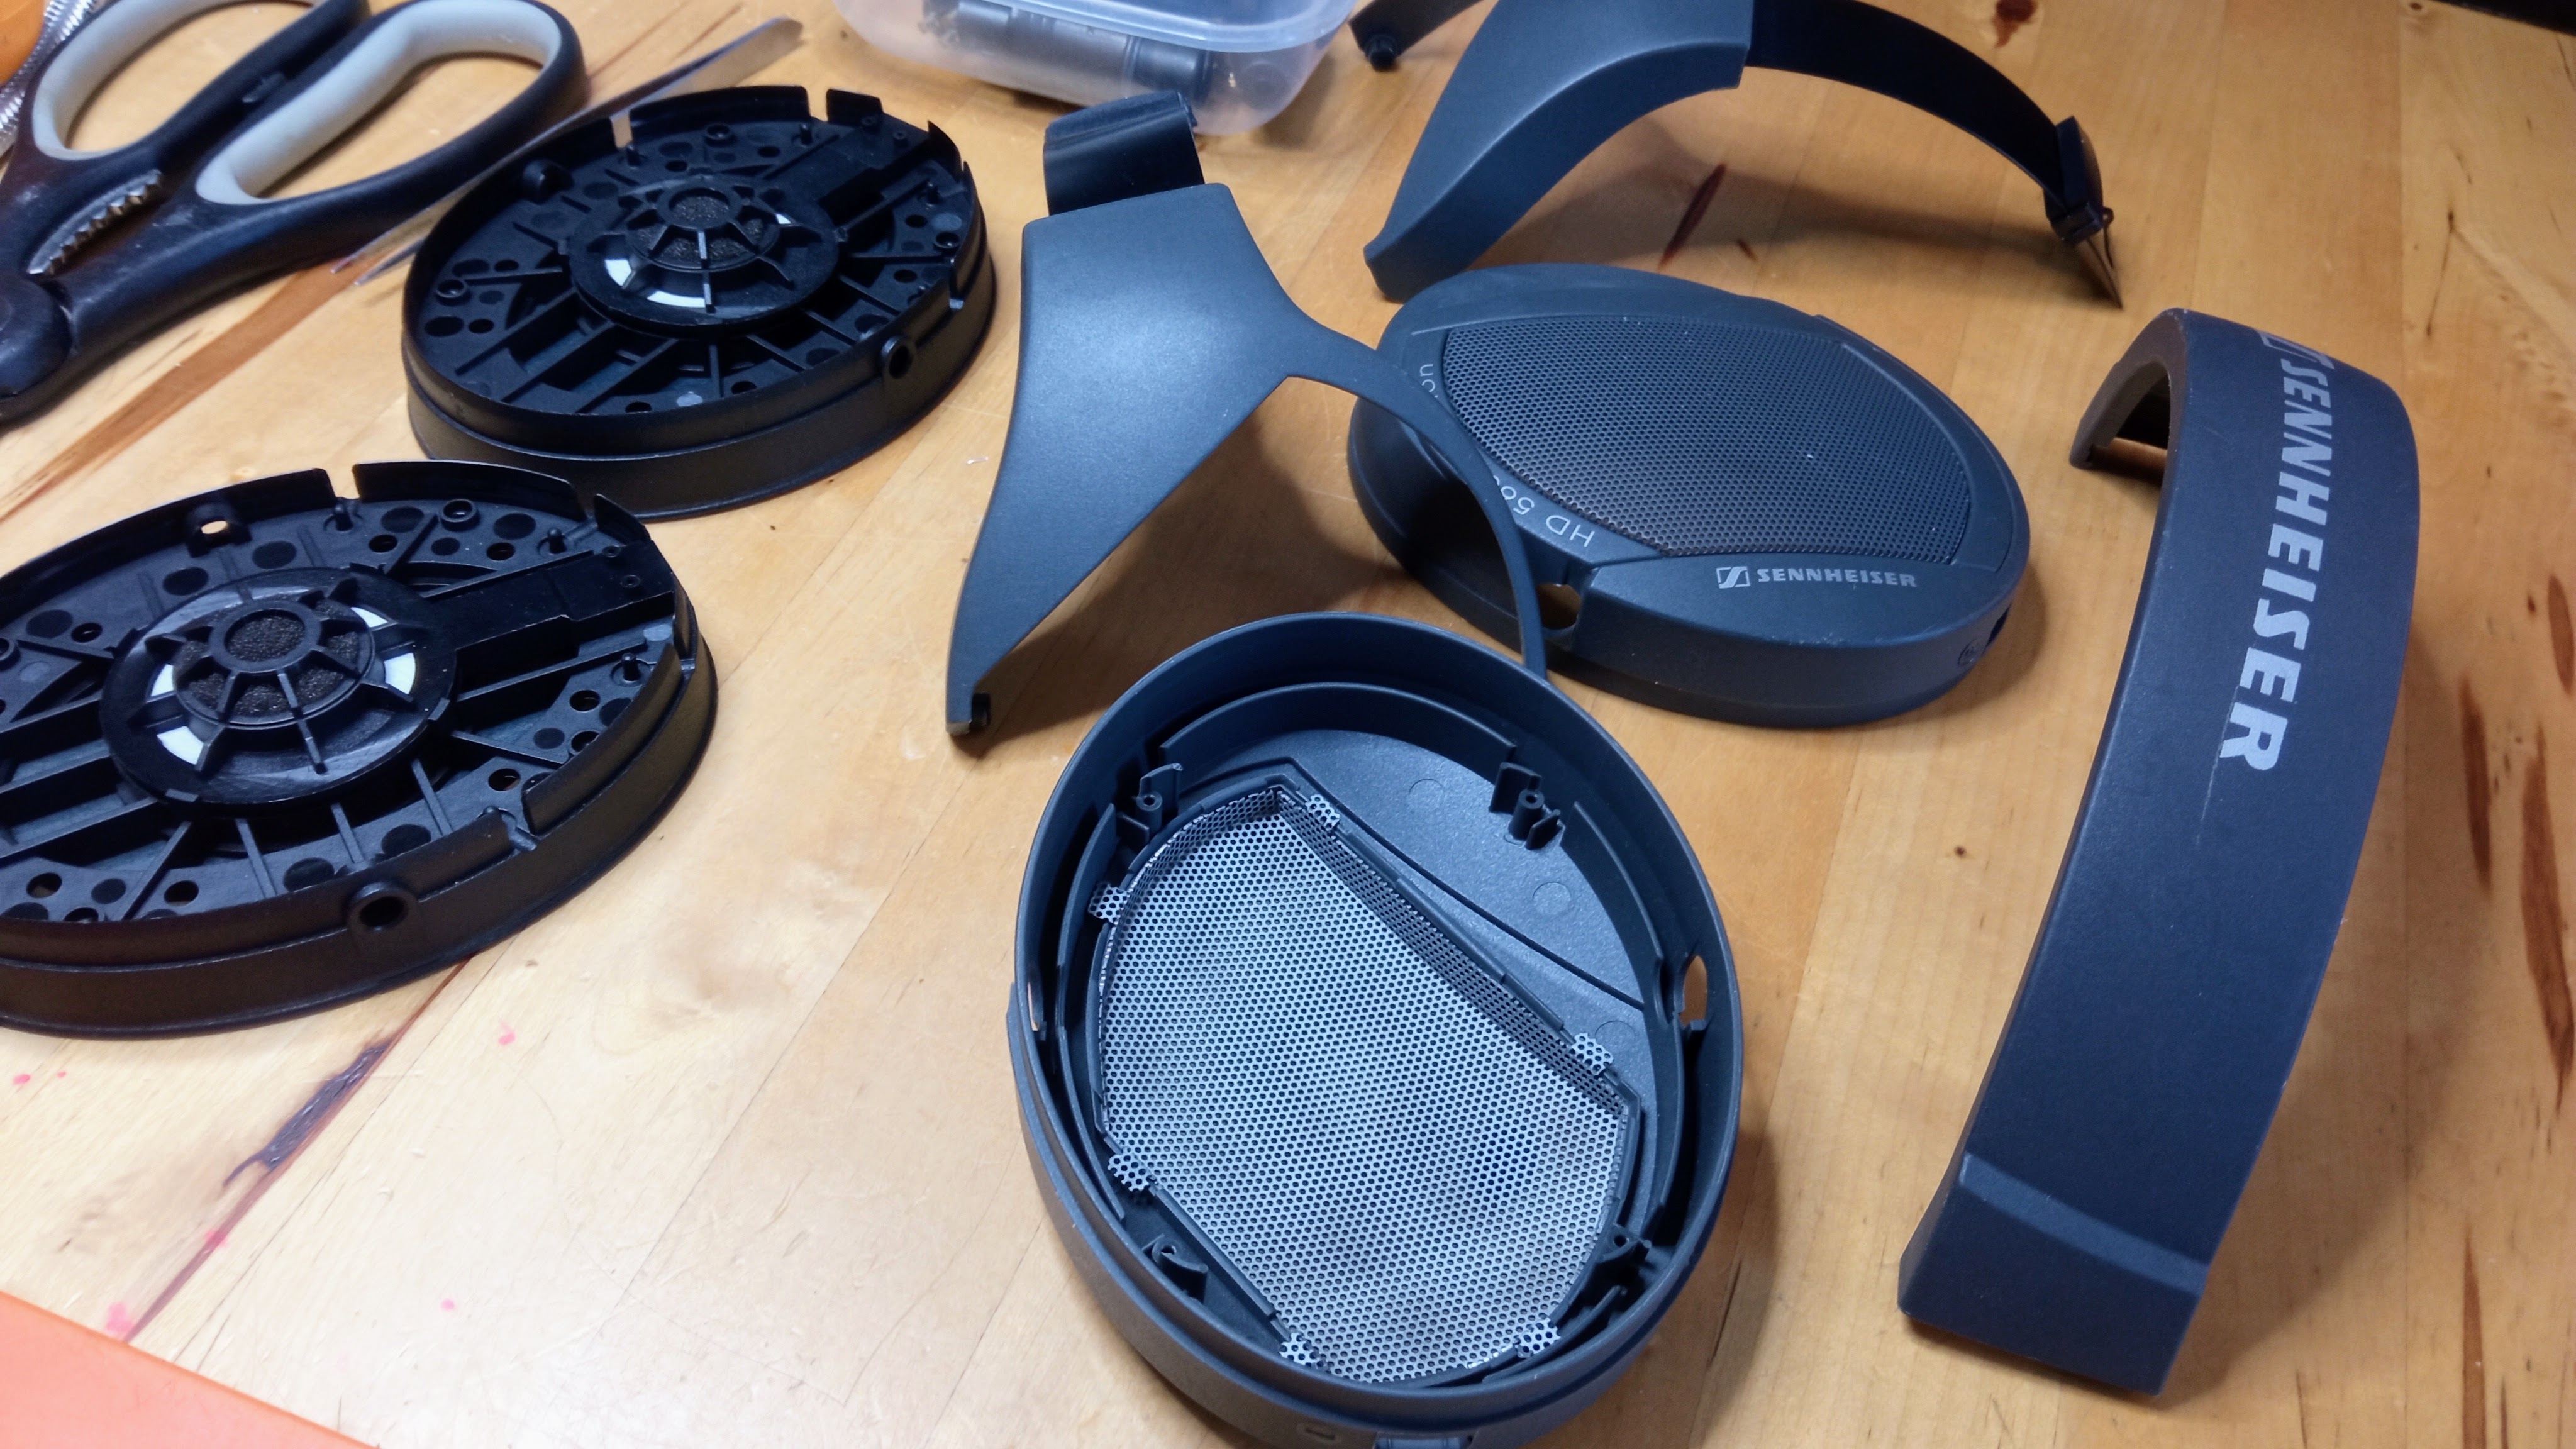
So as I have resto-modded 2 pairs of these with a pair of HD-600 and HD-650 drivers respectively, it means I have 2 pairs of original HD-565 drivers sitting in boxes.
I dug them out of the back of a drawer recently to see if I could investigate the problem driver from the very first pair of HD-565's I owned which was the nexus for the journey to upgrade these drivers in the first place.

The problem driver had a caved-in diaphragm for some reason, probably because of the ridiculously damp house I was living in at the time. It compromised the SQ and motivated me to seek out a replacement driver whereupon a call to a helpful chap at Sennheiser UK revealed that it was possible to drop in some higher-spec HD-650 drivers as they were exactly the same size and fit. After approx 3 seconds of chin-rubbing I agreed to his suggestion and duly ordered a pair.


Anyway, onto the HD-565 driver resto...
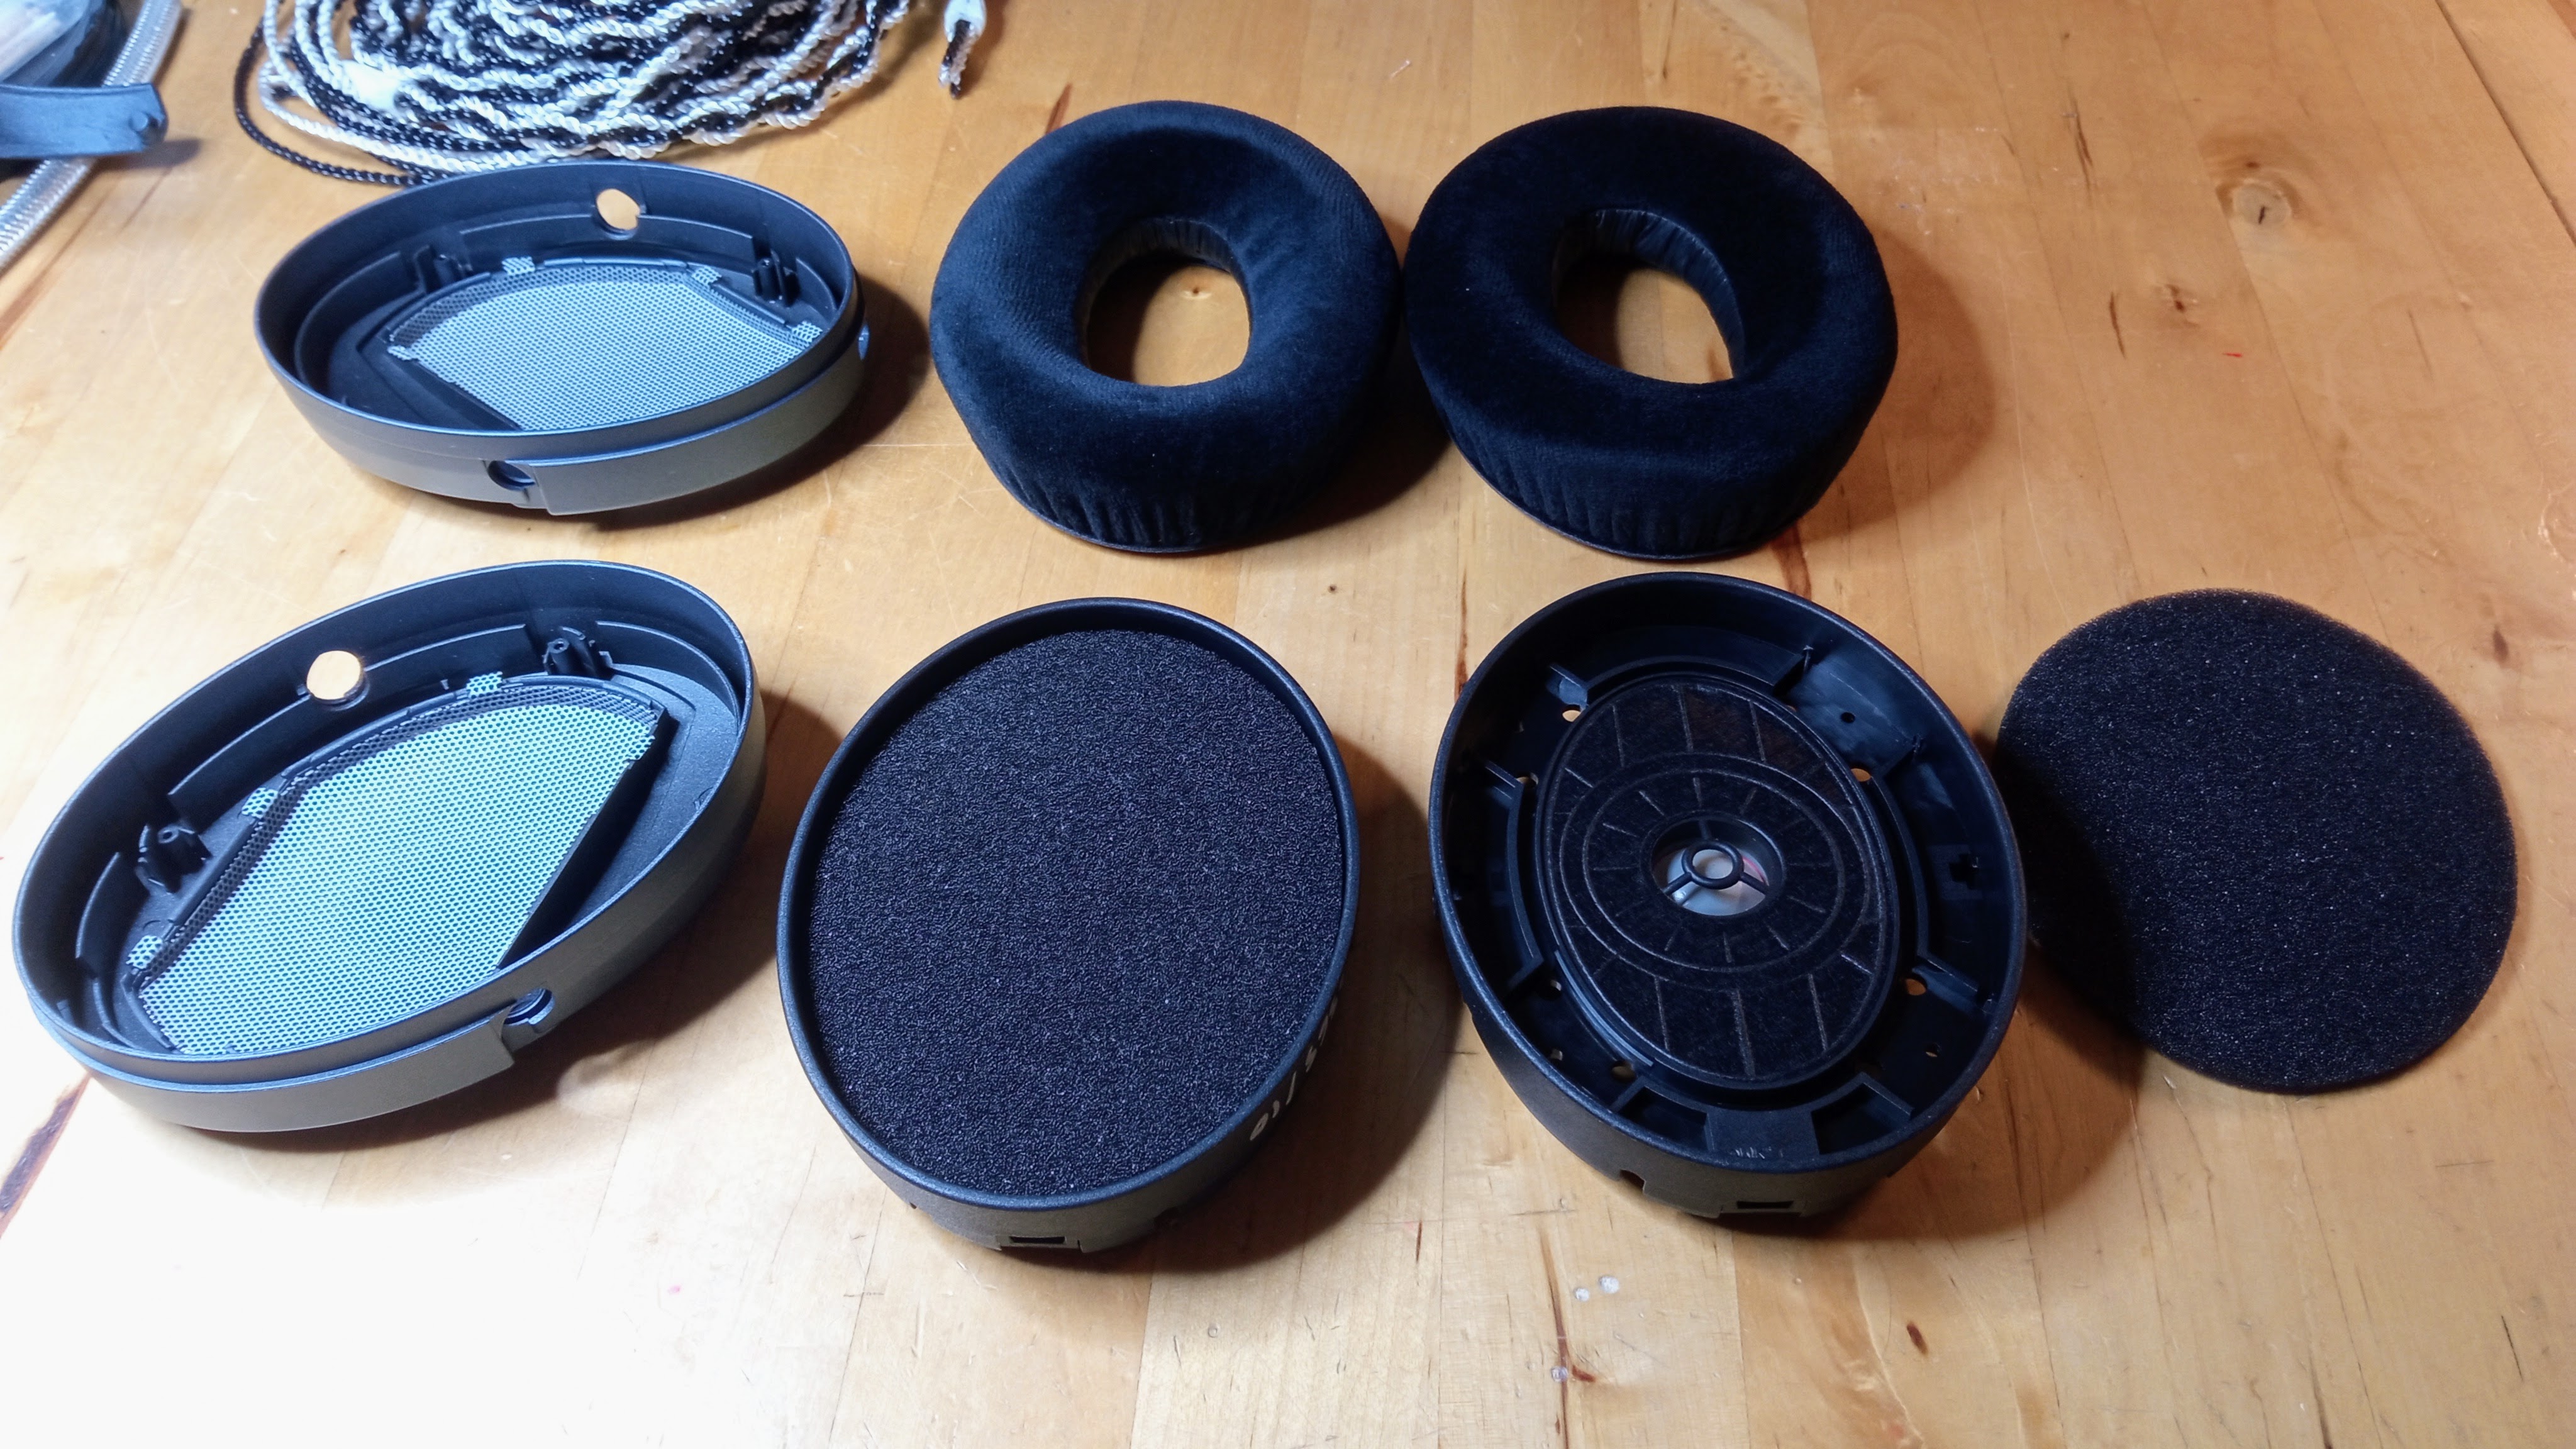
First things first, clean out as much of the dust, detritus and earwax as possible....
... being mindful not to disturb or touch the 2 tiny, delicate red driver wires that reside in a channel between the driver cable connectors and the voicecoil. It looks like these wires expand and deform over time, causing them to egress from the relative safety of that channel.

Next step was to remove the small black piece of foam that resides in the small plastic cage right behind the driver. Of course, this just disintegrated as soon as I touched it so I had to go carefully and work upside down so as gravity would draw the bits of foam out and away from being trapped within the the driver diaphragm.


Once most of the crud had been removed from the chassis it was time to carefully remove the driver, being careful not to touch the 2 tiny red driver wires.

These tiny wires deform/expand over time so care needs to be taken to gently coax them back into the relative protection of that shallow channel.

It's possible to push the diaphragm outwards by manouvering a cotton bud through the driver hole at the rear as this is now accessible since we removed that bit of black foam. This helps to rectify the caving-in of the central dome but it's also possible to push the diaphragm out a bit more, making a large dome shape. this enables cleaning the entire external surface area of the diaphragm dome. I used a cotton bud and a 50/50 mix of demineralised water and alcohol to remove as much dirt, dust and detritus as I could.


The problem driver has a black line running accross its centre-line. I'm not sure what this indicates as the other driver doesn't have it. Maybe one of those clever invisible indicators that becomes visible if the diaphragm has become damaged at some point perhaps? Like the iphone internal indicator that turns red to let engineers know if it's been immersed/dropped in water (?) Dunno. Don't care.
Job done and time to replace the driver back into the chassis. Not too shabby.

Now onto the other driver for the same wash and brush up. No black line on this driver's diaphragm.

All done and time to test....
TOP! It still works and more importantly it sounds great again now that the small indents have been removed from the diaphragm dome.
A 30 min job from start to finish, going carefully and using a magnifier lamp to see what my 51 yr old eyes couldn't see otherwise. -.-

Going to have a play around to see how SQ changes with different materials and/or nothing placed behind the drivers, but for now they go back in the box.
Watch this space....