New Millett Hybrid MiniMAX (what happened to this thread?)
Feb 14, 2009 at 7:32 AM Post #991 of 1,948
Quote:

Originally Posted by aphexii /img/forum/go_quote.gif
So i'm tossing around the idea of making an acrylic sandwich of the faceplate.

Anodized Aluminum with the Logo and Volume Knob cut out ---> Brushed/Frosted acrylic in the middle ---> solid piece of aluminum on the back with holes cut for the LED's to shine though.

Ideally, the strategically placed LED's would light up the Acrylic from the back, and the holes on the front would allow it to glow from behind. Primarily through the logo and around the volume knob.


Talk to MrMajestic2 ... been there, done that:
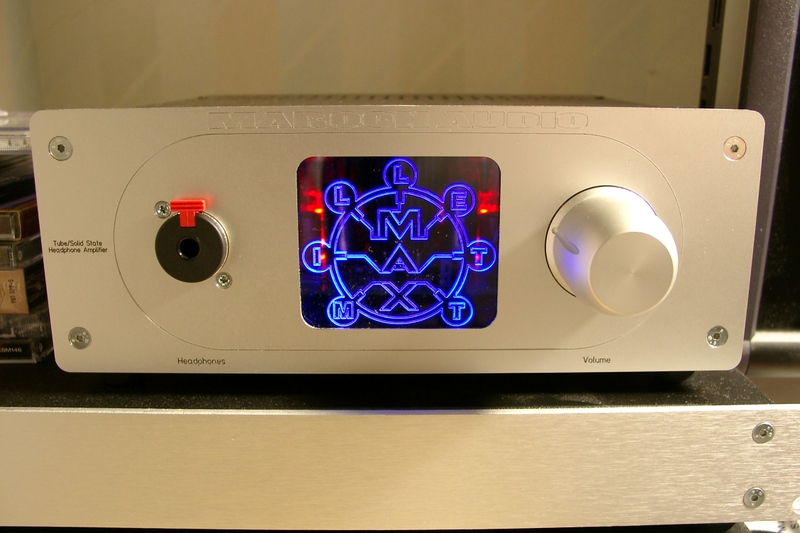
techhigh1.jpg
 
Feb 14, 2009 at 8:34 AM Post #992 of 1,948
Quote:

Originally Posted by linuxworks /img/forum/go_quote.gif
has anyone tried these things? they are called 'slow color change leds':

rgb.jpg


on ebay, you search for 'slow color change led' and this comes up.

I'm thinking of trying it under the tube sockets. is that going too far?
wink.gif
wink.gif


There was a neat build a few years ago the builder called the Disco MINT. http://www.head-fi.org/forums/f6/dis...warning-85534/
Not used to light tubes but may give you an idea of what to expect.

As to the question of too far? One of the local electronics stores here has 7 Colour LED's, maybe your not going far enough!
beyersmile.png

(5mm only though, might be difficult to fit)
 
Feb 14, 2009 at 10:16 AM Post #993 of 1,948
Quote:

Originally Posted by tomb /img/forum/go_quote.gif
Nice pics, Beefy! More that I can use on the MiniMAX website and do that wiring page that GeoffSpence wanted.


Tom, are there any plans to make this page? I just wired everything up in my MiniMAX, but needed to search for Beefy's pictures to figure out how to get it all wired up. And the only reason I knew to search for his pictures is because I've followed this whole thread. Someone new to the MiniMAX would probably benefit from wiring directions on the build website.

BTW - My MiniMAX is fully assembled! I'm going to bias it in the morning, it's way too late and my eyes are pretty bugged out. Hopefully, another MiniMAX will live!
dt880smile.png


EDIT - R1 is optional, right? Am I correct that it needs to be jumpered if not used?
 
Feb 14, 2009 at 11:12 AM Post #994 of 1,948
which wiring? it's not too dissimilar than the MAX.

R1 is optional, and should be jumpered if not used. It should bring about a slight improvement in the power supply, but I haven't scoped it out so cant say what. I've still got mine jumpered, and already have the part! I've just been.. pretty busy this semester. Fortunately, it'll have been my most intense one throughout my degree, and I'm half way through exams already, so almost there!
smily_headphones1.gif
I'll hopefully get back into the game after it all.. but I'll be getting married in august
biggrin.gif
so, we'll see...
 
Feb 14, 2009 at 11:46 AM Post #995 of 1,948
Quote:

Originally Posted by patton713MW /img/forum/go_quote.gif
Tom, are there any plans to make this page? I just wired everything up in my MiniMAX, but needed to search for Beefy's pictures to figure out how to get it all wired up. And the only reason I knew to search for his pictures is because I've followed this whole thread. Someone new to the MiniMAX would probably benefit from wiring directions on the build website.


I'm sorry, Andrew. Between running beezar, getting the MAX V1.2 proto going, and launching the SSMH PCB (working on the website, now), I'm spread pretty thin lately.

Yes - by all means - my intent is to add a "Wiring and Assembly" page. It'll get done when it gets done, though.
frown.gif

Quote:

BTW - My MiniMAX is fully assembled! I'm going to bias it in the morning, it's way too late and my eyes are pretty bugged out. Hopefully, another MiniMAX will live!
dt880smile.png


Pics or it doesn't count!!
tongue.gif

Quote:

EDIT - R1 is optional, right? Am I correct that it needs to be jumpered if not used?


You are better off with R1 than without, but a jumper will let you run fine indefinitely. I say that because 10ohms at 27VDC will put the heater voltage at its optimum value for tube performance and longevity.
 
Feb 14, 2009 at 7:45 PM Post #996 of 1,948
smile.gif
smile.gif
Quote:

Originally Posted by tomb /img/forum/go_quote.gif
I'm sorry, Andrew. Between running beezar, getting the MAX V1.2 proto going, and launching the SSMH PCB (working on the website, now), I'm spread pretty thin lately.


[threadjack]
smile.gif


SSMH?

[/threadjack]
 
Feb 14, 2009 at 9:07 PM Post #997 of 1,948
Quote:

Originally Posted by MASantos /img/forum/go_quote.gif
smile.gif
smile.gif


[threadjack]
smile.gif


SSMH?

[/threadjack]


At least I'm an equal-opportunity thread-jacker. I mention the MAX and MiniMAX regularly over in the SSMH thread.
wink.gif
wink.gif
 
Feb 14, 2009 at 9:24 PM Post #998 of 1,948
how's the tube availability for that? I picked up some tube sockets for a SS, but never got around to looking for tubes much. they weren't readily available at the time..
 
Feb 14, 2009 at 9:35 PM Post #999 of 1,948
Quote:

Originally Posted by tomb /img/forum/go_quote.gif
I'm sorry, Andrew. Between running beezar, getting the MAX V1.2 proto going, and launching the SSMH PCB (working on the website, now), I'm spread pretty thin lately.

Yes - by all means - my intent is to add a "Wiring and Assembly" page. It'll get done when it gets done, though.
frown.gif


No worries, I understand that there is a lot on your plate. Maybe for the time being you could just add a link at the end of the construction page to Beefy's post?

Quote:

Originally Posted by tomb /img/forum/go_quote.gif
Pics or it doesn't count!!
tongue.gif


Will post them when it's alive!
smily_headphones1.gif
I've been taking pictures throughout the whole process if you want them, though I can't guarantee that they'll be as pretty as Beefy's or LinuxWorks'.
 
Feb 14, 2009 at 9:40 PM Post #1,000 of 1,948
Quote:

Originally Posted by ruZZ.il /img/forum/go_quote.gif
how's the tube availability for that? I picked up some tube sockets for a SS, but never got around to looking for tubes much. they weren't readily available at the time..


YGPM
 
Feb 14, 2009 at 10:29 PM Post #1,001 of 1,948
ARG!! I got a bad wallwart!
frown.gif
Of all the things to be bad, it had to be that! *sigh* Well, let's see how fast Mouser can ship a wallwart...

These will have to hold you all over until I can post some live shots:
IMG_9095.jpg

IMG_9096.jpg
 
Feb 15, 2009 at 2:50 AM Post #1,004 of 1,948
Just a total shot in the dark here, as I've never used them......

Silicone rubber softens a touch on heating. Perhaps drop them in some almost boiling water, let them sit for a bit, then scoop them out and quickly slide them onto the tubes.
 
Feb 15, 2009 at 2:52 AM Post #1,005 of 1,948
Quote:

Originally Posted by Beefy /img/forum/go_quote.gif
Just a total shot in the dark here, as I've never used them......

Silicone rubber softens a touch on heating. Perhaps drop them in some almost boiling water, let them sit for a bit, then scoop them out and quickly slide them onto the tubes.


I'm thinking maybe to try rolling it on like a condom...
happy_face1.gif
 

Users who are viewing this thread

Back
Top