Help! Any DIY solutions for a broken headband of Stax SR L300?
Jan 24, 2019 at 7:42 PM Thread Starter Post #1 of 21

viveksaikia22

100+ Head-Fier
Joined
Feb 28, 2012
Posts
385
Likes
47
Location
Minneapolis, Minnesota
Hi,
My Stax SR L300 just arrived today.
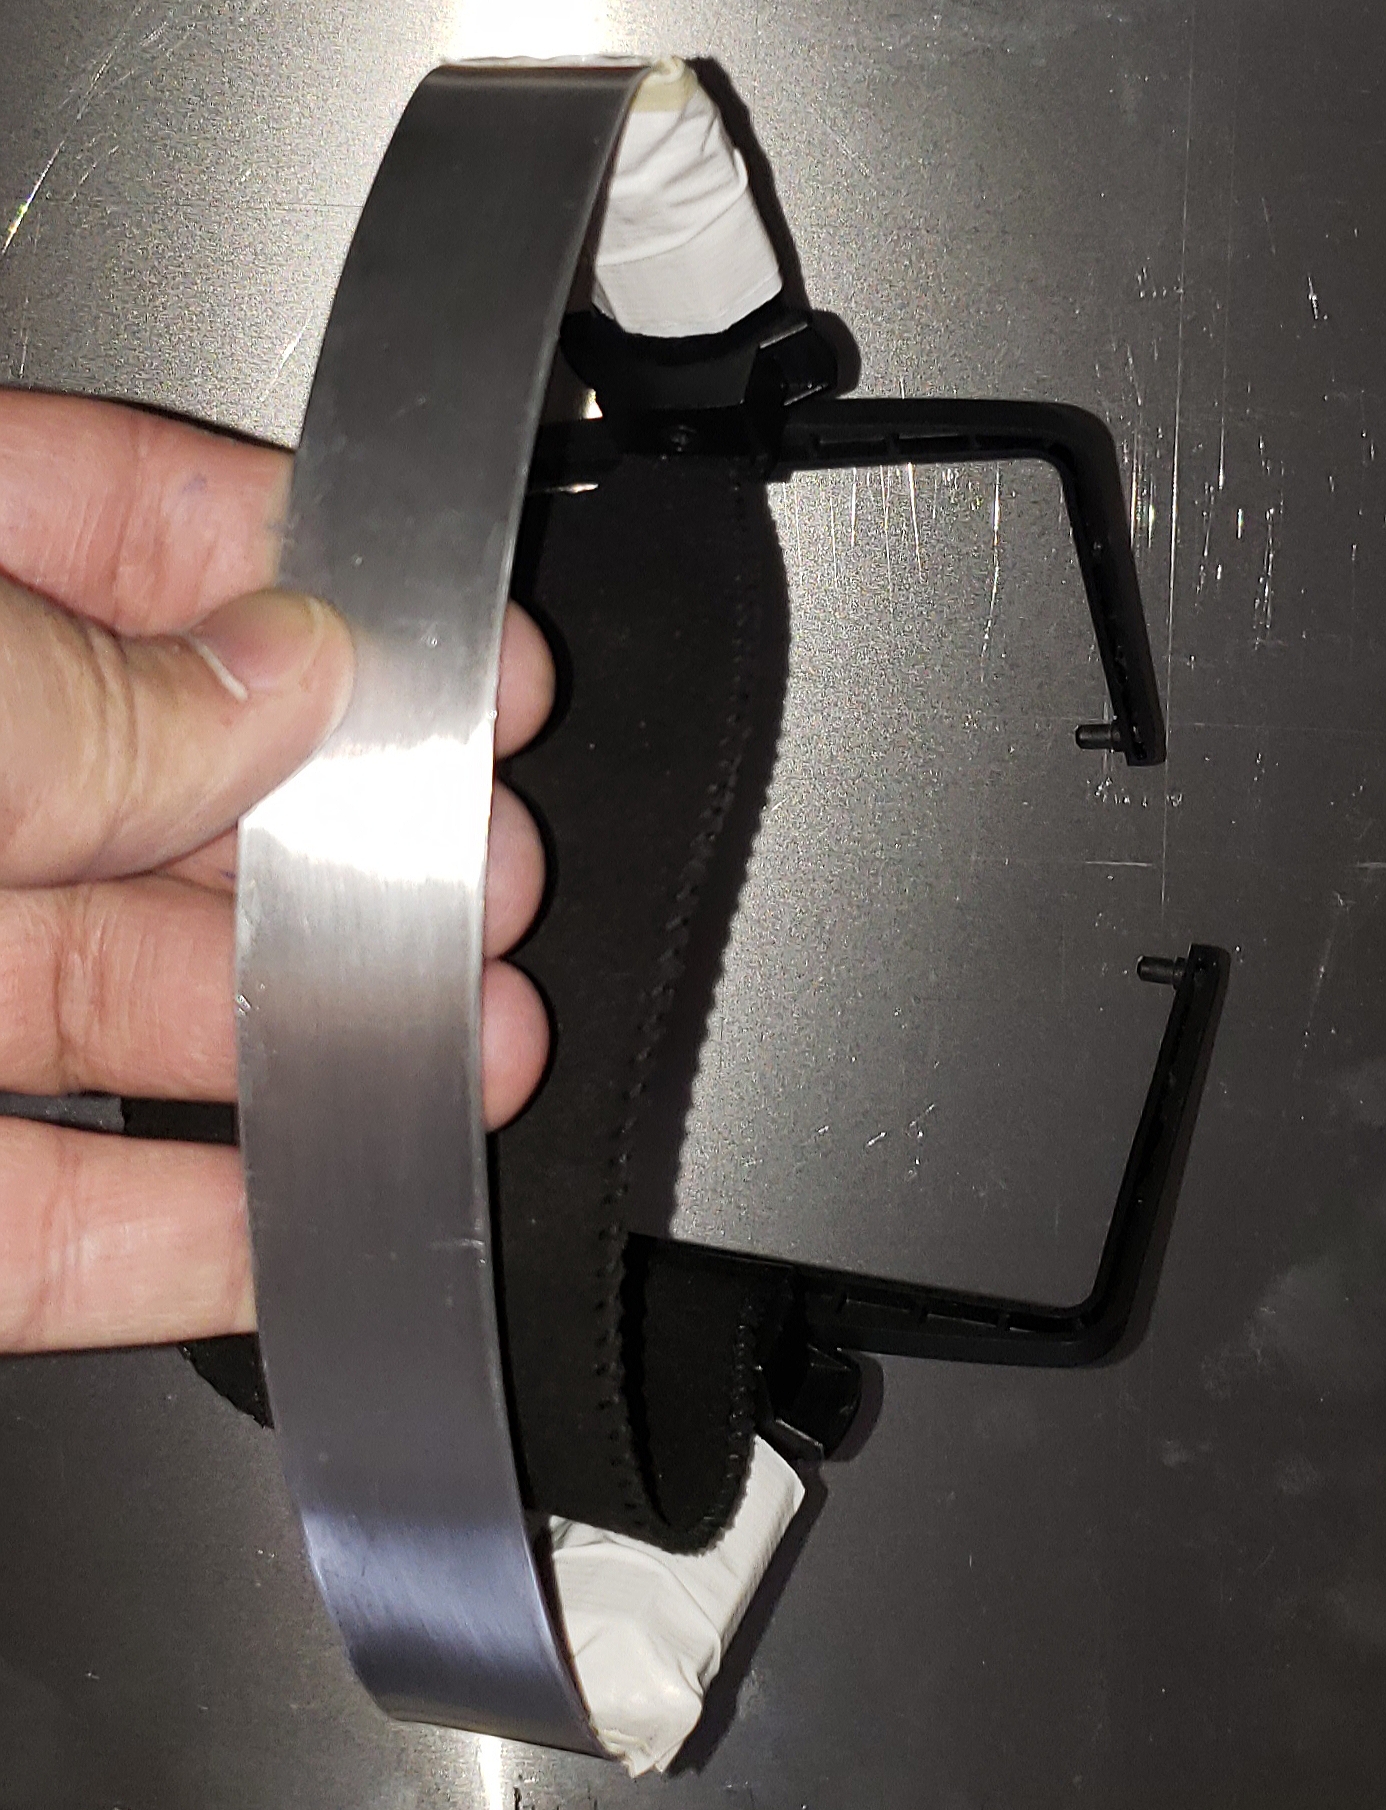
I was all excited to hear some music from these and put these on my head and this happens! The headband just snaps into two pieces!

Not to mention that I am so much pissed at Stax for selling such a poorly constructed products, I went to their website to find that this replacement piece of junk sells for $75! No way I am going to spend my money on these junks.
https://staxaudio.com/headband/stax-sr-l300-headband-assembly

Now, coming back to the main intent of this post, I am sure I am not the only one who is annoyed with the Stax quality and have decided to take the matter into their own hand. I would like to know if anyone here has worked on a DIY Stax headband?
I am thinking of reinforcing the plastic headband by using brass flat bar and glue it to the plastic piece (or maybe use some screws to secure).
Any DIY ideas are welcome.
Or alternatively, I would love to know if there is any better quality third party replacement part already available.

Thanks
Vivek
stax.jpg
 
Jan 26, 2019 at 11:16 AM Post #2 of 21
Well first things first, I would at least JB weld your headband back together so that you at least have something to listen to.

Secondly, I would write to stax. If this is a brand new pair of headphones you bought from them, they should send you a new headband for free.
 
Jan 26, 2019 at 1:47 PM Post #3 of 21
I bought them used so will not be able to get any support from Stax.

For the time being, they look like this -

fix.jpg

I have ordered some hardware parts and I will work on fixing these as soon as I get the parts.
 
Jan 26, 2019 at 3:29 PM Post #5 of 21
Jan 26, 2019 at 7:29 PM Post #6 of 21
I planning to use this headband on my next broken headphones...:)
looks like metal good one,
HTB1VZo3dgvD8KJjSsplq6yIEFXaM.jpg_q90.jpg


dont know about stax,
plan to use one Sennheiser hd650 when it will brake


I bough the open back one, but differently one of the greatest Headbands, great 90mm ear pads . and even good sounding by itself, better headband from many headphones that I using and used.
 
Last edited:
Jan 26, 2019 at 8:49 PM Post #7 of 21
I planning to use this headband on my next broken headphones...:)
looks like metal good one,
HTB1VZo3dgvD8KJjSsplq6yIEFXaM.jpg_q90.jpg


dont know about stax,
plan to use one Sennheiser hd650 when it will brake


I bough the open back one, but differently one of the greatest Headbands, great 90mm ear pads . and even good sounding by itself, better headband from many headphones that I using and used.
I highly doubt if this will fit a Stax (even without the yolk). I mean, the claimping force will be like a vise.
By the way I ordered the 3-D parts for two pairs from here for only $40 - https://www.thingiverse.com/thing:1780659 (thanks to federicopol). I will also be getting an aluminium sheet to create a headband for the broken piece. So, all in all I will end up having 3 pairs of replacement headbands for less than $50.
 
Jan 27, 2019 at 8:25 PM Post #8 of 21
Just wanted to share the work in progress...

Got the aluminum sheet today and started working on my mini weekend project.
I cut the sheet into a strip of 1-inch width and polished it using 400 grit sandpaper. Shaped it using the broken band and then hardened it by heating it in the oven at 500 degrees for about an hour and then cooling it off under running water. The band is holding is it's shape fairly well.

Did a dry fit to check if the fitting is right and just attached the band to the yolk piece using some tape for now. I will drill some holes and use socket cap screws to secure it in place. I will also paint the band black to give it more stock look.

For now, the band is feeling quite sturdy and maybe even lighter than the stock one.

20190127_143658.jpg 20190127_143718.jpg 20190127_145903.jpg 20190127_145958.jpg 20190127_150323.jpg
 
Last edited:
Jan 28, 2019 at 10:28 AM Post #10 of 21
viveksaikia22:

I know an engineer when I see one. Well done!

You can probably still work the aluminum some. I've did a similar project and used a piece of metal pipe as a rolling pin to smooth the irregularities and covered the band in heat-shrink tubing just for aesthetics. I used pop rivets and epoxy in the area you have the tape to put it together. I built up with epoxy around the rivet heads then sanded the area smooth. Was pretty ugly until I covered it in heat shrink. I finally used the oven (set very low) for the heat shrink to get decent results. In other words, I was glad I got plenty extra heat shrink!

Anyway - just offering some options. But honestly it doesn't look like you need any help.

G'day!

-jrt
 
Jan 28, 2019 at 12:37 PM Post #11 of 21
viveksaikia22:

I know an engineer when I see one. Well done!

You can probably still work the aluminum some. I've did a similar project and used a piece of metal pipe as a rolling pin to smooth the irregularities and covered the band in heat-shrink tubing just for aesthetics. I used pop rivets and epoxy in the area you have the tape to put it together. I built up with epoxy around the rivet heads then sanded the area smooth. Was pretty ugly until I covered it in heat shrink. I finally used the oven (set very low) for the heat shrink to get decent results. In other words, I was glad I got plenty extra heat shrink!

Anyway - just offering some options. But honestly it doesn't look like you need any help.

G'day!

-jrt
Thanks for the suggestions!
Heatshrink sounds like a good idea.

I tried to shape the band using a wooden rolling pin but didn't do a good job I guess. I was planning to paint it Matt black to hide the irregularities. Another idea was to dress it up using a foam headband cover you can get on Amazon.

I will invest some more time to make it a bit more presentable. The tape will go off soon and it's just a temporary arrangement till I get my m2 cap head screws delivered from Amazon.
 
Feb 8, 2019 at 3:15 PM Post #12 of 21
Finally completed the project.

HeatShrink was a very good idea, as I feel the finishing was quite good.
I added a little bling to the band as well :)
Overall, it came out pretty industrial looking and more importantly very strong and durable.

s-l1600 (1).jpg
s-l1600.jpg
s-l1600 (2).jpg
s-l1600 (3).jpg
 
Feb 15, 2019 at 9:21 AM Post #15 of 21
Wanna sell 'em now?

Hehehe.

Seriously, a very good job indeed.

I am constantly fixing stuff, but only occasionally do I get to work on something that I'd enjoy like a pair of Stax! Last project like that was a brand new display model Nespresso machine I just happened to see being tossed in a dumpster outside of Walmart. Recognized it from a distance because I've had my eye on one for a while but just couldn't bring myself to shell out the cash. LemmieTellYaWhat... Fixing that thing up has sure made all my other projects a lot more pleasurable - if not faster!


-jrt
 

Users who are viewing this thread

Back
Top