DX200/220 Amp8, MAX and other EX modifications

Feb 14, 2019 at 2:44 AM Post #17 of 473
Notes on DX208-EX conversion (It is almost a wasteful story)

People who first look at the board of the DX 200 and ask the experts have no difficulty.
Before summer, DX 220 will be sold and it is recommended to those who enjoy work, if they are ready to break.

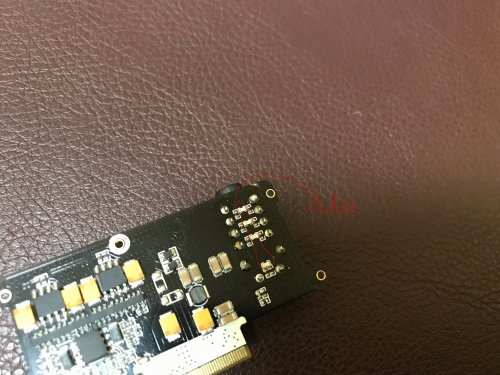
If you look closely at the main body of the DX 200, there are several resistors that seem to be 0.6 mm (EIA 0201) size in the vicinity of the tantalum capacitor to be replaced.
These resistors float from the land and are on the solder.

Be careful not to blow it away with the hot air of the heat gun, as the solder may melt before the tantalum cap due to removal of the tantalum cap or due to heat of installation.
(Conversely, if the solder of the resistor melts first, reliability also improves when attached to the Land, but since it is a lot of solder for the size, if you press carelessly against the land it may short circuit)

Likewise, there is a place where tantalum Cap is sandwiched between film Cap (PPS), but since PPS is sensitive to heat, attention to temperature management is necessary.
Since it is a double-sided mounting board, when using a reflow device or heat gun, we directly warm the parts (board) so it is safe to ask the experts for work.

For DIY not asking experts in general, cream solder generally degrades more quickly than ordinary solder, so please choose high quality and reliable one.
(When asking the experts, of course, please specify the highest quality cream solder.)
Discount items are closer to the expiration date, I think that it is better not to purchase like you will not regret later.

When using a soldering iron it is relatively safe to work while confirming the condition, but Pad of KO-CAP 22uF has a dent and is attached to the inside.
In ordinary soldering irons, you can not affix solder unless you open it at an angle and diagonally. (There are several impossible places)

Even if the soldering tip is thin, it makes it oblique, so it will touch the next part so if you use a soldering iron tip of a flat head (like a precision minus screwdriver) with a width of about 1.6mm and a thickness of about 0.5mm I think work will be easier.
I felt the limit for the first time in my favorite "good 20W" soldering iron for nearly 20 years.:relieved:

The DX200 main body EX conversion is required the highest difficulty which can not be compared with the normal kit.
In my case, I am planning to make a DUAL ES 9038 pro 8 para DAC if I go well, I will think about buying a DX 220 if I fail.

Do you want a very exciting experience?
Do you enjoy the DX208-EX you received?
Good luck to you.

Thank you.
 
Feb 28, 2019 at 12:33 PM Post #18 of 473
You guys are superb! I am listening to @Whitigir EX and it is indeed better than before. Gotta love the increased in sense of dynamics on the EX now. It can power my modded HD800 with room to spare. Best portable DAP I have heard to date. It more or less sound like a solid mid-end desktop system to my ears.
 
Mar 1, 2019 at 11:55 PM Post #19 of 473
Long time no see.
The HOKKO tip(T18-S9) of the order we ordered arrived and it was able to be converted to EX.

T18-C1 (1mm x 60°) on top
The bottom is T18-S9 (1.2 x 0.4mm).
D0oFaEhUcAAOCiS.jpg


I need a tip thermometer for temperature calibration, but I used an affordable kit.
HAKKO's thermometer will $300, but you can buy this kit (HAN-ON) using this HAKKO sensor for $30.
D0oHTNqVYAMyl67.jpg:large
 
Apr 12, 2019 at 11:24 PM Post #22 of 473
It is AMP7.
I replaced the tantalum capacitor with KEMET (KO-CAP) and made it EX.
(A part of 100uF arrangement (polarity) differs from AMP8)
It is a finish by sticking the sheet for noise suppression of TDK.

I tried to replace the capacitor so that the pattern was peeled off the PCB, but KO-CAP seems to be the best.
(Manufacturers such as TOKIN also provide KEMET)

I'm looking forward to sounding with the DX220.
D3_-49aU4AAnv1b.jpg:large
 
Apr 13, 2019 at 12:09 AM Post #23 of 473
It is AMP7.
I replaced the tantalum capacitor with KEMET (KO-CAP) and made it EX.
(A part of 100uF arrangement (polarity) differs from AMP8)
It is a finish by sticking the sheet for noise suppression of TDK.

I tried to replace the capacitor so that the pattern was peeled off the PCB, but KO-CAP seems to be the best.
(Manufacturers such as TOKIN also provide KEMET)

I'm looking forward to sounding with the DX220.
D3_-49aU4AAnv1b.jpg:large
Awesome!! What can be better than an EX line out :)
 
Apr 16, 2019 at 10:11 AM Post #25 of 473
The previous image has been used for testing and will be re-upped.
(There is an error in the polarity of some capacitors)
D4R2VvuWAAEerm6.jpg

D4R2YW6W0AEudt_.jpg

Finally, we check whether there is no problem with the condition at about 600x magnification.
(You can see the difference between cream solder and iron solder)
As it is mobile use, we use solder more than desktop to prevent coming off by vibration.
D4R2dg2UIAEVe_j.jpg
 
Apr 16, 2019 at 10:22 AM Post #26 of 473
@EggofSound thanks for the pictures. I've been interested in cream solder (paste), because of its ease of use. I haven't tried it though because I'm concerned it doesn't work well for audio. How is the sound quality with cream solder?
 
Apr 16, 2019 at 11:11 AM Post #27 of 473
Very nice! I love solder paste too! But I often mixed them up for better reliability. What I do is

1/ solder paste for SMD components to helped attach the components, iron it so it solidify

2/ then I use regular SS47 to touch up with it for better reliability

What I found out is that once the SS47 is solidified by iron, the cream grainy textures is no more. It would be very shiny and every solder joins should be

I never tried to observe and tell the differences from when I only use paste alone vs SS47. It took me a lot of money/time/experiments to realized the SS47 is the signature that I wanted, so I always stick with it and never bothered to change up.
 
Apr 16, 2019 at 12:08 PM Post #28 of 473
And, for anyone who would love to achieve better extensions in Sub bass with a touchmore mid bass warmth and make it more articulated while more musical. Everything else is very well preserved

ECHU upgrades here

These have no Polar, so no need to worry about it

You just need to pay attentions that the ECHU is plastic film and side casing. You can not grab the ECHU on it side when it is hot, as you will deform it by pressure and ruin the caps. Can only touch by the tinned plate and or top/bottom side

Advised to also use Hot-air station with super low fan speed, steady motions and heat up all of them, take out, and replace all. For those who is more curious about ECHU and soldering techniques, check out the Data-sheets. **no lifting pads** here, but ECHU can melt like chocolate if you grab them on the sides, and also is 1/2 the size of a rice**. These is also a little larger than stock one, you just need to fit it right in on the marking and you are gold

Also, secure your 4.4mm socket. By heating up the whole Palace with hot gun throughout your 4.4mm socket will Fell out of it PCB. I did also clean up the solder here and redone with SS47 as my favorite solder too! Slightly bend-in the legs a bit for better contact-joins too!

**recommended** for people who performed EX on Amp8 and still crave for more musicality, liquidity and flows

Picture is Amp8-EX

ECHU-Links to Mouser
8C6294D3-806D-4480-8E8C-D346B5B0DEB1.jpeg BA579B1B-AB8D-441C-9CDF-AF88E0E2C5C9.jpeg DD185316-50BB-45DD-AE76-67EC49239F00.jpeg
 
Last edited:
Apr 17, 2019 at 9:16 AM Post #29 of 473
@EggofSound thanks for the pictures. I've been interested in cream solder (paste), because of its ease of use. I haven't tried it though because I'm concerned it doesn't work well for audio. How is the sound quality with cream solder?

I have some cream solder but I can not evaluate it because I have never used it for audio equipment.
I used HAKKO FX-888D (Solder Iron) for the 208EX.
I may use "Good SD-62" etc. for spare solder, but finish uses Wako SR-4N, Oyaide SS-47.
 
Apr 17, 2019 at 9:18 AM Post #30 of 473
Very nice! I love solder paste too! But I often mixed them up for better reliability. What I do is

1/ solder paste for SMD components to helped attach the components, iron it so it solidify

2/ then I use regular SS47 to touch up with it for better reliability

What I found out is that once the SS47 is solidified by iron, the cream grainy textures is no more. It would be very shiny and every solder joins should be

I never tried to observe and tell the differences from when I only use paste alone vs SS47. It took me a lot of money/time/experiments to realized the SS47 is the signature that I wanted, so I always stick with it and never bothered to change up.

I broke two AMP7 to convince myself.
It takes time and money for trial and error:sweat_smile:
 

Users who are viewing this thread

Back
Top