"Double Barrel" Fully machined aluminum closed back headphones
Feb 9, 2015 at 9:07 PM Thread Starter Post #1 of 42

noguera

New Head-Fier
Joined
Feb 9, 2015
Posts
6
Likes
22
Hello everyone at Head-Fi,
 
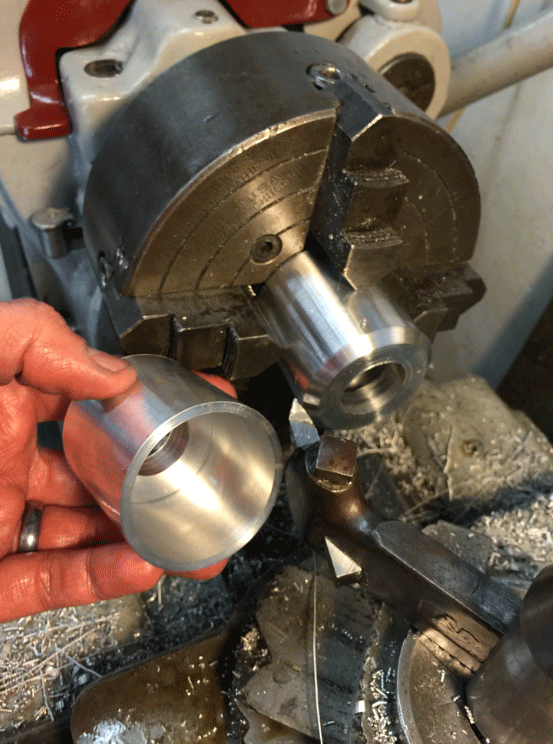
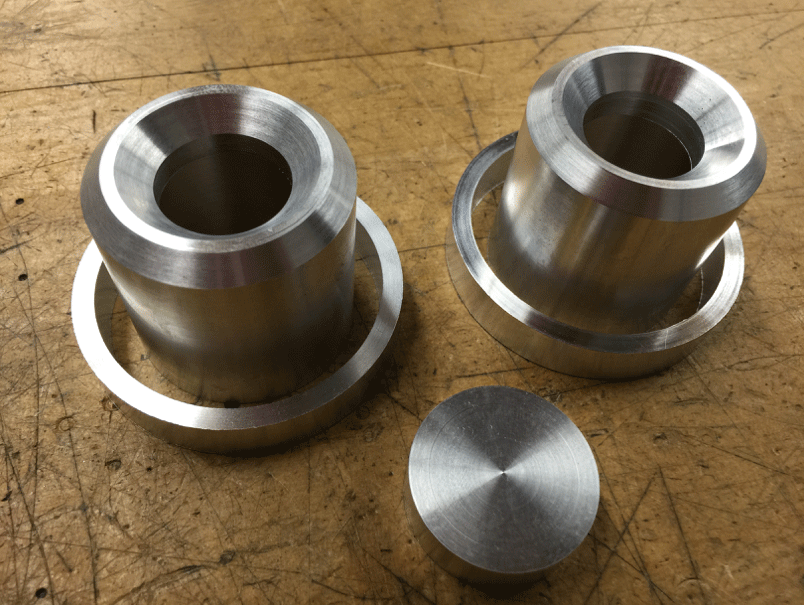
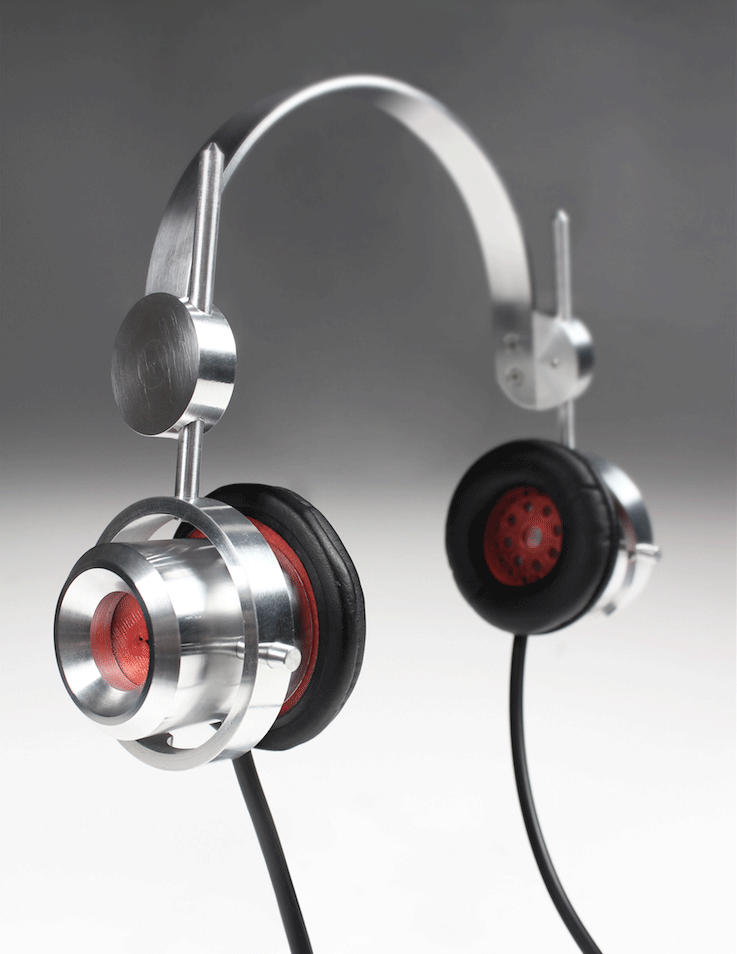
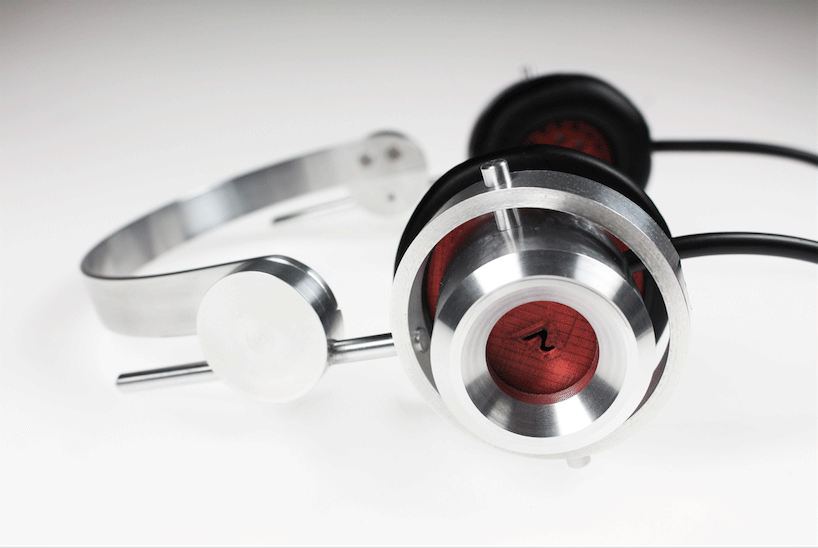
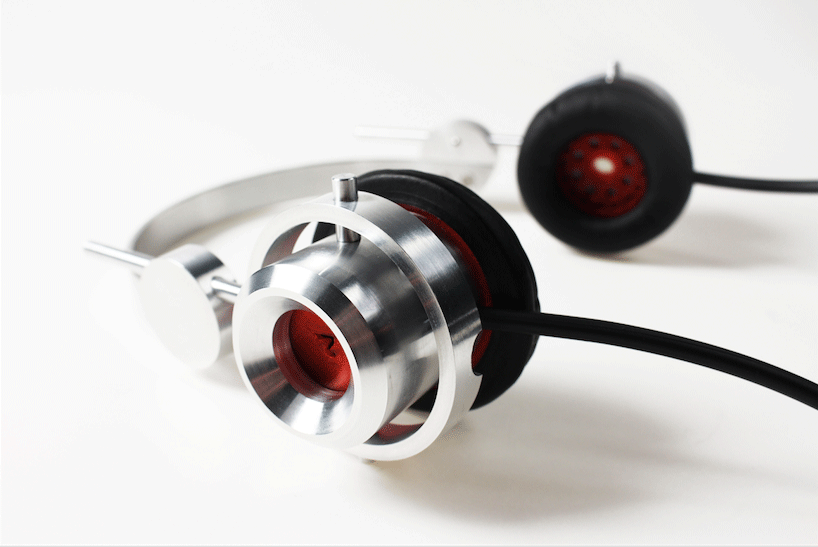
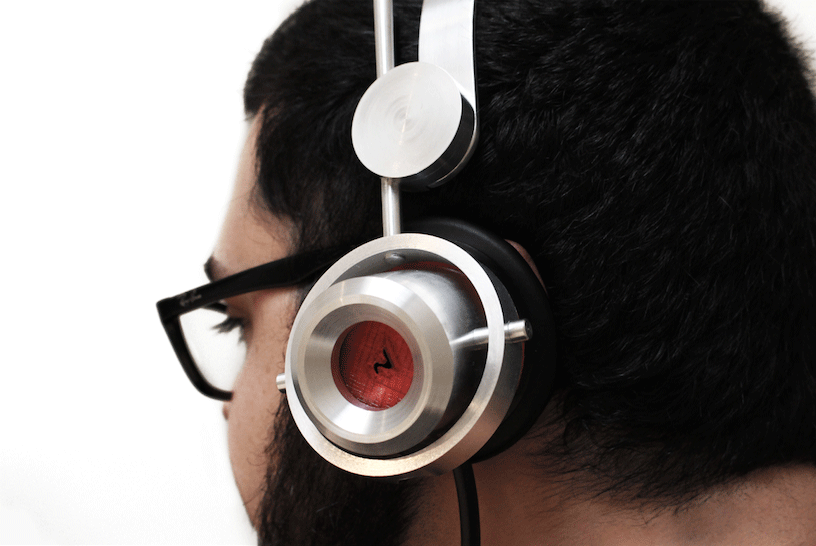
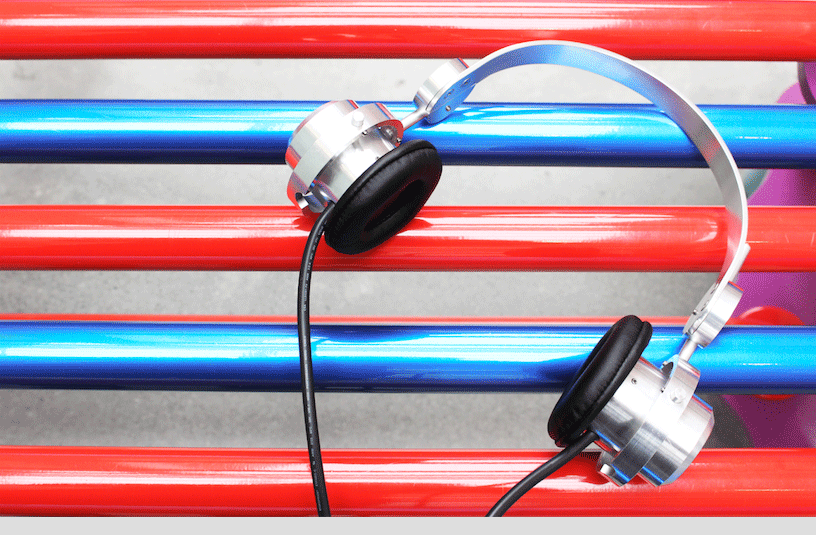
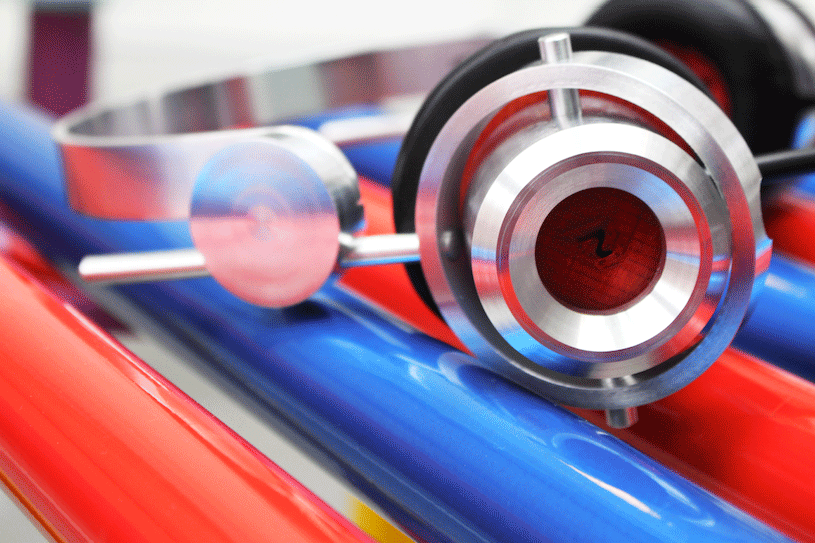
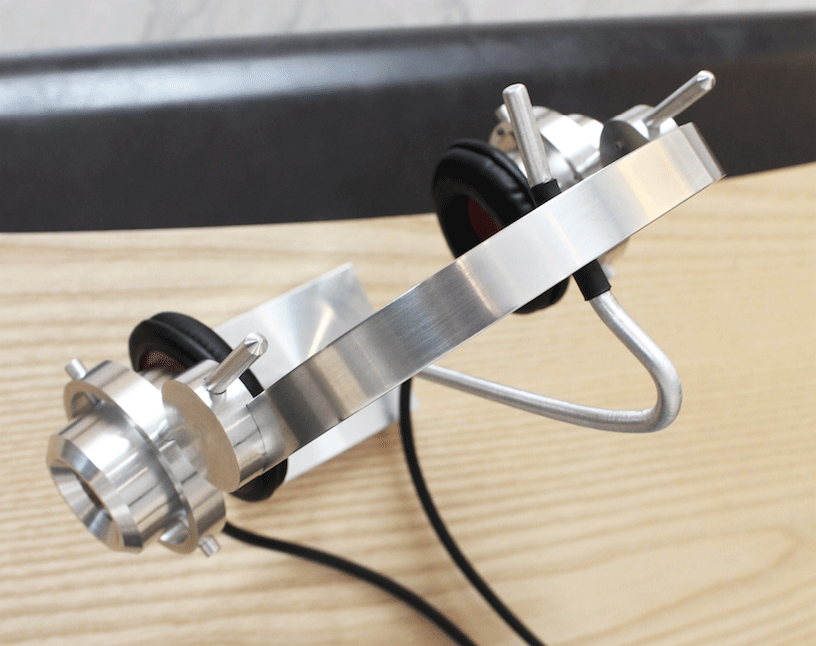
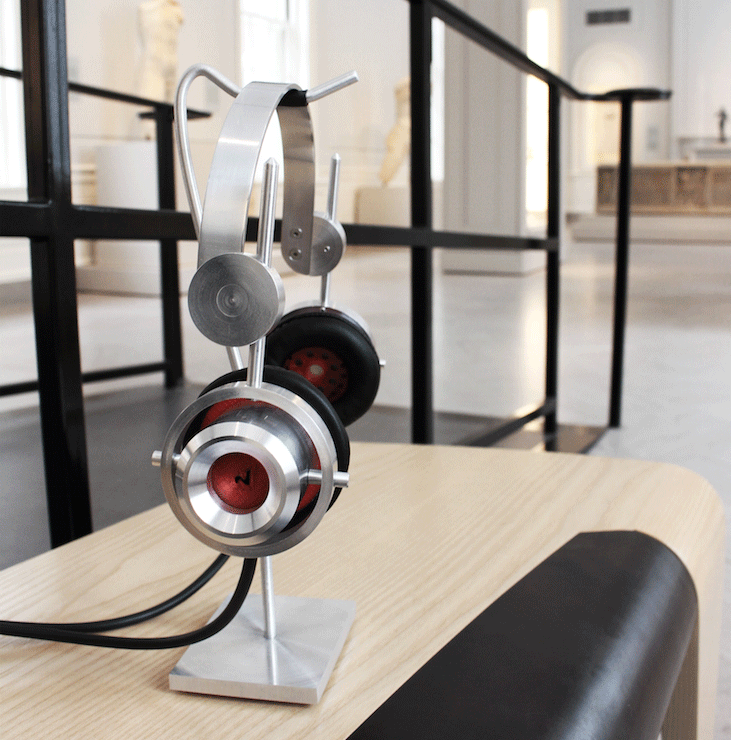
It's a pleasure for me to share my first post here with you. My name is Juan Noguera, and I am an Industrial Design graduate student here at the Rhode Island School of Design (RISD). I have for some time become fascinated with over-the-ear headphone design, and have become inspired to try and make my own. I have accumulated some pictures of my initial design process, fabrication, and my finished prototype and would love to share them with you. These were crafted by myself at the RISD machine shop out of 2024 aircraft aluminum alloy.
 
 
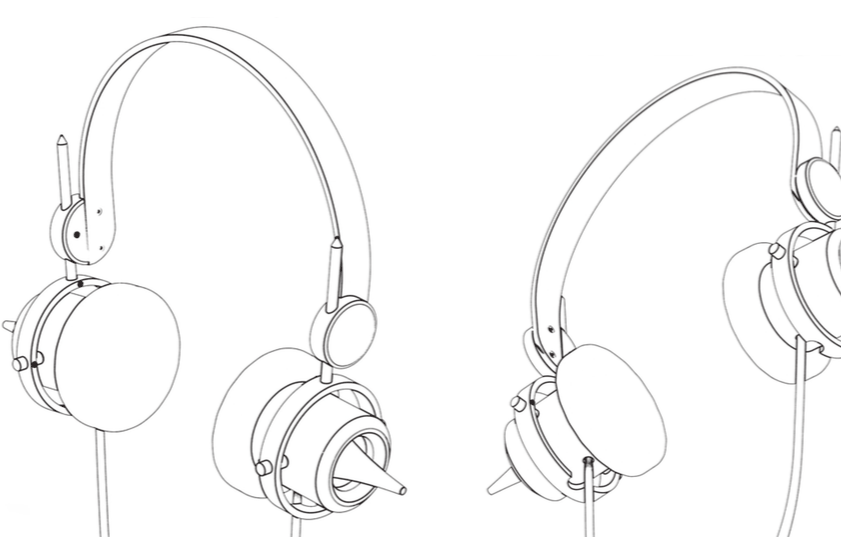
Here are some photos of my initial CAD model. Please disregard the conical plastic sound chamber coming out of the headphone. I was initially toying with the idea of a parabollic sound chamber with a single port but decided it was very cartoony looking:
1.png


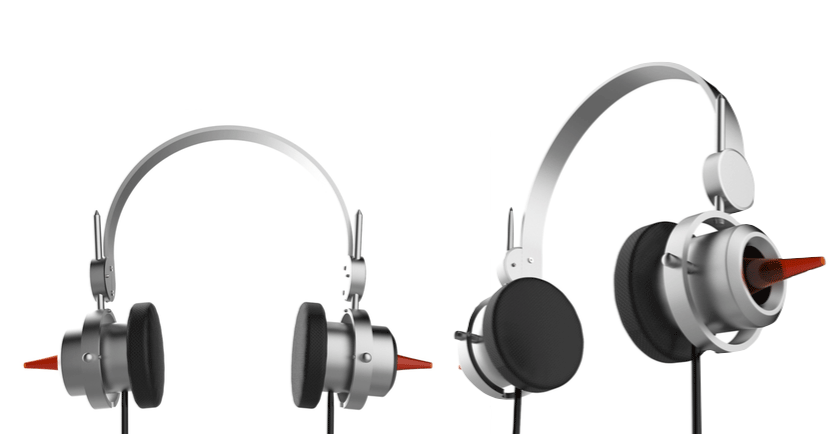
In this image you can see my idea for affixing the headband and for the gimbal/height adjustment mechanism:
2.png

 
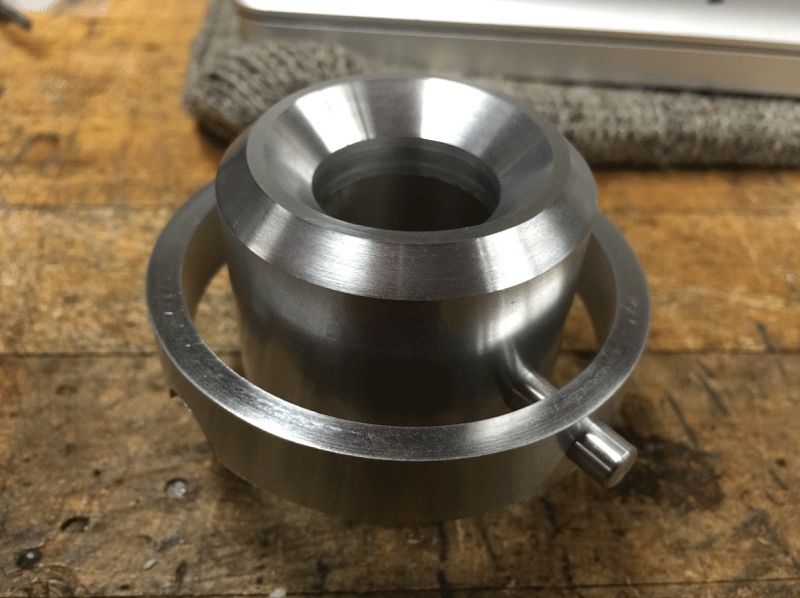
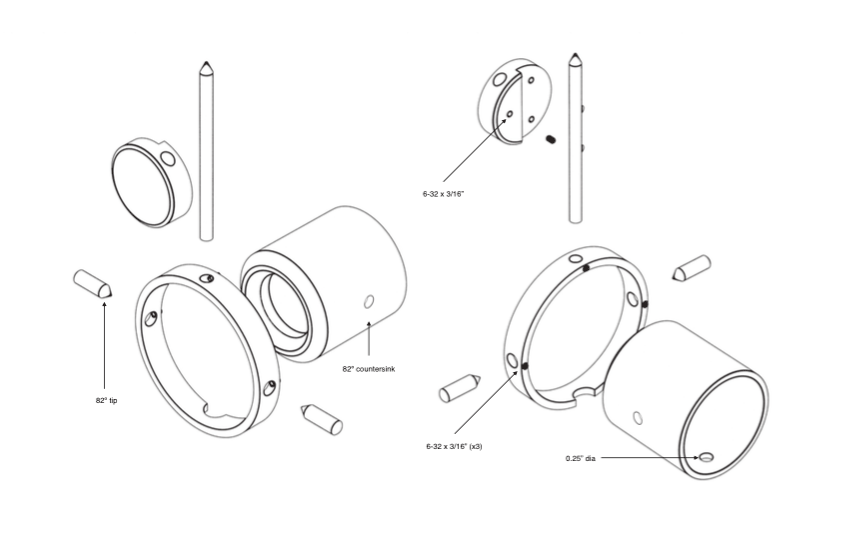
And my thoughts for the detailed assembly of the gimbal. The conical pins and hole that connect the gimbal to the sound chamber are done so that by increasing the surface area in contact, I can increase the friction on the assembly and make everything fit tighter. 
In my next post, I will detail the crafting of the prototype. 
3.png
 
 
Feb 9, 2015 at 10:43 PM Post #2 of 42
Part 2: Machining the parts
 
I have access to a wonderful 1940's era South Bend machinist's lathe here at school. I machined the 
parts out of wonderful 2024 aluminium alloy. it cuts easily and has great sheen with no polishing. It 
also resists tool and scratch marks better than the usual 6061 alloy. Here I am boring out solid 2" bar 
stock to make the stock shapes, and then doing the inner and outer chamfers.
 
4.png

 
Here are the main parts after the initial turning, and before additional milling and drilling steps were performed. 
Notice the great sheen of the material and the wonderful tool marks this fantastic vintage lathe can achieve. It 
is buttery smooth and a pleasure to work with. 

5.png

 
Here are the same parts after carefully drilling and tapping all holes necessary. All the drilling/milling was done on a 1940's Bridgeport milling machine, also a wonderful fixture at our shop. Notice the 1/4" connecting rods, turned to a 82º point on the 
lathe, that fit precisely onto the 82º countersink drilled into the barrel.

6.png

 
Here is the headband connection piece / height adjustment piece. It has two 6-32 tapped holes to connect the headband, which are
recessed in order to make the headband flush. This recess was precision cut in a milling machine. The third 6-32 tapped hole will
serve as a friction adjustment and set screw for the band's height adjustment. 

7.png

 
Here is an initial assembly of the Gimbal and cup. Two set screws hold the pins in place and firmly to the outer ring. The pin's conical 
tip and matching hole in the cup provide very satisfying friction, as the increased surface area allows for more contact. The joint is 
also very clean and does not require penetrating the cup's enclosure. 

8.png

 
Finally, I am introducing a second material to the mix. I have designed the speaker grille/foam cushioning ring and the cap pieces to 
be 3d printed in beautiful translucent red PLA plastic. Here is my little printrbot at work creating the pieces that will go onto the headphones. 
 
9.png
 
 
Feb 10, 2015 at 10:48 AM Post #3 of 42
Part 3 - finished prototype
 
Finally, I am happy to present to you my finished prototype 1. My wife and I took it out for a small photoshoot because I was
so happy with the results. Even if they are on the heavy side, the fit was so great I am considering getting higher end drivers and pads for them. (The 40mm drivers and pads were cannibalized from a set of Panasonic headphones I owned just for testing purposes).
 
10.png

 
The aluminum headband was bent on a set of rollers in order to be smooth all around. It is not as flexible as spring steel so adjusting 
it between users is not extremely easy. I find it to be very comfortable because of the width.
 
11.png

 
Here you can appreciate the gimbal assembly and the cable relief cutout on the gimbal. 

12.png

 
The fit was great for my taste, and although they are fairly massive and somewhat heavy, I could listen to them for several hours without discomfort.

13.png

 
The deep (2") sound chamber combined with the very dense 2024 alloy prove to have great bass clarity without being muddy or having diminished mids or highs, even with these sub-par drivers. I cannot wait to fit something better onto these.
 

14.png

 
The "N" (Noguera) logo is actually a cutout with roughly enough surface area to provide an adequate air port for these closed back drivers. 

15.png

 
Here you can appreciate the (as of yet unpadded) high polish aluminum headband. I like the look so much I almost want to live with
it as-is.
 

16.png

 
I also concocted a small aluminum base/holder for them, they will be a fixture at my office desk from now on! I am very happy 
and proud of them, they were a great machining exercise and made me want to experiment with headphones even more. Thank 
you for reading and I would love to hear what you think of my little experiment. you can view large versions of these pictures if you 
head over to my personal portfolio. I will also upload these versions to the gallery once I gain permission (sorry, I am a head-fi newbie.)

17.png
 
 
Best, 
 
 - Juan Noguera
 
Feb 10, 2015 at 12:58 PM Post #5 of 42
Love them! Great work, a very beautiful design. Congratulations!
 
Feb 10, 2015 at 1:19 PM Post #7 of 42
Nice job I love South Bend Lathes, doing my Tool & Die apprenticeship that's all we used. Most apprenticeship programs use them to learn on. How do they sound?
 
Feb 10, 2015 at 1:27 PM Post #9 of 42
That is a real accomplishment. Very lovely. What is next?  Perhaps a pair in titanium. 
 
Feb 10, 2015 at 2:53 PM Post #11 of 42
They are really cool. Great job. When will you be taking orders LOL.
 
Feb 10, 2015 at 3:43 PM Post #12 of 42
Beautiful! How did you determine the cavity/chamber size, and the size of the port?
If you were to proceed into production (don't mean to get ahead of things here), you may want to consult an acoustician, to optimize sound.
 
Feb 10, 2015 at 3:57 PM Post #13 of 42
They look amazing! How did you fabricate the headband, did you roll it? What's the thickness, and how's the clamping force? Do the rodblocks allow for adjustment on the go or do you need to unscrew the screws before adjusting? 
 

Users who are viewing this thread

Back
Top