


captione
100+ Head-Fier
@jeejack I just found a solution to fit your metal mesh pink dots in MX500s.
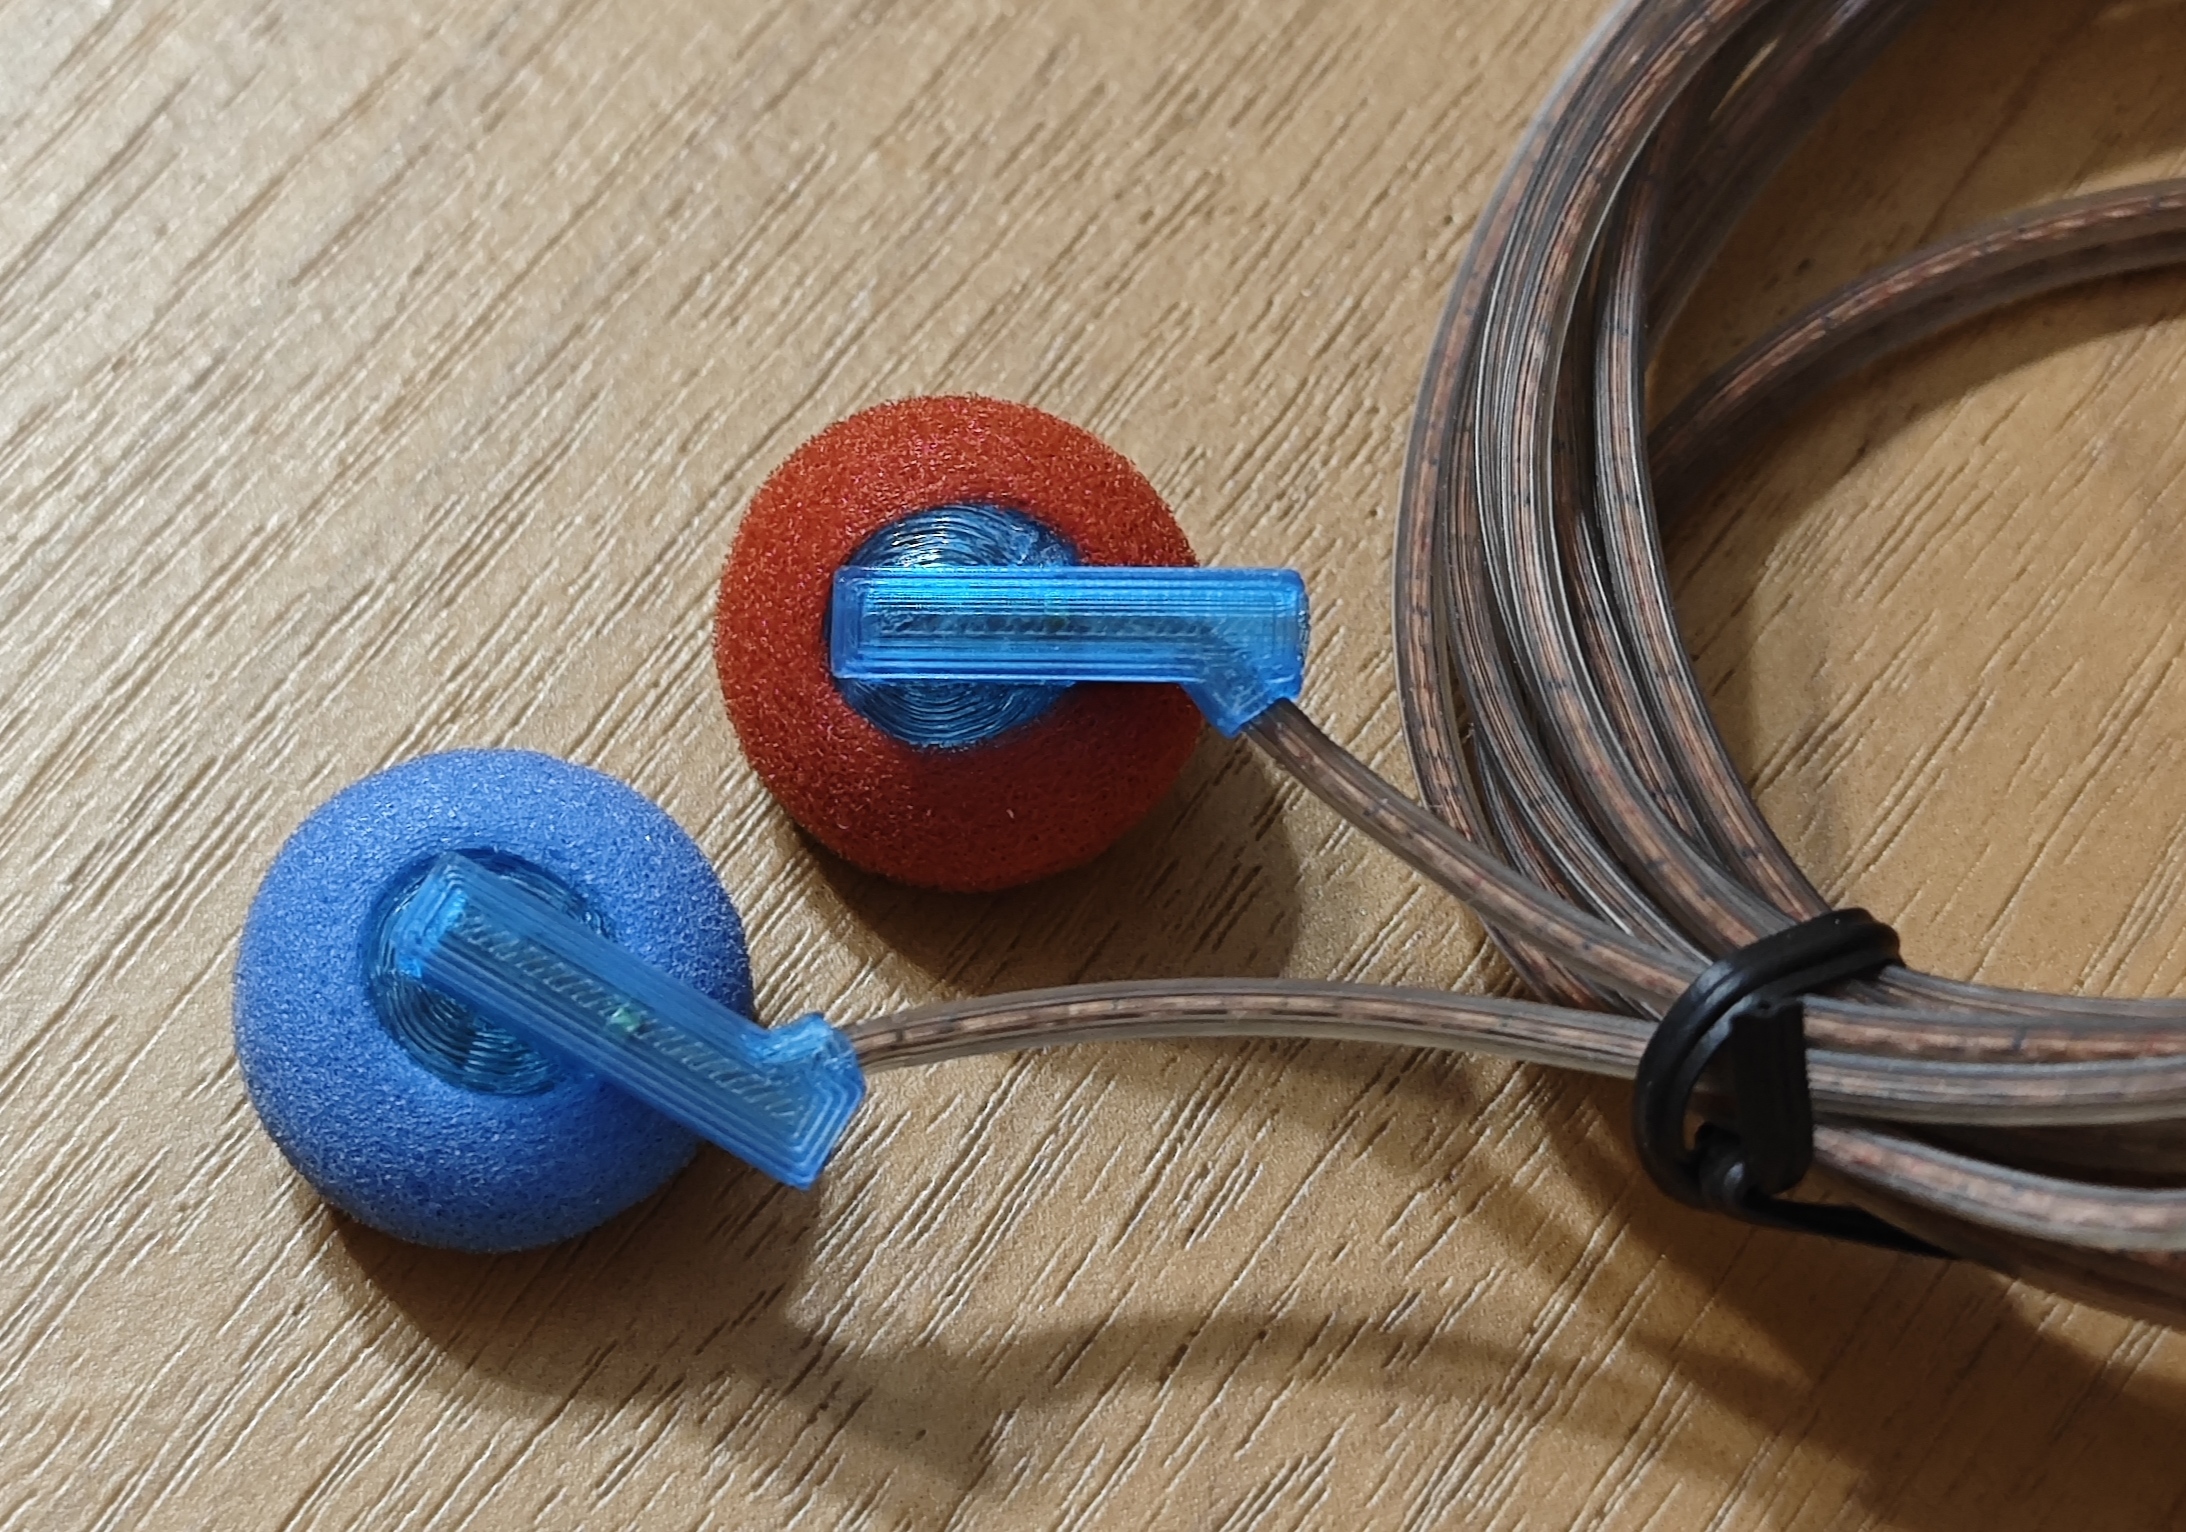
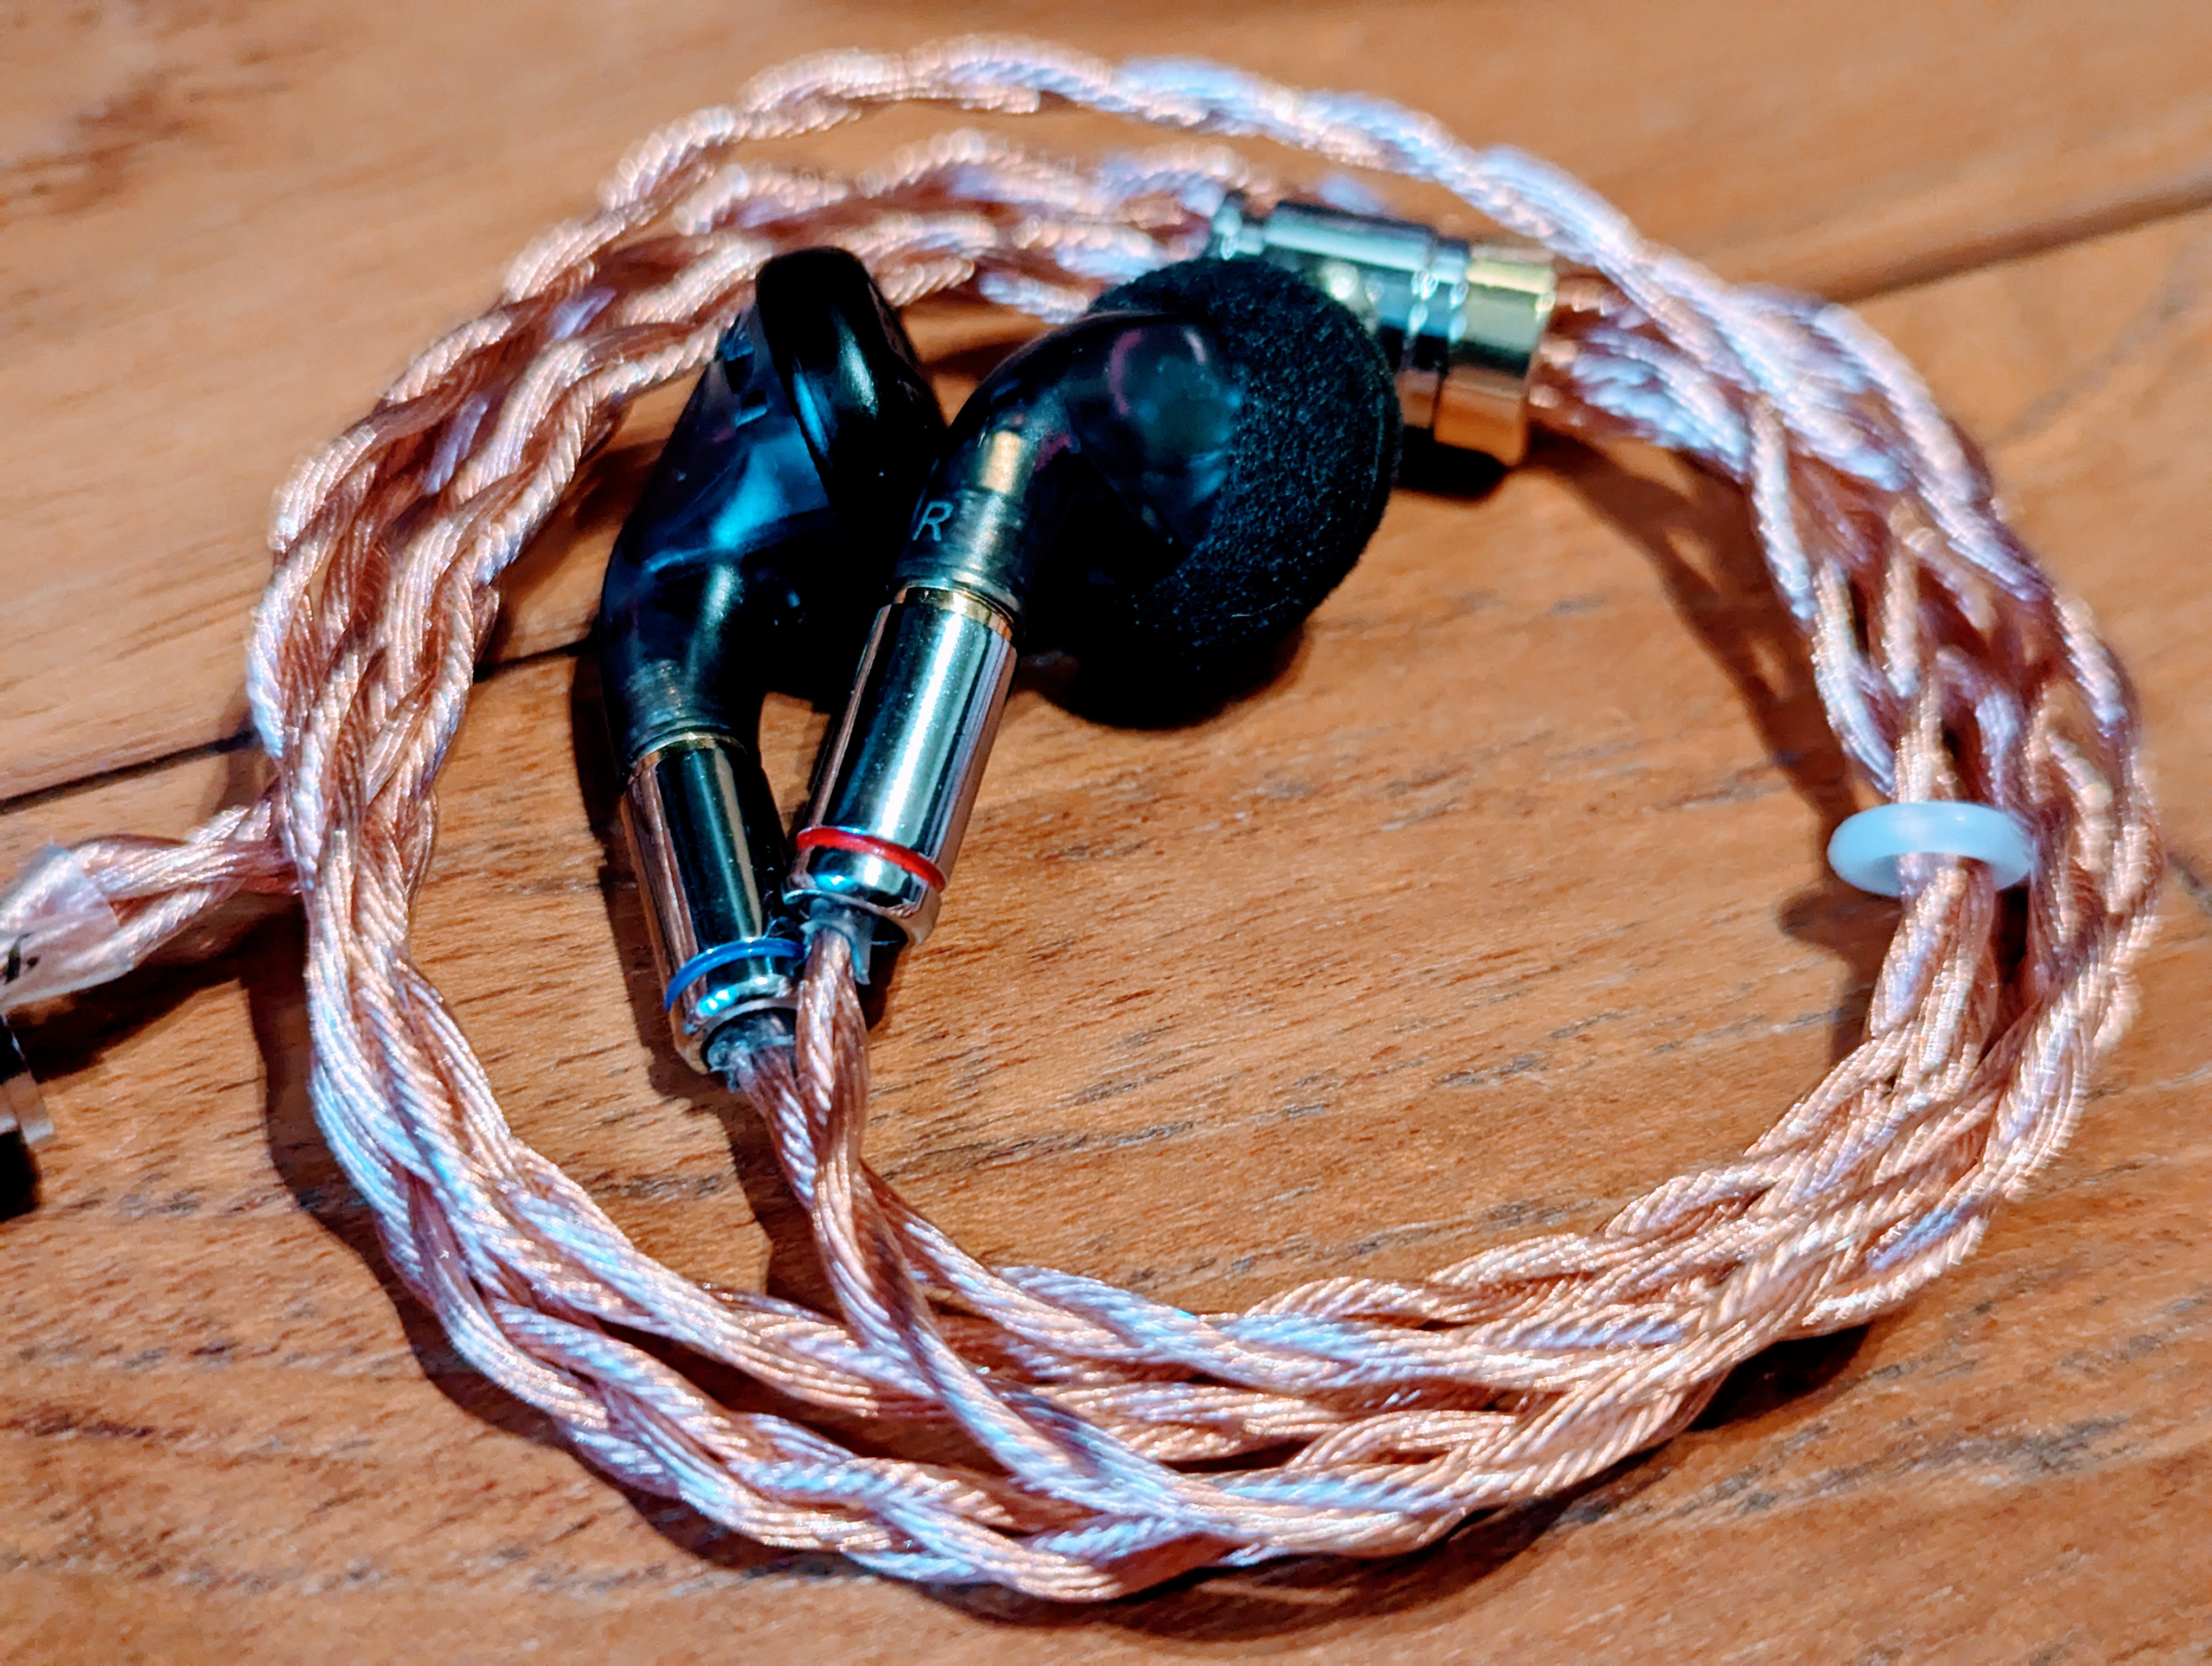
All you have to do is buy those MX500 shells variants with a lip cutout (either the transparent ones or the black ones with engraved L and R markings). The lips on there ends thinly from the body so it's a bit more easy to fit on the shallow faceplate depth of those metal mesh. Just make sure you put the voice coil vent on the lip cutout.
I tested this already and it fits them somehow.

 Also if you guys are planning to tune the pink dots, I have some ideas, all you have to do is to cover the coil vent, leaving some driver vents in the process.
I tried the usual coil vent up method and the upper mids seems strident, but covering it makes it less energetic in that area.
There's also something I noticed when I tuned these pink dots, and it seems to be more bright in transparent shells (with the lips cutout, no faux vent) compared to the usual normal ones without lip cutout, and exhibits more lower treble control.
Putting only a full horseshoe (horseshoe foam that fully covers the driver vents) really turns the pink dot into a more balanced, U shaped signature. The humongous overall bass got turned into warmth and sub bass focus and the 2khz - 5khz shifted to parts of the upper treble.
This is also applicable to any big solder drivers too! I tested it on my green dots and the treble shift seems to help with the stridency in its stock signature.
Hope this helps!
Also one more question.
I got interested in your hardships on tuning the 300ohms, and I'm curious to see the result if you removed the preapplied foam and seal the shell vents completely. Like giving it like a full closed headphone effect as shown from @furyossa ShoonTH post. Maybe restraining completely of air movement might help with the treble?
There's also an option where you leave the pre applied foam alone and put a circle foam (those foams that come with pairs of horseshoe foams) on the inside of the lips where the coil vent meets.
All you have to do is buy those MX500 shells variants with a lip cutout (either the transparent ones or the black ones with engraved L and R markings). The lips on there ends thinly from the body so it's a bit more easy to fit on the shallow faceplate depth of those metal mesh. Just make sure you put the voice coil vent on the lip cutout.
I tested this already and it fits them somehow.
I tried the usual coil vent up method and the upper mids seems strident, but covering it makes it less energetic in that area.
There's also something I noticed when I tuned these pink dots, and it seems to be more bright in transparent shells (with the lips cutout, no faux vent) compared to the usual normal ones without lip cutout, and exhibits more lower treble control.
Putting only a full horseshoe (horseshoe foam that fully covers the driver vents) really turns the pink dot into a more balanced, U shaped signature. The humongous overall bass got turned into warmth and sub bass focus and the 2khz - 5khz shifted to parts of the upper treble.
This is also applicable to any big solder drivers too! I tested it on my green dots and the treble shift seems to help with the stridency in its stock signature.
Hope this helps!
Also one more question.
I got interested in your hardships on tuning the 300ohms, and I'm curious to see the result if you removed the preapplied foam and seal the shell vents completely. Like giving it like a full closed headphone effect as shown from @furyossa ShoonTH post. Maybe restraining completely of air movement might help with the treble?
There's also an option where you leave the pre applied foam alone and put a circle foam (those foams that come with pairs of horseshoe foams) on the inside of the lips where the coil vent meets.
Last edited:


