Audio Note Kit DAC 5.1 signature - NOS R-2R
Jan 5, 2016 at 2:16 PM Thread Starter Post #1 of 38

bigfatpaulie

Headphoneus Supremus
Joined
Sep 2, 2012
Posts
1,854
Likes
684
Location
Toronto, Ontario, CANADA
Hello,
 
I wanted to add a place to talk about ANK kits as I know a few people here have them.  I would also like to hear opinions on the new DAC 5.1!
 
From their website:
 
DAC 5.1 signature - NOS R-2R digital to analogue converter
 
ANKits is proud to announce the latest addition to our level 5 series with the new DAC 5.1 Signature. Under development for over 4 years it's quite incredible this product is available as a kit, rather it is an exceptional piece of high-end audio that can also be purchased in kit form or as factory assembled.
 
____DAC 5.1 features include
  1. New Digital Board (SHUNT).
  2. New Super Regulation Board.
  3. New Large Can I/V Transformers.
  4. New 12AU7 & ECC99 Line Stage.
  5. Triple C-Core O/P Transformers.
  6. New WE274B SHUNT Power Supply.
  7. Dual Mains Transformers.
  8. Mentor Filament Board.
  9. WBT Silver 75 ohm SPDIF input.
  10. AES/XLR input.
  11. Silver Input Cable.
  12. Optional USB board.
  13. Available as a Kit or Factory Assembled
    (Finished Product).
 
 
  Our brief was to build on our current DAC expertise and develop one of the finest digital to analog converters on the market today. We leveraged our Mentor shunt power supply technology and combined that with a film capacitor architecture dedicated to delivering unparalleled performance.
The dynamics, the smoothness, the end result - a staggering experience for the modern audiophile and a chance to re-experience their entire digital collection.


Jan 5, 2016 at 2:24 PM Post #2 of 38
5.5k isn't excately spare change when you put it in a kind of DIY context
wink.gif

 
Feb 24, 2016 at 4:23 PM Post #5 of 38
I have always been an admirer of AudioNote products.  Let’s just call a spade a spade – they make good stuff.  I had heard of ANK around here and one day reached out to Brian (the owner of the company) about a DAC 4.  He casually mentioned that he has been cooking a new monster – the DAC 5.  I knew then and there I had to hear it!  I am very excited to say that I am the first person to receive the new DAC 5 kit and I look forward to what looks like a challenging but very interesting build!
 
Look what arrived in the mail!


What?  The box isn’t big enough for you?  What about this one then:


Yes.  The DAC 5 comes in not one but TWO boxes. 


I hate packing peanuts…


But we are off to a good start!


In the smaller box are all the transformers and chokes and such. 


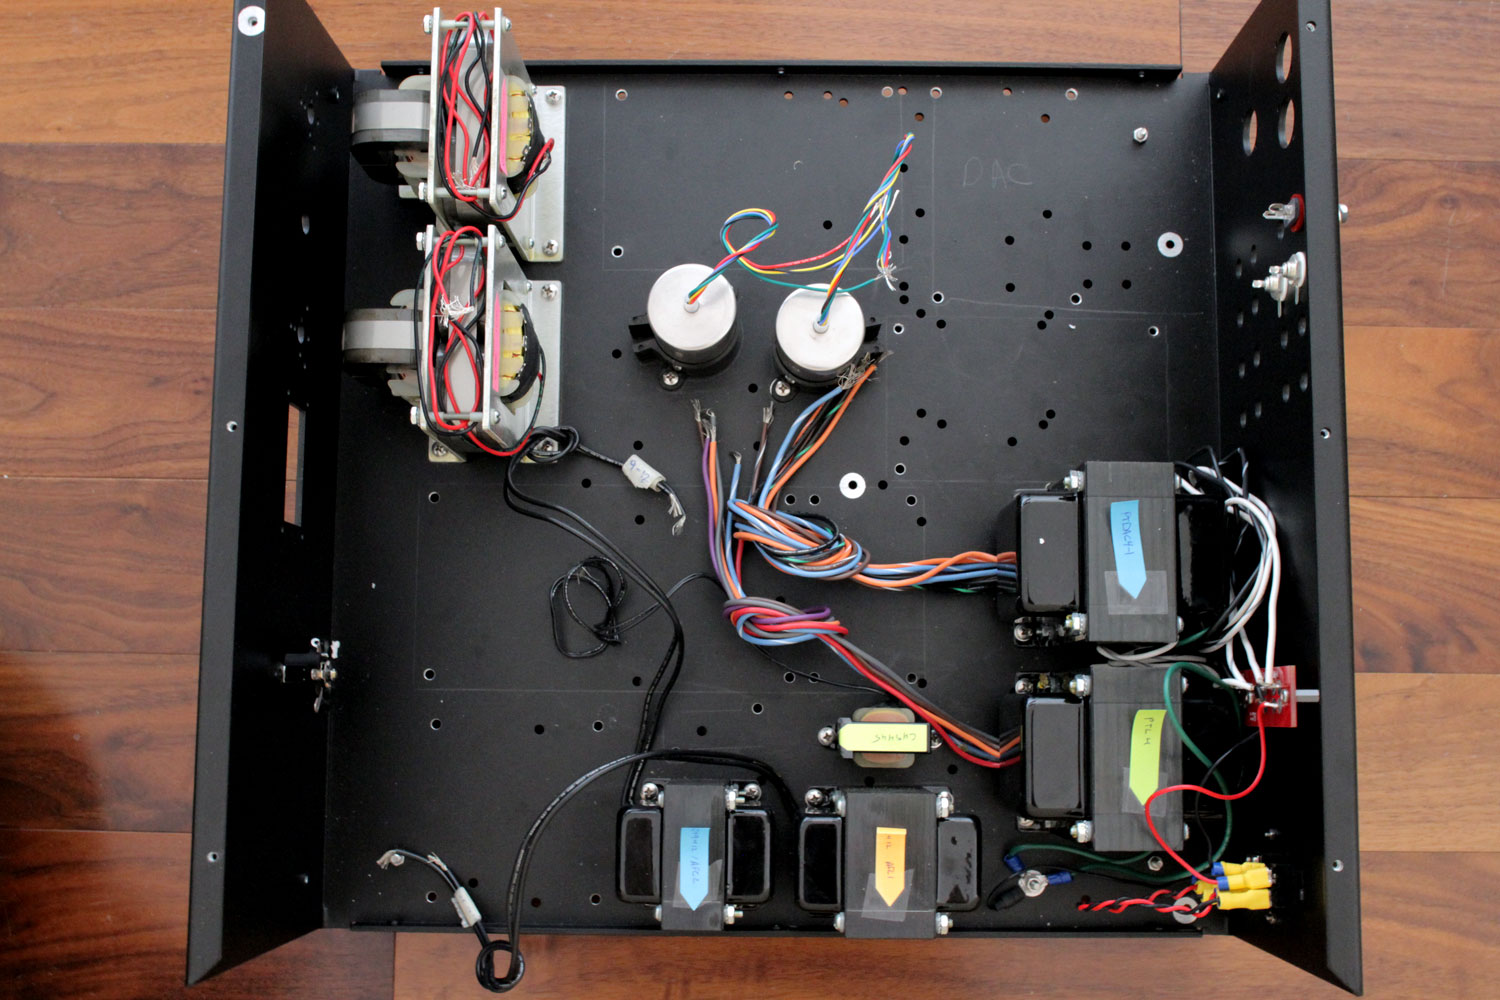
In the bigger box was this beast.  Holy moly is it a monster:


And inside it, more stuff.


I had a chuckle to myself when I saw this.


The two boxes that were inside the chassis, inside the box…  You follow, right?


The DAC board.  It’s an all hyped up R2R board.


Everything came individually bagged and tagged.


I’m not kidding…  EVERYTHING.


Finally, the tubes: the “burn-in set”.


Well, here we go again folks!  Another build and I’m really looking forward to this one.  I will be working pretty closely with Brian on this because the manual is still ‘beta’ – I am literally the first person to get a DIY kit!
 
Stay tuned!
 
Feb 26, 2016 at 1:14 PM Post #6 of 38
Okay, the first day of building is officially underway!!!
 
One thing to keep in mind is that I am the very first DIY’er to attempt this build, and this is the first kit.  I knew that and Brian asked for one thing from me: patience.  He was right to ask for it.  I stared by building the power input board: it’s simple.


Just wire in the rear switch, power socket and the two massive main transformers. 


You can tell the manual is a work in progress :)


So comes the ‘easy’ part, just screw the transformers to the chassis.  But there was a SLIGHT issue.


2 of the 4 holes would never align.  After playing around with everything and calling and emailing Brian it turns out that the standoffs used to secure the IEC to the back of the chassis were too long so I could not correctly position the transformers to match the holes.  You can see the long standoffs on the right, behind the IEC.


This also lead me to place everything on in the case (and outline it in pencil) so that I knew everything going forward would fit.


And it did, albeit, a little differently than the manual.  Oddly enough one of the boards in my kit was from a 300b amplifier and Brian noticed in this photo.  He is rushing a care package to me with the new screws/standoffs, boards, and few other things.  I know it doesn’t look like much progress today but that was several hours!  Troubleshooting in time consuming!
 
Mar 12, 2016 at 5:49 PM Post #9 of 38
Okay, my wife is away for work so I have picked up the project!!
Today, we get start building the boards; otherwise known as ‘my favorite part’.


I like Brian’s style.  In the manual he spends a lot of time talking about making sure the tube sockets are level, and when install caps to make sure the writing is all facing out and so on.  He really cares about making something that looks good, not just sounds good.


The power supply board built!  That’s a lot of expensive caps…


Now on to the regulator board.  Everything and I mean EVERYTHING is packed individually and labeled.


Some 47uf and capacitors and resistors…


And the bridge rectifiers go in.


And the completed board!


Just kidding :)  Did you catch the mistake?


And finally on to the analog line board….


It has been a very pleasant build so far but this is where I ran into a problem – missing parts.  I was short a few tantalum resistors and some silver hook up wire so I am in limbo while Brian sends me a care package.
 
Till next time!
 
Mar 24, 2016 at 11:19 AM Post #10 of 38
New parts have arrived so I can continue building!!


The completed line board:


So on the building the filament board…  And we have a bit of a snag: more missing pieces.


But I could mount everything else in the chassis!


Some parts are a very tight fit.  A little more room here would have been nice.


Here are all the boards (mostly) assembled.  Just a few missing caps for the filament board but other than that we are off to the races.


Things are really starting to take shape.  Here is everything placed and mounted.


Until next time!
 
Apr 9, 2016 at 2:26 PM Post #11 of 38
Well, more stuff arrived including the “USB” module.


Yup.  This is it.  I’m concerned as you are.  Brian says that it was highly recommended, but this is basically a $25 USB -> SPDIF converter so I have my doubts it will be any good, and likely the major bottle neck of this DAC. 


But some good stuff also showed up!


I spent a lot of time wiring the boards and cutting things to length.  Visually, this is all pretty unimpressive.


But!  It’s alive!!  I fired up the power supply board and all the voltage check out and the LED fires up.  I tell you, no matter how many projects I build, that first power up is always so rewarding.


And sure enough the rectifier starts to glow.


But I’m missing some parts, so now we wait again…  Until next time.
 
Apr 12, 2016 at 5:20 PM Post #12 of 38

I read your posts. I would recommend using an external USB/SPDIF convertor like the Audiophilio or M2Tech units. It will get you better PC audio than an inbuilt board.
 
Also better galvanic isolation, and you can power the convertor with a linear supply to get it even better. 
 
USB audio is complicated, but it can be better (a lot better) than spinning CDs as far as sound quality goes. It just takes some time and research to set it up well.
 
Hope this helps.
 
Apr 13, 2016 at 6:11 AM Post #14 of 38
  isnt products like intona usb isolator will be better?


What he needs is to feed that high level DAC with USB/SPDIF data. Having an external convertor with it's own power source also has the benefit of galvanic isolation.
 
The world of USB has so many levels, it can sound great, excellent, but can also sound poor. Many modern DACs have poor USB input boards down to budget and multiple input issues. Better to sort that yourself IMO.
 
May 16, 2016 at 11:34 AM Post #15 of 38
Well, after much ado about nothing, the ANK 5.1 DAC is complete!!


It's a really nice sounding DAC, no question.  It is very musical.  I would describe the sound as 'effortless'.  It flows very nicely and has a wonderful life and aplomb. This DAC really only supports SPDIF input so if USB in is important to you you will have to spring for a USB to SPDIF converters.  
 

Users who are viewing this thread

Back
Top