3D printed closed headphones with HD800 driver
Feb 7, 2015 at 12:39 AM Post #32 of 166
You mean in December 2013? At that time only the driver has arrived.
smily_headphones1.gif
you are welcome the next time you are in Vietnam


Hey Frank, I'm in Phu My Hung, District 7 - I'd love to hear these sometime!
 
Cheers,
 
Aaron
 
Feb 7, 2015 at 12:53 AM Post #33 of 166
 
Hey Frank, I'm in Phu My Hung, District 7 - I'd love to hear these sometime!
 
Cheers,
 
Aaron

Haha this is where I live also. Just PMed you. Maybe someone can post an impression of my headphones after all.
 
Feb 7, 2015 at 1:13 AM Post #34 of 166
  Haha this is where I live also. Just PMed you. Maybe someone can post an impression of my headphones after all.


This is so crazy - I got your message. We're practically neighbors! Such a great website...
 
Feb 7, 2015 at 2:02 AM Post #36 of 166
Wow these look amazing. I'm going to try modding this sumer too when I get my guts together.
 
Feb 7, 2015 at 4:16 AM Post #37 of 166
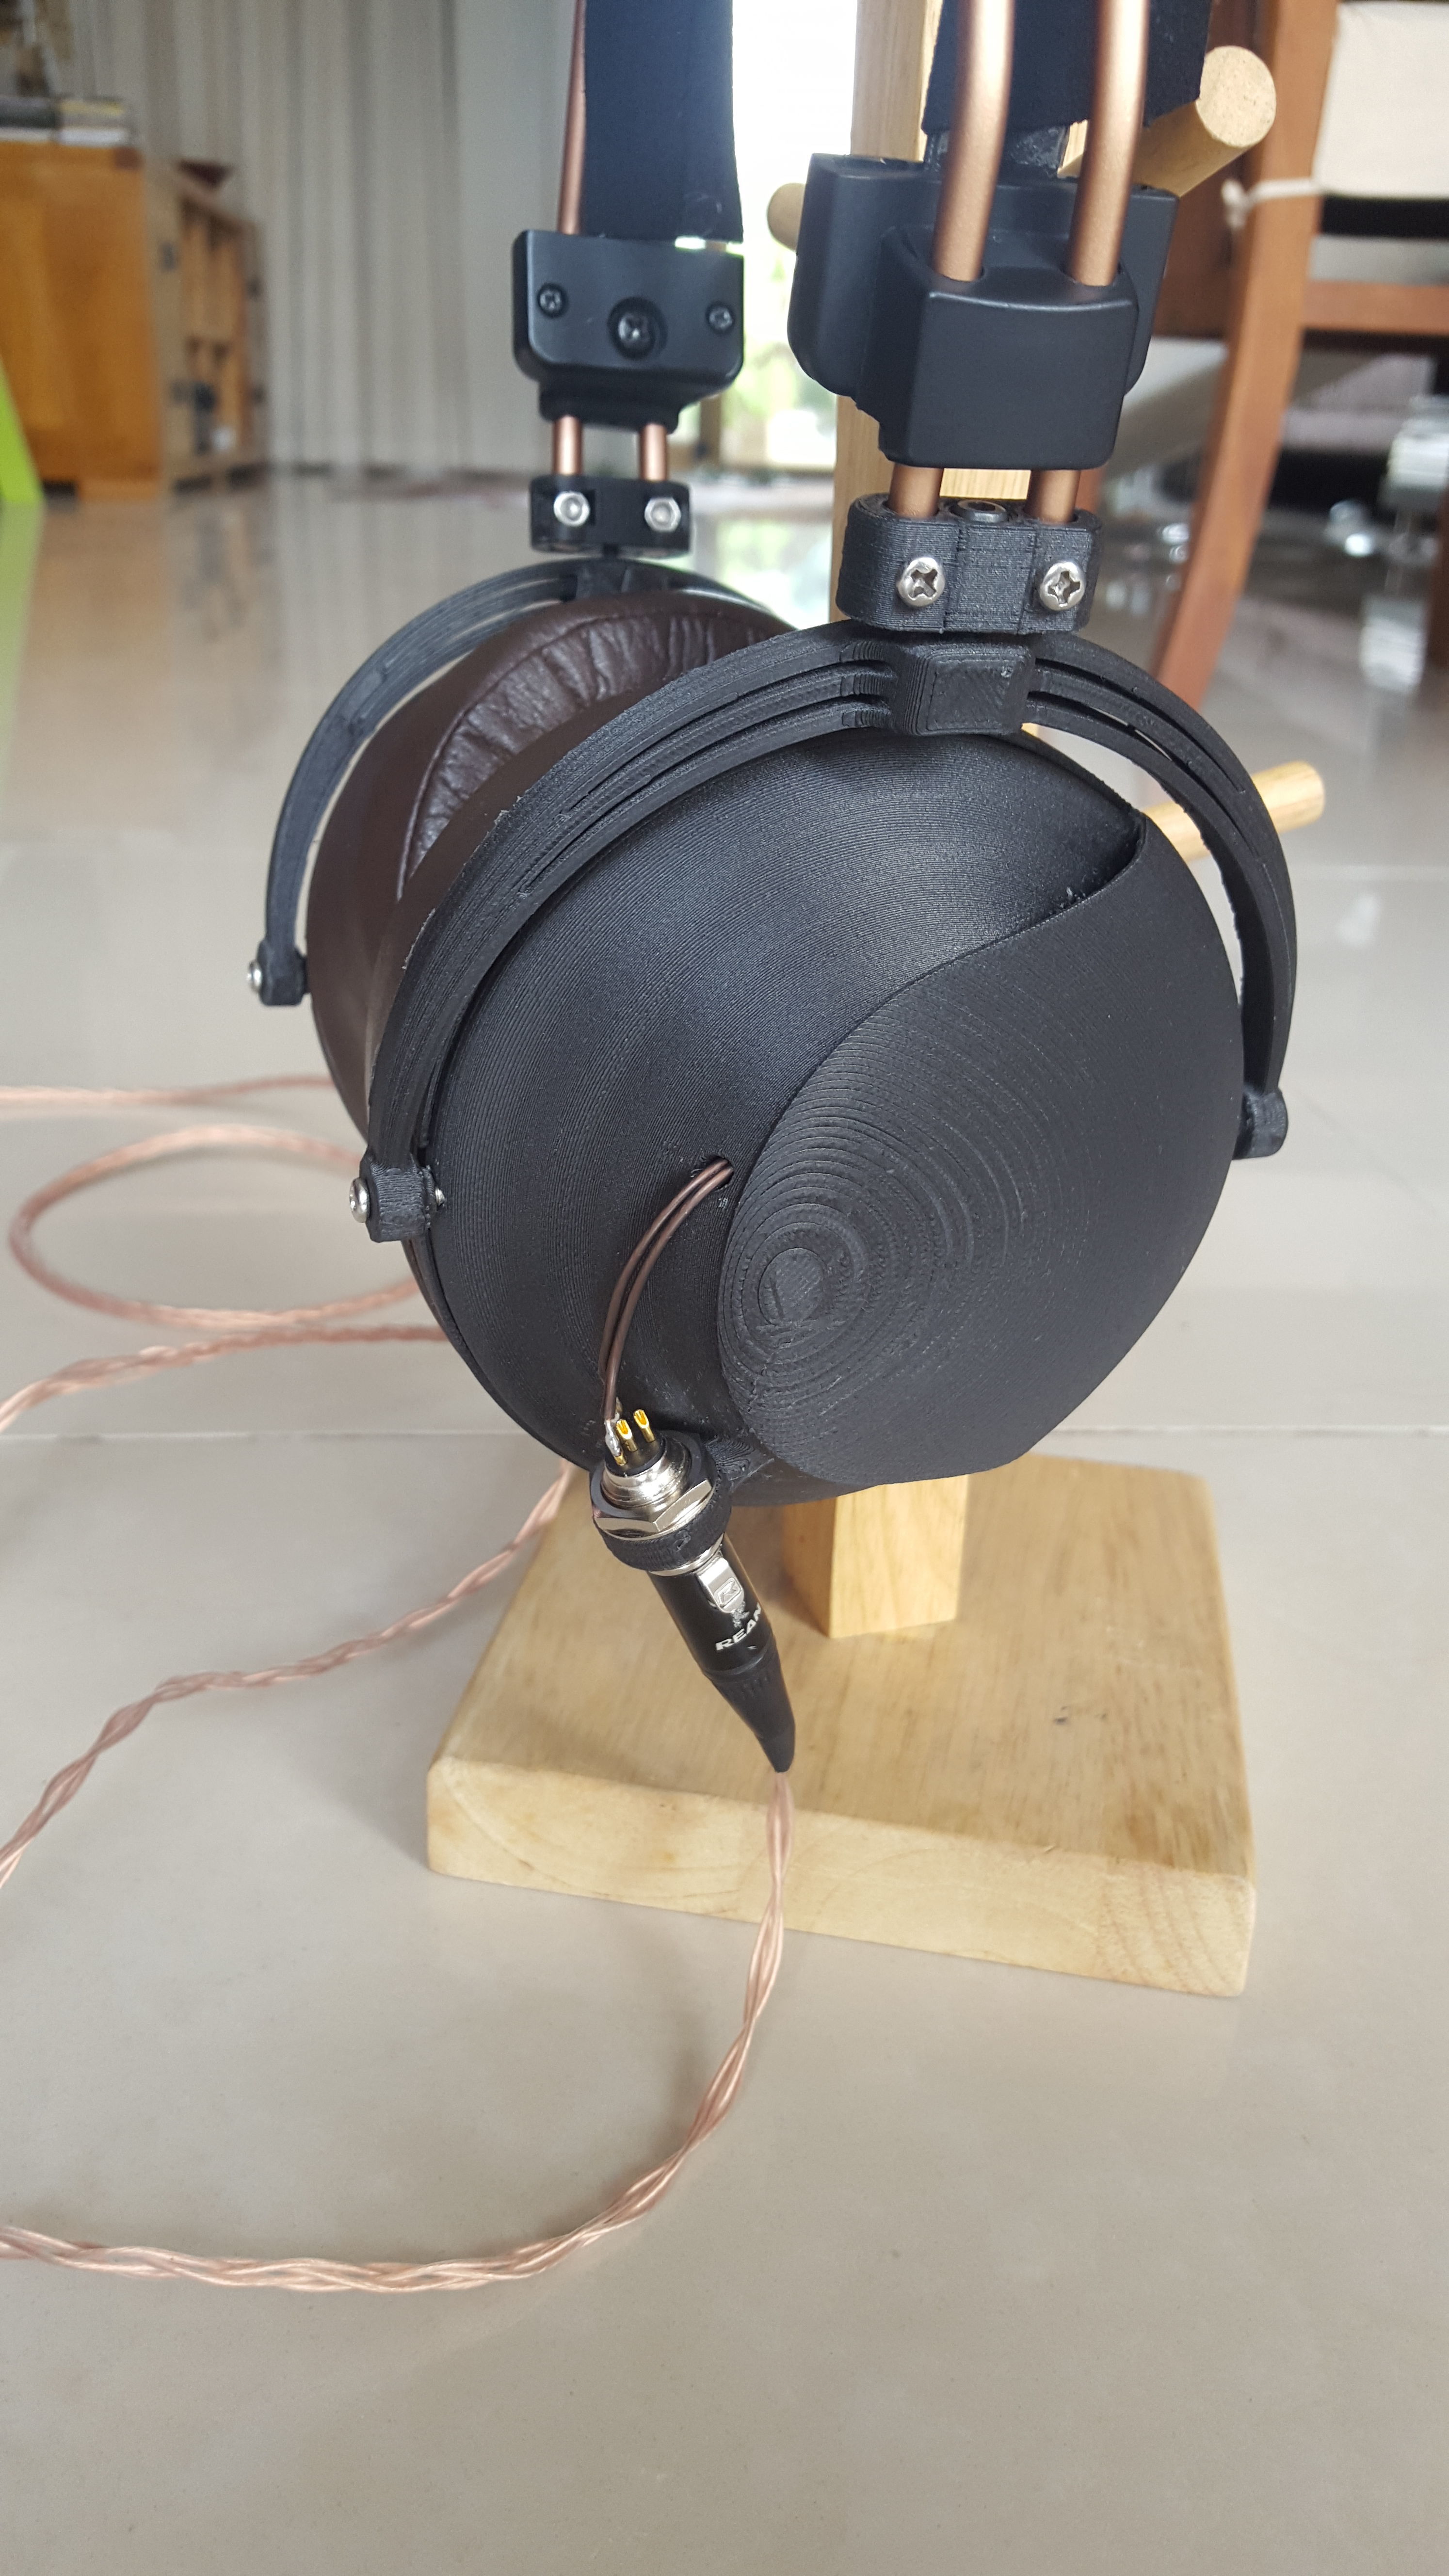
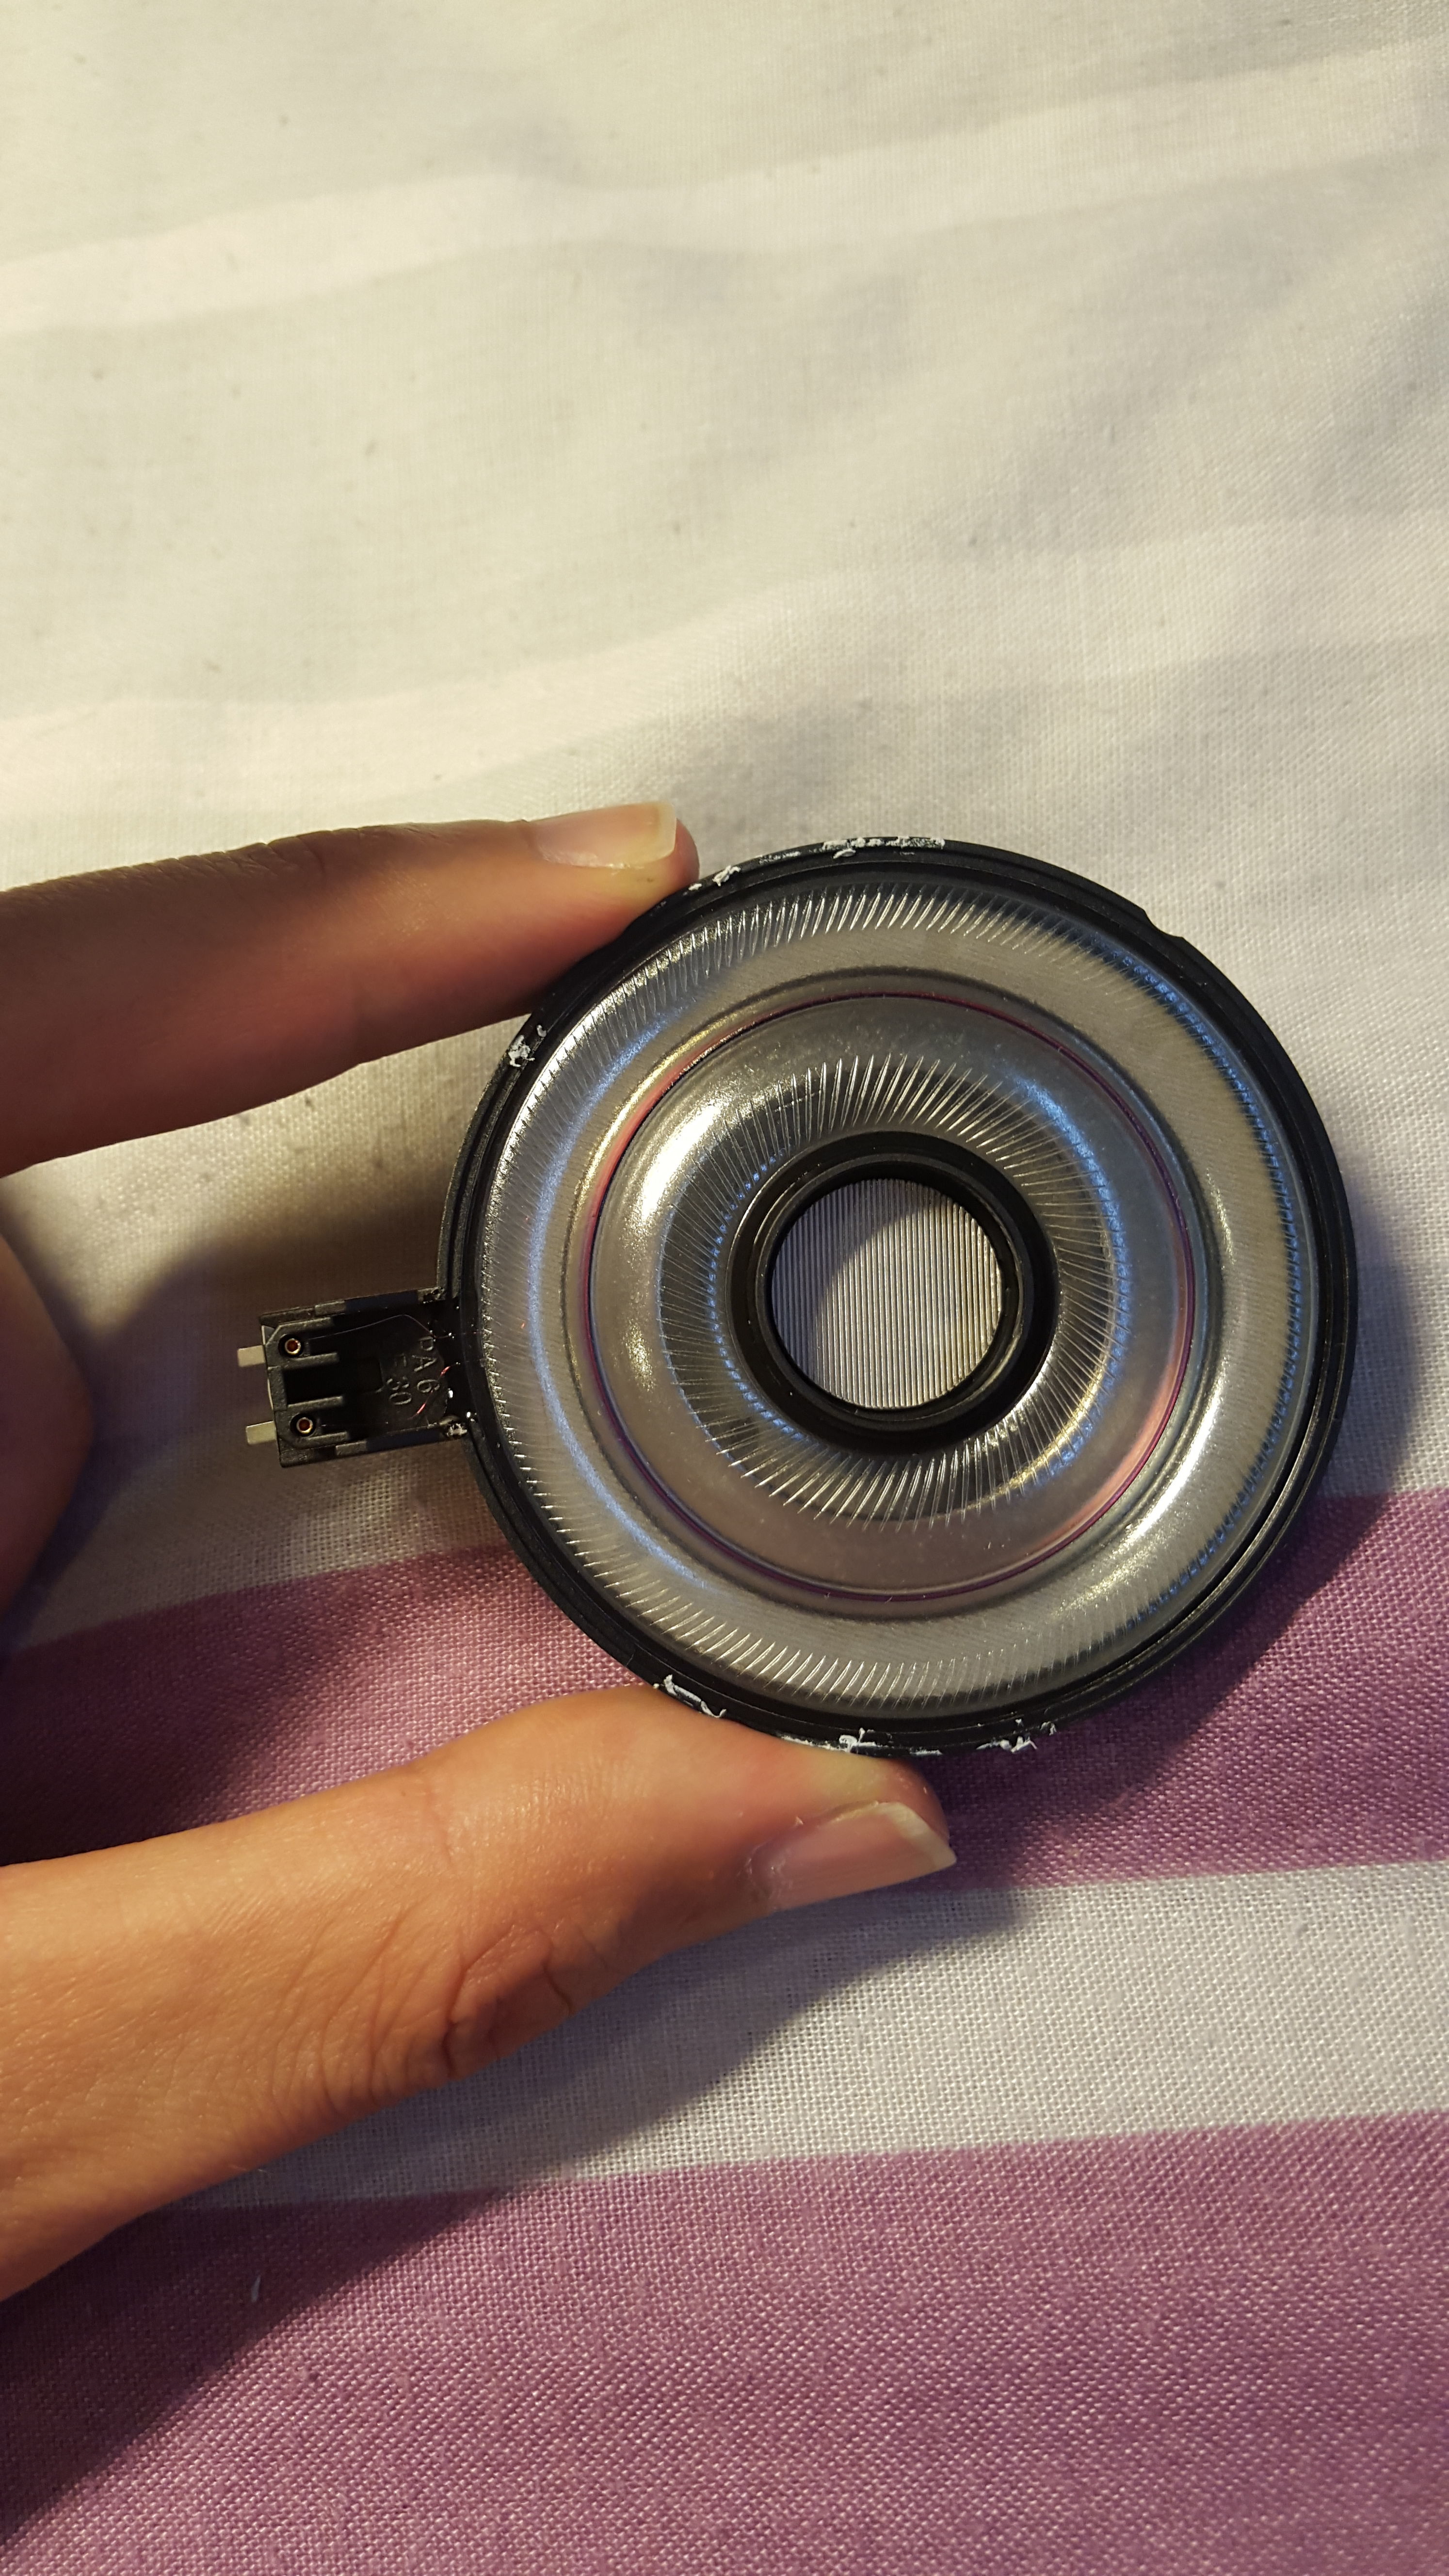
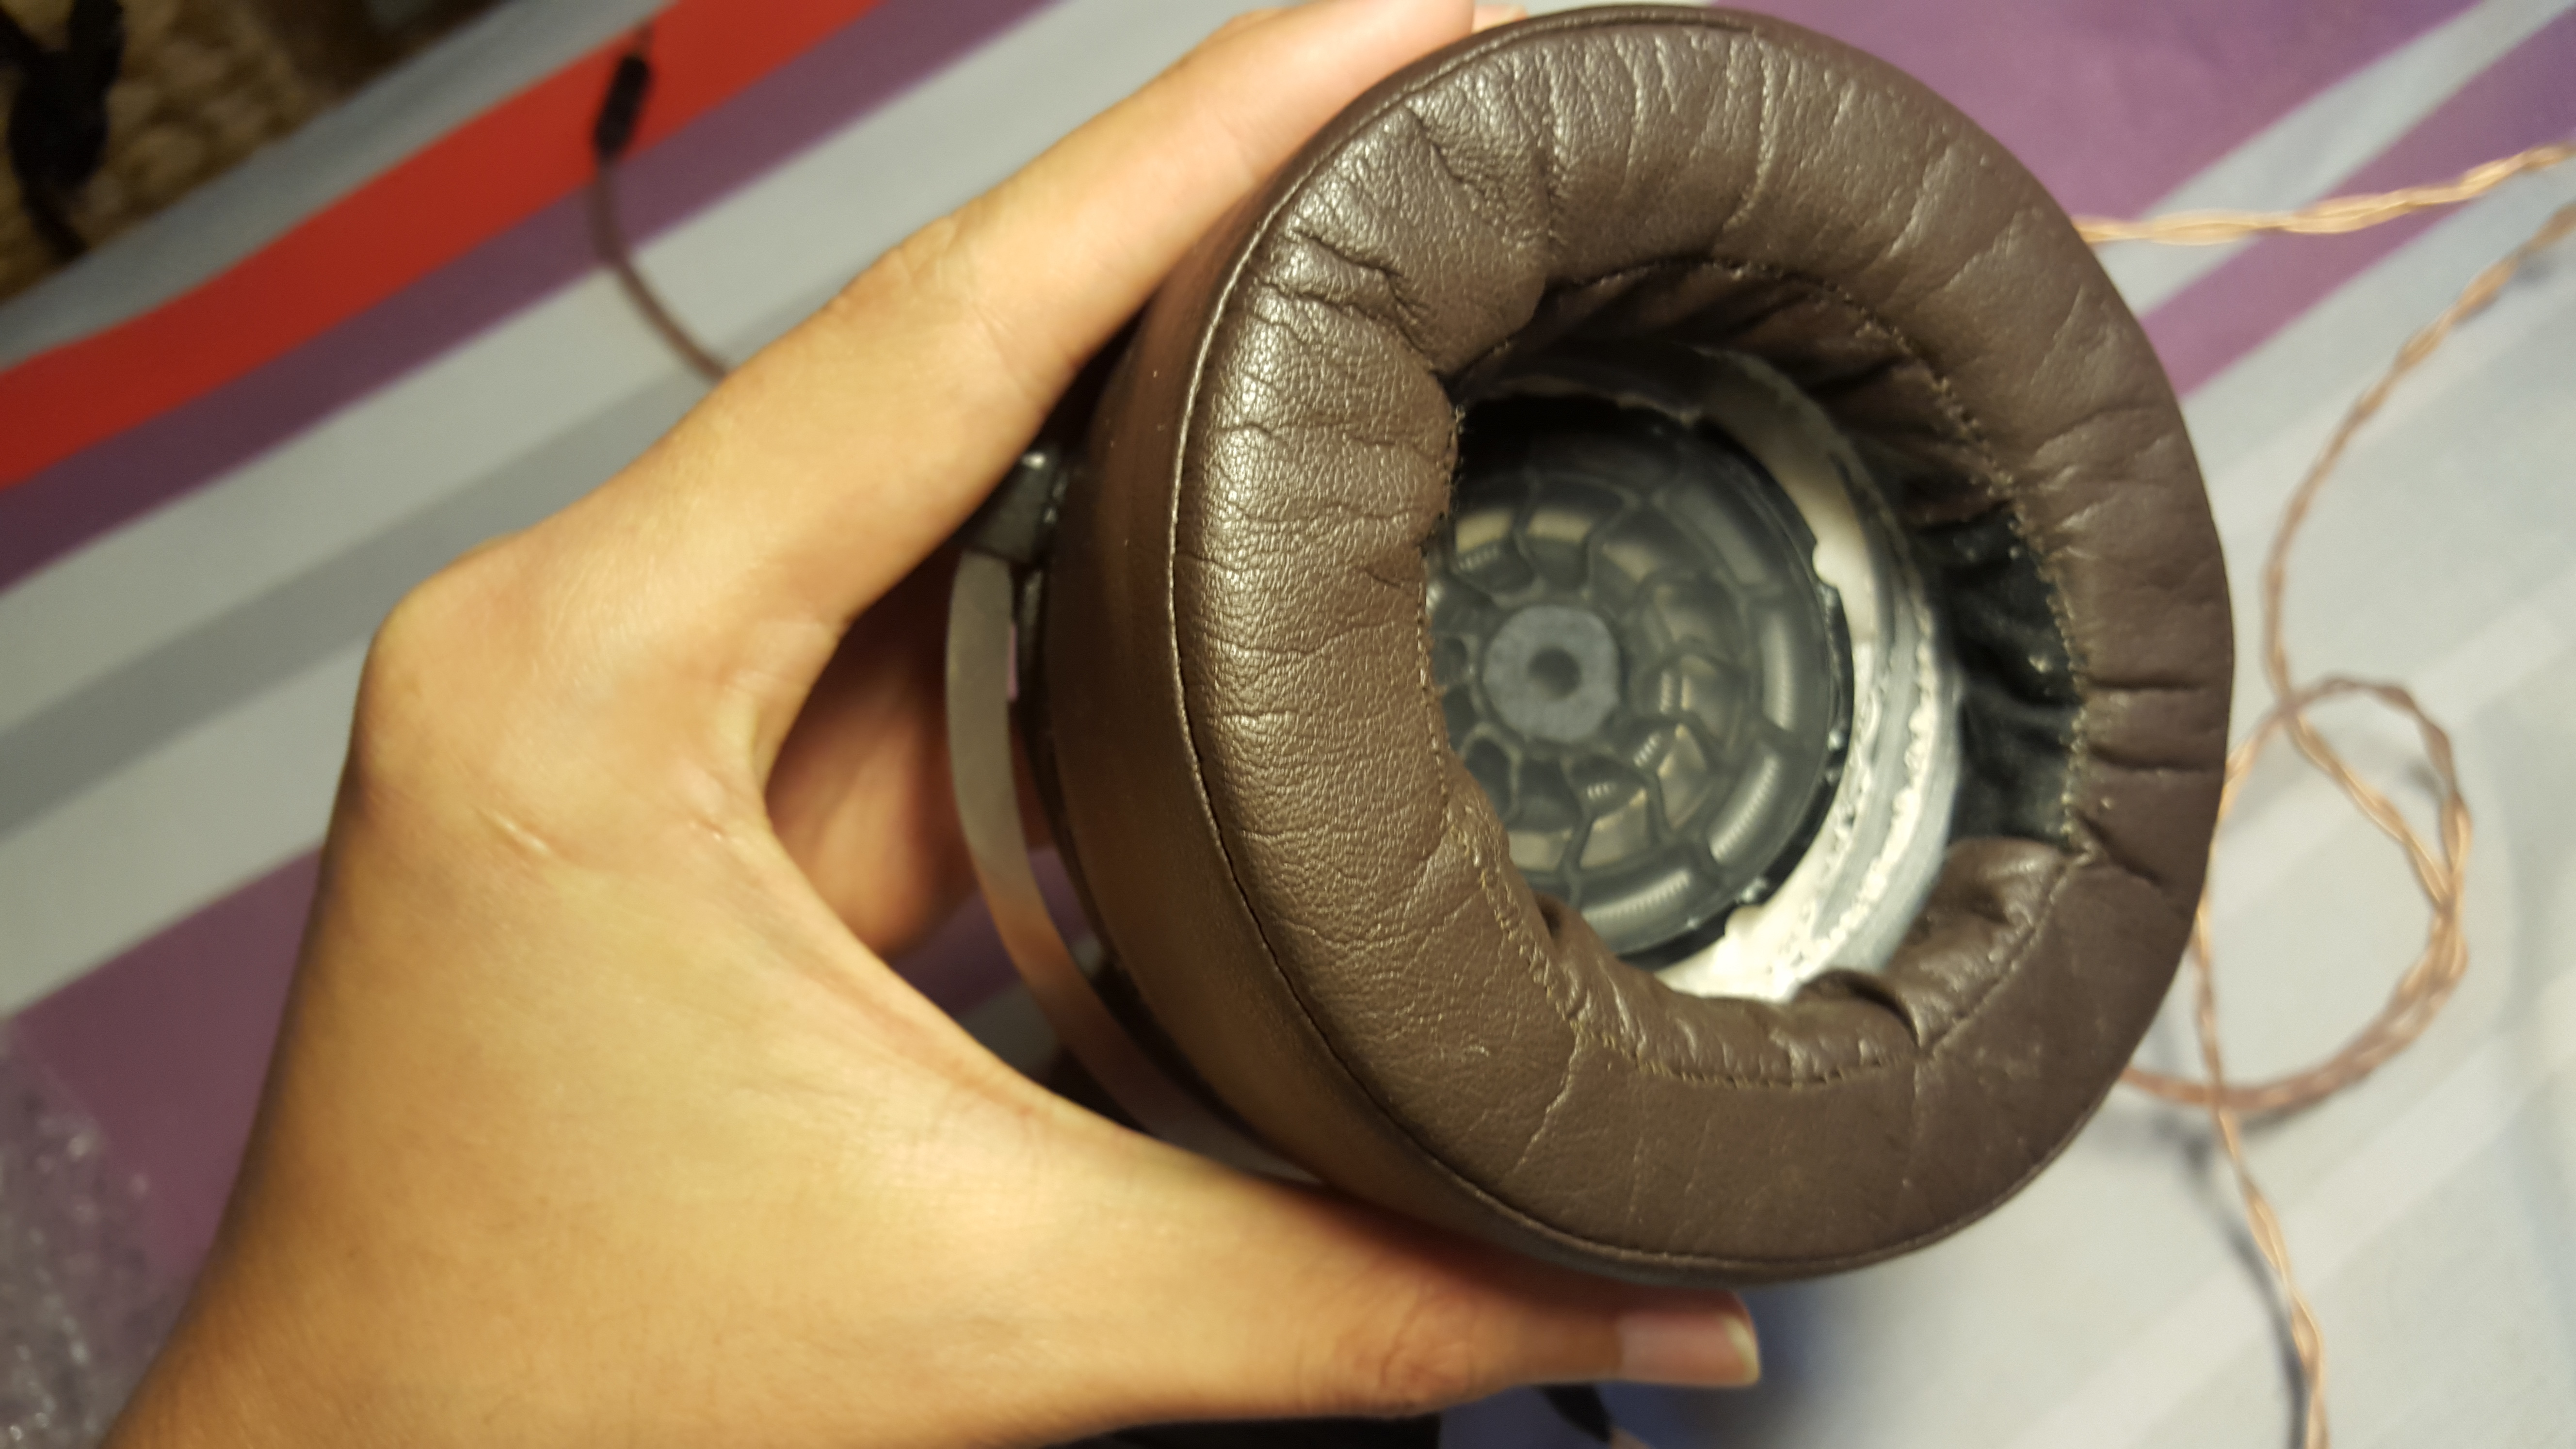
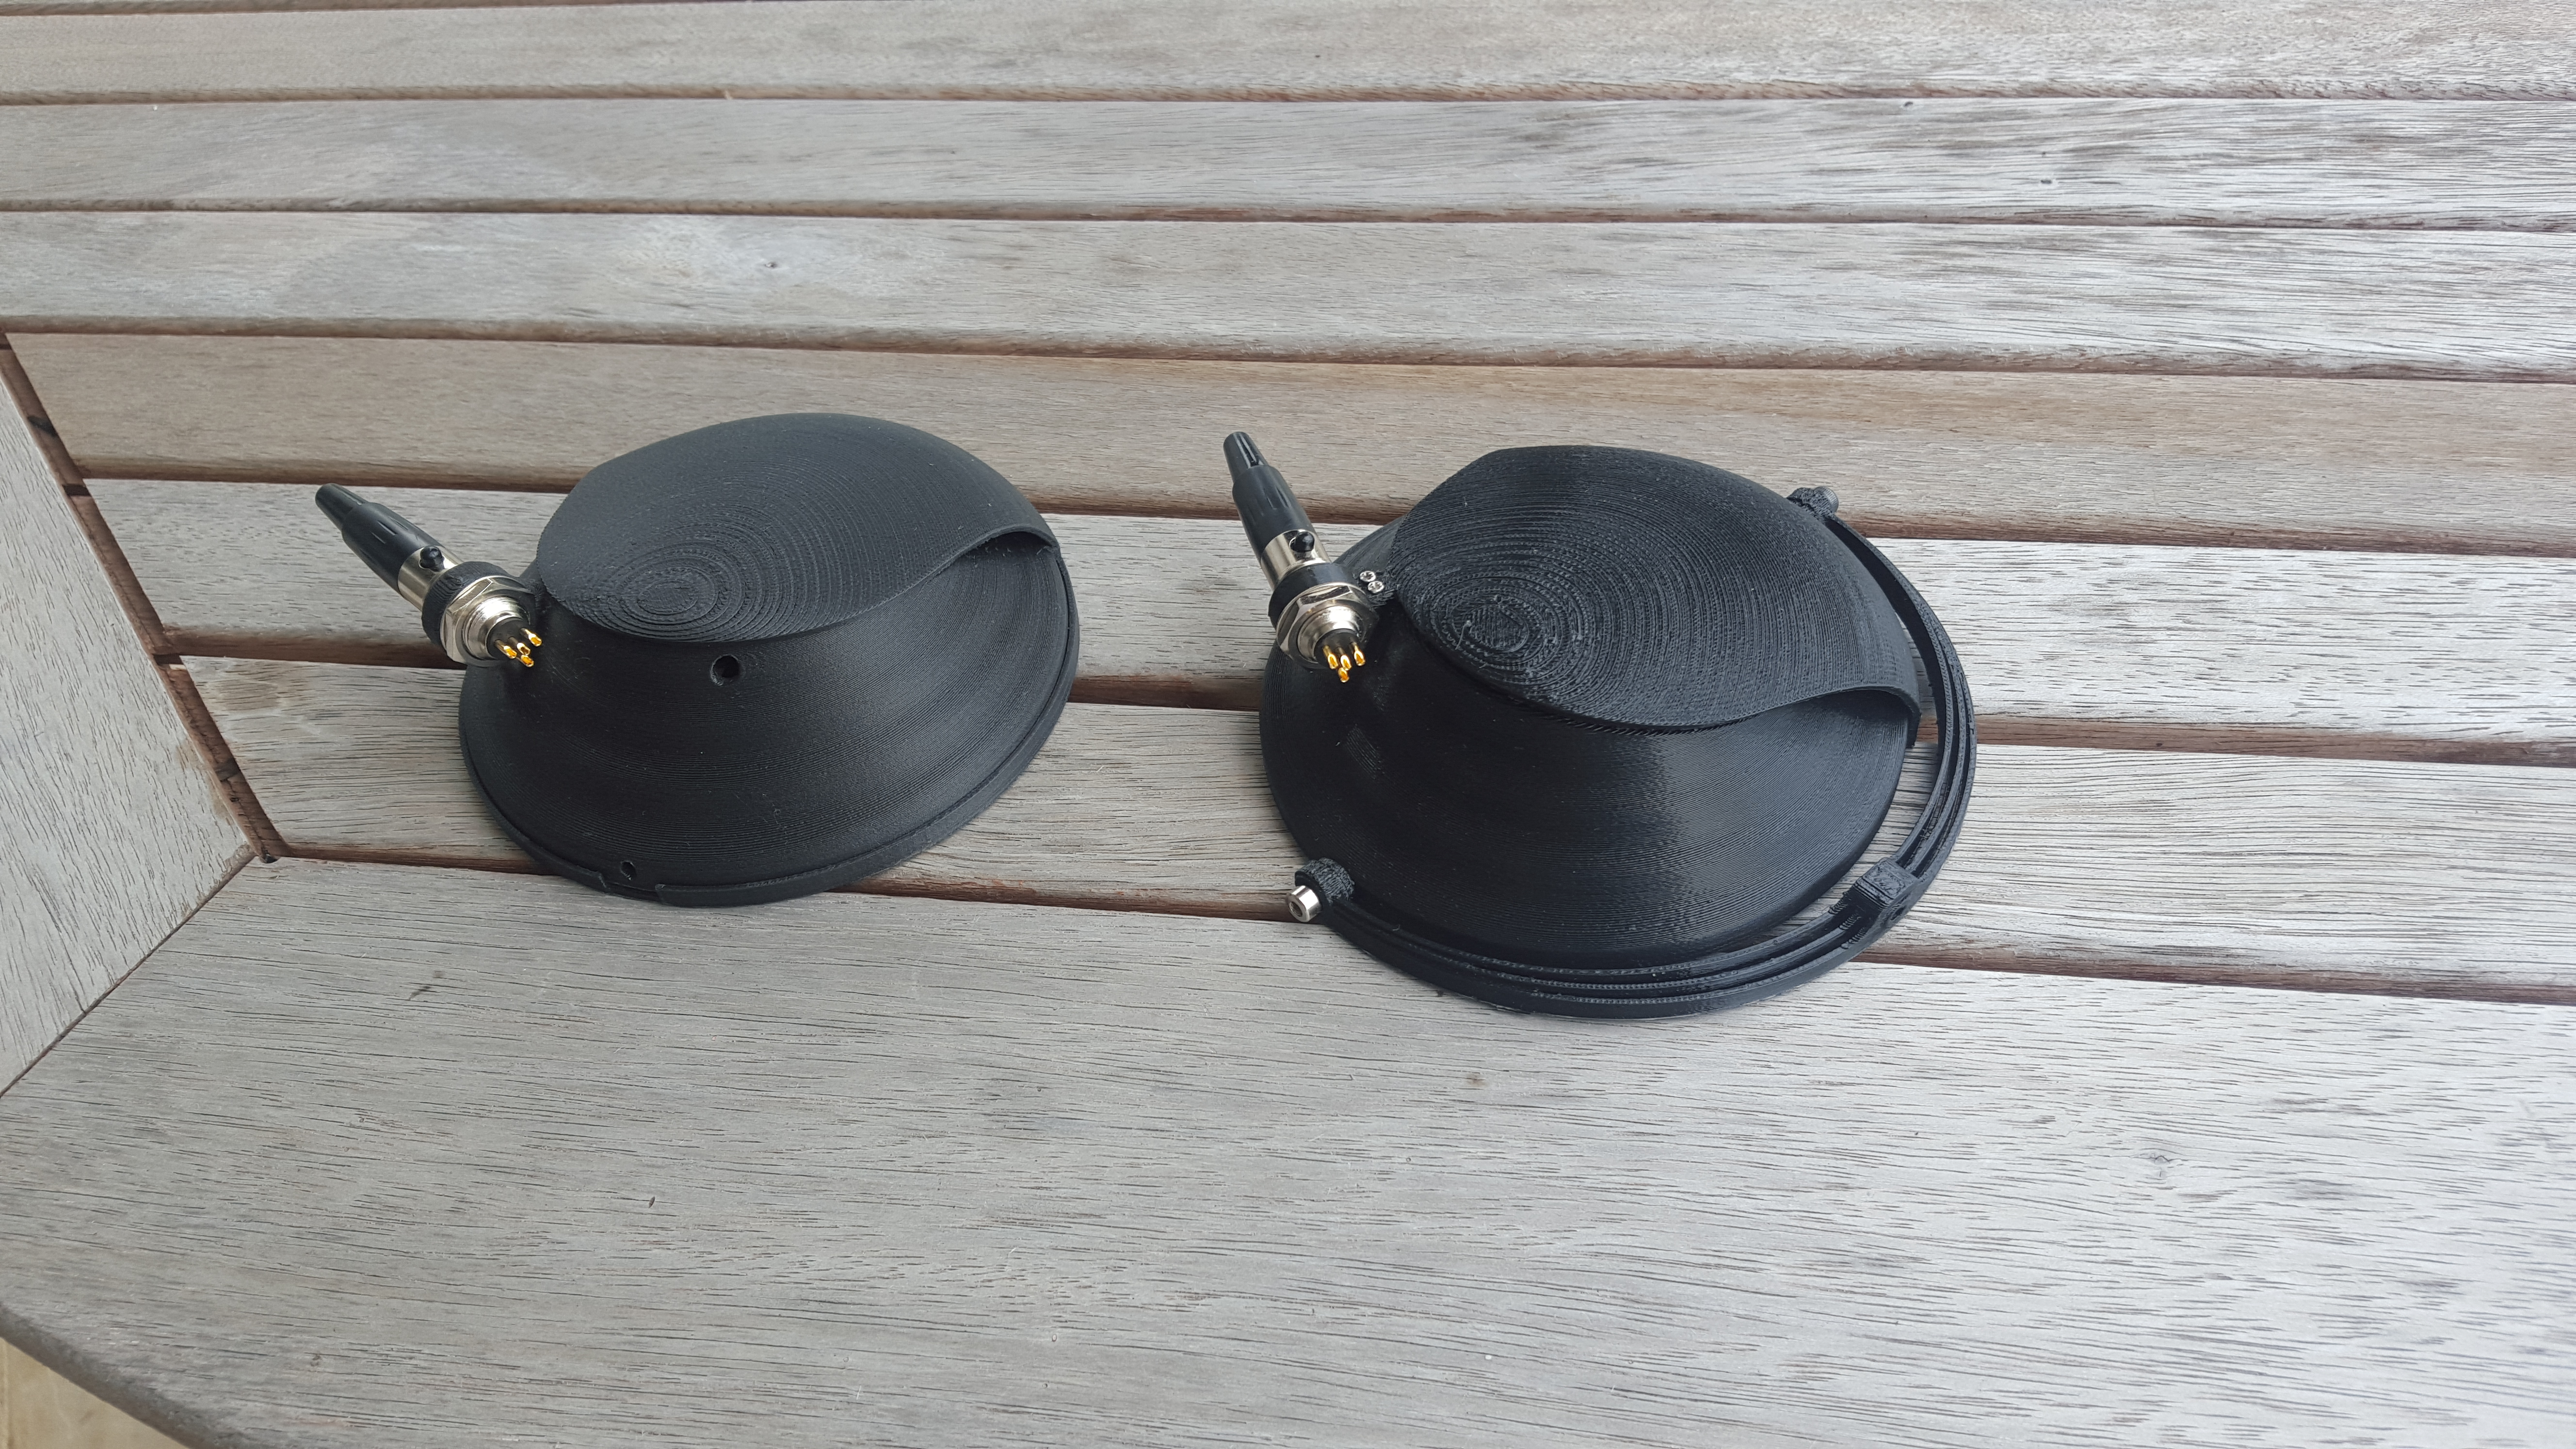
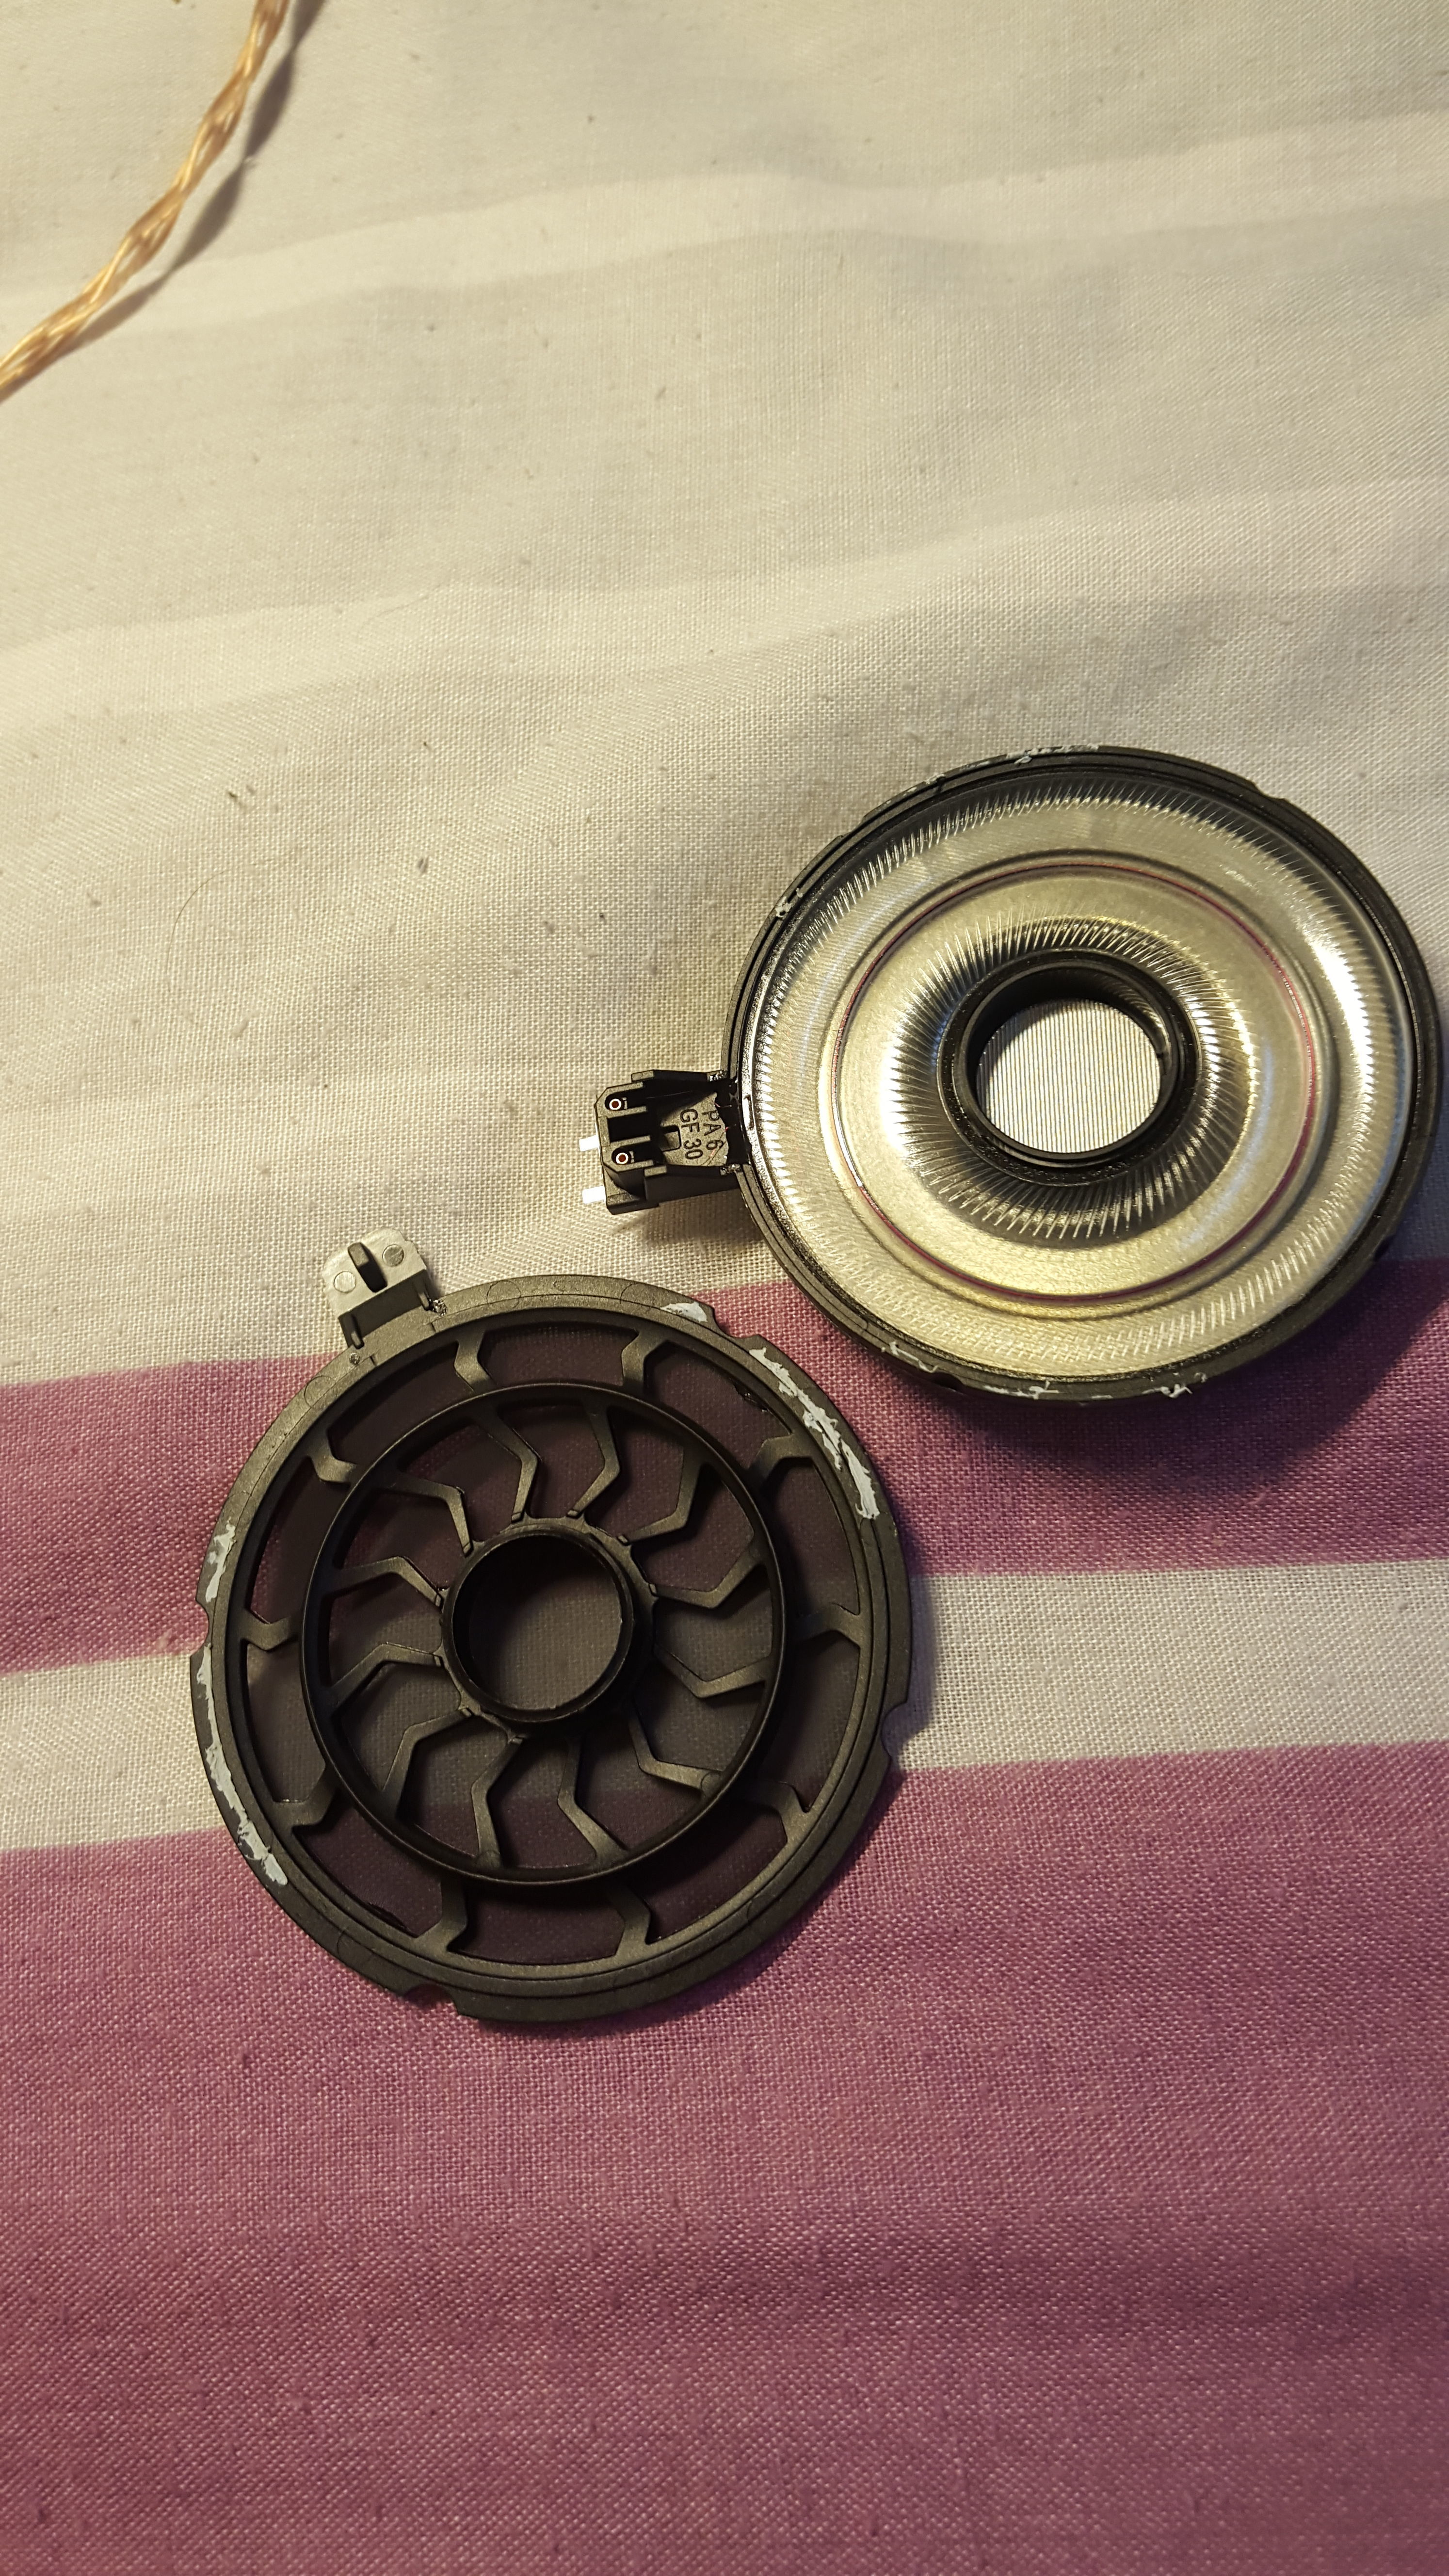
  The HD800 driver is a ring design, so the back of the driver has no holes. I made the cup with quite a large internal volume and lots of vents/bass port for tuning. Similarly on the ear side of the driver, the center of the driver is a hole, so if you cover the circumference, all the sound is blocked. I think Sennheiser designed the driver with this issue in mind, so the ring design would solve the problem of peaks. However the peak comes when they made the headphones extremely open and use extensively the steel mesh. I have no experience with the material but I suspect its the source of treble peaks.

I meant the center hole of the ring. There is only some mesh inside that hole and in the original HD800 configuration it is comunicating with the outside as you can see.


I do not mean that all of the front of the driver should be dampened of course, and of course being it a ring configuration the center is a hole. I mean that half of part of the trasducer ( excluding the center hole) should be frontally dampened. Approximately from the outer circumference to the middle inner circumference, the one between the outer one and the center ring.

Or maybe one could do the opposite and cover the center hole and the part from the ring to the inner circumference. The hole may be acting as a resonator. 
 
Feb 7, 2015 at 1:07 PM Post #39 of 166
Might be a bit too late but if you want to get rid of the rough edges from the 3d printing and give it a nice polished piano look you can look at acetone polishing.
 
I used to do this for 3D printed ABS plastic prototypes for work but it's a bit dangerous as you need to heat up acetone and then hold the 3d printed part in the fumes for 15-20 mins. The effect is stunning if you can pull it off.
 
Feb 7, 2015 at 3:25 PM Post #41 of 166
Might be a bit too late but if you want to get rid of the rough edges from the 3d printing and give it a nice polished piano look you can look at acetone polishing.

I used to do this for 3D printed ABS plastic prototypes for work but it's a bit dangerous as you need to heat up acetone and then hold the 3d printed part in the fumes for 15-20 mins. The effect is stunning if you can pull it off.

Thanks. I have been using this method for different objects, but these cups and baffle were printed in pla, and so far all my friends like the layered finish, so I didn't bother. I'm also aware there is a similar method for pla but not using acetone, but havent tried it out
 
Feb 8, 2015 at 3:39 AM Post #42 of 166
I don't think most people really appreciate how amazing this DIY is.  Really great stuff, keep it up.  Can't wait to see the measurements!
 

Users who are viewing this thread

Back
Top