SONY MDR-V6 DETACHABLE CABLE MOD
Jan 11, 2017 at 2:08 PM Post #46 of 61
   
That looks great... what part/number did you use for the 3.5mm jack?


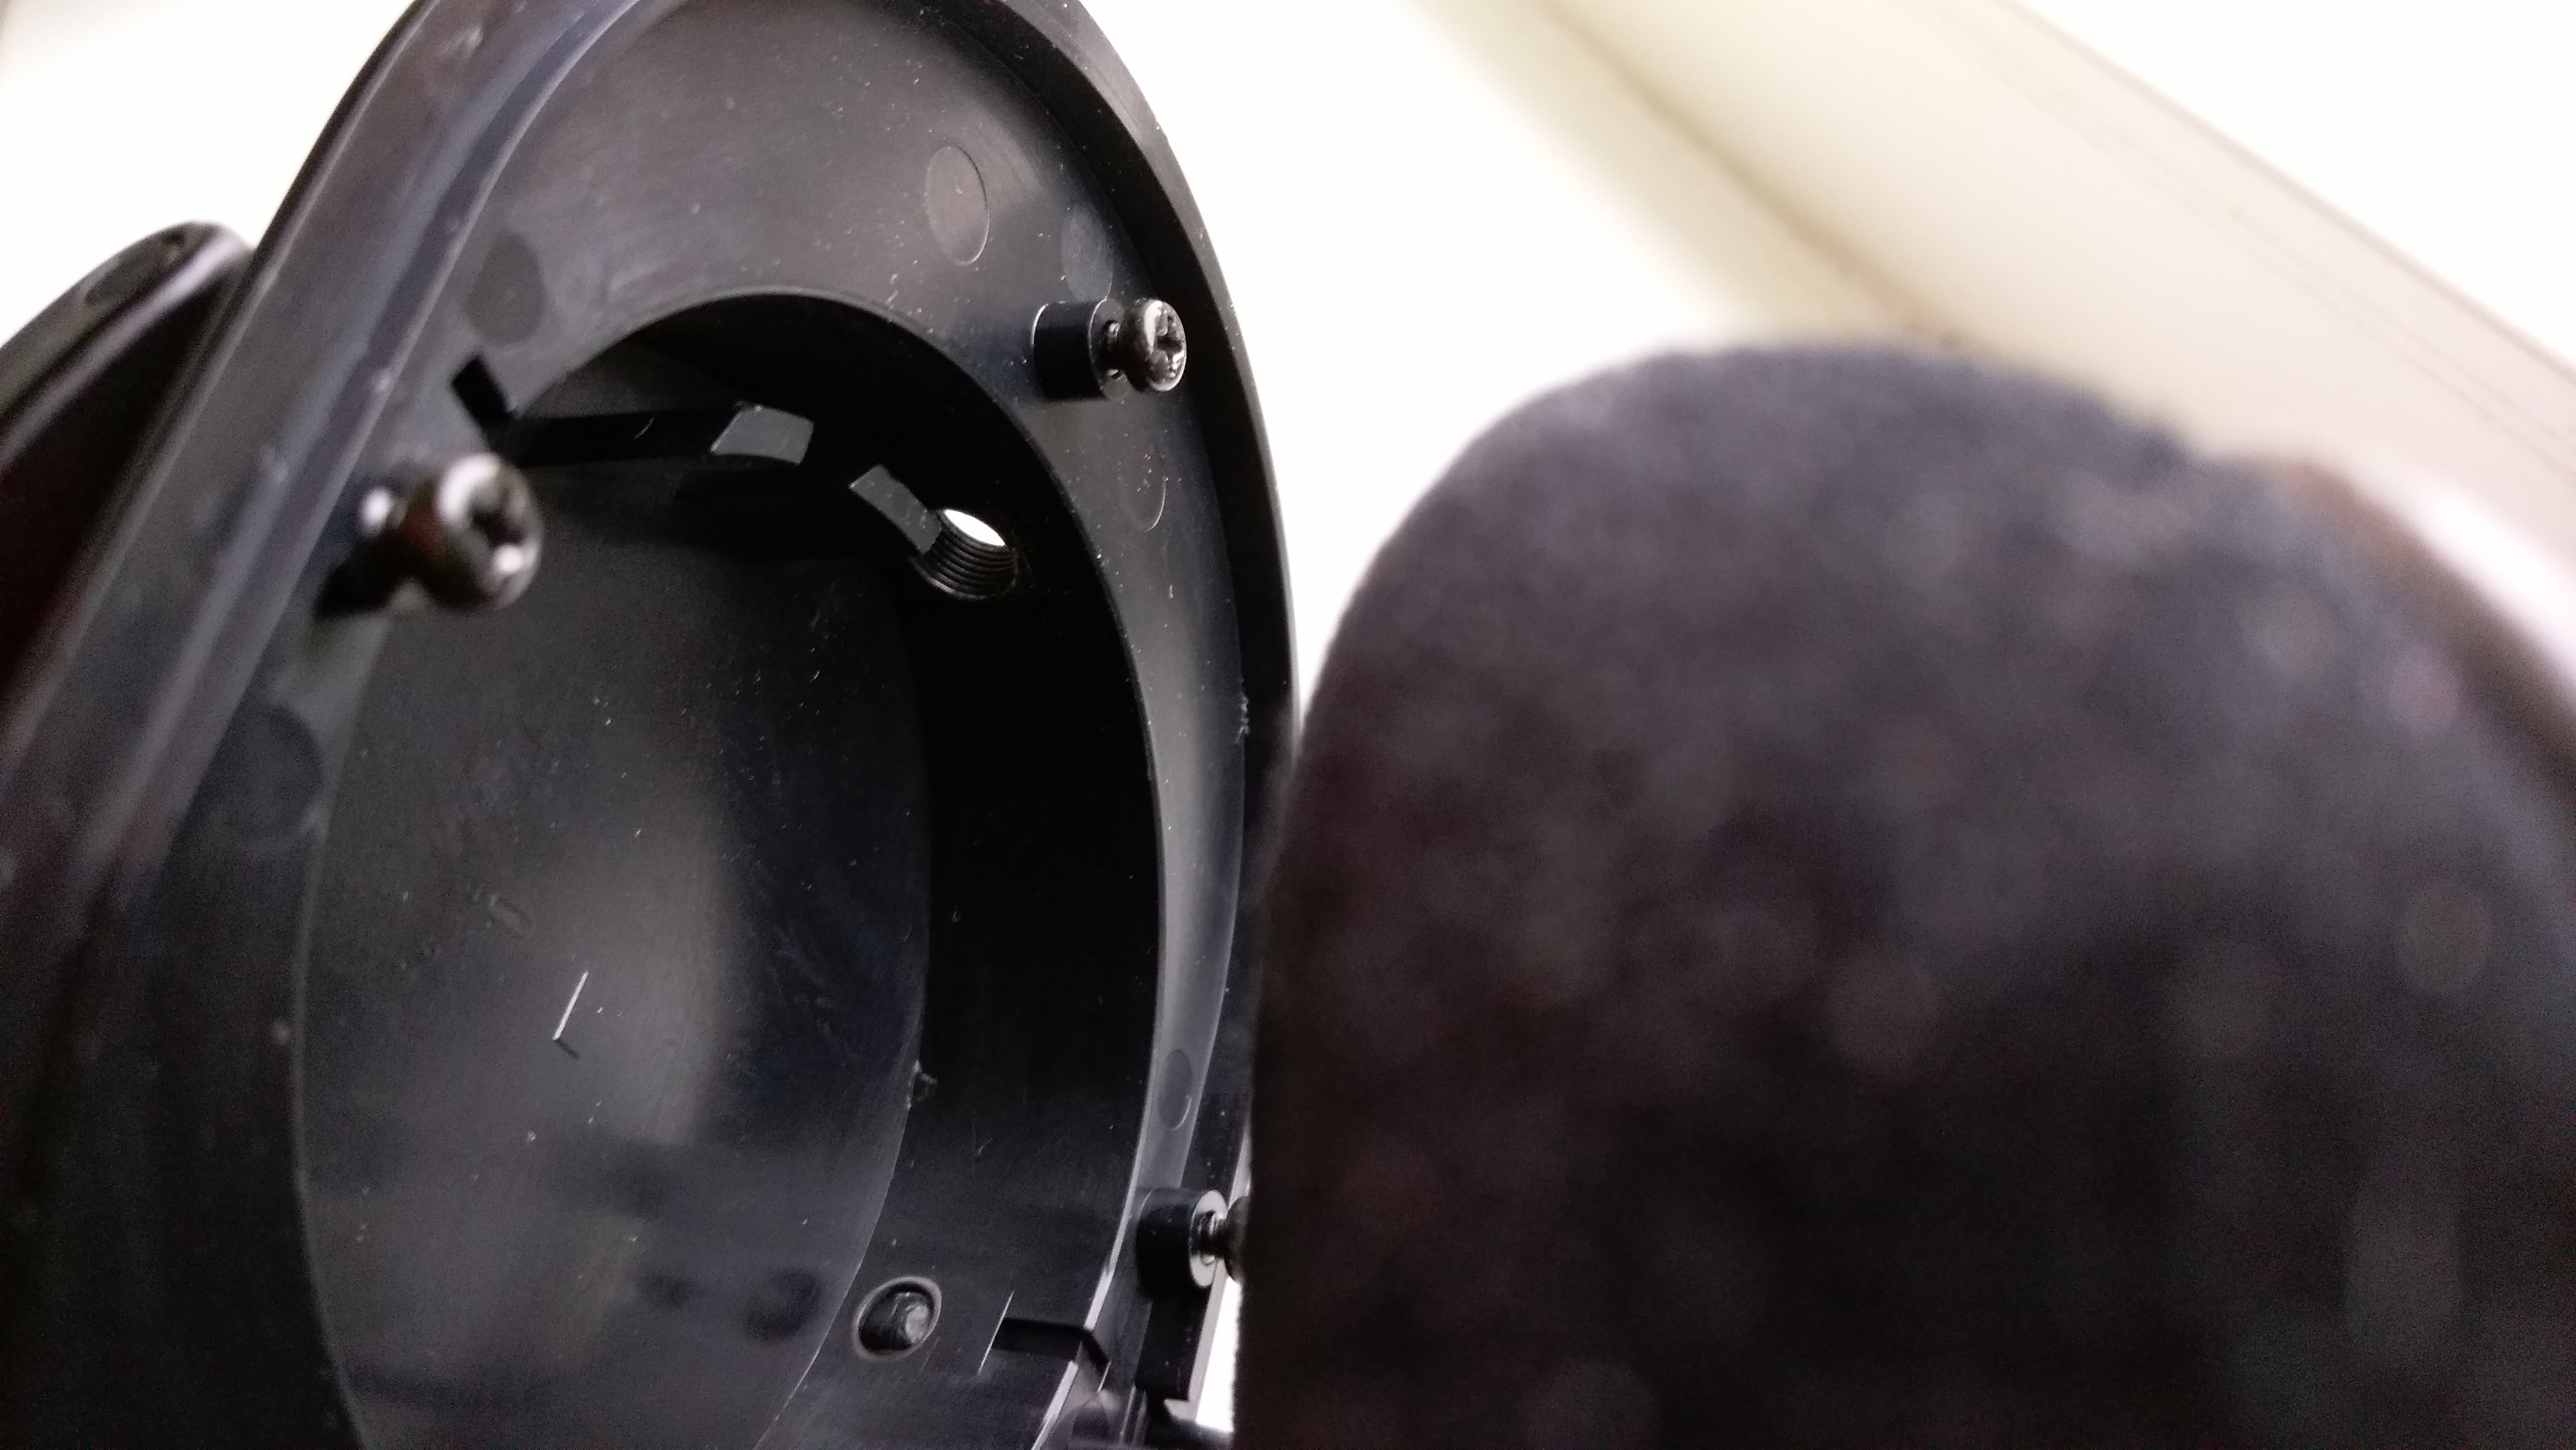
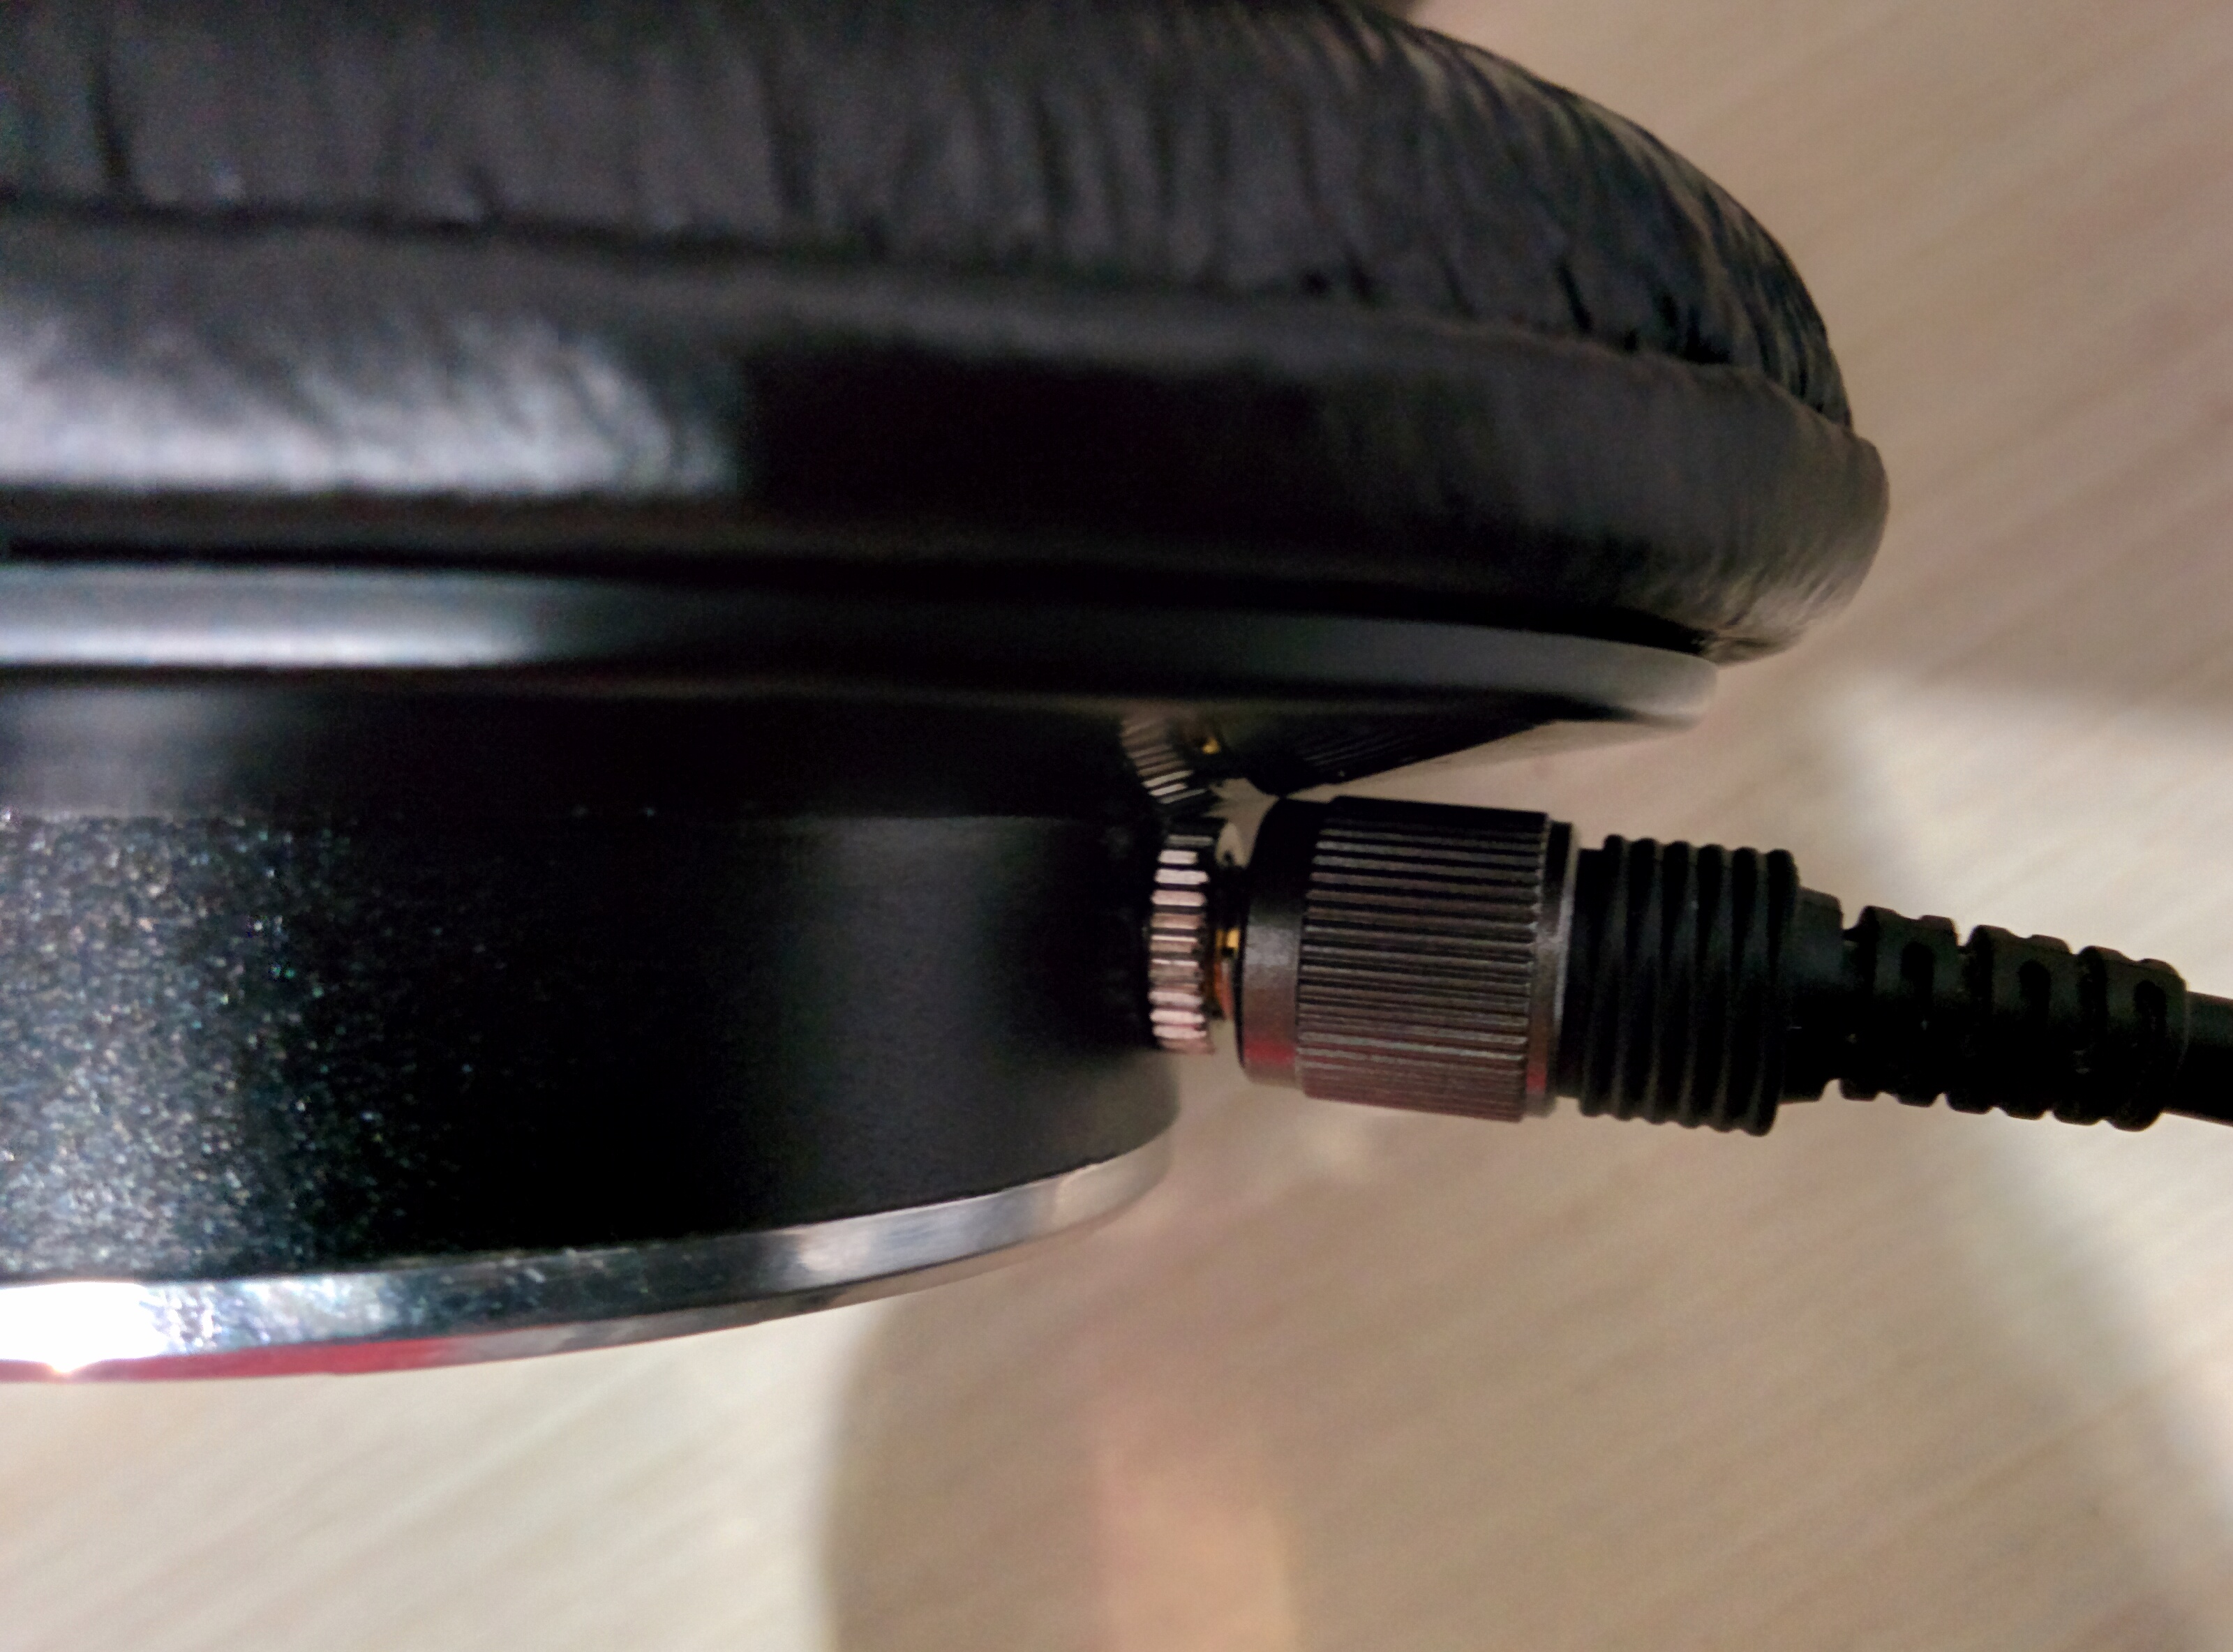
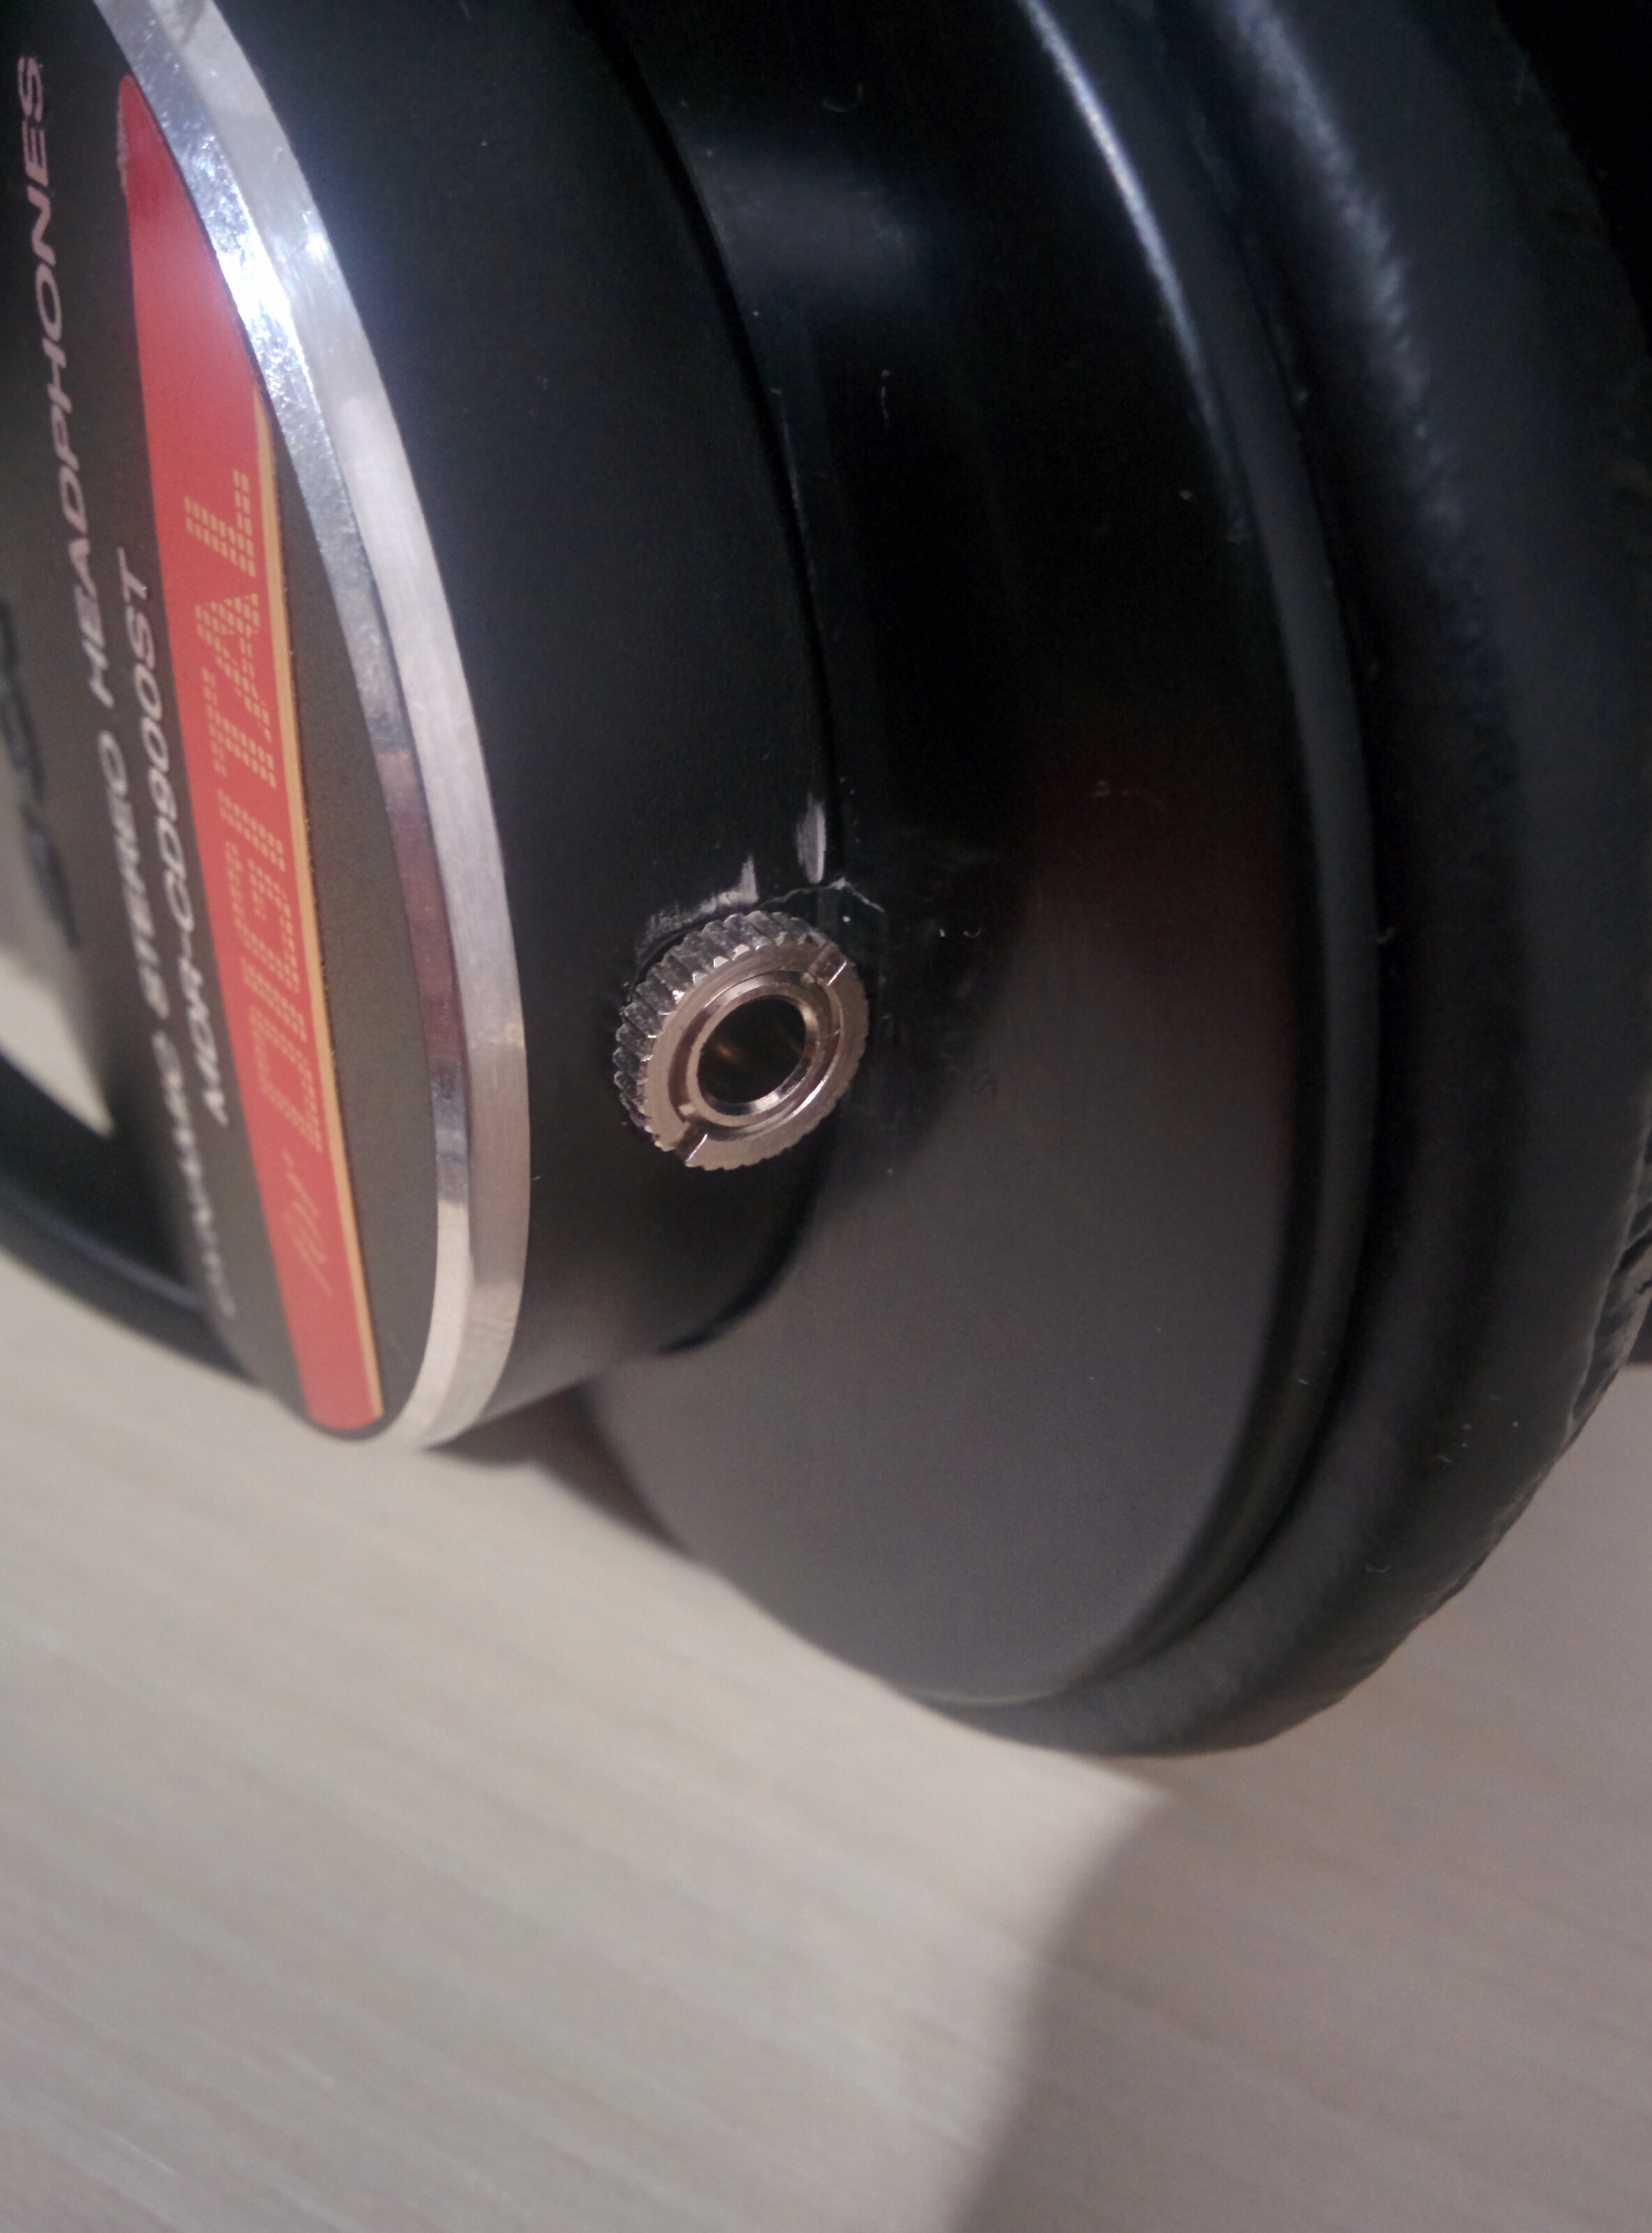
thank you.. The jack I used was a Philmore No. 504K.. I bought mine at the local Fry's store.
 
http://www.frys.com/product/3343172
 
 
HOWEVER:  fair disclaimer.. looks wise I'm pretty satisfied..but it is a bit kludgy if I'm honest..   the jack is meant to go thru and then be secured by a nut on the out side.. I didn't want to grind down the cable exit and so the jack doesn't really stick out of the hole at all, let alone far enough to use a nut.   I secured the jack using epoxy which seems to be holding quite well.      
 
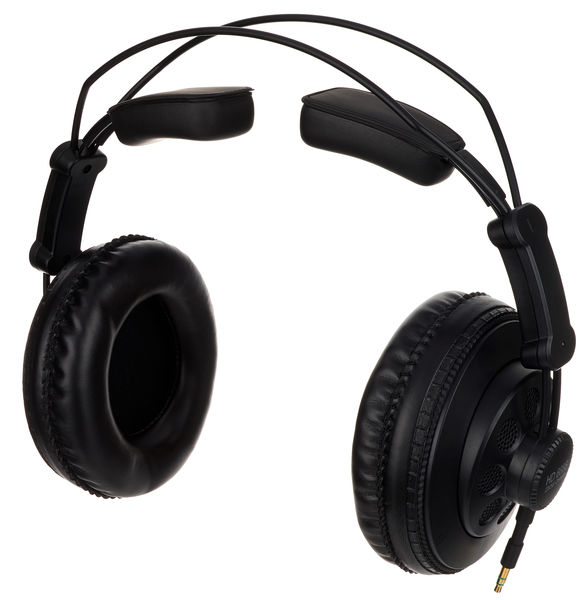
The other issue with my approach is that the Sony's have very small about off clearance by the cable exit.. so having the 3.5mm jack flush mounted where mine is will be a challenge depending on the connector size of the 3.5mm cable you want to use..     honestly you will almost certainly wind up with wear marks on the earcup below the 3.5 jack.   I am using a 6ft Kabeldirekt cable atm.. which fits (but does rub on the earcup.. however this seems to make the cable less prone to pulling out. =p
 
 
https://www.amazon.com/KabelDirekt-Aux-Cable-Auxiliary-Headphone/dp/B00DI8A05Q/ref=pd_day0_23_2?_encoding=UTF8&pd_rd_i=B00RXNUELM&pd_rd_r=8Z1NZJ5606CD71HBBKB8&pd_rd_w=E7Oue&pd_rd_wg=y8VOX&refRID=8Z1NZJ5606CD71HBBKB8&th=1


I'm happy with my results.. but I feel like the above should be mentioned.. it is possible I may try to find a different jack or give up and grind down the cable exit bit to all securing the jack with the nut..   with the jack sticking further out cable clearance would be improved.
 
Feb 1, 2017 at 11:12 PM Post #47 of 61
Here's the album:

Sony MDR 7506 Bluetooth + Detachable Cable + Beyerdynamics Pads Mod


http://imgur.com/a/lORBc

Pictures in random order.

Time it took me alltogether: 4 hours.
Average soldering skills required, used a 3$ soldering iron from the Dollar store. Make sure to use flux, it makes everything easier!

Female aux from B&H Electronics in NYC for 3$
Beyerdynamics from same store for 23$. Turns out Amazon with shipping is often more expensive! Buy locally and support biz where you live!
All cables from old 3.5mm aux cable.
Drilled holes with drill nad drilling machine.
Used this bluetooth adaptor and took it apart: http://www.ebay.com/itm/3-5mm-USB-Bluetooth-Wireless-Receiver-Audio-Music-Adapter-Car-Home-AUX-Speaker-/201210654465?pt=LH_DefaultDomain_0&hash=item2ed916ef01

Listening time: Around 6 hours. Could take a larger battery as there is much more space but I don't really mind, I charge them every night when I go to bed.

Sound quality: I sealed any possible holes with glue. Blind test of right/left with a couple of my friends, nobody could tell the difference. Can't tell the difference myself, bass/treble sounds exactly the same to me.

Definitely worth it. Bluetooth headphones are so much more comfortable to wear, now I really loathe cables. And the beyerdynamics mod ... of course...


FREAKINAWESOME!! When you took apart the bluetooth receiver did you just take it out of the plastic housing? How would you add an external mic?
 
Mar 11, 2017 at 3:42 PM Post #48 of 61
I finally got around to doing this. I am happy with it, though I need to touch up where my file scratched the paint a little. No biggie, these are my knockin about headphones anyway.


I used radio shack part# 274-0249. It has a very solid grip on the plug.
 
Jun 18, 2017 at 12:04 PM Post #49 of 61
I tried this method and it worked great on my 7506, I drilled a 0.5mm bigger hole then used a M6x0.5 thread tap and just screwed the jack in place. The hole in the headphone was 4.5mm deep same as the thread on the jack so now it sits flush.


IMAG0827.jpg


IMAG0829.jpg


IMAG0831.jpg


IMAG0832.jpg


IMAG0841.jpg
 
Oct 10, 2017 at 12:06 PM Post #51 of 61
Oct 22, 2017 at 7:01 PM Post #53 of 61
Dec 11, 2017 at 4:23 PM Post #56 of 61
Is possible to do the mod outside the earcup like the cable of the Superlux hd668b? Either with male or female.
I'm tempted to try to cut and peel off the cable to see if it can be done, which would not need soldering.
I haven't seen no one commenting in this option. Here's what I mean, if you don't know the Superlux.
9545489_800.jpg
 
Dec 11, 2017 at 6:52 PM Post #57 of 61
hi... you can certainly do a superlux pig tail mod... however the stock cable is a nightmare to work with (enameled) If I was going to do a pig tail I would 100% take them apart desolder the stock cable (save it that way you could undo the mod later if you wanted for whatever reason) ..it is super easy to desolder the stock cable from the driver with a minimum of soldering skills and then I would personally use a new cable for the pig tail.. one that tins more easily for soldering to driver and to male / female driver (whatever you choose) on the other end.

If You use the stock cable you are going to have to get the enamel coating off and it is a pain .. such that I wouldn't bother personally...

unless I wanted to get super audiophile~ish I'd probably just buy a ~decent patch 3.5 patch cable and cut one end off to solder to the driver..
 
Dec 11, 2017 at 7:25 PM Post #58 of 61
hi... you can certainly do a superlux pig tail mod... however the stock cable is a nightmare to work with (enameled) If I was going to do a pig tail I would 100% take them apart desolder the stock cable (save it that way you could undo the mod later if you wanted for whatever reason) ..it is super easy to desolder the stock cable from the driver with a minimum of soldering skills and then I would personally use a new cable for the pig tail.. one that tins more easily for soldering to driver and to male / female driver (whatever you choose) on the other end.

If You use the stock cable you are going to have to get the enamel coating off and it is a pain .. such that I wouldn't bother personally...

unless I wanted to get super audiophile~ish I'd probably just buy a ~decent patch 3.5 patch cable and cut one end off to solder to the driver..
Thank you. Then there's no point in doing something harder (if possible) than soldering... I guess I'll stick to the coiled cable untill it breaks and then do the soldering and drilling stuff, so I have an excuse to mess with the headphones. Although I like san14 product.
 
Last edited:
Mar 5, 2018 at 12:59 PM Post #59 of 61
I tried this method and it worked great on my 7506, I drilled a 0.5mm bigger hole then used a M6x0.5 thread tap and just screwed the jack in place. The hole in the headphone was 4.5mm deep same as the thread on the jack so now it sits flush.


Sorry for digging this thread up again but I'm doing this mod and wanted to compliment you on the job you did. Your mod looks very professional and Sony should take some cues from you.
 
Oct 2, 2018 at 6:52 PM Post #60 of 61
I finally got around to doing this. I am happy with it, though I need to touch up where my file scratched the paint a little. No biggie, these are my knockin about headphones anyway.

I used radio shack part# 274-0249. It has a very solid grip on the plug.

I used radioshack part 274-0246
(contacts enclosed, with the solder pads coming out the bottom)
Soldered it up, then bent the contacts out of the way.

I also attached a strip connecter to the wire, connected it to my computer, and just plug in when I'm ready.
As for the wire I use what I ger off ebay/ali/wish. with a android mic and volume buttons.

I am really happy with wire with the small controler with a apple/android switch (p
This one works really well with my phone, PC, PS4, media center (I have another wire for that.)
Unfortunately it shorted after about a 6-12 months of use)

However one thing I noticed when I replace my pads is that the screws in one cup got rusty.
I Would like to replace them is i knew what size they were.
 

Users who are viewing this thread

Back
Top