jERiCOh
New Head-Fier
- Joined
- Dec 9, 2007
- Posts
- 38
- Likes
- 0
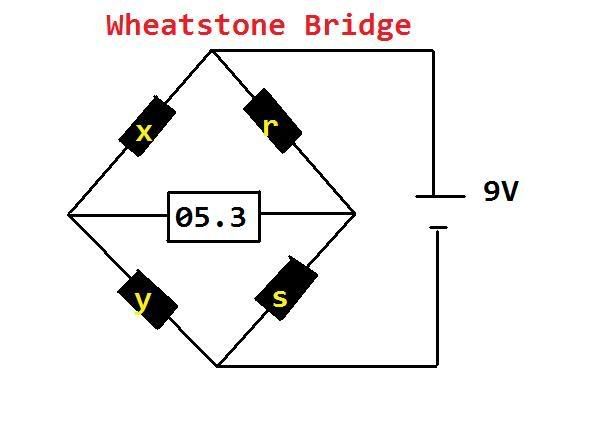
I guess everyone who will use that bridge knows how to build it. Just to give you some hints, I used perfboard, 2 2x2 dip sockets to easily swap the resistors, 2 banana posts to plug in the DVM probes and as a source, I used a 9V battery.
Before being able to use the bridge you need to get a pair of 1K resistors matched at least to 0.1% or even better 0.01% to populate R and S. The way I did to get a pair of 0.01% resistors without spending 60$ is not proven by an engineer but mathematically it should be right.
1- Get 25 1k resistors matched to 1%. (You don't necessarily need 25, the objective is to find the closest match possible. Get enough resistors to find a perfect match)
2- Plug in your DVM probe between X and Y, the other probe between R and S. Set it to its 200mV range.
3- Populate Y, R and S with any of those 1k resistors.
4- Populate X and you should get a value 0.0 and 15.0 on your DVM or maybe a little more.
5- Identify the resistor with Its result.
6- Repeat step 4 and 5 until you get 2 resistor with the same result.
Now that you have 2 matched resistors, put them in position R and S. You are now ready to match your own 0.01% resistors.
Use positions X and Y to test your to-be-matched resistors. The objective is to get the DVM to display 00.0 mV to have a pair of matched resistors.
I hope it is clear enough to be useful to someone...
Any further information about the Wheatstone bridge can be found on Wikipedia
