ElScorcho
New Head-Fier
- Joined
- Feb 7, 2013
- Posts
- 2
- Likes
- 0
Hi everyone!
This is my first post on Head-Fi, although I've been skulking around here for quite some time.
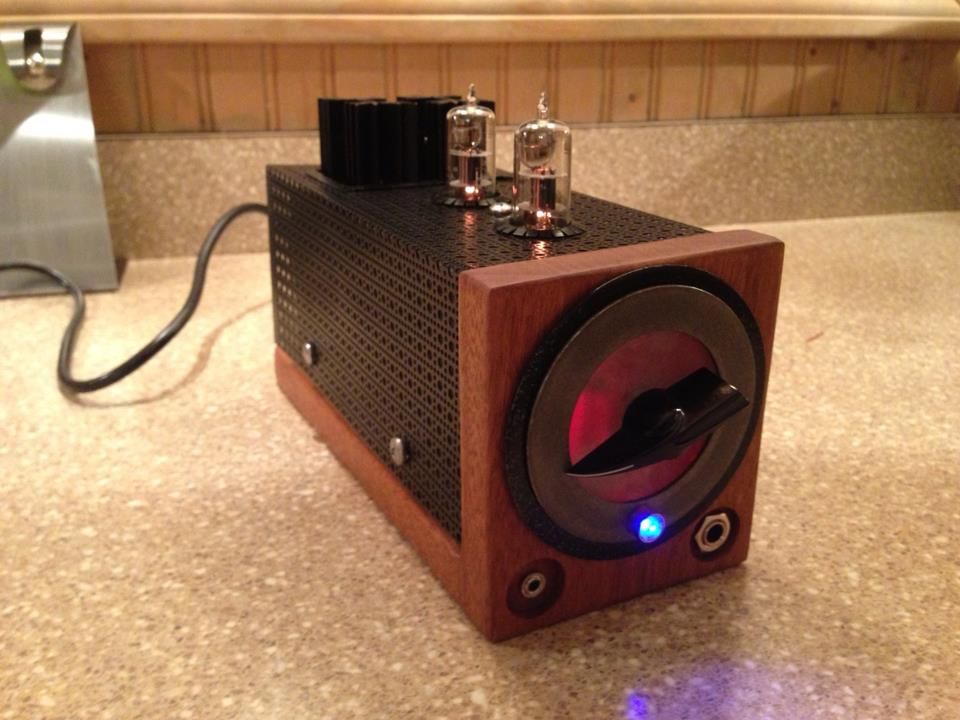
I just finished my first headphone amp build, and figured I'd share. It's based on the Starving Student, but I'm calling it a Well Fed Student for, well, probably obvious reasons. LOL!
It came out pretty nice. Not exactly like I wanted it to, and not quite as nice as I wanted, but this build was really a bit of a trial run for the build I want to do later this year. (More on that in a few!)
A little background: I'm a live audio engineer that works for a performing arts center in CT. I build a lot of my own furniture around my house and have a woodshop at my home. I have a love of home made items, and particular style. I'm also very fond of clean audio. It's not just how I make my living, it's also what keeps my (hopefully) mild OCD in check. Hahahaha.
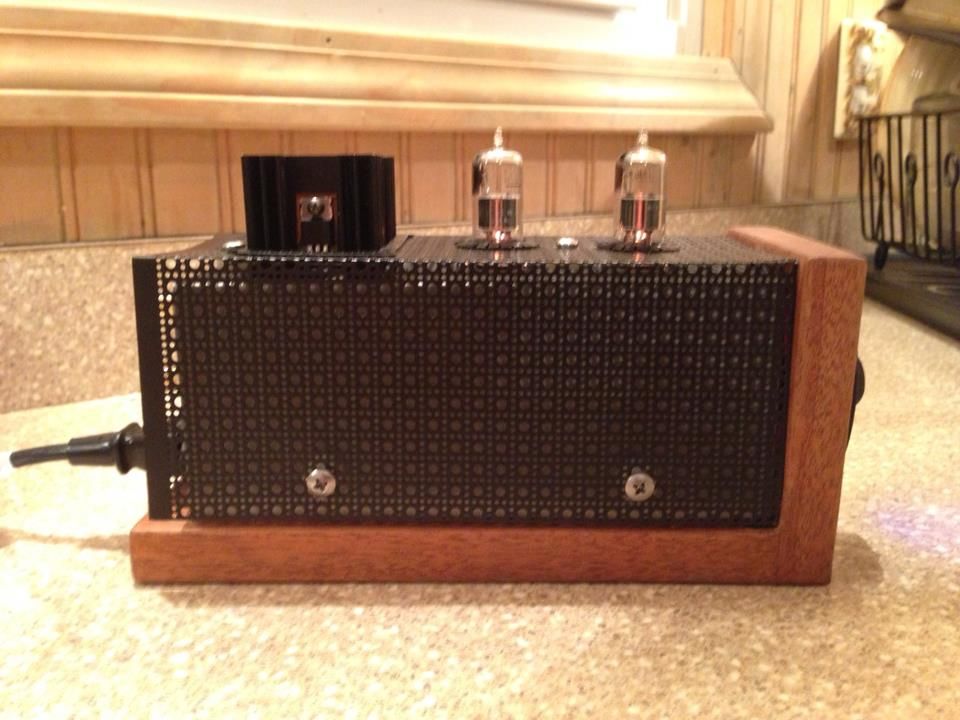
With that said... other than the obvious electrical components, I hand built everything else. It's all scrap metal, scrap plexi and scrap wood I had in my shop. Some cutting, grinding, bending, rolling, drilling, sanding and painting later, bam! It's alive. The black "shell" around the main chassis is there for looks. There is another gray/silver chassis underneath that is the actual structural component. That metal is actually from the hardware store with that hole pattern pre-drilled. It's meant for inserts into cabinet doors, etc. I just cut it, bent it and finished it. I did however build the entire sub-chassis from flat 22g steel.
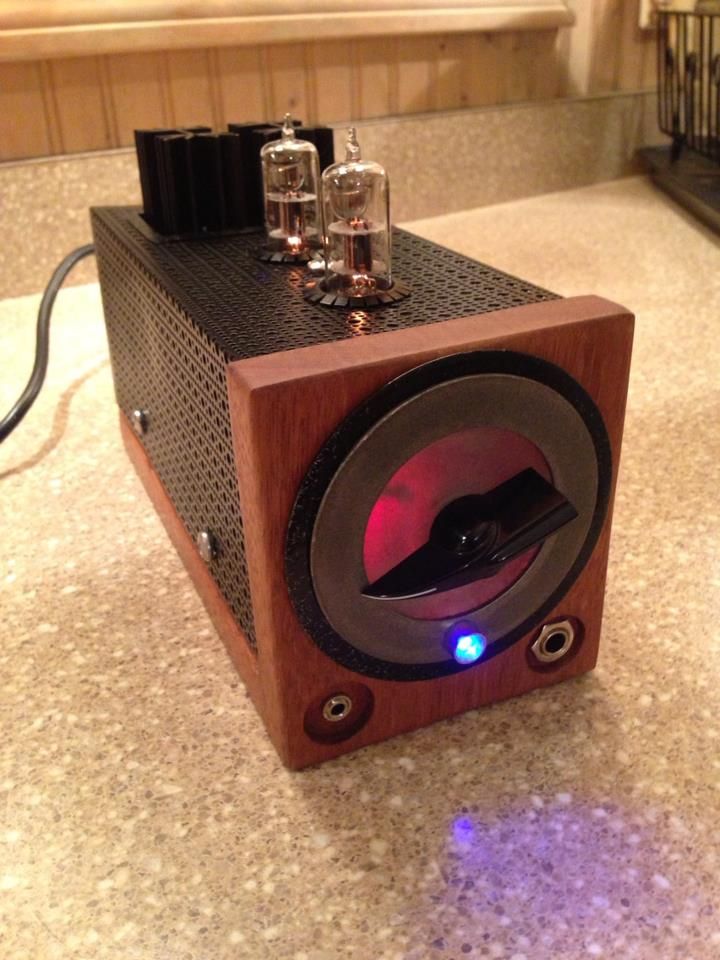
I wanted something that would look at home on my desk. Kind of a hand made feel, kind of old school. Maybe a touch of Steampunk.
I used a .7 amp version of the 48v supply, cracked it out of its case and built it into the chassis. I had to build some shielding around it to keep it from adding noise to the circuit. There is also a separate 5v supply for the LED's. There are 4 that make the face glow and the single blue in the ring. All told, it would have been cool to build the supply from scratch too, but that will be something for the future.
I have some photos of the build in progress. If anyone is interested, I'll post them.
My goal for the end of the year is to build a clone of an Ampeg B-15 Flip-Top since I'm also a bassist. I have some ideas to modernize the EQ section with some digital resistors, encoders and a little Arduino code... but I'd like to keep it pretty true to form for the original.
Anyways, good to meet you all, and look forward to seeing more amazing stuff from everyone.
Ian (aka Scorcho)
This is my first post on Head-Fi, although I've been skulking around here for quite some time.
I just finished my first headphone amp build, and figured I'd share. It's based on the Starving Student, but I'm calling it a Well Fed Student for, well, probably obvious reasons. LOL!
It came out pretty nice. Not exactly like I wanted it to, and not quite as nice as I wanted, but this build was really a bit of a trial run for the build I want to do later this year. (More on that in a few!)
A little background: I'm a live audio engineer that works for a performing arts center in CT. I build a lot of my own furniture around my house and have a woodshop at my home. I have a love of home made items, and particular style. I'm also very fond of clean audio. It's not just how I make my living, it's also what keeps my (hopefully) mild OCD in check. Hahahaha.
With that said... other than the obvious electrical components, I hand built everything else. It's all scrap metal, scrap plexi and scrap wood I had in my shop. Some cutting, grinding, bending, rolling, drilling, sanding and painting later, bam! It's alive. The black "shell" around the main chassis is there for looks. There is another gray/silver chassis underneath that is the actual structural component. That metal is actually from the hardware store with that hole pattern pre-drilled. It's meant for inserts into cabinet doors, etc. I just cut it, bent it and finished it. I did however build the entire sub-chassis from flat 22g steel.
I wanted something that would look at home on my desk. Kind of a hand made feel, kind of old school. Maybe a touch of Steampunk.
I used a .7 amp version of the 48v supply, cracked it out of its case and built it into the chassis. I had to build some shielding around it to keep it from adding noise to the circuit. There is also a separate 5v supply for the LED's. There are 4 that make the face glow and the single blue in the ring. All told, it would have been cool to build the supply from scratch too, but that will be something for the future.
I have some photos of the build in progress. If anyone is interested, I'll post them.
My goal for the end of the year is to build a clone of an Ampeg B-15 Flip-Top since I'm also a bassist. I have some ideas to modernize the EQ section with some digital resistors, encoders and a little Arduino code... but I'd like to keep it pretty true to form for the original.
Anyways, good to meet you all, and look forward to seeing more amazing stuff from everyone.
Ian (aka Scorcho)
